An easy drawing for children can be depicted with a simple sketch or more realistically, using markers, colored pencils or paints. If desired, the flamingo can be left as a black and white drawing, but then the bright coloring of the bird remains invisible.
Flamingos are remembered by children precisely because of the unusual color of their plumage, pink-red shades, there are also white colors of feathers. You can offer children to draw only this bird or use their imagination to create a plot - the surrounding nature or other animals, birds or people.
In the process of drawing, regardless of the chosen method, the following tools will be required:
| What is needed | For what |
| Paper | The thickness is chosen depending on what the finished drawing is painted with. When choosing paints, preference is given to thicker sheets of paper. |
| Simple pencil | Beginners are advised to use hard or hard-soft pencils, as they leave a thinner and less easily soiled mark. |
| Eraser | Remove sketches and schematic lines. |
| Liner or black pen | Outline the general contour, create hatching in places where shadows fall. |
| Colored pencils or paints | Color the finished drawing. |
Easy step by step method
Drawing flamingo for children in this way is suitable even for children 5-6 years old. This is a simple step-by-step method that does not require much time and skills.
During the process, children will not have time to get tired, and drawing will captivate them and help develop fine motor skills of their hands:
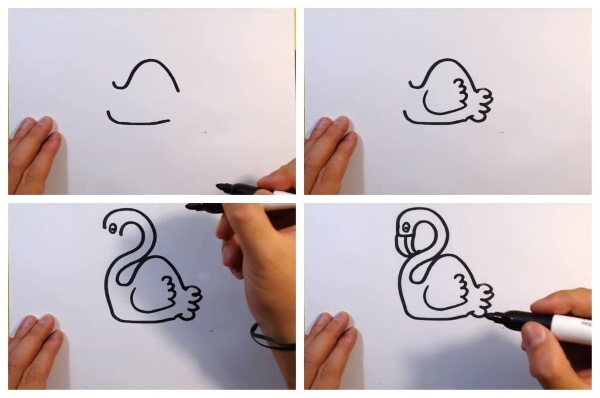
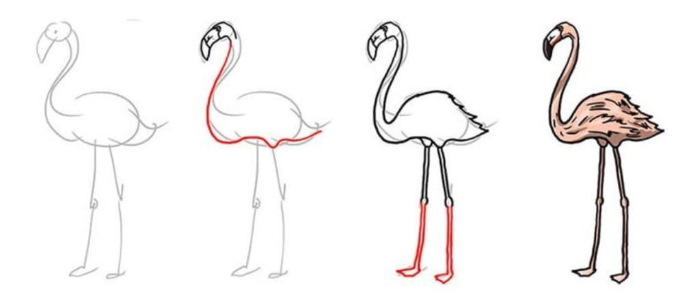
- The sheet is placed horizontally and begins with the image of the bird's body. The back is shown with a curved line, the belly is slightly lower with a straight line.
- Add feathering to the tail and wing using frequent rounded lines.
- From the belly and back there are two parallel lines, denoting the neck. In flamingos it is curved and resembles a two. The neck is narrow, but it widens closer to the head.
- Draw the bird's head, which ends in a thick, downward-curved beak. The beak is divided by a short strip. Draw the bird's eye, slightly indented from the beak. The second eye is not visible, since the bird is standing sideways to the viewer.
- From the middle of the belly, draw a long narrow leg on which the bird rests.
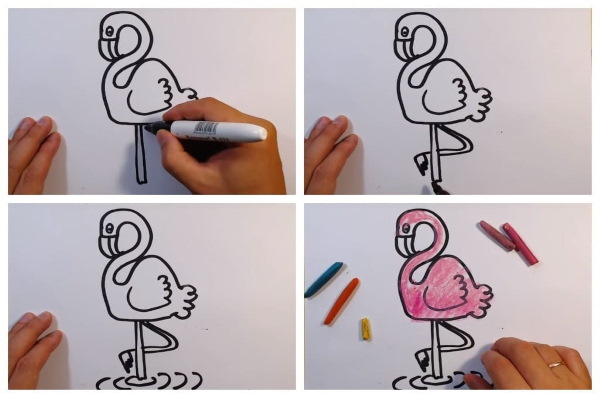
- The second leg is curved, its curve leads backwards. The leg ends in a flipper, which is drawn in a frequent zigzag.
- The end of the straight leg is not visible, it is hidden in the water. To show this, curved repeating lines are drawn, going in both directions from the leg. This imitates circles on the water.
- The bird is painted pink, the legs and beak yellow, and the water blue or light blue.
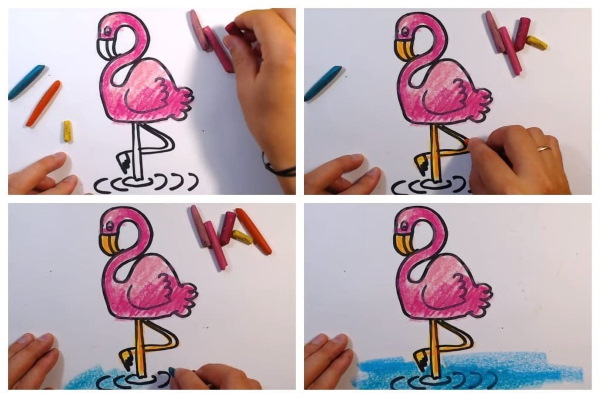
- Paint the lower contour of the neck and head, wing and belly in a darker color or with a stronger press to create the effect of a falling shadow. If desired, draw other characters.
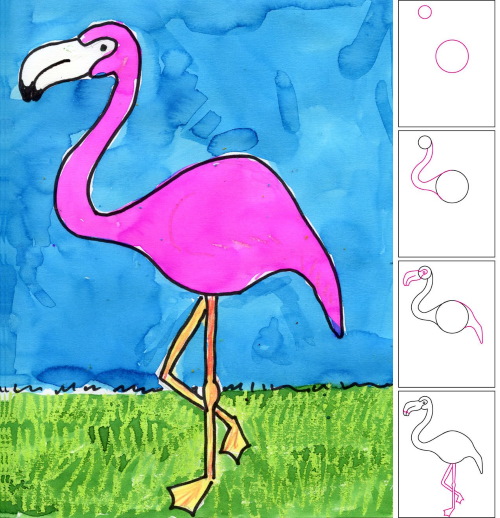
Simple realistic drawing
Flamingo (a drawing for children of this bird can be depicted in a simple but realistic manner using pencils and markers) Suitable for beginners, as it does not contain labor-intensive drawing stages.
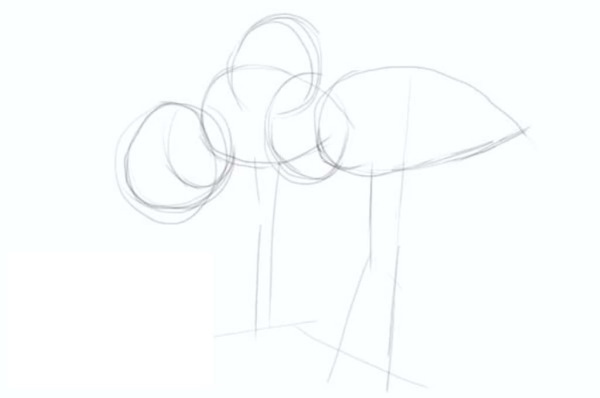
- The sheet is placed vertically and in the center of the sheet the bird's body is schematically outlined as an oval. To the right of the body, the tail is drawn as a triangle. To the left of the body, a long neck curved in the form of a two is drawn.
- The head is small and round, and a large blunt beak extends downwards from it. Two legs are drawn with straight lines from the middle of the belly. The knees are marked with small circles. The flippers are shown schematically.
- Draw the bird's head in detail. The head is small, but wider than the neck. Make a smooth transition to the beak. Lines show the border between the head and the beak, the end of the key, which has a darker color. At the base of the beak, draw a small black eye.
- A clear outline of the body is drawn. From the head, a curved line of the neck is drawn down to the stomach. The convex places where the feathering on the legs ends are shown. From the back of the head, a line is drawn down the neck and transferred to the back. The feathering on the back, wings and tail is shown in zigzags.
- They outline thin legs and make the places in the bends a little wider. The fins look in one direction, they are slightly widened towards the ends and shown in a frequent small zigzag.
- Color the bird in any convenient way - with pencils or paints.
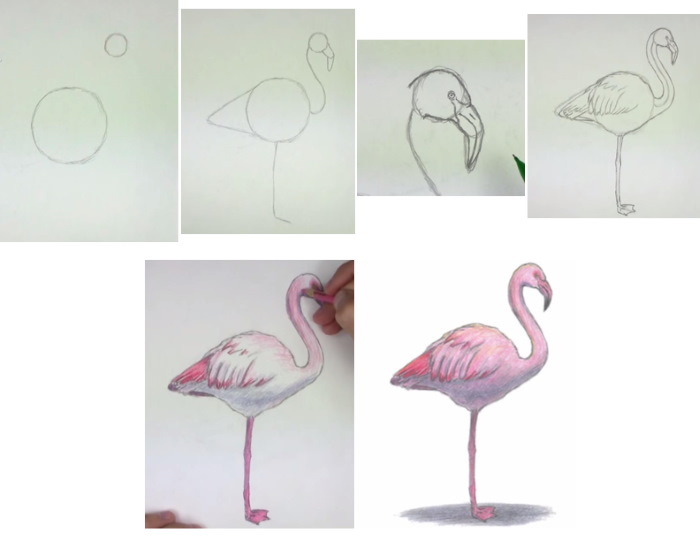
Realistic drawing for children aged 10-12
Flamingo (a drawing for children of this bird can be drawn in a realistic manner, following step-by-step examples), shown below in the text, is suitable for children aged 10-12 years due to the large number of complex elements, uneven and asymmetrical lines, as well as due to the longer time it takes to create the image.
Step by step:
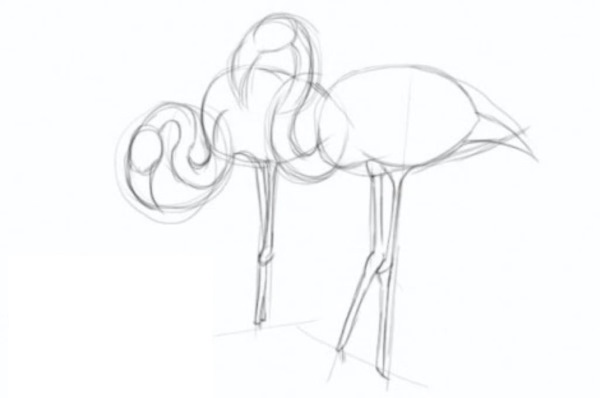
- The sheet is placed horizontally and begins with a schematic image of the bird. In this lesson, 2 flamingos are drawn at once, but if desired, you can draw only 1 figure. The body is drawn in the form of a drop, where the narrow part denotes the tail.
- Thin legs are outlined with straight lines, one of which is bent at the knee, the bend of the flamingo's leg is always backwards. A thin, sinuous neck, head and beak are outlined.
- Make the outline clearer. Outline the body, accentuate the sharp tail. The curve of the neck becomes like a two and widens closer to the head. A thick, sharp beak leads from the head. Make a smooth transition to the legs, which slightly widen at the knees. You can leave the fins out so that they are submerged in water.
- Detail the drawing. The end of the key is blunted, its tip is painted black, but you can leave the pencil shading. From the end to the base of the beak, draw a horizontal stripe dividing the beak in half.
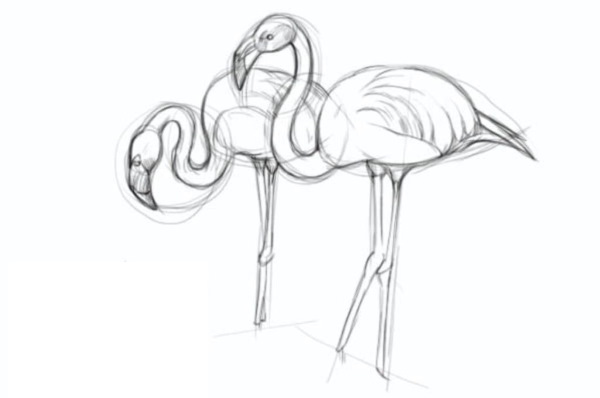
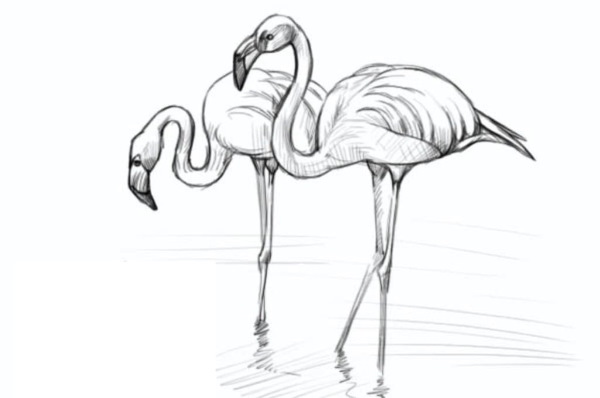
- Draw a small round eye with a small indent from the beak. Outline a large wing folded on the body, and show long feathers with curved lines. Outline the tail, draw several feathers on it.
- Erase the schematic lines and unnecessary features. Outline the main contour with a pen, liner or felt-tip pen. Add shadows to the bird figures with light shading.
- Color the finished image with colored pencils or paints.
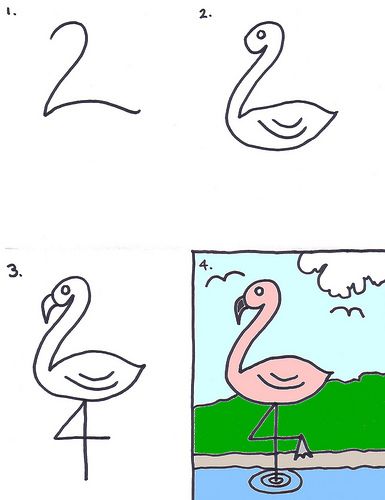
Cartoon style drawing
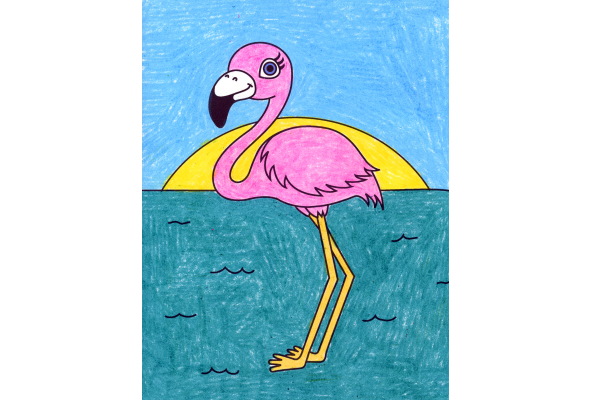
Flamingo (a drawing for children aged 6-7 years can be made in a cartoon style) can arouse a child's interest in the creative process:
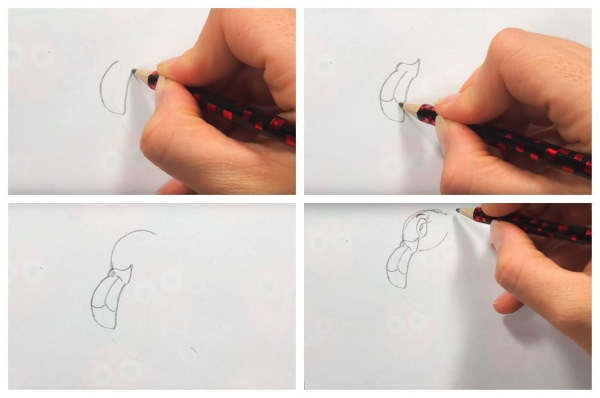
- The sheet is placed horizontally and begins with the image of the beak in the upper left corner. The key is wide and curved upwards. Closer to the head (to the right side) the beak narrows slightly.
- Draw the tip of the beak and divide it in half with a straight line.
- From the base of the key, draw a small round head.
- An oval is used to draw the eye, and the same figure is repeated in a smaller size to create the pupil. Several curved eyelashes are drawn in the corner of the eye. An eyebrow is depicted above the eye with a short arc.
- From the head down, draw 2 parallel lines, curved in the form of a 2. These lines form the neck, which slightly widens closer to the head and torso.
- From the neck, draw the body of the bird, which widens at the back and narrows into a sharp tail at the back.
- Draw the plumage in a frequent zigzag in the middle of the body, at the bottom and on the tail. Mark the protrusion from which the bird's long legs will lead.
- Draw a straight thin leg and mark the knee bend with a circle in the center.
- The second leg is bent backwards. Both legs end in flippers, which expand to the sides in the form of webs or oval toes.
- Erase any unnecessary auxiliary or unsuccessful details. Trace the general outline of the drawing with a felt-tip pen or pen.
- Color the drawing in a convenient way. The flamingo's body is colored pink, the beak and legs are yellow, the pupil and tip of the nose are colored black. If desired, add other characters.
Watercolor drawing
The flamingo (a drawing for children aged 12-14 can be made more realistic using watercolors), shown below in the text, is also suitable for those who have an intermediate level of drawing.
In the process, the silhouette of the bird is outlined with a pencil and the entire figure is painted in different shades of pink. Watercolor requires a lot of water, which causes thin sheets of paper to have a wavy shape even after drying. Therefore, it is recommended to use thick paper or special sheets for painting with watercolors.
Step by step:
- The sheet is placed vertically and a flamingo figure is sketched out using a pencil. The body is drawn in the center in the form of a drop, tapering to the right side, where the bird's tail is located. The neck is marked with a hook with a small indentation to the right and upwards from the body.
- Draw the neck from the wide part of the body. In this place the neck is slightly wider than in other parts. Its curve resembles a two. The neck ends with a small round head. From it, draw a wide beak curved downwards. Closer to the beak, draw an eye with a small dot.
- Down from the belly of the bird, straight and bent legs are drawn. In places of bends, the legs widen and resemble small balls. The legs end in flippers, widening in different directions.
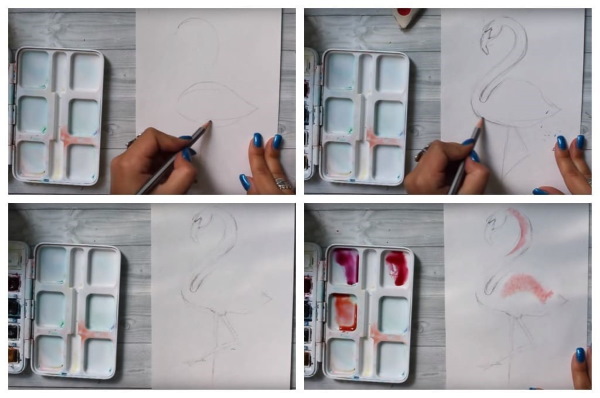
- Erase all unsuccessful and auxiliary lines. Outline the general outline with a pencil. Try to make the outline not too bright, so that it does not stand out under the layer of paint.
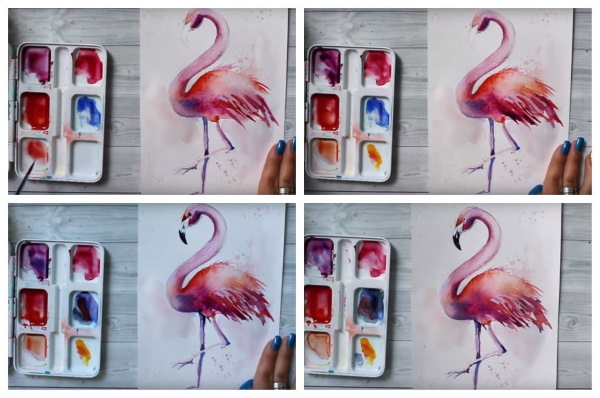
- Start working with paints. Dip a large brush in water and apply it to the entire surface of the sheet. Work with pink paints, you will also need red, crimson and violet colors.
- The bird's entire body is covered in pink.
- The top of the head and the body at the top and closer to the tail are painted in light red. The same color is added to splashes in several places around the flamingo figure.
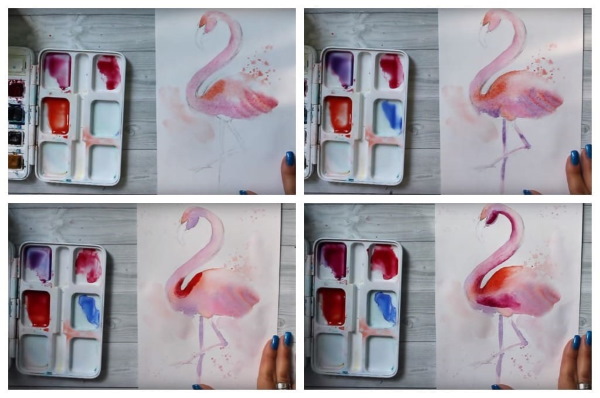
- The lower part of the body, the outline of the neck, the junction of the head and beak, and the feathers on the wings and tail are shaded with purple. The thin legs are painted purple and pink.
- The curve from the neck to the body is accentuated with bright red color.
- The crimson color shows the shadow on the lower part of the head and neck, on the lower part of the body.
- Light pink, red and crimson colors are used to make light strokes with a thin brush (No. 1, No. 2) on the upper part of the body, in the tail and wing parts, showing the feathers. The higher the feathers, the lighter they are, the lower, the more saturated the color of the strokes is.
- All sharp transitions are slightly blurred with water.
- The area of the head near the beak is shaded with violet, and the eye is drawn. The shadow is shown on the lower part of the neck closer to the body and on the legs in the part where the light does not reach well. Several thin strokes of violet are made in the tail feathers.
- The tip of the beak is drawn in black.
- Leave the drawing until it dries completely.
Realistic pencil drawing
This lesson is suitable for children aged 10-12 or for those who have an intermediate level of drawing. In the process, using a simple pencil, a sketch of the bird's figure is made and then colored with colored pencils. It is recommended to use a soft and hard pencil for different types of strokes, as well as a black pen for outlining the contour.
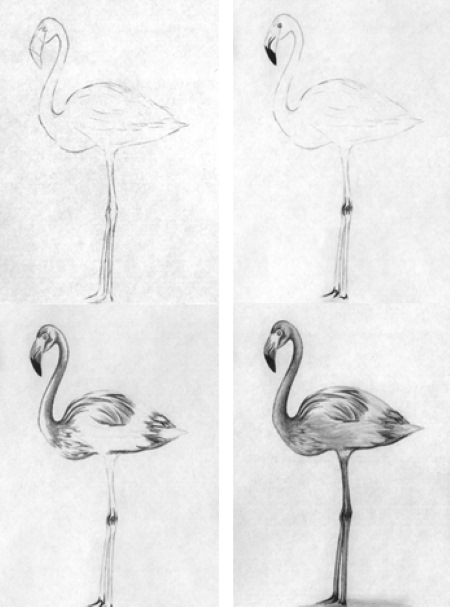
Step by step:
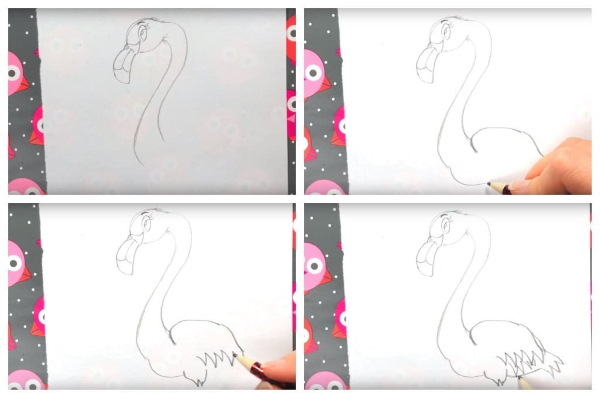
- The sheet is placed vertically and a schematic sketch of the bird is created with a hard pencil. In the center of the sheet, a body with a sharp tail is drawn in the form of a drop. To the left of the body, a curved neck is drawn upward in the form of a deuce, which ends in a small rounded head.
- A large curved key goes down from the head. From the center of the lower part of the body, 2 thin legs are drawn, ending in flippers. The legs are widened at the bends.
- Use a pen to darken the beak area. Shade the flippers and knees. Draw a small eye next to the beak.
- Shade the flamingo's figure with a soft pencil. Apply light pressure to make frequent hatching on the top and bottom of the head, on the upper contour of the neck and on the knees. Shade the feathers at the base of the neck, on the back, on the wing and in the tail. Apply more pressure to draw the feathers closest to the viewer.
- Lightly shade the entire bird's figure with a hard pencil. Outline the general contour. Make sure that the shading smoothly transitions from the dark to the light area. The upper part of the back should remain lighter, since more light falls on it. To soften the transitions, shade the drawing with a piece of paper. Shade the legs with a soft pencil using light shading.
- The finished drawing is left in black and white, or colored with colored pencils, softly shading the entire body of the bird.
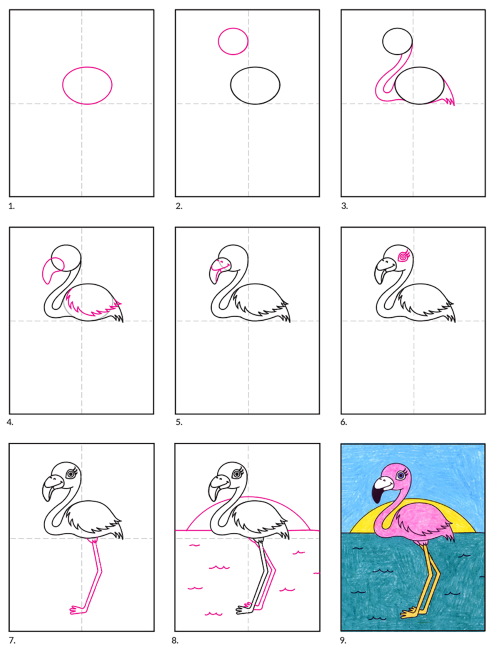
Drawing with colored pencils
This method is suitable for children aged 8-10 or those who have an intermediate level of drawing, since the drawing process requires a little more time than simple drawings and the skill of shading with a pencil.
Step by step:
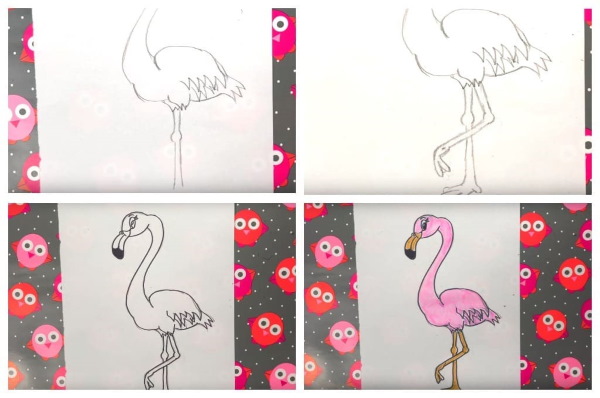
- The sheet is placed vertically and the key elements of the bird's figure are schematically depicted. In the left central part, a large circle is drawn, indicating the bird's body. Above and to the right, a smaller circle is used to mark the head.
- The figure of a flamingo is schematically depicted: from the head to the body, a neck is drawn with a curved line, at the bottom of the head there is a large downward-curved beak, a triangular tail and straight legs.
- Add details to the head. Combine the general outline of the beak and head. Divide the beak in half, mark the darkening zone and outline the nose. Next to the beak is a small round eye.
- Connect the general outline of the body - the neck, body and legs with flippers and membranes. Long ovals show feathers on the wing, back and tail of the bird.
- Erase excess details and outline the general outline with a hard pencil.
- Color the entire body with a pink pencil, pressing lightly on the lead. Shade the legs, feathers, neck and head with crimson. Shade the places where the shadow falls with violet. Color the eye and the tip of the beak with black.
Tips and tricks
Drawing a flamingo for kids can be easier and faster, regardless of the chosen lesson, if you follow a few simple tips:
- Before starting to draw, think through the entire composition so that all the characters fit on the sheet. Then the sheet is placed vertically or horizontally.
- In order for all the intended characters to appear in the drawing uncut and with the correct body proportions, a preliminary outline is made with a pencil, showing the head, body and other parts of the body in the form of a circle and oval or straight lines. Then each part is gradually outlined, and the schematic image is erased at the end.
- The drawing starts with the largest part – the body or the head. Then the remaining parts of the body are added. Small details are drawn at the very end, when the general outline of the figure has already been created.
- To make the drawing more realistic, use paints, pencil or pen to create a shadow effect. To do this, use fine, frequent hatching in one direction with light pressure. If the shadow is created with color, then darker colors are used along the contour and in places where the light does not reach.
- They start drawing with a pencil so that they can correct incorrect lines and erase the schematic outline. The finished outline is outlined with a liner, pen or soft pencil so that it stands out after coloring the drawing.
- If a child wants to redraw a more complex drawing, but lacks drawing skills, use carbon paper or the cell-by-cell redrawing method. Place carbon paper and a clean sheet of paper under the drawing. Trace the outline, it is printed on the paper, and all that remains is to color it. Or line the original drawing and gradually transfer a fragment from each cell to a clean sheet of paper.
Video about drawing
Flamingo drawing for kids: