Dot painting is becoming increasingly popular among handicraft enthusiasts. This trend allows you to independently give any object an individual and unusual look. Thanks to the contours, patterns and stencils that make the work easier for a beginner, you can create a real masterpiece.
What is dot painting
Dot painting with contours (schemes and stencils can also be used in it) is the art of drawing, with the help of which a drawing is applied using dots.
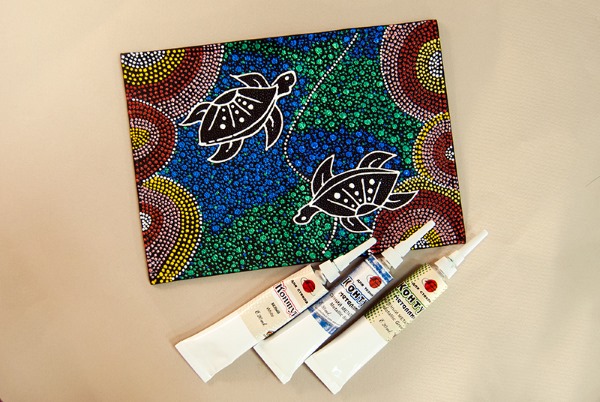
This technique of applying patterns is more than 40 thousand years old. The first finds that contained traces of dot painting were found in an Australian Aborigine settlement. Later, its patterns began to be found in Persia, China, Indonesia, India and Thailand.
The dot painting technique can be seen in the works of C. Pissarro, P. Signac and J. P. Seurat. The dots, merging into a common picture, create incredibly beautiful landscapes. Most often, this direction is used in painting decorative objects, mirrors and dishes.
Drawing styles
Dot painting with contours (diagrams, stencils and templates are an addition to beginner kits) has gone its way of development from the rock paintings of the aborigines to modern fashionable art. Based on the variety of possibilities for using this drawing technique, it has been divided into several styles.
Pointillism
The name comes from the French word "Pointilisme" - dottedness and "Point" - dots. This is the most popular style, which is used both in painting and in everyday graphics. The first option uses round or rectangular brush strokes.

The colors are not mixed to create a transitional shade. It is reproduced using dots that allow you to draw the illusion of volume, as well as convey light shadow. It was in this technique that the artist Paul Signac worked in the 19th century.
Dot art
The name of this style is formed from 2 English words: "Dot" and "Art", which means point and art. This direction is more modern. It uses dots to create a three-dimensional design. Also, in dot art there is a direction called "Point hyperrealism". It is used to create a drawing that looks like a real photograph.
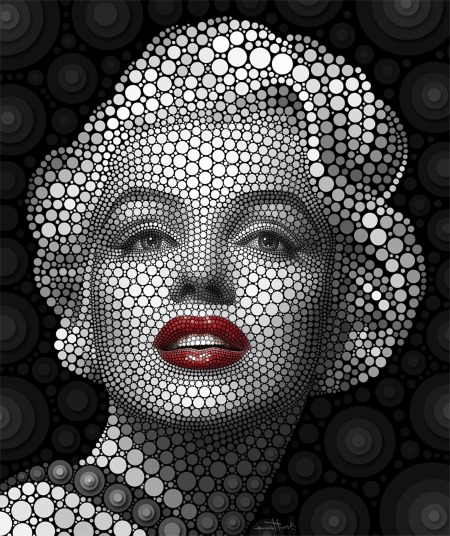
To achieve such a realistic effect, applying dots requires great skill and painstaking work. The modern artist M. Endara works in this style. In simple manifestations, dot art is used in doodling and zentang to apply an ornament.
Point-to-point
This style implies precisely dot painting. Translated from English, it is translated as "dot to dot".Point-to-point is a technique of decorating using dots. It differs from pointillism in that the dots are applied along specific lines, which form a single pattern.

This trend originated in the tribes of Africa, Australia and Polynesia. Both adults and children can learn this technique. Point-to-point can be seen on painted boxes, dishes, interior items, wallets.
Dotwork
The name of this style comes from 2 English words “Dot” and “Work”, which are translated into Russian as dot and work.
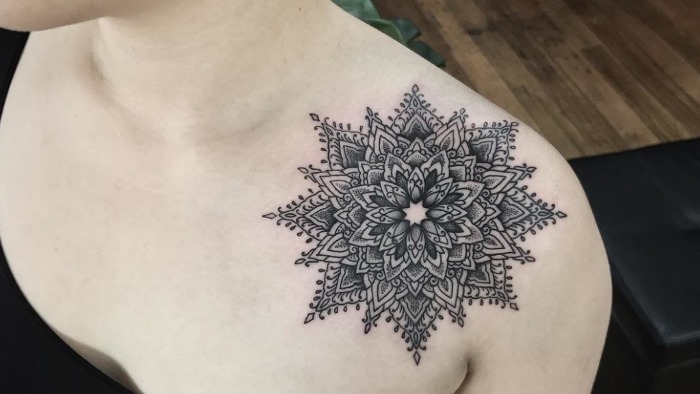
In addition, dotwork is a direction in the art of tattooing. There are thousands of tattoo designs that are made in the form of geometric shapes, mandalas and plants.
Drawing by dots
This trend is familiar to many people from children's educational copybooks, where after tracing the dots they merge into a single drawing. Dot art can be seen in makeup elements and simple abstractions.
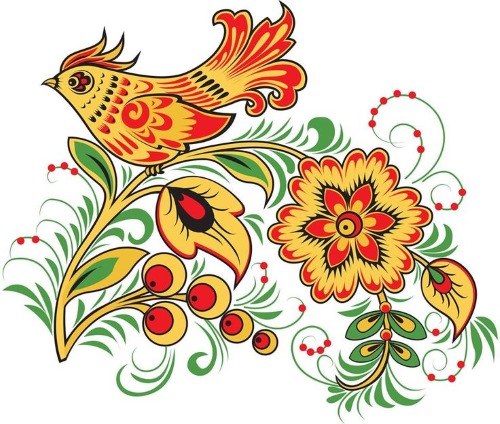
Besides this, dot painting has many branches. Khokhloma painting is one of the directions of dot painting. The only exception is the technique of applying the pattern. If in dot painting the elements are in the form of a drop, then in Khokhloma painting - strokes with a brush. Another branch is painting on stones. It is used to design both decor and a garden plot.
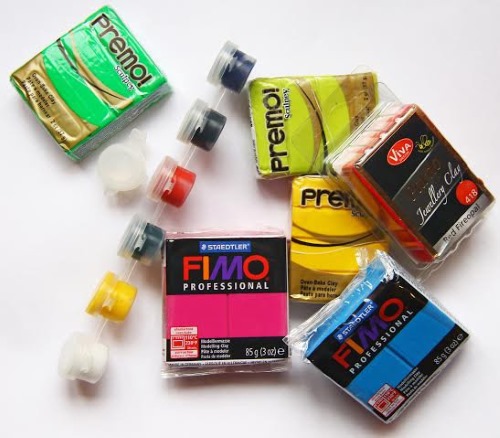
What paints to choose
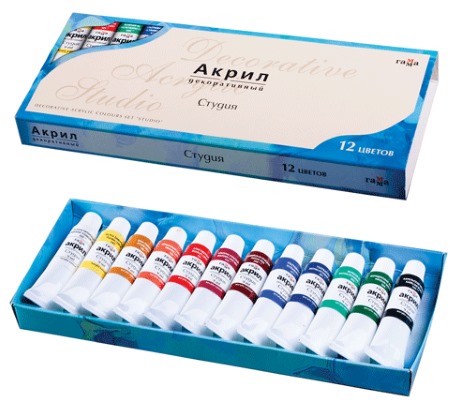
Dot painting with contours (schemes, stencils for which are often sold without color transfer) is carried out using acrylic paints contained in them. Most often, they are a tube with a thin tip, inside which there is a coloring substance.
The palette of acrylic paints is quite diverse. In addition, they are sold with various additives that allow you to give the future drawing shine or an unusual shade. In order for the applied image to be timeless and continue to retain its original appearance, you need to choose baked acrylic paints.
You can recognize a tube of baked paint by one of the following notes:
- dishwasher resistant;
- dishwasher ability.
You can find paint with a baked effect from the following manufacturers:
- Pebedo Vitrali.
- Hobby Line Kreul.
- Marabu.
- Decoola.
Paints can be created on the following bases:
- Water.
- Organic.
The first can be erased with ordinary water, but in the second case you will need a special solvent.
A short overview of acrylic contours, which are most popular among fans of dot painting:
| Country of origin | Name | Peculiarities |
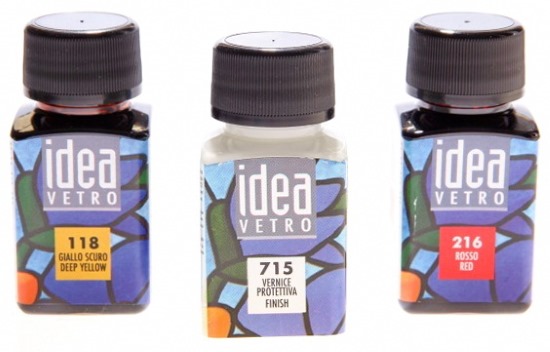
| Italy | "Maimeri", line "YEA Vetra"
| Stained glass dyes in a tube of 20 ml each. The dispenser is very narrow, thanks to which you can get small dots.
A small cut at the end allows for thin and sharp patterns on one side and wide and flat ones on the other. The consistency is thick. It will be ideal for point-to-point work. The paint does not spread, but keeps its shape. Drying takes from 10 minutes to 1 hour. To wait until the product is completely ready, it must be left for 1 day. There is no need to burn (bake) the finished work. The palette is represented by chromatic shades: silver, light gold and platinum, dark Gold, copper, steel, rust effect, bronze. Achromatic colors: colorless, gray and black. The only drawbacks of the paint are a small defect that is sometimes present in the tube (there may be a plastic residue on the tip of the dispenser, which can be removed without loss of paint performance). |
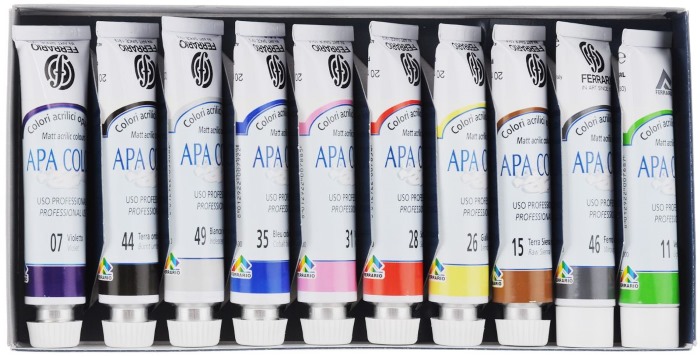
| Italy | «Ferrario»
| This manufacturer produces 2 lines of contour paints: “Piombo lmitazione” and “Craft rilievo”.
The first one has the colors: steel gray, simple gray, iron gray, copper, bronze, silver, ducat and simple gold, platinum. They have a rich color and shine. In the second line, the palette consists of the following colors: blue, white, dark blue, yellow and golden yellow, sea wave, purple, red and bright red, green. Also, this line has a wide variety of opaque outlines in color. The paints in both lines are produced in tubes of 20 ml each. The disadvantages are the same as in the Italian "Maimeri". The coloring substance is homogeneous, with sufficient density. Complete drying of the product is achieved in 24 hours. Drying from half an hour to 1 hour. Firing of the products is not necessary. |
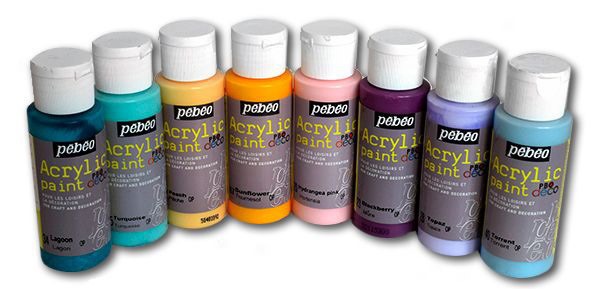
| France | «Pebeo»
| The paint tubes contain 20 ml. The range includes transparent and opaque color contours. The Porcelaine 150 and Vitrea 160 lines are used for working with water-based substances that require baking.
"Vitrea 160" withstands baking temperature of 160 degrees. You can use these paints without firing. The line includes colors: pearl white and steel. In addition to these 2 types of acrylic paints, there is a non-baked series called "Cerne relief". It contains the colors lead, gold, copper, gilding and royal gold. However, these circuits can withstand a heating temperature of 130 degrees for half an hour. |
| Russia | Tahir
| The consistency of the paints is quite liquid, which makes it difficult to apply patterns. Those located close to each other can merge into one whole. |
| Russia | Gamma
| The contours of this manufacturer can be purchased both in a set and individually. The tubes are inconvenient to work with.
The dispenser spout is too big, which is why the dots are of large diameter. This product is attractive due to its budget prices. |
The paint should be selected based on the base on which the future drawing will be applied.
The thickness of acrylic paint can be:
- Liquid. Suitable for applying a design to fabric.
- Gel with a paste-like consistency. This thickness of paint is suitable for applying raised dots to give them the appearance of pearls or beads.
- Standard. It will be ideal for painting on hard surfaces.
The prices for acrylic outlines are very high, so they can be replaced with regular acrylic paint. However, it will not be so convenient to use, because it does not have a tube with which you can easily apply the drawing. To draw with regular acrylic paint, you will need a dotting tool or a homemade outliner.
Preparation of materials and tools
The key to good work is having the right set of tools for chiseled painting.
Acrylic contours
Dot painting with contours (diagrams, stencils with a pattern you like can be printed out independently) with acrylic paints makes it easier to apply the ornament to the surface of the product.
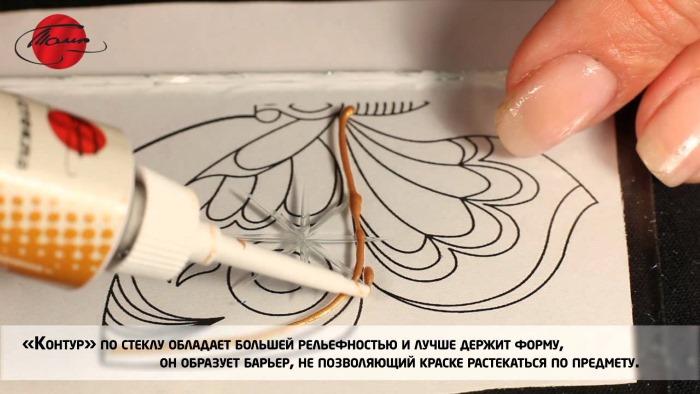
The dye itself is in a tube that has a thin end. The tube can be made of soft plastic, but most often it is metal. Thanks to it, you can easily apply small lines that, after drying, are transformed into a three-dimensional decorative element.
The contours must be selected in accordance with the surface on which the drawing will be applied. Acrylic paints for textiles allow you to maintain the clarity of the applied patterns, while the dye penetrates through the cells of the fabric, allowing the image to be well fixed on it. Choosing a shade for painting textiles will not be difficult.

There are now different color variations for this purpose:
- Neon.
- Classic.
- Glowing in the dark.
- With glitter.
The company "Nevskaya Palitra" produces a special series of acrylic contours "Decola" for painting on fabric. Also, the necessary substances can be found under the brand "Tair".
For painting on a hard surface, acrylic contours with a viscous consistency are suitable, which allows you to preserve the convex lines and volume of the drawing.
You can find materials for working on hard surfaces from the manufacturer "Marabu".
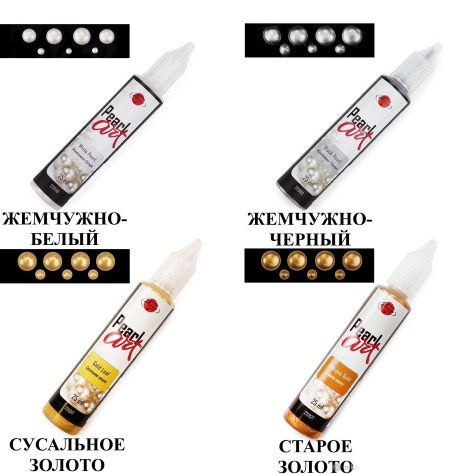
If the drawing contains volumetric elements (pearls or beads), they should be applied with acrylic gels, which do not sag after drying. The applied pearl drops will retain their spherical shape, and its center will not fall off.
This happens if volumetric details are applied with standard acrylic contours. You can find gel-like acrylic contours in the company "Tair", which produces this product with the "Peаrl Art" marking.
Types of contours:
- Universal, suitable for painting various surfaces, with the exception of textile products and those that will be fired (baked).
- For painting fabric.
- For working with ceramics and glass.
- A contour that increases in size when heated is swollen.
- Outline for items that require firing or for those that will be frequently used in everyday life (dishes, glasses, mobile phone cases, mice, laptops).
- Stained glass.
A large number of contours with different properties allows you to paint almost any surface.
Painting without contours
If there are no contours, then regular acrylic paint will do. A little life hack to turn an ordinary tube of this substance into an easy-to-use painting tool.
It is enough to select a nozzle from any glue-moment for the existing jar of paint and screw it onto the thread instead of the lid. The hole of the spout will be ideal for applying patterns.
Before you start applying the design, you need to check the consistency of the paint. If it is too viscous, it should be diluted with a little water, until it reaches the consistency of thick sour cream. Using this method, you can adjust the thickness of the substance depending on the surface being painted.
Surface preparation
A properly treated surface for painting is the key to the durability of the drawing. Before you start applying patterns, the future product must be treated with a primer.
Priming is the application of a special coating to the top layer of a product. This process allows to level the surface and improve the adhesion of coloring materials to the base.
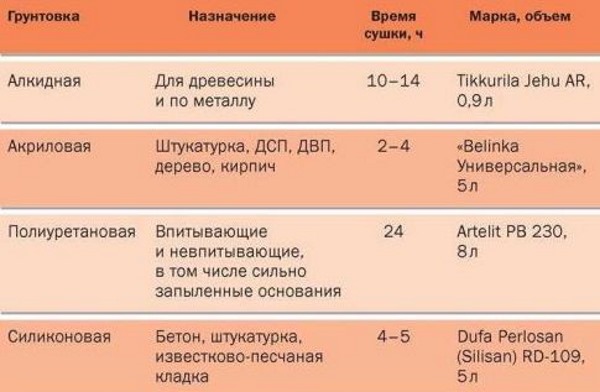
Priming materials can be:
- Mineral.
- Alkyd.
- Acrylic.
The primer should be selected based on the surface of the item to be painted. Primer mixtures are applied with a sponge, from a spray can, or with a brush.
There are 2 main categories of surfaces that require this step:
- Smooth products – tiles, glass, glazed ceramics, metal.
- Porous – cardboard, wood, fibreboard and MDF products, papier-mâché, unglazed ceramics.
Priming materials with a porous surface will reduce the consumption of acrylic paint by filling the pores of the product. Processing smooth materials will prevent peeling of the future drawing.
The soil, depending on the surface, can be:
- Adhesive - for processing glass, tiles, glazed ceramics. The surface should be processed until a characteristic sound is heard - a creak.
- Colored aerosol primer. Used for working with metal. During the priming process, 1 or 2 layers of this substance should be applied to the product, after degreasing its surface.
- Anti-corrosion primers. They are used when the working surface is covered with corrosion. They are applied directly to the rust itself.
After priming, the surface on which painting will be carried out must be varnished, this will allow:
- Improve the adhesion of acrylic paints to the surface.
- The future drawing will look more presentable.
- A coating resistant to external influences is formed on the working surface.
Because varnishes can have a very strong smell, they are very difficult to work with in closed spaces.
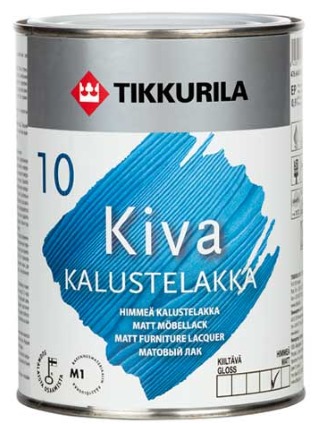
Therefore, among their large assortment, the most suitable and safe varnishes are:
- Finnish "Tikkurila Kiva". Does not turn yellow, suitable for internal procedures.
- German "Poly-R". It is distinguished by the fact that it dries quickly and has no color, it is absolutely transparent.
The varnish should be chosen based on the desired effect. A high-quality varnish coating is achieved by applying 2-3 layers of the substance. Each of them should be applied only after the previous one has completely dried.
Items that will be used for their intended purpose after painting (dishes) cannot be coated with regular varnish. This can cause toxic poisoning. To avoid this, you need to skip this process or choose a varnish that will not harm human health.
Additional materials
In addition to the outlines and the product to be painted, you will need the following tools:
- Rough sheet for test strokes.
- A sponge or similar for priming.
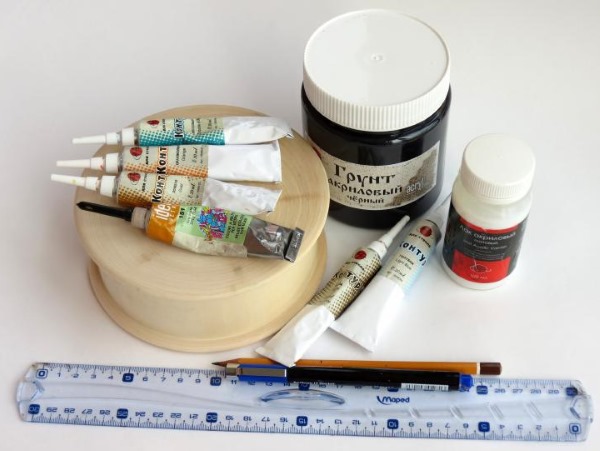
- Pencils for drawing lines.
- Water to remove defects from the product. If the paint is baked, you need to use acetone.
- Napkins or a sponge to periodically clean the dispenser spout in the circuits.
- A needle or pin for cleaning the dispenser in the contours from the inside from baked paint.
- Cotton swab for erasing unnecessary elements in the drawing.
- Tweezers, a toothpick or a stationery knife to remove the baked-on unnecessary dot.
- A brush for applying varnish to a product.
- Alcohol-containing liquid or acetone to degrease the surface.
You can also keep a hair dryer on hand so that you can dry your work at any time.
Templates for painting
You can come up with a dot painting design yourself, or draw it using ready-made templates. This option is suitable for beginners in this business.
In dot painting, the following are used to create a design:
- Schemes.
- Stencils.
- Templates.
For working on an opaque surface (leather, wood, metal or plastic), stencils sold in craft stores are suitable. You can make them yourself from thick cardboard or a plastic folder. Working on a transparent surface is much easier. Any pattern can be applied from different sides.
Templates that are suitable for spot painting can be:
- Cross stitch patterns.
- Examples of patterns for bead embroidery.
- Patterns on fabrics stylized as folk art and ornaments.
- Openwork embroidered shirts.
- Cards for decoupage.
Any of the above templates can be redrawn or printed. Then it will be enough to attach it to the product and start working.
Geometric shapes
Geometric shapes in large clusters can create a beautiful pattern.
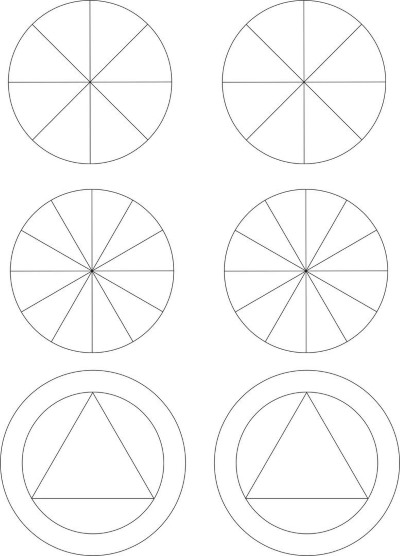
You can come up with your own pattern or choose any template you like. Geometric patterns are distinguished by their simplicity in execution, which at the same time looks great on the product.
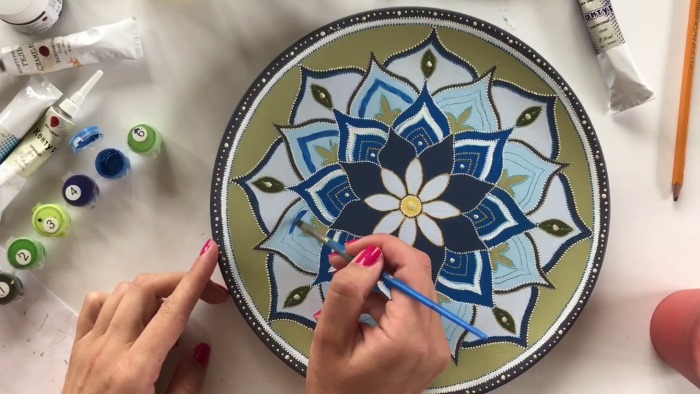
Flowers
Using floral patterns is the most colorful and beautiful design option of all possible. Their various variations provide great potential for developing imagination.
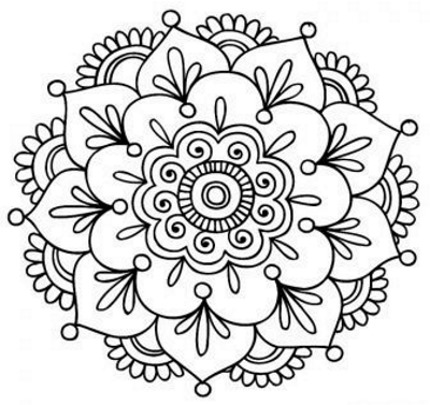
You can compose various ornaments from individual flowers, play with the palette of colors and lines. Each flower should be drawn from the core to the edge. Drawing in this way will help avoid all the dots merging into one whole.
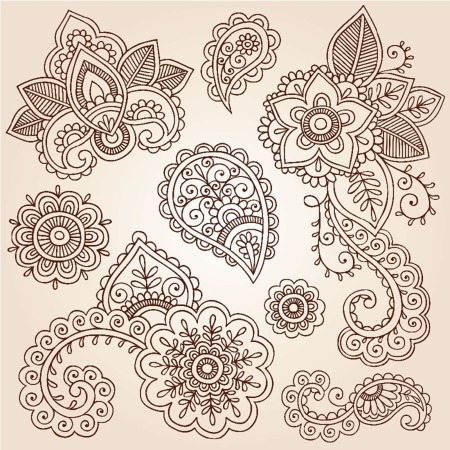
Abstraction
Abstractions on products give it a surreal look. They can be used to decorate bottles, boxes, and equipment cases. There are many options for abstractions that will look great on almost any product.

The only downside is that they are very difficult to work with. A beautiful result depends on painstaking and professional work. When applying abstraction, you need to strictly adhere to the contours and lines of the drawing, because the quality of the work depends on their clarity.
Animals
Animal patterns are the least popular among dot painting enthusiasts. They are difficult to play up in the overall design. Applying such an image requires a corresponding environment.
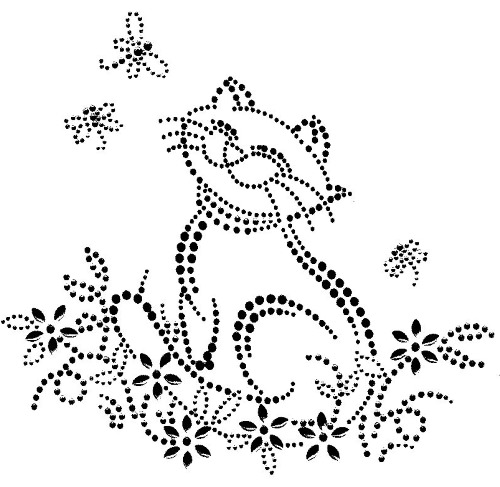
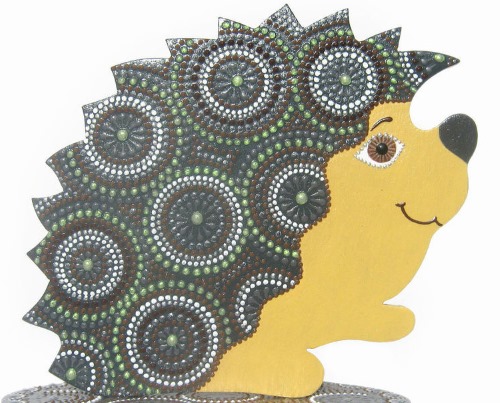
At the same time, animal motifs will look very beautiful if you choose the background and other elements of the design correctly.
Working according to schemes
The pattern that is applied from any original template will not be 100% identical to it. When patterns are transferred to the product, its central part is initially marked. It is most often not identical to the geometric one.
After this, the lines of the outlines of the drawing and its main lines are applied. They are applied with a regular slate pencil or a special one for drawing on glass, with a brush with a thin tip. If the lines are applied with acrylic, then you need to consider how they will look in the finished product.
To make sure the lines don't hurt the eyes, they can be done:
- An inconspicuous paint that does not contrast with the main background.
- When drawing a line, you need to use paint that is several tones lighter than the main drawing.
The sequence of actions should be from the central part to the sides, and then from the top to the bottom. If you start doing the work from the outline of the pattern to the center, there is a risk of not guessing with the sizes and then any error in the work will become fatal and spoil the result.
Applying templates to different surfaces
The surfaces to be painted may not always be smooth. Even an ordinary saucer has a hemispherical shape, and therefore it is almost impossible to apply a stencil to it. To prevent the drawing from being distorted, you need to put a lot of effort and time into making sure that the desired pattern lies as smoothly as possible and retains its original appearance.
Flat surface
It's easy to work with a flat surface. That's why beginners in dot painting should start with it to get their hand in.
It is enough to apply the desired pattern or stencil under the transparent surface, fix it with tape and start working. If the working surface has a color, then the pattern is applied to it using carbon paper of the opposite color.
Painting of glasses
Painting glasses with dot painting is not as difficult as it seems at first glance. The prepared template or stencil should be placed inside the glass, securing its ends with tape. Using cotton wool or paper napkins, you need to completely fill the glass.
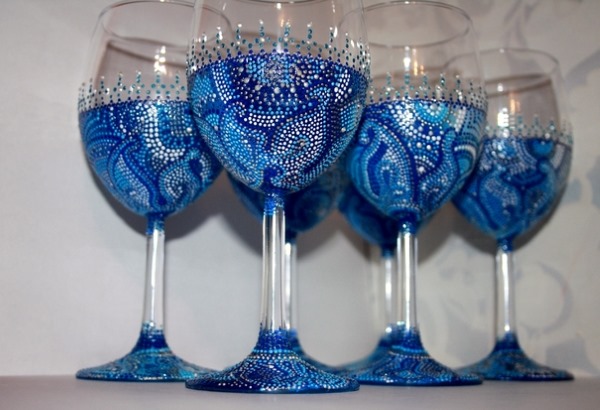
This will allow the template to better fit the convex walls of the product. All that remains is to paint the product, because the lines of the patterns will be perfectly visible through the glass.
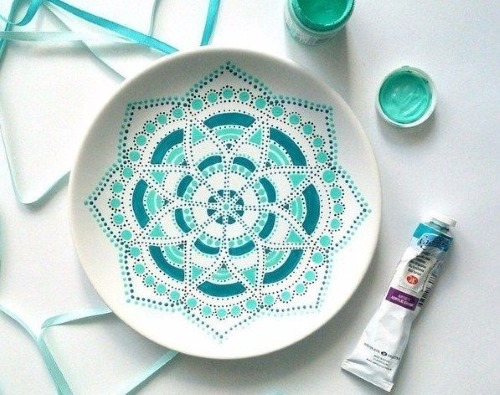
Decorating plates
It is difficult to paint the plates because of their curves.
There are several options for applying templates to this product:
- Each element of the pattern is cut out and applied to the plate individually.
- The template is applied to the surface completely, and in places where the paper is distorted, it is corrected.
- The center of the pattern and its main contours are drawn on the plate. After that, the remaining details of the drawing are outlined.
A little life hack for painting plates:
- You need to take 2 identical transparent plates. Between them you need to clamp a stencil or template made of fabric that will fit tightly to the surface. The transparent top will allow you to transfer the pattern scheme to the product without distorting its outlines.
In addition, you can paint a plate using only your imagination.
Bottle templates
For dot painting of bottles, you need to use stencils or templates that will have an elongated shape. You can use circular patterns, but in order for the finished product to look beautiful, the pattern must be attached very clearly. The main difficulty is the ends of the pattern, which must be connected.

There are several ways to solve this problem:
- Do not connect the ends of the drawing at all. Color the space formed between them yourself.
- Try to calculate the diameter of the bottle and adjust the template to it.
- For work, you can use patterns that consist of repeating and small fragments. If the pattern does not match very well, you can correct it by playing with the details of the ornament.
If the template is large and complex, it should be applied in stages. This will allow you to adjust the drawing at any stage.
Dot Painting Tips for Beginners
Anyone can learn dot painting.
A number of small tips will help beginners master this craft faster:
- The first dot painting jobs are best done on a flat surface.
- Before painting any product, it is worth getting the hang of it on any rough sheet of paper. This will help you understand how hard to press on the tube to get dots of the required diameter.

- Don't despair if nothing works out on the first try. This art requires special skill that comes with experience.
- It is best to start working with a ready-made template or pattern. Over time, you can come up with a design yourself and apply it to the product.
- Always have a cotton swab, solvents and water (depending on the paint you are using) on hand so that you can correct any mistakes at any time.
- Don't be afraid to go beyond the lines of the template or diagram. You can always play with the drawing in your own way, adding additional elements to it.
Dot painting has come a long way in its development. Modern scientific achievements make it easier for both beginners and experienced masters. Thanks to acrylic contours, applying dots will be easy and simple, and ready-made schemes and stencils with ornaments will allow you to create a beautiful pattern even for those people who do not know how to draw.
Article formatting: Natalie Podolskaya
Video about dot painting
Dot painting with contours for beginners:
Tell me where I can get simple stencils. Thank you.
Thanks for the detailed tutorial!
Hello. What is the basis for creativity with dotted lines? What material is it, thin veneer or glass or plastic or metal sheet? Thanks in advance.