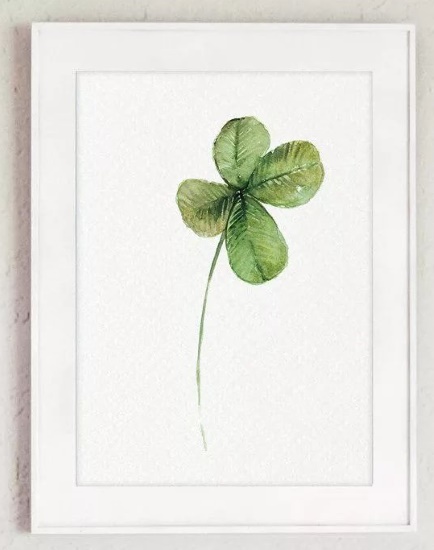
The four-leaf clover has symbolized luck, happiness and good health since ancient times. However, it is not easy to find it in everyday life: anyone who sees it is truly lucky. If after a long search you fail to find such an unusual leaf, You can draw it.
Drawing tools
A clover leaf (a simple drawing takes about 10 minutes) on paper can look realistic if you spend 15-20 minutes drawing it. The time spent will be repaid by the beauty of the resulting pictorial masterpiece.
The main tools for drawing clover will be:
- simple pencil;
- eraser;
- several shades of green.
If a child who has never done this kind of creative work before wants to draw a clover, it is better for him to use colored pencils. Those who are older and more experienced can use paints. When using paints, you can do without a simple pencil.
In this case, the work will become more difficult, because you will have to:
- select the appropriate brush size;
- prepare a container with water;
- wait until the paint applied to the paper is completely dry.
To have fewer problems during work, you should take the preparation of the necessary tools seriously. The quality of the paper that will act as a canvas is also of great importance.
Pencil
The main element of a simple pencil is graphite, the characteristics of which determine the quality of the drawing. Graphite itself is a type of crystalline carbon to which various substances are deliberately added to impart the necessary properties.
A mixture of graphite and clay is generally used. Most often, graphite is set in wood that has undergone special treatment.
The quality of this material depends on its mass and homogeneity. Low-quality graphite will leave scratches on paper, while good graphite will lay down on paper perfectly and will not crumble.
The main property to consider when choosing a pencil is softness. Graphite can be soft or hard. You can find out which of these 2 categories it belongs to by looking at the body of the pencil.
The manufacturer must indicate the appropriate marking using letters and numbers. In the case of imported products, this may be the letter "H" or "B": the first indicates that the pencil is hard, and the second, respectively, that it is soft.
In addition to letters, numbers are used. Each of them indicates the degree of hardness or softness. The larger the number next to the letter, the higher the degree. For example, a 3H pencil is harder than a 2H pencil. Accordingly, a 3B pencil is softer than a 2B pencil. As softness increases, the darkness and saturation of the tone increases.
It is worth keeping in mind that Russian-made pencils often have Russian letters instead of Latin ones. In this case, it will be easier for a Russian buyer to navigate: the letter "M" means softness, and "T" means hardness.
In the case of clover leaves, a pencil will be used to create the outline. It is better to choose a softer tool, for example, 3B.
Eraser
A clover leaf (a drawing by beginning artists is often accompanied by mistakes that can be easily removed with an eraser) when depicted on paper at the initial stage, in addition to a simple pencil, an eraser will be required.
Every child knows how to work with them. However, not everyone knows that these tools, designed to correct a drawing, are divided into several categories depending on the degree of hardness.
There are 5 main types of erasers:
| Eraser type | Description |
| Soft eraser | This is the best option for everyday work. You can buy a large piece and cut it into several pieces. This eraser crumbles a little on paper, but it almost does not spoil it, does not smear the drawing. |
| Hard eraser | An eraser that is needed when necessary not only to remove a pencil mark, but also to rub or slightly scratch the top layer of paper. For example, such an eraser helps to get rid of traces of colored pencils. |
| Hard eraser with added sand | An object needed to scratch off a layer of paper. It is not needed when drawing with a pencil, because in this case you can get by with softer varieties. For removing traces from a fountain pen, such an eraser will be indispensable. |
| Nag | This is not exactly an eraser, but a special material that has about the same plasticity as plasticine. With this item, you can remove marks with a light touch of paper. The main advantage of a nag over a regular eraser is that it does not damage paper. |
| Pencil eraser | A tool for removing marks on paper that looks like a simple pencil, but instead of a lead it has an eraser. It is designed for spot rubbing, when it is necessary to carefully remove a small dot 1-2 mm wide, without affecting the other elements of the drawing. |
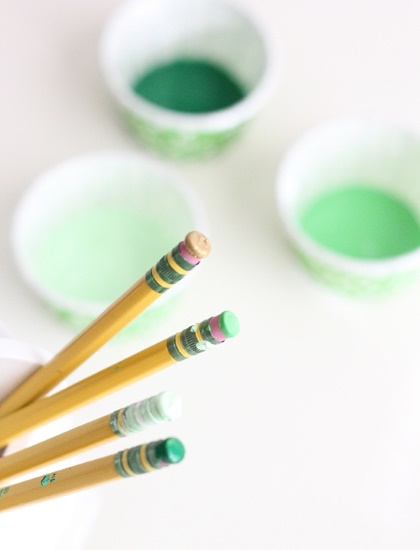
Coloring tools
Various tools and materials will help you give a particular color to a sketch made with a simple pencil:
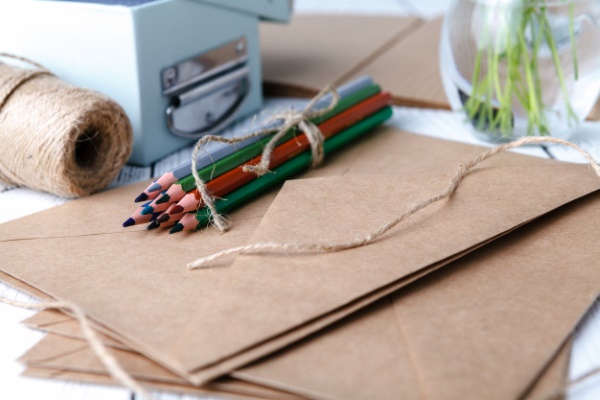
- colored pencils;
- felt-tip pens;
- markers;
- watercolor paint;
- gouache;
- watercolor pencils;
- wax crayons;
- pastel crayons.

The choice should be made based on the artist's preferences and experience. For example, it is better to buy colored pencils for a child, since they are easier to work with. Paints can create a more realistic drawing, but in this case you will have to put in more effort.
Paper
Paper is usually used as a basis for drawing. You can use either white or colored paper. The main thing in the case of clover is not to use green paper, otherwise the drawing will merge with the background.
Harder paper, such as cardboard, can also be used as a base.
When choosing paper, you need to pay attention to its density and texture: the denser the material, the more expensive it is. However, there is no great need to spend huge amounts of money on the purchase. For drawing with pencils, paper with a density of 100-200 g per 1 sq. m is suitable.
Those who plan to paint with watercolors should pay attention to denser options.
Each paper intended for drawing has a certain texture, which foreign artists call the word "tooth". In Russian it is translated as "tooth".
The paper can be very smooth, or, on the contrary, completely rough. For working with simple pencils, the 1st is more suitable.
Master classes
Having prepared what is necessary for the creative process, you can begin drawing. Below are several examples: first the simplest, and then those that will require more effort from the artist.
First, let's look at a step-by-step tutorial on how to draw a four-leaf clover using a pencil, an eraser, and several shades of colored pencils.
Simple drawing
Beginner artists will find the first stages the most difficult: here they will have to work with a simple pencil, carefully drawing each line. When the outline itself is prepared, the interesting and simpler work will begin – coloring.
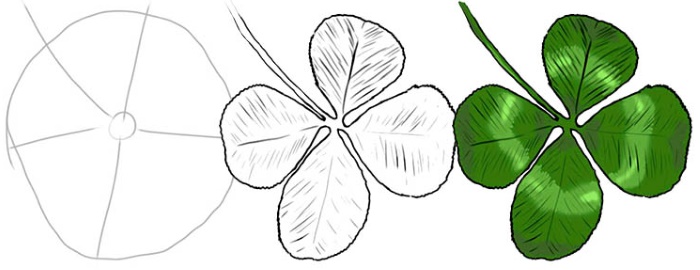
A simple clover leaf design can be completed in a matter of minutes.
To do this you need:
- Draw a plus sign: draw 2 intersecting lines. The angle of their intersection is 90°. The lines should not be straight: they need to be wavy. The ends should be slightly curved. Such an uneven “plus” will be the main “skeleton” of the drawing. You need to focus on it when drawing the remaining elements.
- Draw the first leaf. It should be presented in the form of a heart: this is how the leaves of a real clover look. You should start from the center, drawn in the previous stage of the "plus" - from the intersection point of the two curved lines. The lower, narrowed part of the "heart" should be here. Then, it widens upwards. It is not necessary to observe symmetry, it is better, on the contrary, to try to make the leaf asymmetrical. This will give it realism. The first drawn leaf should be located at the top. The "heart" that it represents, in this case, has the correct position: its narrowed part is at the bottom, and the wide part is at the top.
- Get busy drawing the next sheets, which also come from the center of 2 intersecting curved lines. They will have a different position: the left and right sheets will be represented by hearts lying on their sides, and the bottom sheet is an inverted heart, the narrow part of which is located at the top, and the wide part is, accordingly, at the bottom. In total, there should be 4 leaves of approximately the same size, each of which looks like a heart. All of them are drawn according to the same principle as the very first sheet. It is important to observe their position relative to the center, while trying to make sure that the edges of the leaves slightly cover each other.
- Draw a small stem on the four-leaf clover. It should be located between the left leaf and the lower one. It is a small strip that bends slightly and narrows slightly as it approaches the leaves.
- Color everything that was drawn. To do this, take green pencils and add color to the drawing. To add volume to the leaves and stem, outline all the lines with a dark green pencil. Then you can color the leaves, using a lighter shade of green. The stem can be made a little darker.
With auxiliary lines
Clover leaf (a drawing for very young children can be done using additional lines) using auxiliary lines.
To work you will need:
- simple pencil;
- several green pencils of different shades;
- eraser.
The work takes place in the following stages:
- Draw a large square and divide it into equal segments. To do this, 4 lines are drawn inside through its center: horizontal, vertical and 2 diagonal. When drawing these lines, you do not need to press too hard on the pencil, because they are auxiliary, designed to simplify the work. In the following stages, you will need to get rid of them with an eraser.
- Draw the 1st leaf. It should be in the upper left part of the square. It also comes from the intersection points of the lines and is a heart.
- Add the rest of the leaves, each of which has a heart shape and occupies its own quarter of the square. It is not necessary to make all the leaves similar to each other, because even in nature they are different. It is enough to observe their basic general similarities. In this example, there is no need to draw the leaves so that their edges overlap each other. On the contrary, a gap of several millimeters remains between them.
- Draw the stem. It is a strip that narrows slightly as it approaches the leaves. The stem is located at the bottom - approximately in the middle of the paper sheet: between the two lower leaves.
- Once again, trace all the contours of the 4 leaves and the stem with a pencil.. Along the diagonal lines that were drawn in stage 1, draw 1 vein on each leaf. As a result, each vein will run in the middle of the leaf from bottom to top.
- Take an eraser and remove any unnecessary components.. The lines that were not outlined with a pencil are subject to removal: the square and all the lines that were drawn in stage 1. As a result, 4 leaves with cores and a stem will remain.
- Color the image. First, outline the contours with a darker color, and then completely color the leaves and stem. Light green is used for this. If you want to give the drawing volume, you should try to color those parts of the leaves that are closer to the center with a darker color.
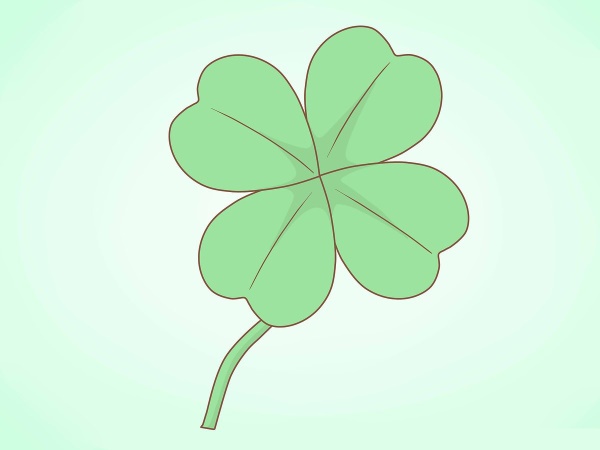
With a pencil
A clover leaf (the drawing can be done with a pencil, paints or felt-tip pens) can be depicted using several elements. It will be more convenient to draw it on a sheet of paper that is pre-divided into 16 equal parts.
To do this, you need to draw 3 horizontal lines and the same number of vertical lines at equal distances from each other. As a result, you will get a field divided into 16 cells, which you should focus on when working.
The stages of drawing are as follows:
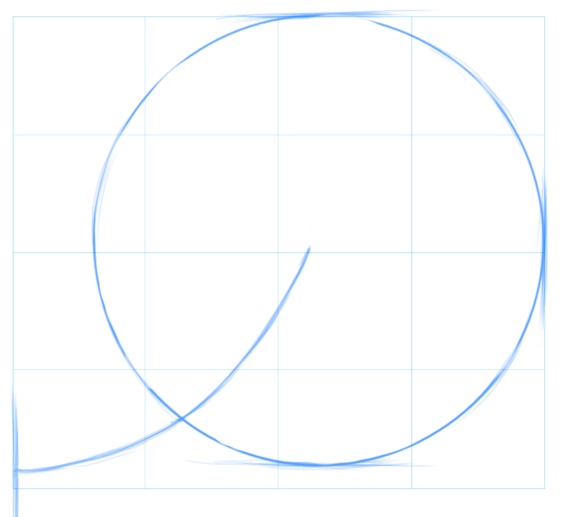
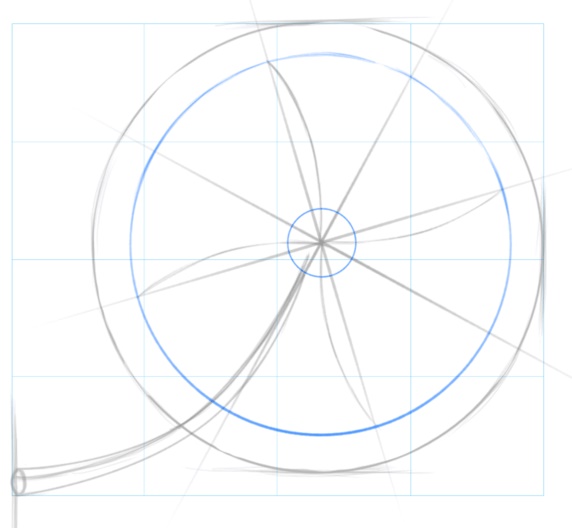
- Draw a circle. This will be the basis of the future drawing. Draw a line that will indicate the direction of the stem. The circle is drawn so that it touches the square at the top, right and bottom. There should be a small gap between the left border of the square and the left border of the circle. The line that will indicate the stem begins in the lower left corner of the square and then, rounding upwards, goes to the right, rushing to the center of the circle, where it should end.
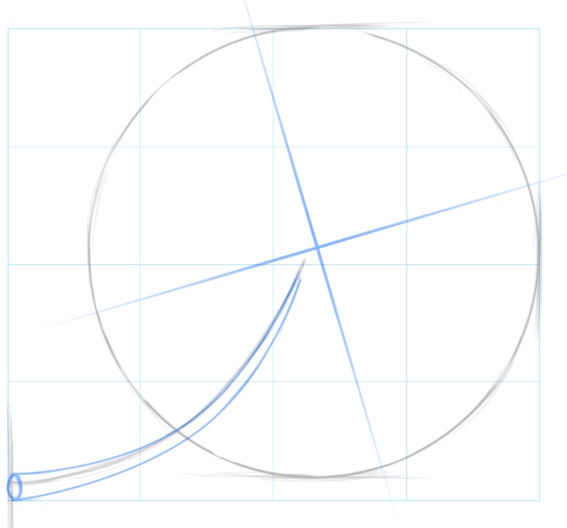
- Using straight lines that intersect at an angle of 90°, demonstrate the direction of the veins that will be located in the middle of each of the 4 clover leaves.
- To add volume to the stem, draw another line that follows the shape of the one used as a sketch.
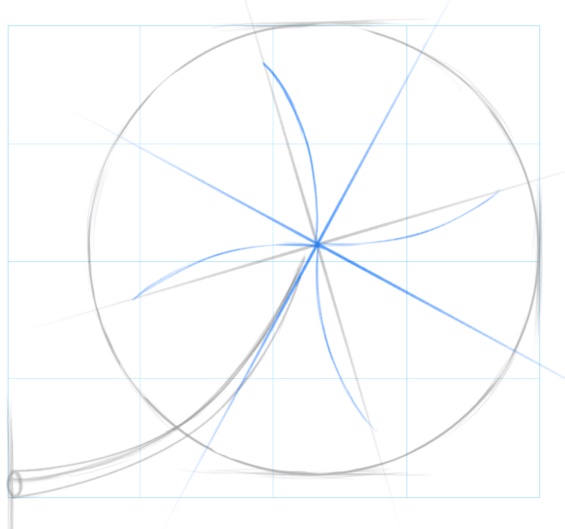
- Using two additional lines, show the direction of the elongated spaces between the leaves. Using arced lines, demonstrate the direction of the veins.
- Using two circles of different diameters, mark the top points of the centers of each leaf (this is shown by the large circle) and the places where the leaves connect at the bottom points (this is the small circle, with a radius of several millimeters).
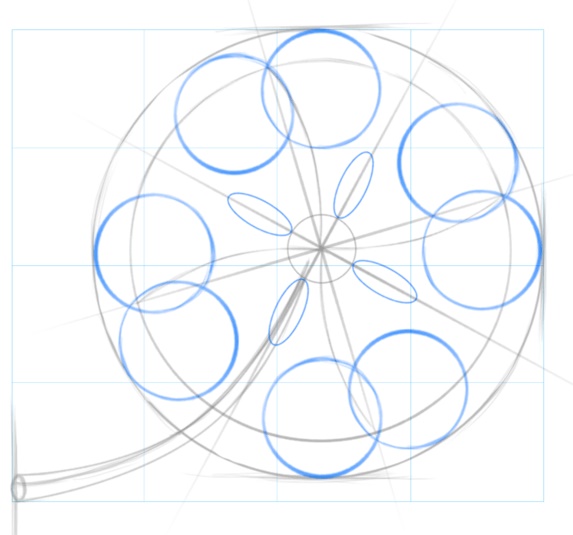
- Using pairs of intersecting circles, show the top of each leaf, which has the shape of a heart. To determine the shape of the places where the leaves are connected, use ovals.
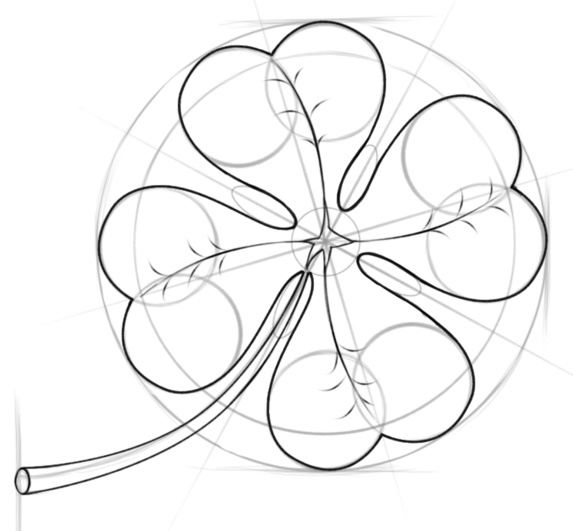
- Draw the leaves themselves using a smooth line.
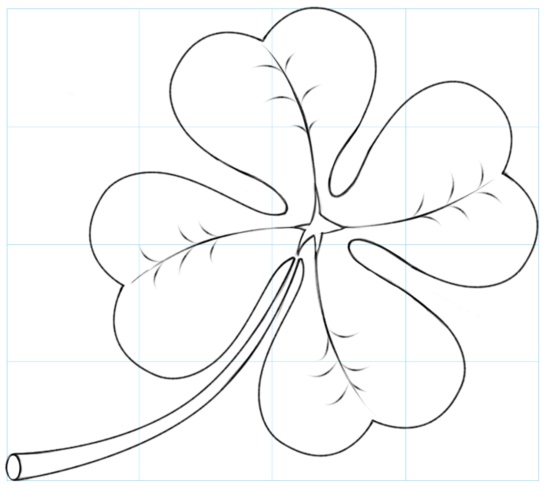
- If desired, color the finished drawing using different shades of green.
A sprig of clover
You can try to draw not just leaves, but a whole branch of clover. The same tools and materials are used for this.
The stages of work are as follows:
- Mark the direction, length of the stems and the midribs of the leaves. One long wavy line should run vertically approximately in the middle of the paper. This will be the main stem. Another shorter stem extends from it to the right. There will be 4 leaves on it.
- Draw the leaves themselves. The same methods described above are used here. If desired, you can make the leaves oval.
- Thicken the stems.
- At the end of the long stem, draw a flower, which can be represented by many short lines gathered into a small oval. Place 2 more leaves under such a flower.
- Colour the drawing using pencils or paints.
The clover flower can be:
- pink;
- purple;
- purple;
- white.
It is very difficult to find a four-leaf clover in nature, but it is easier to draw it. Even a child who has never drawn before can cope with such a task. Perhaps such a picture, which took a few minutes to create, will bring great luck.
Video on the topic: how to draw a four-leaf clover
How to draw a four leaf clover: