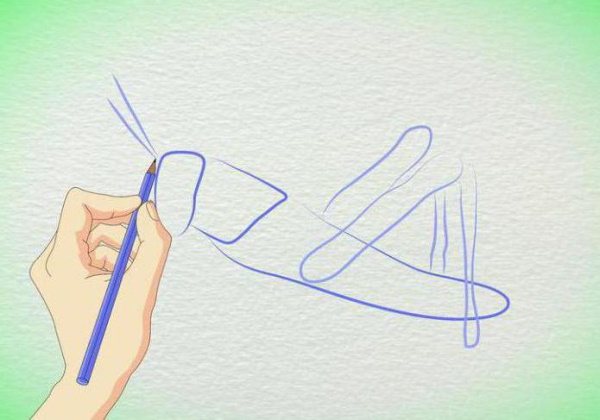
Drawing a grasshopper will help a child to enrich their knowledge about different types of insects. To work, you need to prepare all the necessary tools, select paints and read several step-by-step master classes, choose picture for sketching.
What do you need for drawing?
The table lists all the necessary materials and tools for drawing a grasshopper, as well as their purpose.
| Hard pencil | Required for sketching. A tool marked "T" or "T2" will do. The lines from such a pencil are light and can be easily erased with an eraser. |
| Soft pencil | It is designated by the letters "M" or "M2". It is used to indicate shadows, as well as for the final outline. |
| Hard-soft pencil | Using a pencil marked “TM”, draw small details on the drawing. |
| Eraser | It is advisable to purchase a double-sided eraser to more effectively remove lines from pencils of different hardness. |
| Sharpener | Pencils should always be kept sharp. |
| Art brushes | To paint with paints you need brushes of different thickness and hardness. |
To color the drawn grasshopper, you will need pencils, paints or markers.
What colors should they be:
- dark green;
- light green;
- yellow;
- brown;
- blue;
- black.
The drawing paper should be thick.
For watery paints, such as watercolors, it is advisable to purchase special sheets with a rough surface that absorb excess moisture well. For drawing with pencils and felt-tip pens, an ordinary album is suitable. Simple pencils can be used to draw on paper intended for printing on a printer.
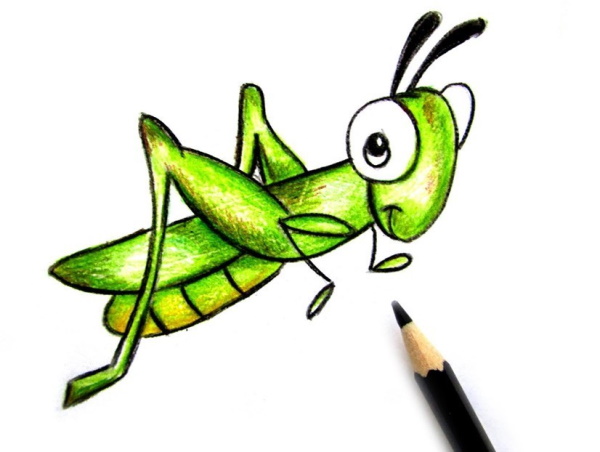
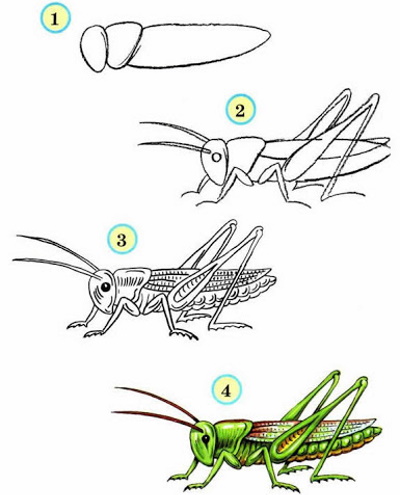
Step by step instructions on how to draw a grasshopper with a pencil
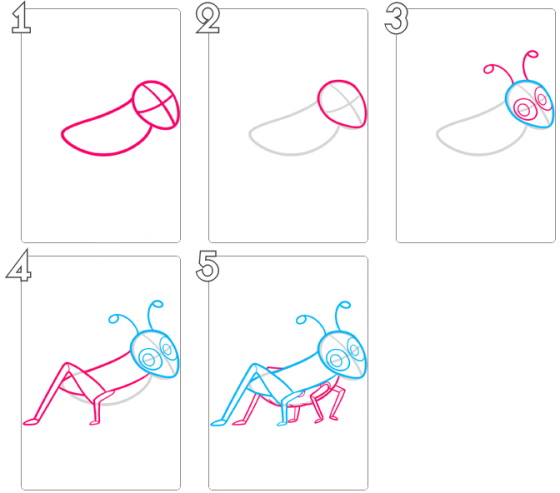
A grasshopper (a drawing for children over 10 years old is preferably done in a realistic style, so that the child learns to draw small details and examines the body parts of the insect in more detail), drawn with a simple pencil, will turn out to be three-dimensional if you correctly apply shadows and indicate highlights.
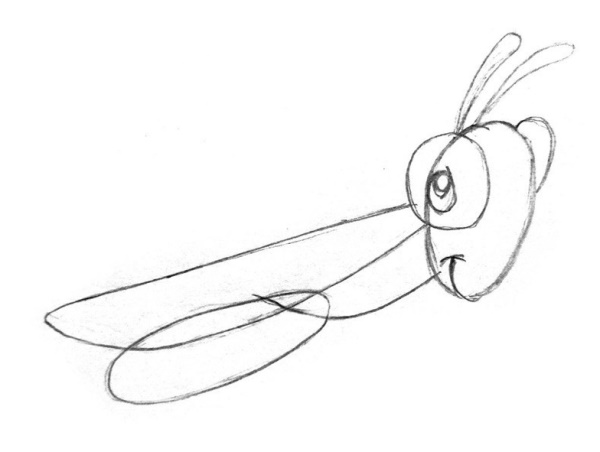
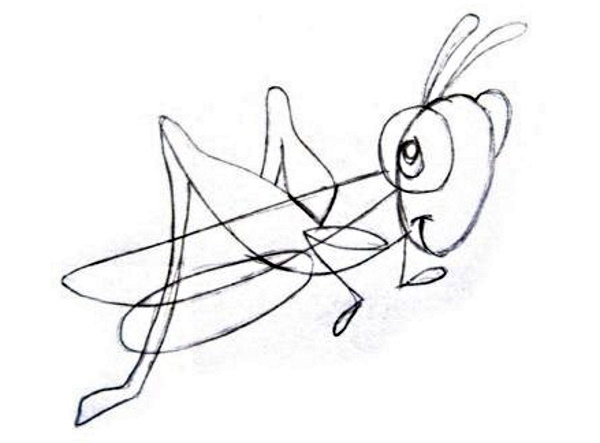
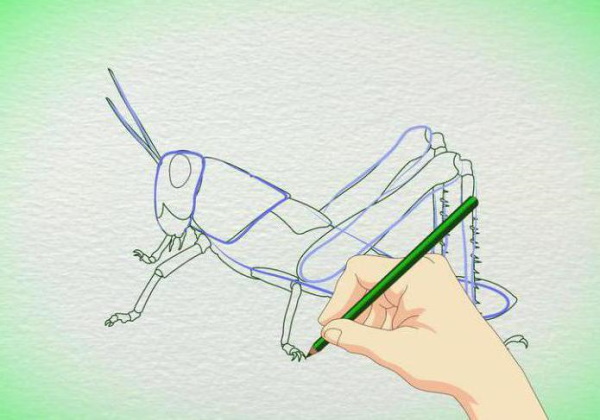
Sketch
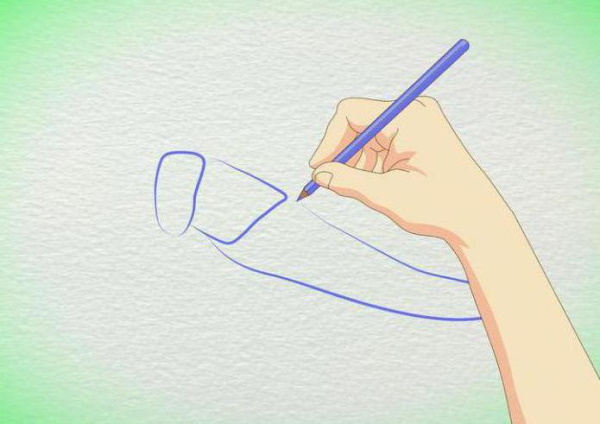
First, you need to make a sketch with a hard pencil.
Algorithm of actions:
- Draw a small horizontal line in the center of the sheet. It will serve as a guide. The length of the grasshopper's body will be equal to the length of this line.
- Above the line, draw an elongated oval. This is the basis for the body. The grasshopper will be drawn from the side, so all elements of the picture should be located in accordance with this direction.
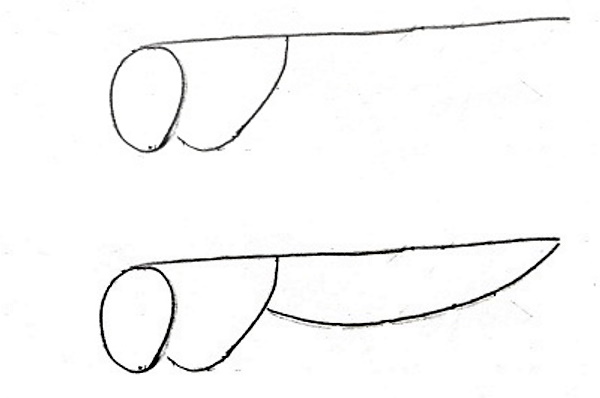
- Draw a small, slightly elongated head.
- Mark the position of the paws.
- The 2 longest legs should go behind the grasshopper's back. Mark the joints on their bends with small circles.
- Connect the head and body with a figure in the form of a square without a left corner. It will imitate the chitinous neck of the insect.
- The lines where the drawn body parts intersect need to be erased with an eraser.
- Draw a big eye on the head.
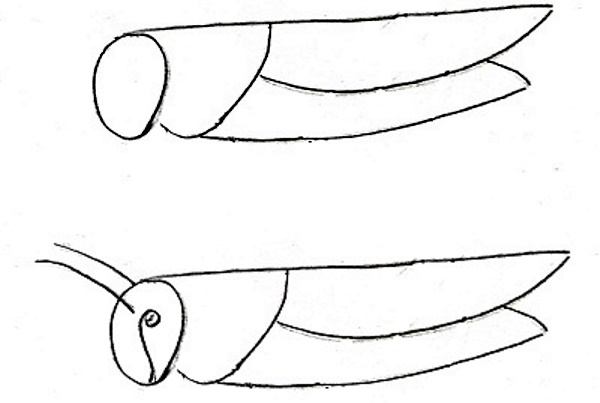
- Draw the jaws below.
- Add wings.
- Add volume to the limbs. They should be thicker at the base than at the ends.
- Draw narrow and long fingers, 2 on each paw.
- Add antennae.
On the front legs, the bending points should be marked with short horizontal stripes.
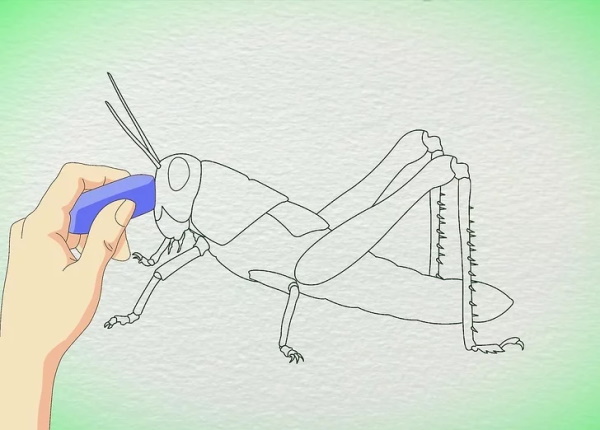
Shadows and highlights
Usually shadows and highlights are applied to the drawing last, but in this picture there will be many small elements drawn. In order not to smudge them, you need to shade the drawing before detailing. Strokes should be applied with a soft pencil.
Algorithm of actions:
- Color the grasshopper's eye.
- Shade the lower part of the abdomen, head and neck.
- Draw a shadow under the paws.
- Without pressing the pencil, shade the body, wings and head. These areas should be lighter than the rest.
- Draw a shadow where the chitinous neck and head connect.
- Apply a few strokes under the wings.
- Without pressing on the pencil, shade the mouth area.
- Blend all the strokes. On the wide parts of the drawing, you can rub the graphite with your fingers, and it is better to blend the small strokes with a cotton swab. This will make it look neater.
Use the sharp corner of the eraser to erase some graphite from the top of the neck and inside the eye. These gaps will simulate shine and glare.
Detailing
You need to draw the details with a hard-soft pencil.
Procedure:
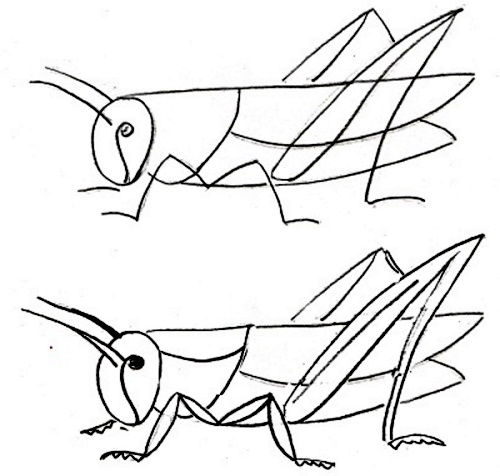
- Select the insect's jaws.
- Draw 2 thin lines from the neck to the eye.
- On the neck, draw 1 stripe dividing this area into 2 parts.
- Design the wings and draw veins on them.
- Divide the abdomen into horizontal stripes.
- Draw bristles on the paws.
- At the base of the paws, depict veins of chitin.
- Draw a grid in the eye without touching the highlight.
Use a soft pencil to outline the drawing along the contour.
Pattern variations
You can draw a grasshopper using different materials. For preschool children, paints are suitable. Since it is difficult for little ones to draw small details, they can be offered to color the outline, which they will draw with a simple pencil together with their parents.
Pencils, felt-tip pens and art pastels are used to draw small elements and highlight shadows in natural tones.
Drawing in this style will teach children to correctly combine and mix different shades. Such tasks are within the power of students in primary and secondary school. Further in the article you can read detailed instructions on drawing a grasshopper with different materials.
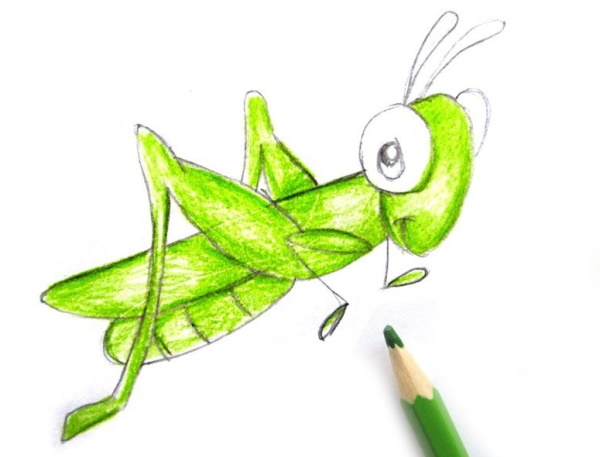
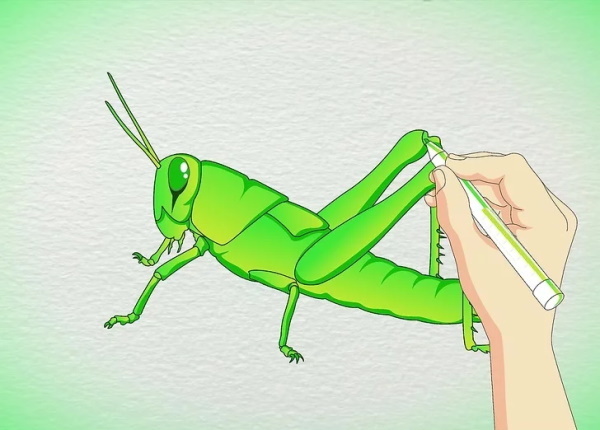
How to Draw a Grasshopper with Colored Pencils
Grasshopper (a drawing for children from 7 years old should be colored, I am guided by a photo of a real insect), drawn with colored pencils will turn out bright and realistic. For work, you can buy acrylic pencils. Their graphite is softer than that of ordinary pencils, so it is easy to rub and make a smooth transition from one shade to another.
How to draw a grasshopper with colored pencils:
- Make a sketch with a simple pencil. First draw an elongated body.
- Draw a round head.
- Add short and long legs.
- Outline the shape of the insect's neck.
- Use the eraser to remove all unnecessary lines.
- Draw a big eye.
- Mark the mouth area. To do this, draw a small triangle on the lower part of the head, which will slightly protrude beyond the circle.
- Draw the wings.
- Increase the volume of the limbs at the base, and draw bristles and fingers at the bottom.
- Highlight the joints at the bends of the legs.
- Draw the antennae.
- Using a light green pencil, shade the upper part of the neck, head and hind legs.
- Color the belly with a yellow pencil.
- Shade the neck and jaws with dark green and color the rest of the paws.
- Make a few strokes on the lower part of the abdomen.
- Paint the wings blue.
- Take a light green pencil and shade the wings over the blue color so that these shades blend.
- Use dark green to draw the veins on the wings and outline the antennae.
- Using a simple pencil, draw the bristles and veins of chitin on the paws and neck.
Use black to color the eyes and also to do the final tracing of the drawing.
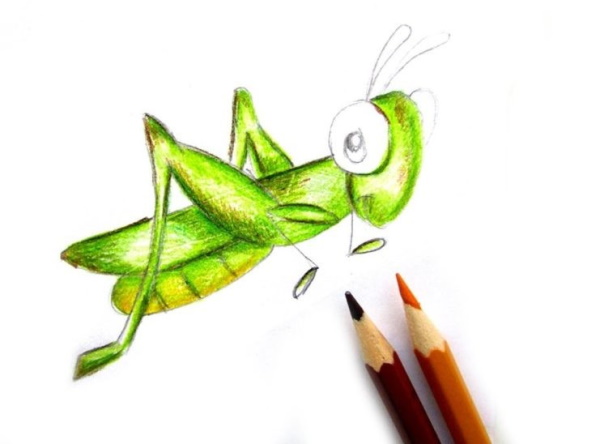
Grasshopper drawn with felt-tip pens
The grasshopper (a drawing for preschool children, made in this technique, will help them prepare their hand for writing), drawn in the picture, can be colored with felt-tip pens. First, you need to draw a detailed sketch with a hard pencil, and then color it, applying all the shades in the correct order.
Algorithm of actions:
- Draw the body, head and indicate the position of the paws.
- Connect the head and body with a figure in the form of a square without 1 corner.
- Erase the lines where the bases intersect.
- On the head, mark the shape of the eye. Inside it, draw a small circle that will imitate a glare.
- Draw the grasshopper's mouth.
- Draw elongated wings.
- Highlight the joints on the paws and make their base thicker.
- Draw 2 long whiskers.
- Draw 2 thin lines from the neck to the eye.
- Divide the neck into 2 parts with a horizontal strip.
- Draw veins on the wings.
- Emphasize the shape of the abdomen with horizontal lines.
- Draw the toes and bristles on the legs. At their base, depict the veins of chitin.
- Draw a grid in the eye.
- Using a light green marker, color the upper part of the neck, as well as the head and hind legs.
- Paint the insect's abdomen and jaws yellow.
- Paint the lower part of the neck dark green and color the rest of the paws.
- Outline the grasshopper's jaws.
- Add 5-6 strokes on the lower part of the abdomen, closer to the neck.
- Color the wings with a blue marker.
- Outline the veins in blue.
- Outline the antennae with dark green.
- Use a grey marker to draw the bristles and chitin veins on the paws and neck.
- Use black to outline the mesh inside the eye and the highlight along the contour.
Complete the final outline of the drawing with a black marker.
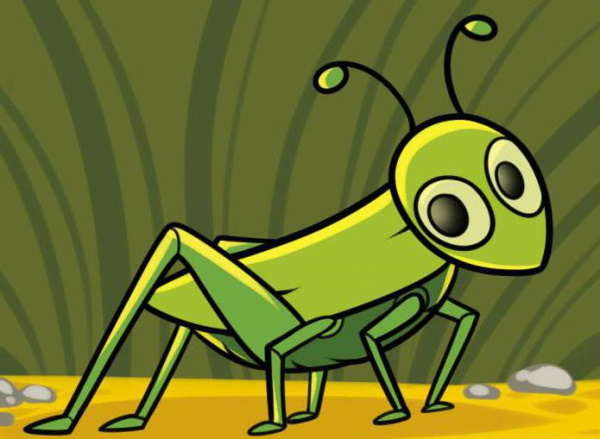
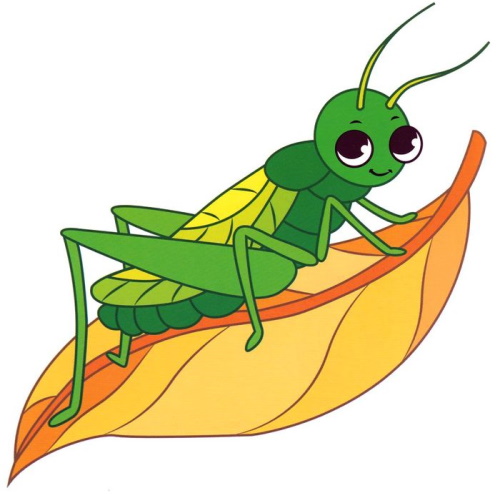
Grasshopper with paints
This tutorial is for children aged 2 to 6. It shows a simple cartoon-style outline of a grasshopper. It is not very detailed. All the elements are very easy to draw, and you will only need 3 colors to color the picture.
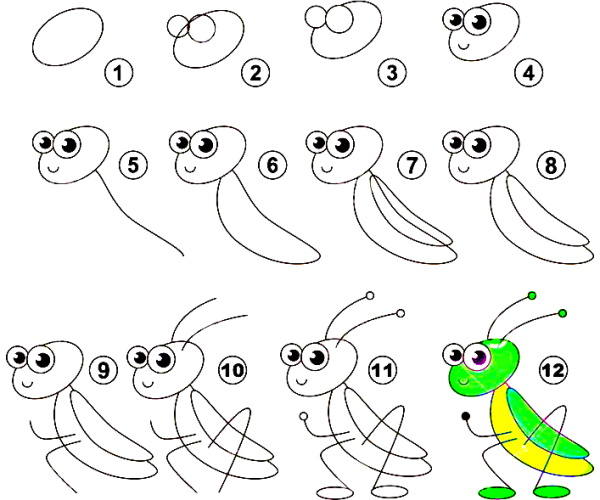
Algorithm of actions:
- Using a simple pencil, draw an oval at an angle. This will be the head.
- Finish off the top with 2 large circles, close to each other. This will be the grasshopper's eyes.
- Use an eraser to remove all lines inside the eyes.
- Draw round pupils with highlights inside, and also add a smiling mouth.
- Determine where the insect's neck will be and draw a line as long as the size of the body.
- Draw the belly.
- Finish off the wing from above.
- Use an eraser to remove all lines inside the wing.
- Draw 1 front paw on the left and 1 leg.
- Draw the second leg from the bottom and add antennae.
- Draw circles at the ends of the antennae and also design the upper paw.
- Paint the belly with light green paint.
- Paint the head, wing and circles at the ends of the antennae with dark green.
- Paint the eyes black and outline the drawing.
To get a bright, saturated picture, you need to use gouache or acrylic. For muted and pastel tones, watercolor is suitable.
How to Draw a Grasshopper with Artistic Pastels in Chinese Painting Style
A grasshopper (the drawing for children should be large so that it is easier for them to shade the pastel), drawn with pastel in the style of Chinese painting, will turn out bright and funny in appearance.
The insect's body shape will be realistic, and its face will be cartoonish.
How to draw:
- Use a simple pencil to make a sketch. First draw an oval head, then add the body.
- Draw the wings.
- Add paws. There should be circles on the bends of the long paws, imitating joints.
- The paws should be thick at the base, but their shape will differ from the realistic one. This part of the legs should be made triangular with smoothed corners.
- Draw antennae curled in a spiral towards the head.
- On the abdomen, highlight vertical lines.
- Use yellow pastel to color the grasshopper's abdomen. Blend the chalk with your fingers.
- Paint the head, wing and thick part of the hind legs with light green.
- Paint the remaining paws and the extension of the long legs with light brown.
- Also paint over the antennae.
- Use pink pastel to paint the circles that imitate the joints on the hind legs.
- Spray the design with hairspray to set 1 layer of pastel.
- Without waiting for it to dry completely, start detailing. Use dark brown chalk to outline all the paws.
- Using dark green paint, draw a smiling mouth and a small eye on the grasshopper.
- Outline the stripes on the abdomen.
- Draw the veins on the thick part of the hind legs. They should not look like real ones. Rather, they will resemble the veins on tree leaves.
- Use pink chalk to add a blush to the grasshopper's cheeks.
- Use dark pink pastel to outline the circles on the hind legs.
Finally, you need to cover the design with hairspray and dry it.
Grasshopper with stained glass paints
Stained glass paints are an unusual material. They are used to draw not on paper, but on glass. You can buy a photo frame for the work, put a sheet of white paper on the background. The drawing should be done on the front side of the glass so that it turns out textured and voluminous to the touch.
To draw an even outline, you need to put a template under the glass. You can print out a coloring picture on a printer or draw a sketch by hand. The master class presents an option with a sketch drawn by hand.
How to draw:
- On paper, use a simple pencil to draw an oval head of the insect.
- Draw him 2 large, round eyes, and mark the pupils and highlights inside.
- Draw the antennae with circles at the ends.
- Add an elongated, stretched body.
- Draw the wing.
- Add the paws. They should be thick at the base and taper smoothly towards the ends.
- The sketch should be outlined with a black marker so that all lines are clearly visible.
- Degrease the glass with a special agent.
- Place a sketch underneath.
- Use black stained glass paint to outline the drawing around the cone and paint over the grasshopper's pupils.
- Wait until the paint is completely dry. Remove the template from under the glass.
- Fill the eyes with yellow paint.
- Fill the head and wing area with light green.
- Paint the belly, paws and antennae with dark green.
All that remains is to dry the drawing and insert the glass into the frame.
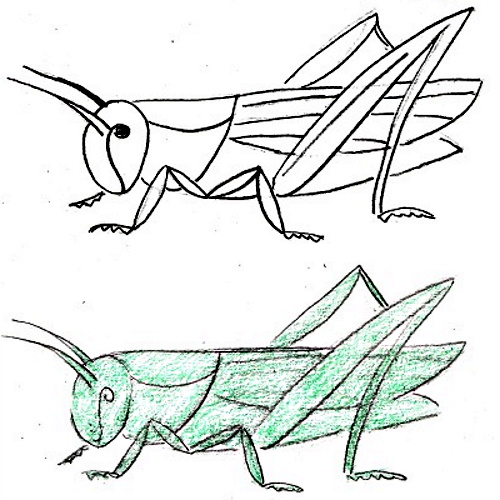
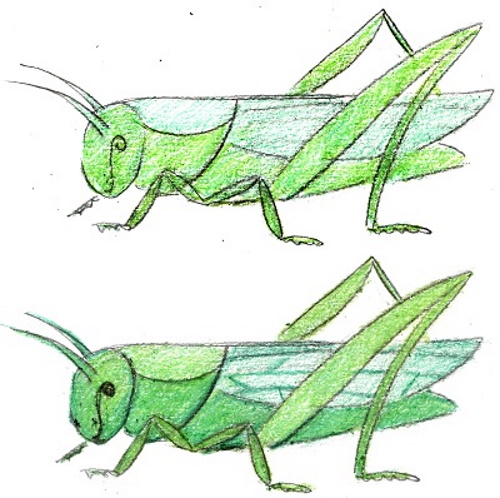
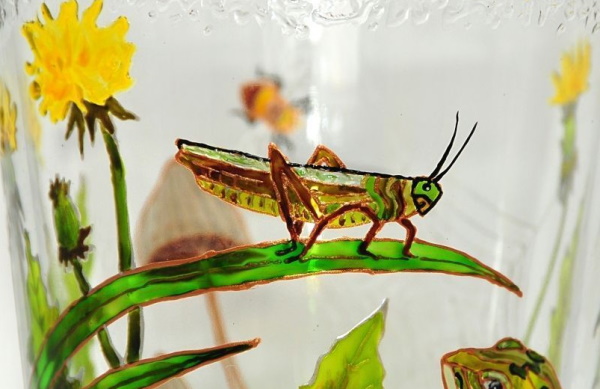
Examples of images for copying, tips for beginners
To ensure that your drawings are neat, you need to follow these simple recommendations:
- When painting with stained glass paints, you should always start by outlining the template in black. The dried outline prevents the colored paint that will be used to paint the inner parts of the drawing from spreading.
- The bristles on the grasshopper's legs can be drawn last, when doing the final tracing. They don't necessarily need to be colored, so you can draw them black.
- To outline the grid inside the grasshopper's eye, you can use a gel pen. This will make the lines more accurate.
- When shading pastels, you can get an even tone, without lines from applying strokes. To do this, crumble the chalk onto the selected area with a knife.

- To draw thin lines with pastel, you need to turn the chalk end-on.
- When painting with watercolors, it is not necessary to select paints of dark and light shades. Where a light shade is needed, paint is applied in 1 layer, and where there should be a dark color - in 2 or 3 layers.
- You can achieve the effect of mixing different shades or a smooth transition of colors using colored pencils by applying dark and light strokes in turn.

Drawing a grasshopper will help children study the structure of its body, as well as learn how this species differs from other insects. During the drawing process, parents should explain to children what grasshoppers are, where they live, and how high they can jump.
This information will contribute to the development of the child's thinking, and will also help maintain interest in drawing insects. The picture for copying can be selected from the options presented in the article.
Video about drawing a grasshopper
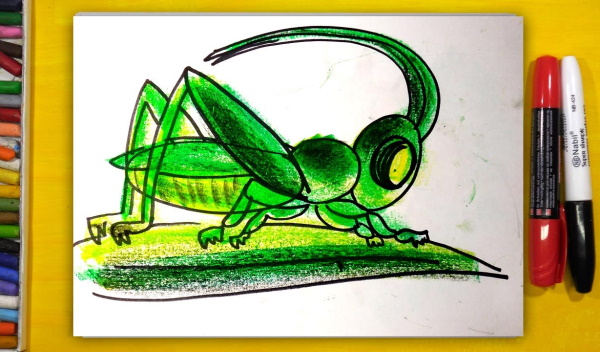
How to draw a grasshopper with markers: