Activities with children are a great way to spend time together. Learning to Draw Strawberries, you can use its image in more complex compositions and crafts.
Contour drawing
To create a simple outline drawing, you will need a pencil, an eraser, and a piece of paper. This example can be mastered by a child and a beginner artist. Depending on your drawing experience, the finished sketch can be colored and given volume using shadows.
The drawing sequence consists of several simple steps:
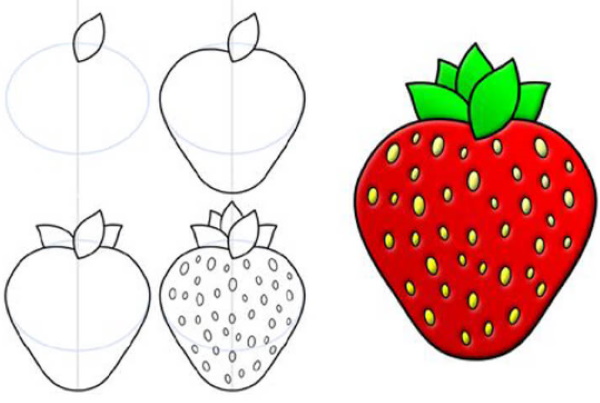
- First, you need to draw the berry stalk and leaves, which are located in a circle on the lower part of the petiole in a chaotic manner.
- Next, you need to draw the outline of the berry itself. It looks like a rounded triangle. The shape does not necessarily have to be symmetrical.
- The last step is to draw the strawberry seeds that are on its surface. They look like small ovals. They are larger in the center of the berry, become smaller towards the bottom and are located very close to each other.
Simple pencil drawing
Beginner artists can start their creativity with simple pencil drawings and gradually bring the level of skill to realistic 3D drawings. Strawberries (a drawing for children and the sequence of its implementation are presented later in the article) have a rounded shape.
To learn how to draw it, you can use the following technique:
- Draw a circle with a diameter of 5 cm (you can use a compass).
- A vertical line is drawn through the center of the circle.
- From the top of the intersection of the line with the circle, step back 1 cm and draw an oblong pointed leaf upwards, at an angle of approximately 45 degrees from the line.
- From the top intersection point, step back 0.5 cm and begin to form the outline of the berry. From the indicated point, smoothly draw the lines slightly upward and to the sides until they intersect with the circle, like drawing a heart.
- Next, outline the sides of the circle and smoothly move to the tapered bottom of the berry.
- If it is difficult to shape the rounded tail of the berry, you can draw the side lines until they intersect with each other, and then round off the resulting corner.
- Add a few more leaves on top, placing them at different angles.
- On the surface of the berry, seeds are depicted in the form of small ovals located vertically.
- The berry is painted in bright colors or volume is created using a simple pencil.
Colored drawing
Simple drawings are available for children to draw, starting from senior preschool age. Children quickly remember the execution of basic elements and then can easily repeat the mastered material. The knowledge that children received at an early age remains throughout their lives.
Strawberry (the drawing for children has a simplified scheme) consists of a stem, sepals, the berry itself and seeds in the form of dots on the surface.
Depending on age, coloring can be done using different materials. Younger children find it easier to work with pencils, while older children can decorate the craft with felt-tip pens or paints.
For creativity you will need the following materials:
- Drawing paper.
- Eraser.
- Simple pencil.
- Soft colored pencils, markers, felt-tip pens, paints.
Drawing strawberries is done as follows:
- The sheet of paper is placed vertically.
- The image begins with drawing the stick and sepals. First, draw a small, slightly curved stick, at its base draw a cap of 7-8 small leaves located tightly to each other.
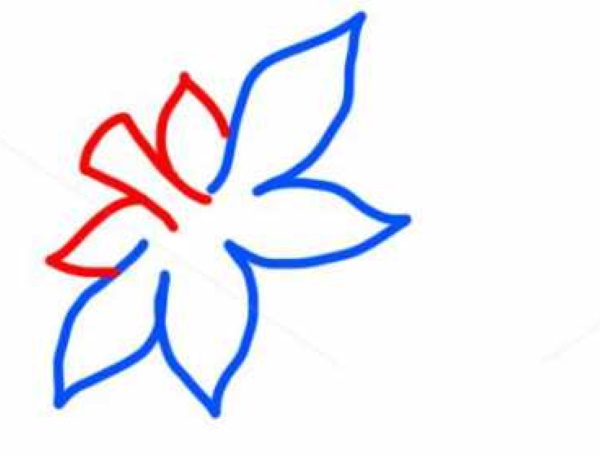
- To create a natural arrangement of sepals, first draw 3 pieces located on 3 different sides, and then draw 1 more leaf between them.
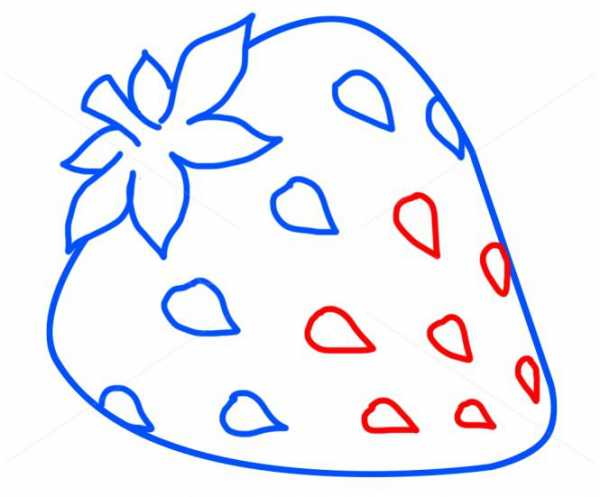
- Next, move on to the image of the base of the berry. The strawberry has a rounded shape, tapering downwards. Start drawing from the upper sepals. First, make a small expansion, and then a smooth narrowing. The bottom of the berry should be rounded.
- On the surface of the berry, seeds are depicted in the form of small drops.
- If you want, you can liven up the drawing and draw eyes and a smile on the strawberry.
- The berry is painted either with classic colors, filling the base with red and the leaves with green, or with other colors, creating an unusual image. After that, the outline is outlined with black and the dots are painted.
Watercolor drawing
The more experienced the artist, the more complex and realistic the images are. For this, a combination of shades and shadows is used.
To paint a watercolor picture you will need the following materials:
- piece of paper;
- simple pencil;
- eraser;
- palette;
- tassels;
- watercolor paints;
- water.
To create an image of strawberries you will need:
- Place the A4 sheet horizontally.
- Outline the berry and draw around it. The drawing should be large enough and the center of the berry should be slightly to the left of the center of the sheet.
- Draw sepals arranged in random order.
- Draw seeds on the surface of the berry
- Dilute yellow paint and paint the bones.
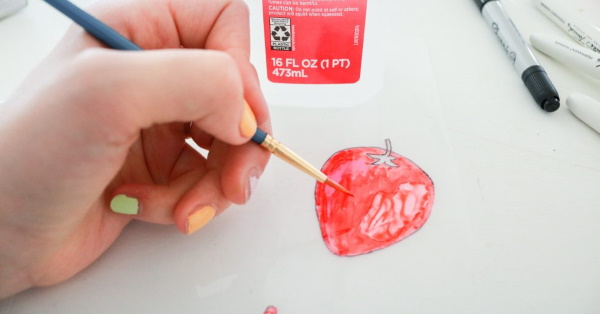
- Dilute the carmine color with yellow, dilute with water and apply to the base of the berry. Leave white space around some of the seeds.
- Make the color more saturated by adding carmine color and color the berry again, without coloring the space around the seeds.
- Make the color even more saturated and use a thin brush to draw a shadow near each bone on the right side.
- Add more yellow and carmine to the paint and carefully begin to paint the surface of the berry with a thin brush, leaving unpainted spaces near the seeds. In the center of the berry, in the wide part, leave small gaps to create highlights.
- Wait until the paint dries and paint the surface of the berry base again with an even brighter color. Do not paint the light areas, only shade the areas near the seeds.
- Dilute the paint with water and paint over the light areas and spaces around the bones with a more transparent mixture.
- Darken the right side of each bone with brown.
- Add a little purple to the paint mixed for the berry and darken the lower right side.
- Mix yellow and green colors, dilute with water and paint the leaves with almost transparent paint using a wide brush.
- Add green to brighten the paint and paint the top of each leaf.
- Use more intense paint to shade the edges of the leaf and draw the veins.
- Paint the bases of the leaves with yellow paint with the addition of green.
- Using an almost transparent mixture of purple and brown, draw a shadow from the berry at the bottom right.
Khokhloma strawberry pattern
Strawberries painted in the Khokhloma technique are made by applying several layers of paint in succession. Educational examples designed for children have a simpler scheme.
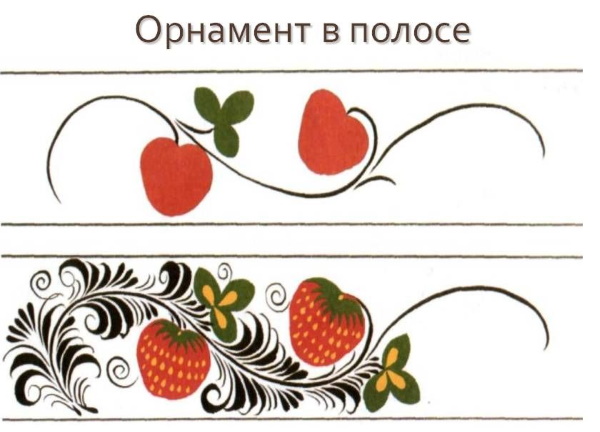
When drawing on paper, it is recommended to do the work with gouache and dry each layer of paint. Drawing on objects requires the stability of the dye and is done with oil or acrylic paints.
The main stages of creating strawberries in the Khokhloma style:
- The contours of the berries and sepals are applied to the base, and the contours are outlined in black with a thin brush.
- The first layer is the base and is called "zamalevok". The berry is painted with thick red paint, and the leaves - with green.
- After drying, apply the main color of the berry with semicircular strokes and let it dry again. Leaves are shaded with a more saturated color, also using semicircular strokes.
- On the dried surface, dots are applied with yellow paint to imitate bones.
By the cells
Drawing by cells is a fascinating activity for adults and children. Pixel drawings are distinguished by their characteristic geometricity. They are used for cross-stitching, interior design, and teaching children to draw.
Cellular drawing can be:
- Contour. When lines are drawn in given directions by counting cells, the outline of an object is formed.
- Pixelated. When sectors consisting of several cells are outlined and painted in a certain color.
This drawing method is available for older preschool children. From about 5 years old, children enthusiastically count and color the cells, try to be attentive and not to spoil the drawing. To begin with, it is worth choosing simple patterns. After the child has mastered the technique, you can take more complex templates with colorful multi-colored filling. Pixel drawings turn out bright if you draw them with markers or felt-tip pens. For small children, it is recommended to use soft colored pencils.
Drawing by cells is done in 2 ways, which are described in the table:
| Method of drawing | Description |
| Line by line | · Drawing is done without outlining the cells; · each row is sequentially filled with colors according to the pattern, line by line. |
| Contour | · Drawing of contours is performed by tracing the required number of cells;
· coloring the circled cells with different colors according to the diagram. |
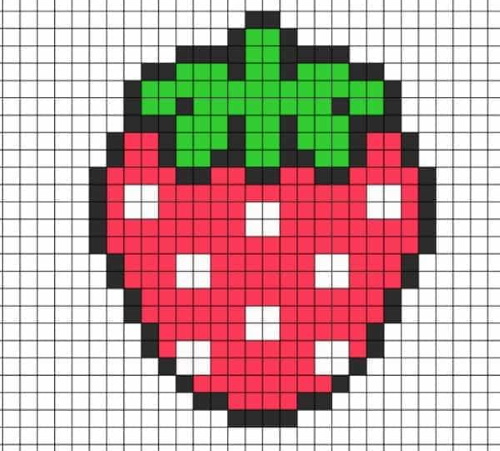
To create a drawing, you can print out a ready-made template and color it, or use the following step-by-step diagram, which will help you draw a bright strawberry.
To create pixel strawberries you need:
- Take a sheet of paper from a notebook and lay it horizontally.
- Find the center of the sheet, step back from the bottom edge of 3 cells and outline the first element - 4 horizontal cells.
- Next, following diagonally to the right, circle and color black the following sequences: 2 cells horizontally, 2 times 1 cell, 3 times 2 cells vertically, 5 cells vertically.
- Then, diagonally to the left, circle 2 cells vertically, 3 cells vertically, 2 cells horizontally, 3 cells horizontally.
- The next 3 vertical cells need to be placed perpendicular to the last element so that the 2nd cell is in the center.
- Repeat the pattern from the beginning, symmetrically following the diagram on the left side.
- Proceed to drawing the upper part of the berry with sepals. Above the two central vertical elements of 3 cells, outline 2 cells horizontally.
- Find in the outline of the drawing on the right side the 2nd element going diagonally to the left. These are 3 vertical cells. From the bottom cell, put aside 2 cells to the left and circle them. Then from the last cell of this element, put aside 2 cells down and circle them again.
- Draw the following sequence diagonally, tracing 2 cells horizontally: down to the left 2 cells, up to the left 2 cells, down to the left 2 cells, up to the left 2 cells, down to the left 2 cells.
- Draw 2 vertical cells diagonally upwards and connect them to the outline on the left side with 2 horizontal cells.
- From the inner cells of the 2 horizontal elements located on the sides of the central element of the sepal contours, draw upwards a figure consisting of 2 cells located one above the other.
- On the surface of the berry, place symmetrical elements depicting grains in the form of 2 by 2 squares.
- Paint the outlined cells black with a felt-tip pen. Paint the rest of the surface red.
Basket of strawberries
Strawberries (a drawing for children may contain fewer elements), drawn with a pencil or in color, always look realistic. Their images are used to decorate dishes, clothing and interior design. A picture depicting a basket of strawberries can become a bright element of the decor of a kitchen or a country house.

Materials required for work:
- pencil;
- paper;
- eraser.
Drawing sequence:
- First, draw the outline of the basket, which consists of a base and a handle.
- The sides of the basket, the edges and its handle are schematically designed in the form of intertwined vine branches.
- Inside the basket, the outlines of the berries are depicted in the form of ovals, slightly elongated on one side.
- Fruit stalks and leaves are added to the berries.
- The contours of the berries are clearly highlighted, the grains are drawn on their surface, and a light shadow is made near each grain.
- The basket weaving lines are clearly outlined, shaded at one edge, giving volume to the image.
- The work is completed by adding volume to the berries and creating a general shadow.
A suitable option for children's creativity, which is distinguished by brightness and abundance of colors, is drawing strawberries. The simple shape of the berry also helps the beginning artist to master different styles of fine art in practice.
Video on how to draw strawberries
Let's draw strawberries in kawaii style: