To learn how to make a cube out of paper or cardboard, you need to learn how to draw a scan correctly, as well as study several schemes for assembling different versions of products. You also need to prepare tools for the work, as well as choose suitable materials.
Necessary materials and tools
The table lists all the necessary tools and materials that you will need to create a paper cube.
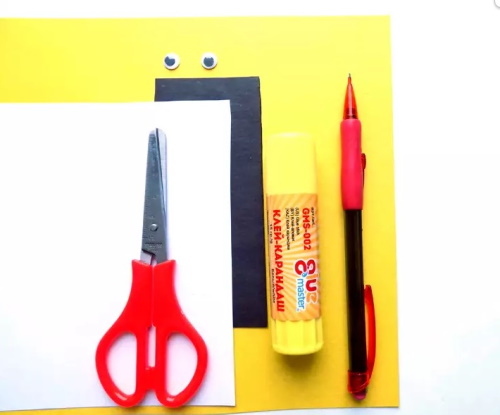
| Thick paper | You can use album sheets, as well as printer paper (A4 format). |
| Simple pencil | A tool with a hard-soft lead will do. |
| Eraser | It is necessary to correct errors made during the drawing process. |
| Ruler | It will help you accurately measure the sides of a cube and draw straight lines. |
| Scissors and a stationery knife | Useful for cutting out the workpiece. |
| Glue stick or PVA | For gluing cube parts. |
You will also need an old pen that has run out of ink. It is convenient to use it to press the fold lines. You can use not only paper as a basis for creating a cube. Thin colored cardboard for children's creativity will do.
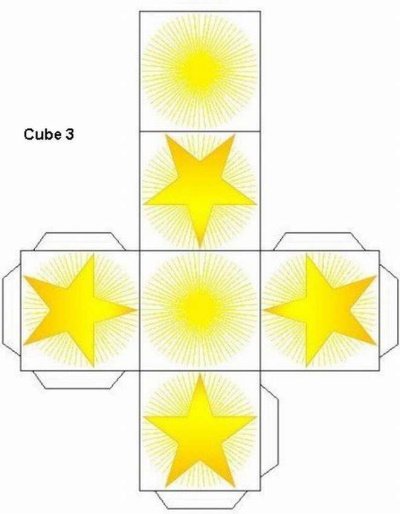
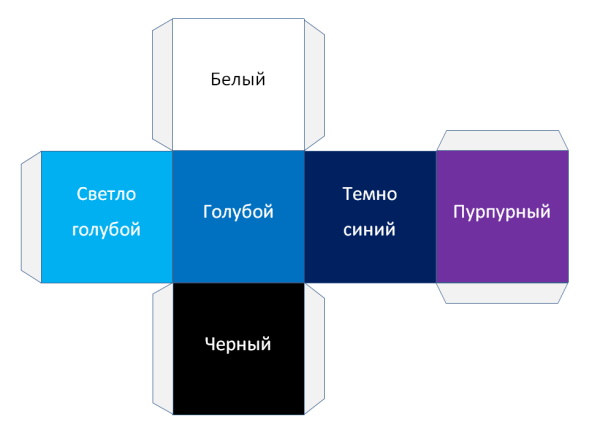
Cube unfolding diagram
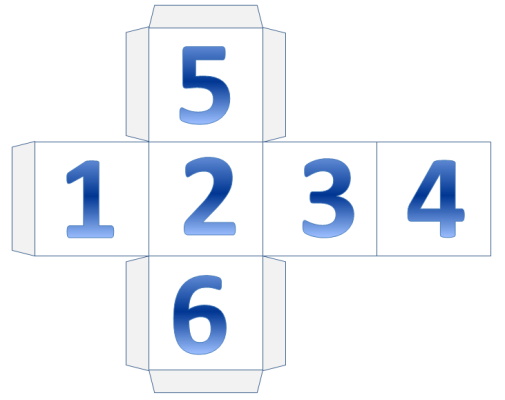
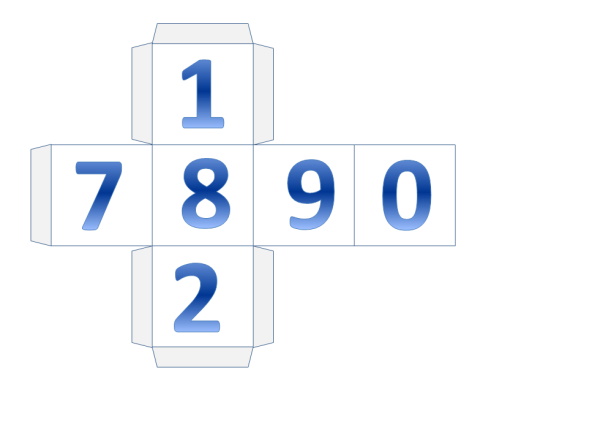
The paper cube (the diagram can be made in a computer program and later printed on a printer) consists of 6 parts:
- lower plane;
- upper plane;
- 4 sides.
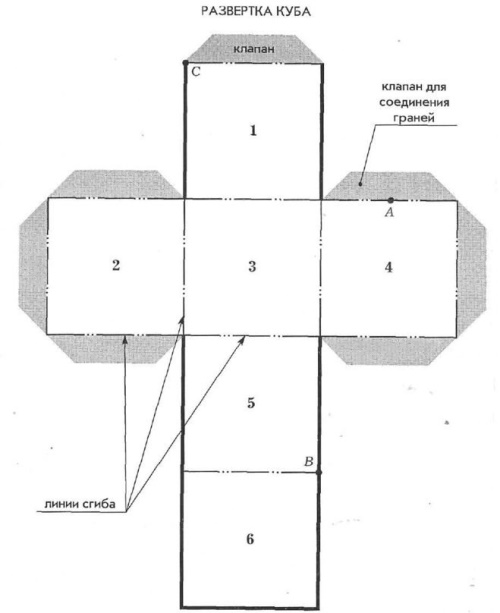
On the 2 side faces and the top plane, it is necessary to make additional strips. They will help to glue the cube neatly. These strips should not be too wide, otherwise it will be inconvenient to assemble the product.
The optimal width of strips for gluing medium-sized cubes is 1 cm. On large drawings (cubes more than 8 cm in height), you can make strips of 2 cm.
How to make a cube out of paper
The diagram for a paper cube can be made in 5-10 minutes. To do this, place a sheet of paper horizontally on the table. Take a ruler and a simple pencil. The sides of the cube will be equal to 6 cm.
Next steps:
- Step back 6 cm from the bottom of the sheet.
- Draw a line 24 cm long. It should not touch the edges of the sheet.
- From the ends of the marked line, step back 6 cm upwards.
- Draw another strip parallel to the previous one.
- Connect the ends of the strips with vertical lines to form a rectangle.
- Place a ruler on the top of the rectangle. Place dots every 6 cm.
- Make marks on the bottom of the triangle in the same way.
- Connect the dots with vertical lines.
- Above the 2nd square on the left, draw another square with sides of 6 cm. They should have one side in common.
- By analogy, draw a square from below.
- Add "ears" for fastening to the remaining squares, 1 cm wide. They need to be drawn at the top and bottom.
- Add an "ear" to the side of the very last square.
- Make the corners of the "ears" beveled.
- Use an eraser to remove excess lines.
- Use scissors to cut out the blank along the outline.
 |  |
 |  |
 |  |
 |  |
 |  |
How to assemble a cube:
- Using a ruler and a pen without ink, press down all the fold lines.
- Apply glue to the "ears" of the first square. The glue should be applied from the back side.
- Fold the sides of the cube and connect them to the piece.
- Glue the remaining sides together one by one.
The square with 3 "ears" should be glued last. This is the upper plane of the cube. It is necessary to try to glue the parts so that there are no gaps or unevenness at the joints.
How to make from cardboard
A cube made of paper (the scheme for working with thin colored cardboard is no different from that created for a paper product) turns out to be quite fragile. It can easily wrinkle or tear. A strong and larger cube can be made from two-layer cardboard.
The ends of boxes from household appliances are suitable for creating the blank. The diagram for a cube made of such cardboard is slightly different from the drawing for creating a paper cube.
How to make a diagram for a 10 cm high cube:
- Draw 2 parallel lines on the cardboard, 40 cm each. The distance between them is 10 cm.
- Connect the ends of the lines with vertical lines.
- Make marks on the top of the rectangle every 10 cm.
- Similarly, place marks below.
- Connect these dots with vertical lines.
- Above the 2nd square, draw another square with sides of 10 cm. One of their sides should be common.
- Draw the same square below.
- On 1 square, on the left side, draw an “eye” for fastening, 1.5 cm wide.
- The same “ears” need to be made on 3 sides of those squares that are located above and below the next figure.
- Make the corners of all the "ears" beveled.
- Cut out the blank from cardboard using a utility knife.
- Use scissors to cut off all burrs and uneven areas.
 |  |  |
How to assemble a cube:
- Press all fold lines using an old pen and a ruler.
- Fold the cube. Make sure there are no large gaps.
- Grease the "ears" for fastening with glue and attach all sides of the cube to them.
The cube needs to be lightly pressed with your fingers and wait for the glue to harden. When all the parts are glued together, the cardboard can be painted or covered with colored paper.
Forming a cube from paper modules
A paper cube (the assembly diagram for the modules is described further in the article), folded from individual paper modules, resembles a mosaic. To make the product look more interesting, you can use brightly colored paper to assemble each module. You will need 6 square sheets measuring 14x14 cm.
 |  |
 |  |
 |  |
 |  |
 |  |
 |  |
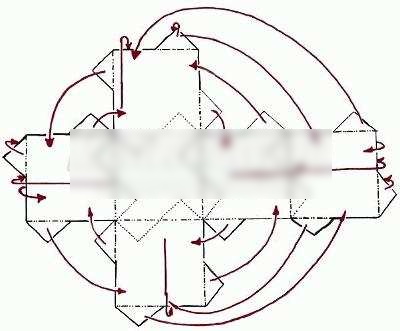
How to stack modules:
- Fold a sheet of paper vertically.
- Straighten the sheet. Fold both edges to the resulting line.
- Turn the paper over.
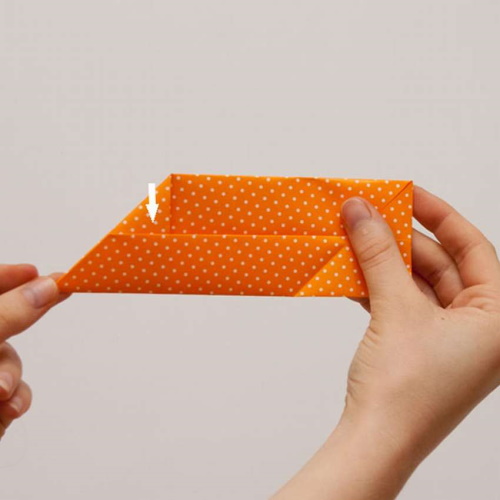
- Fold the bottom left corner, directing it towards the middle of the figure.
- Fold the right corner from the top in the same way. The result should be a trapezoid-shaped blank.
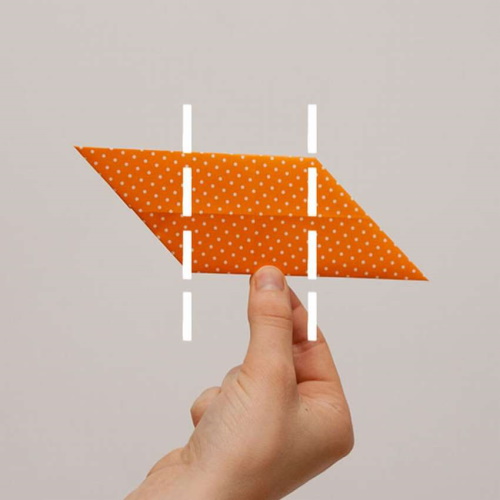
- Turn the figure over.
- Fold both corners, pulling them towards the middle of the workpiece.
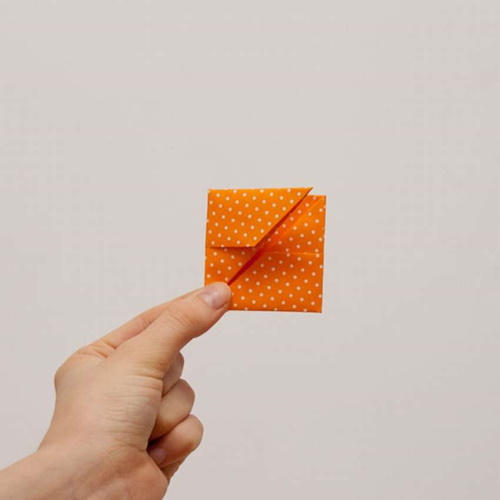
- Iron the marked folds.
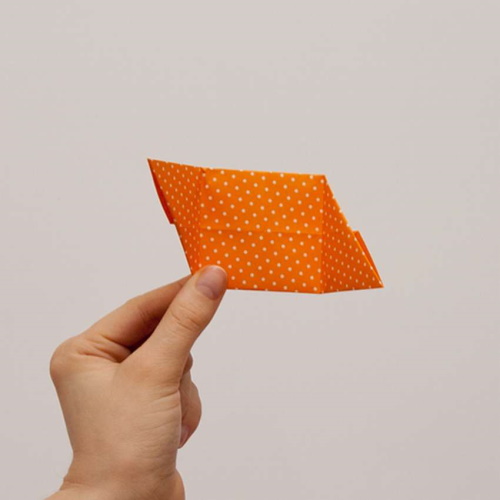
- Expand the corners.
By analogy, you need to fold the remaining sheets of paper.
 |  |
 |  |
 |  |
 |  |
 |  |
 |  |
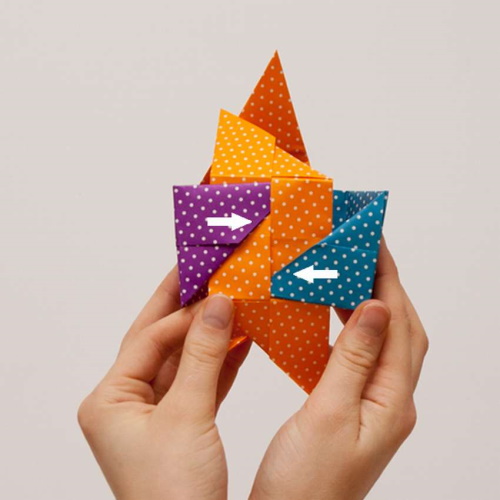
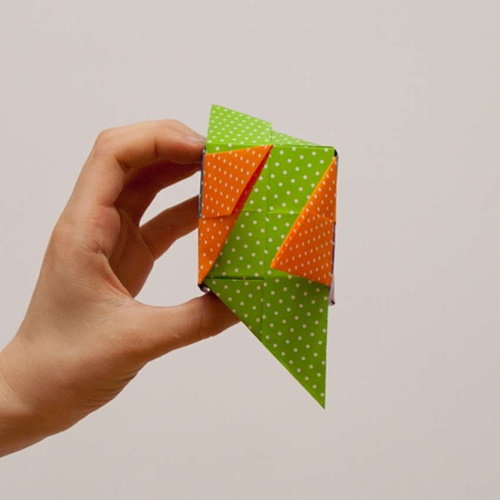
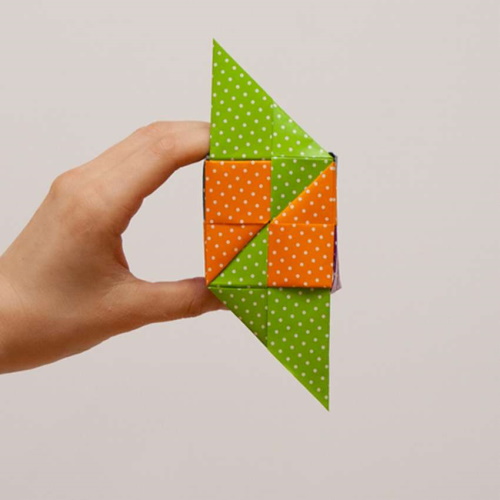
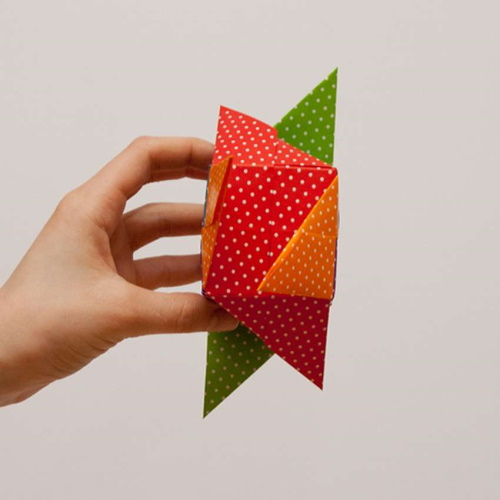
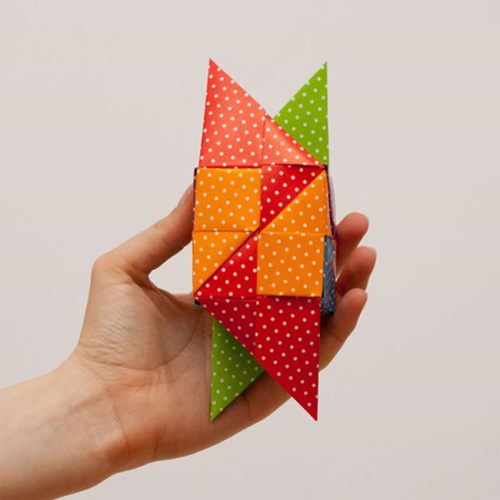
How to solve the cube:
- Prepare 2 modules. The corner of the first one must be inserted into the pocket of the other piece, which is located in the middle.
- Insert the new module into the same pocket, but with the other side. 1 pocket on the module holds 2 corners.
- Insert the remaining parts in the same way.
- Tuck all corners into pockets. Adjust them with your fingers.
The result is a colorful cube that can be used as a puzzle, taking it apart and putting it back together.
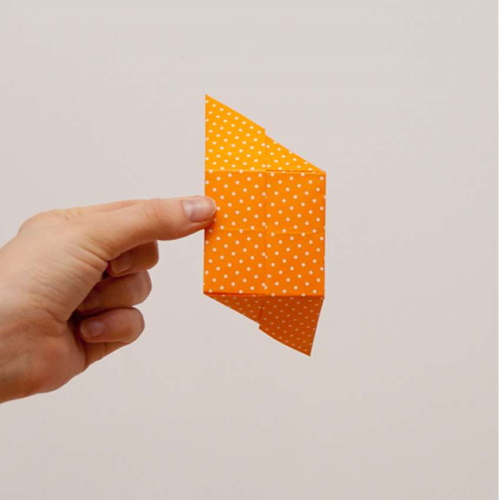
In origami technique
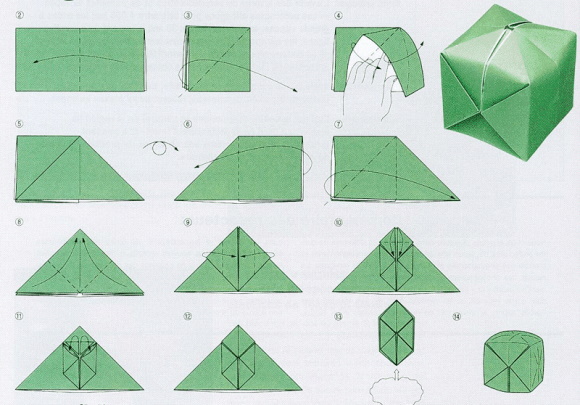
The peculiarity of such a cube is that it is assembled from a whole sheet of paper. It folds, which allows you to conveniently store the craft. If necessary, the cube can quickly return its volume.
How to assemble such a cube:
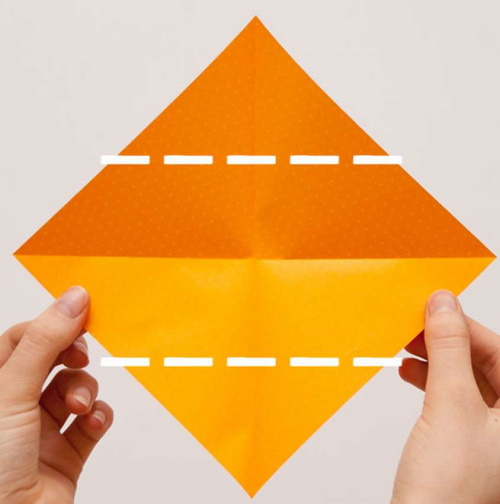
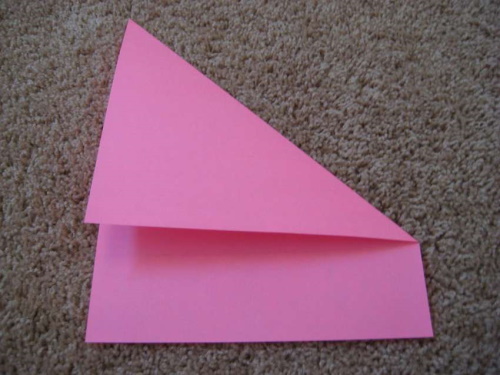
- Place a sheet of A4 paper vertically on the table.
- Fold the paper so that the left edge meets the right edge.
- Cut off the remaining paper with scissors.
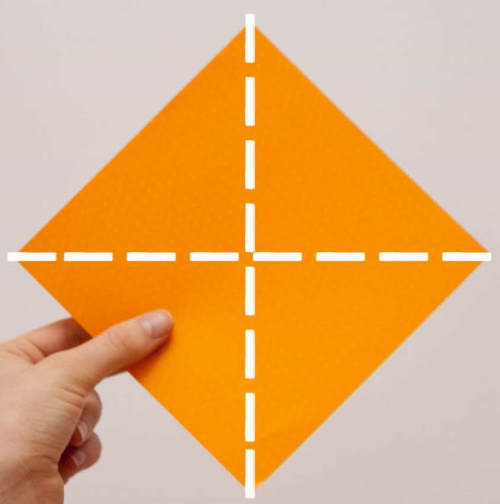
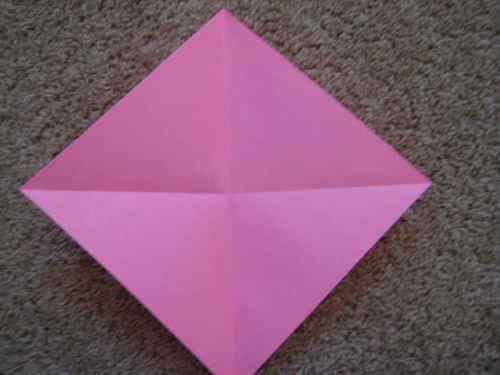
- Expand the triangle.
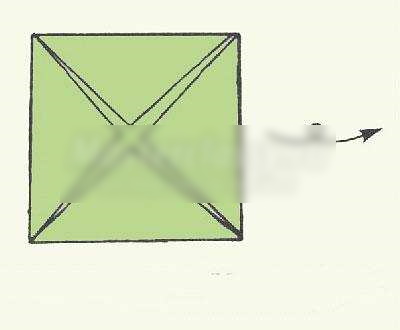
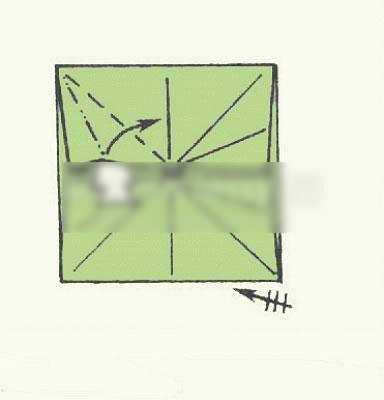
- Fold the sheet diagonally to form 2 intersecting lines.
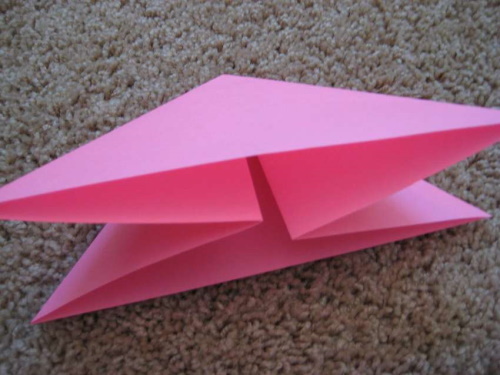
- Pull the square by the sides. They should fold towards the center. You will get a double triangle.
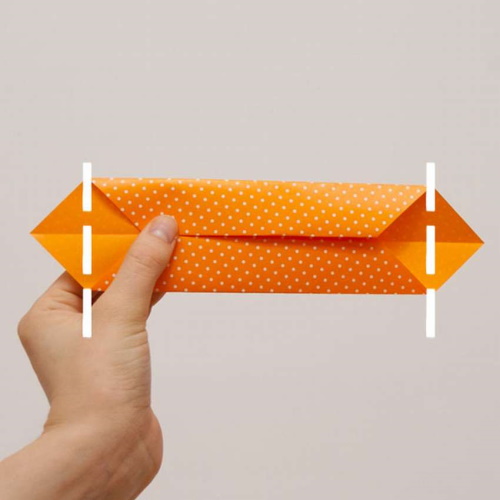
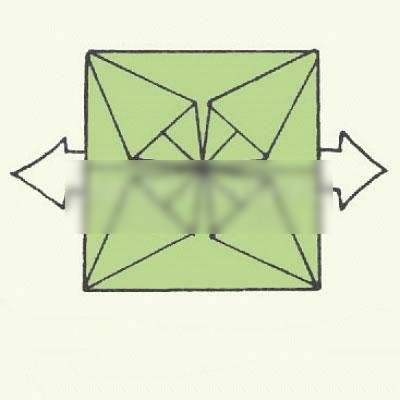
- Turn the piece so that its wide side is at the bottom.
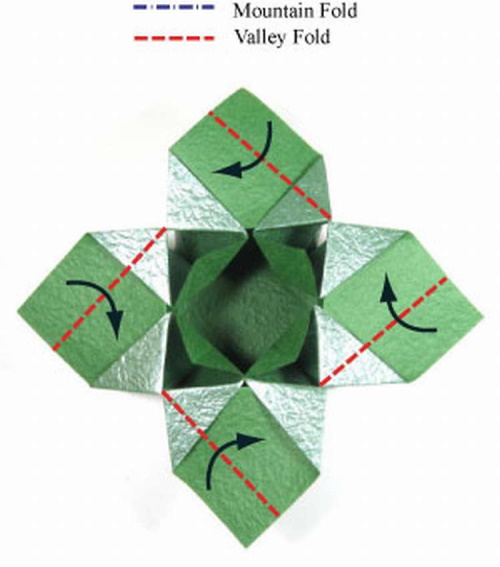
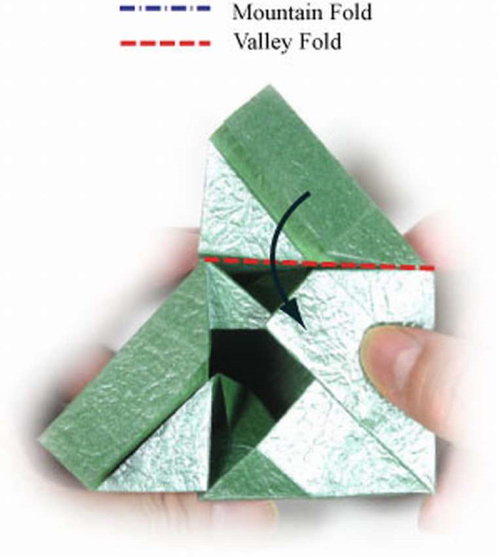
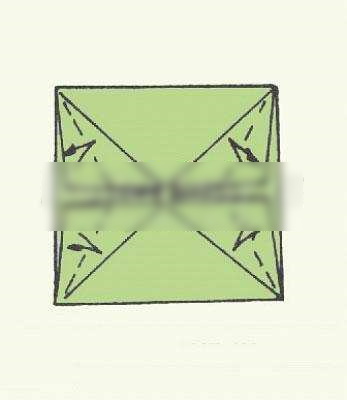
- Fold both corners of the first layer to the top of the shape.
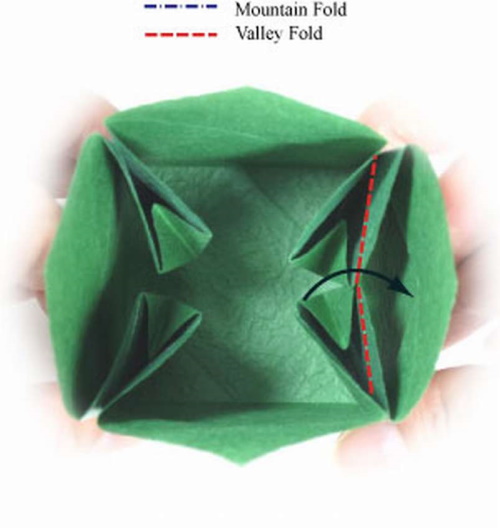
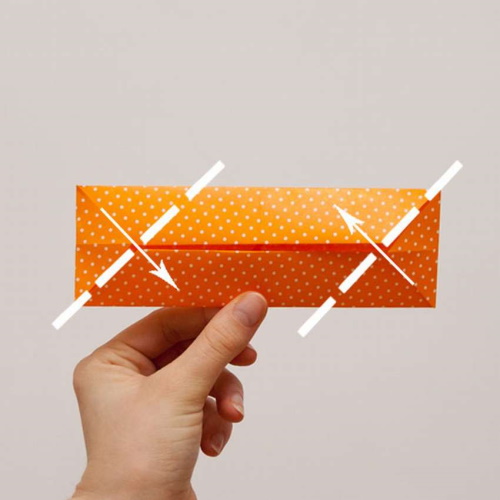
- Fold the side corners of the resulting rhombus towards its center.
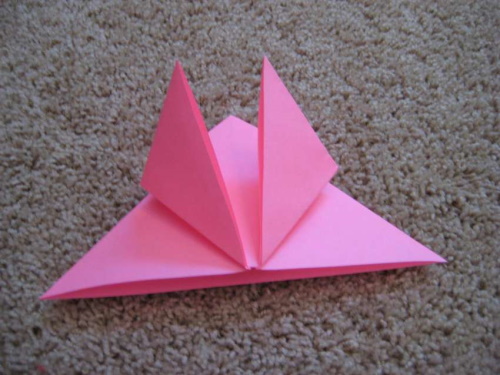
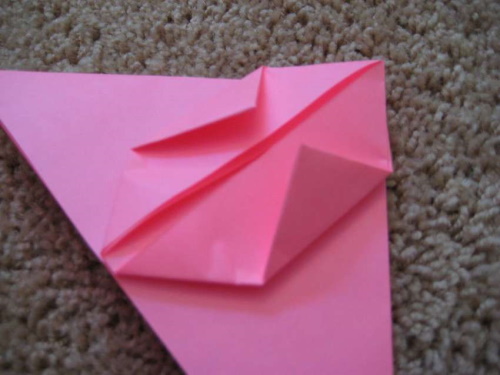
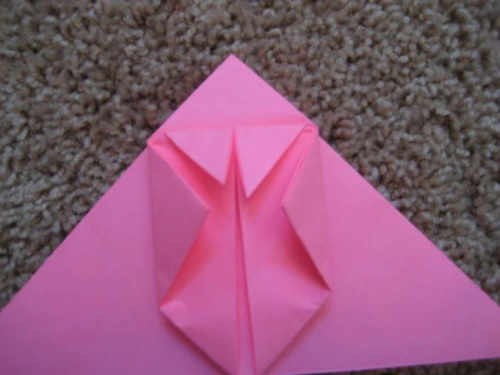
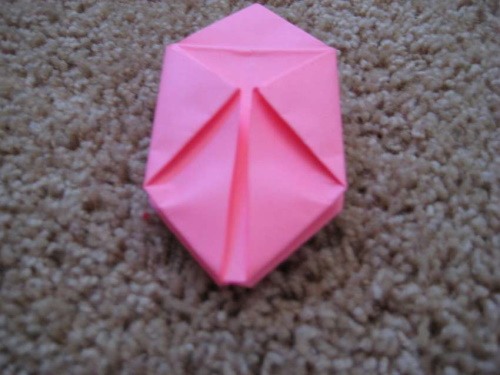
- Bend the top of the figure so that the corner connects with the sharp ends of the already folded corners.
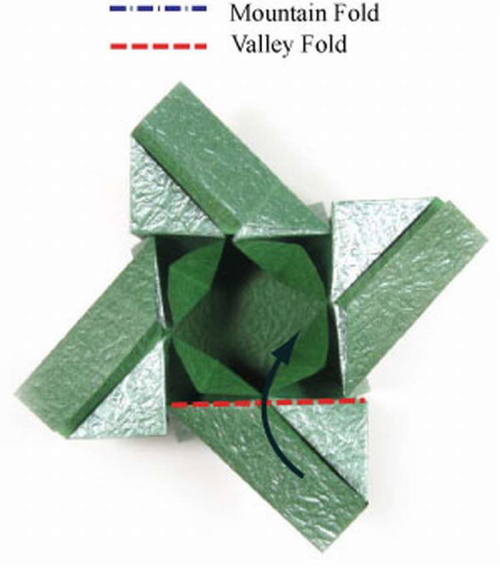
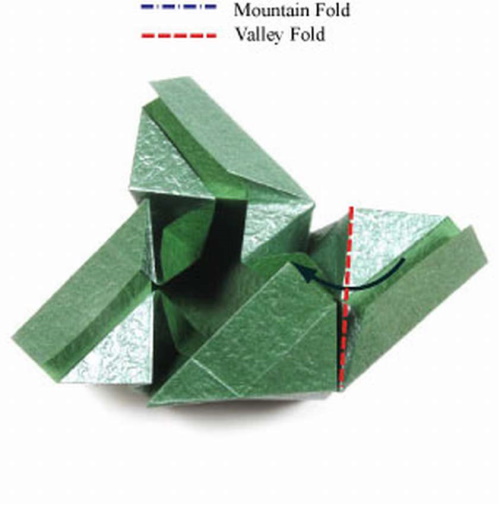
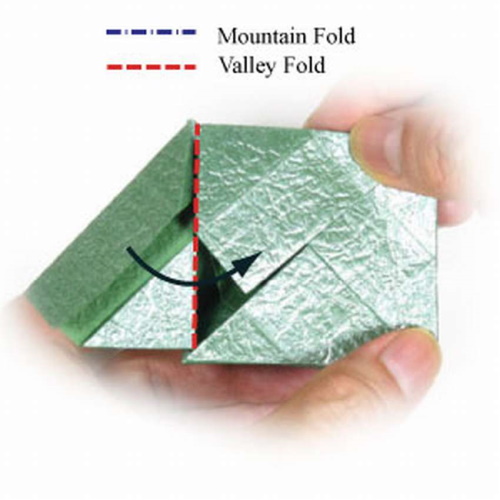
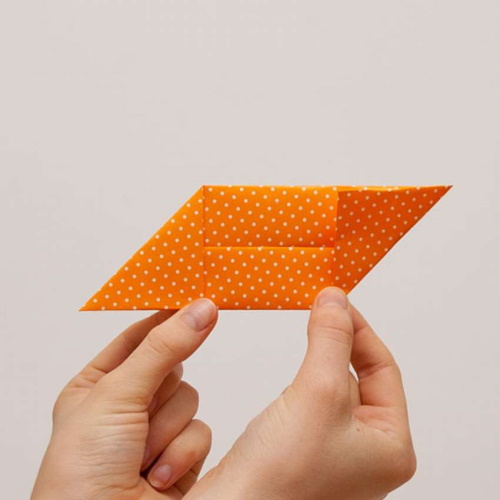
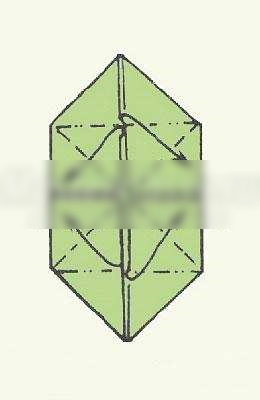
- There are now 2 small squares on top. They need to be folded diagonally and the top corners tucked inside the pockets that are in their middles.
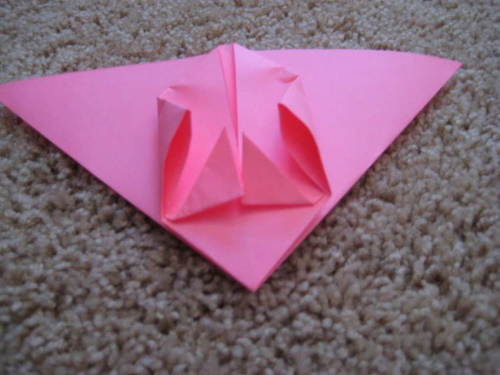
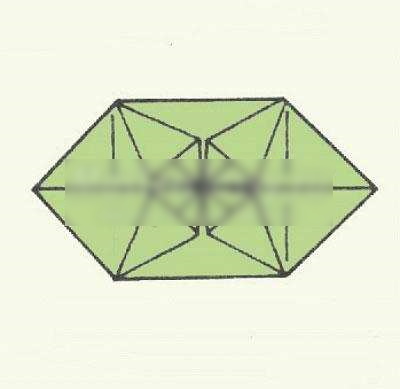
- Turn the part over to the other side, repeat all steps from point No. 4 to No. 11.
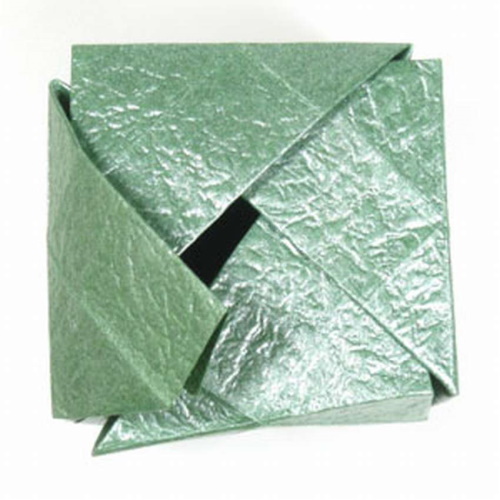
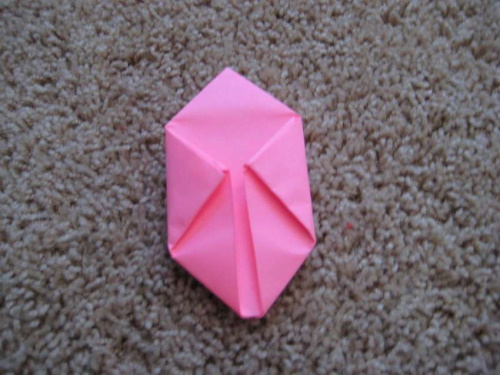
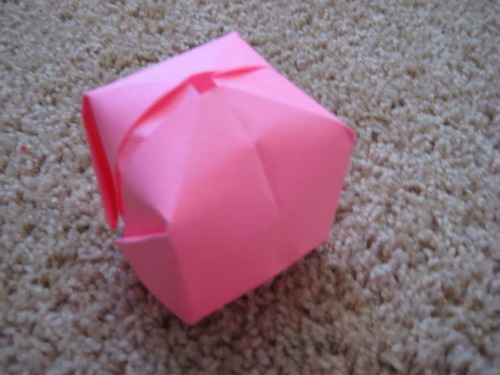
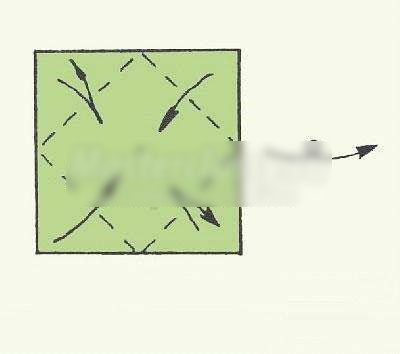
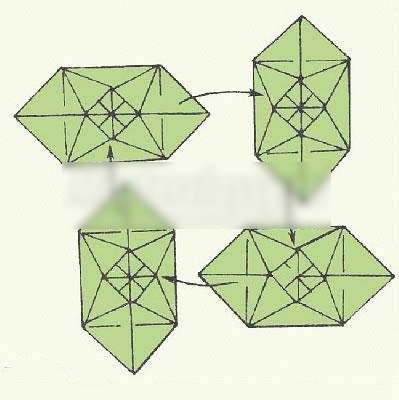
- You should get a hexagon. It needs to be placed vertically on the table.
- Using the method of multiple folding, mark the folds on the upper and lower corners of the figure.
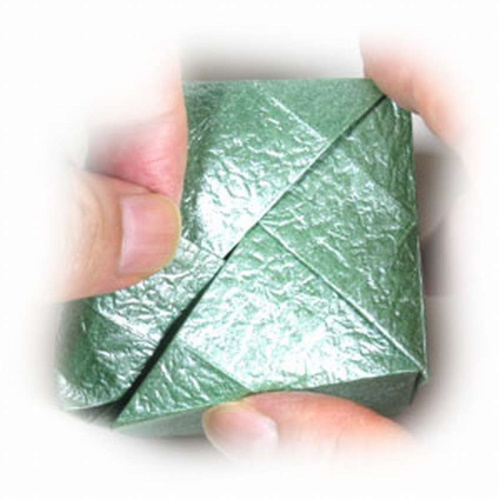
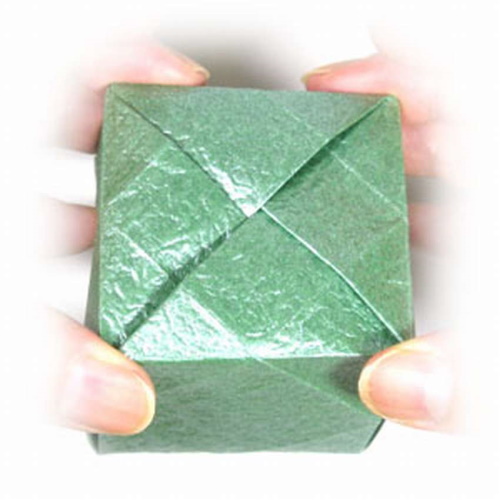
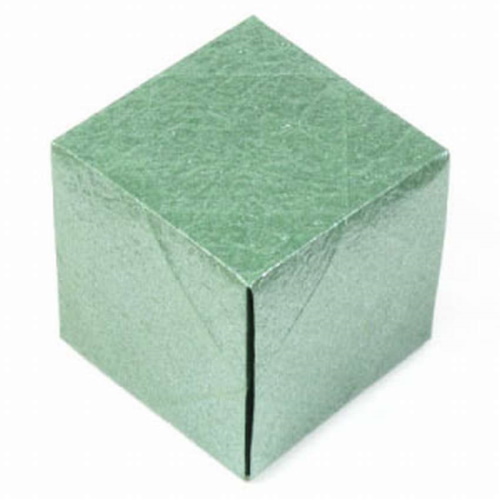
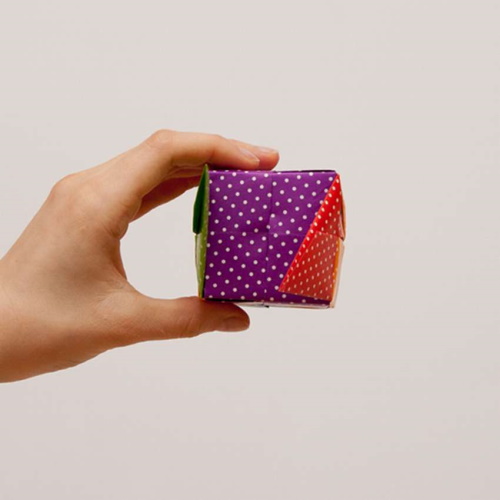
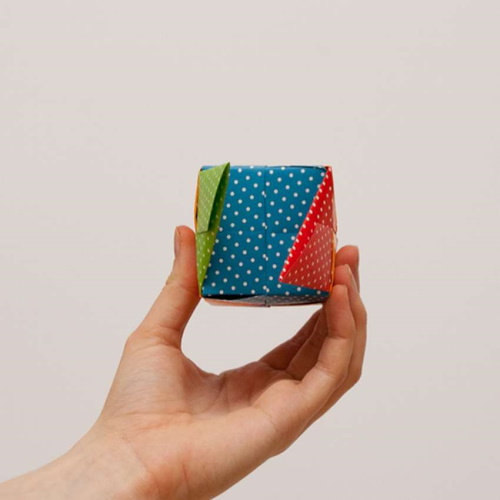
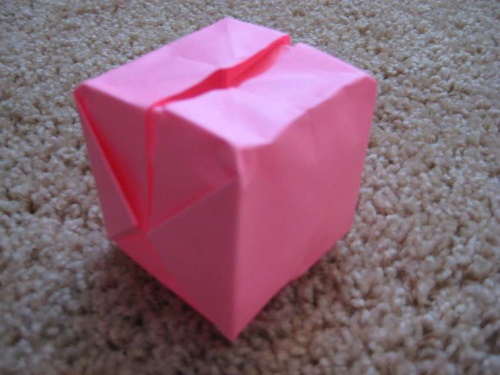
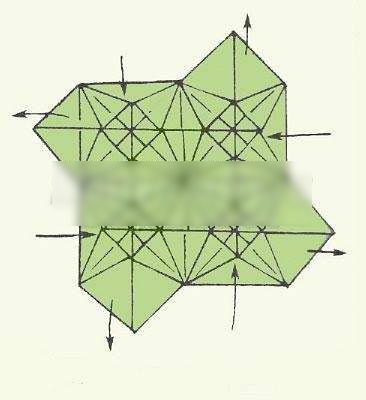
- The cube is almost ready. All that's left is to find a hole in one of the bent corners and blow well into the figure. It will straighten out and turn into a paper cube.
If desired, you can carefully release the air from the cube and fold it into the figure obtained in step 13.
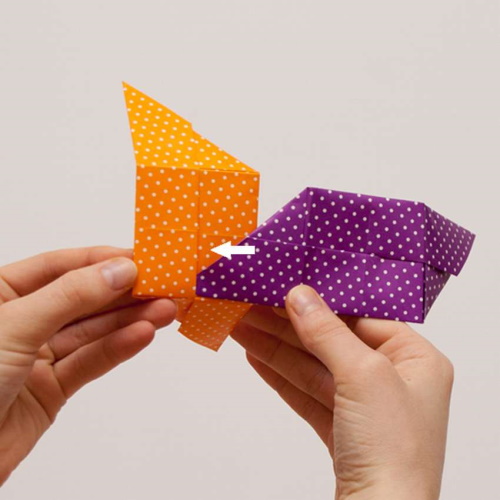
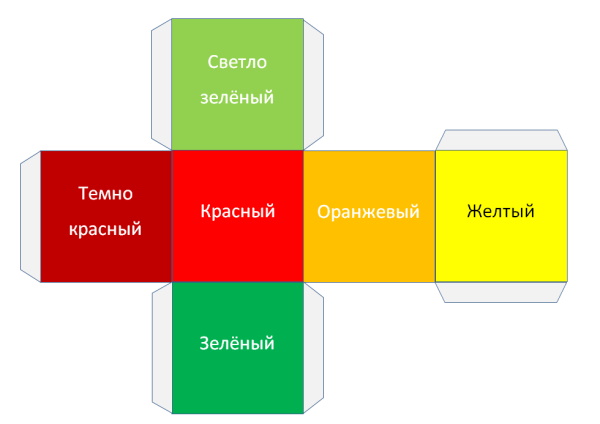
Original cube
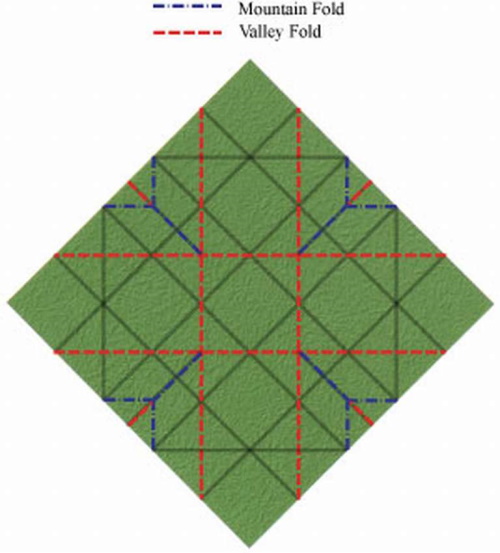
You can make an original openwork cube from thick double-sided paper. To work, you will need to cut 24 multi-colored squares 8x8 cm.
How to assemble such a cube:
- Take 1 square and fold it diagonally.
- Straighten the paper.
- Fold the sheet again, marking a diagonal line from the other corners.
- Unfold the sheet. Turn it with the corner facing up.
- Fold the top corner to the point where the lines intersect.
- Fold this half of the figure in half, horizontally. The edge should coincide with the central fold.
- In the same way, bend the bottom corner, fold part of the corner in half.
- Fold the sharp corners inward. The tips should match the folded edges.
- Fold the lower right corner of the resulting rectangle. Its edge should coincide with the upper edge of the figure.
- Fold the upper left corner in the same way, pointing it downwards.
- Open the bottom part of the figure.
- At the bottom, along the marked lines, fold the small corner inward.
- Fold the corner back and tuck it in.
- In the same way, fold and tuck in the corner on the opposite side.
- The remaining parts need to be folded in the same way.
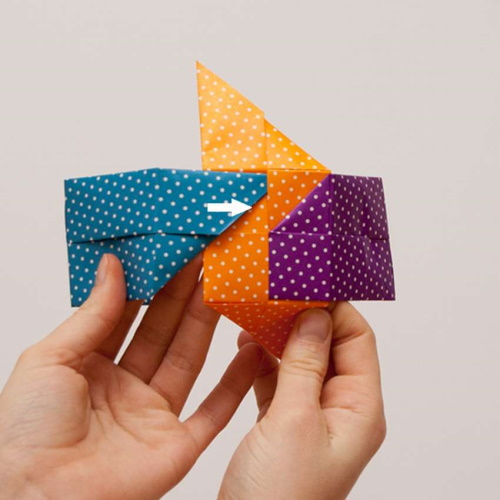
- Take 2 elements. Insert 1 corner into the side part of the other part.

- Add 1 more module.
- The last module needs to be inserted between parts 2 and 3.
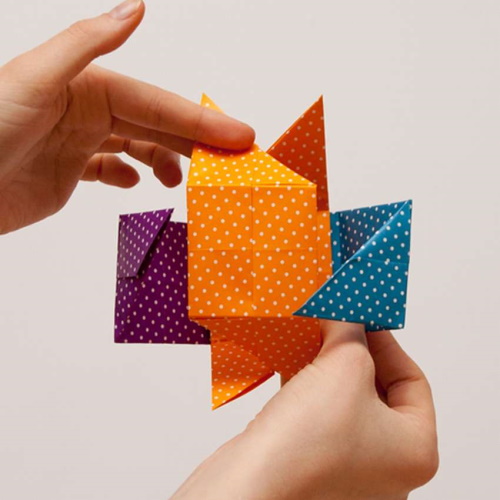
- By analogy, add 5 more faces of the cube.
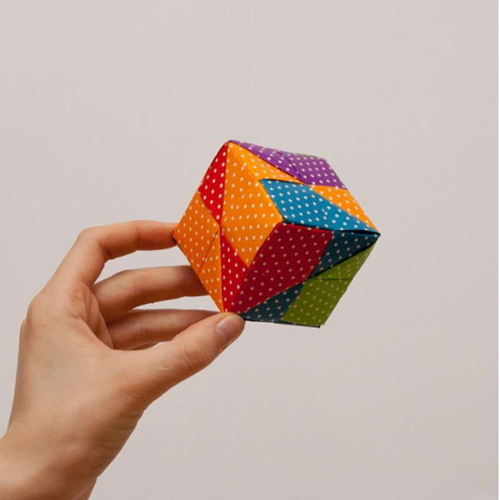
- Connect all the edges together.
The multi-colored openwork cube is ready!
Secrets and tips for making a paper cube
To get a neat cube, you need to know a few secrets:
- When choosing double-layer cardboard, it is important to pay attention to its surface. It should be smooth, without creases. Otherwise, it will be difficult to assemble the cube.
- You can use cardboard with a glossy finish. It will be difficult to glue the smooth sides together, so you can use double-sided tape.
- Press the fold lines on thick cardboard carefully. It may tear.
- When creating a cube using modular or origami techniques, you need to iron all the fold lines well. The folds must be even so that the cube is stable.
- To avoid damaging the surface of the table on which the workpiece will be cut out using a stationery knife, you need to lay down a silicone mat.
- It is not recommended to paint paper products. The paper will deform if exposed to moisture. The glued cube may lose its shape.
- It is not recommended to use thin paper for making three-dimensional figures. It does not hold its shape well, and light passes through the walls of such a cube well. The places where the paper is glued will be very noticeable.
- To quickly glue the walls of a cube made of thick cardboard, PVA glue can be replaced with Moment Crystal. This glue dries in a few seconds, reliably gluing the surfaces.
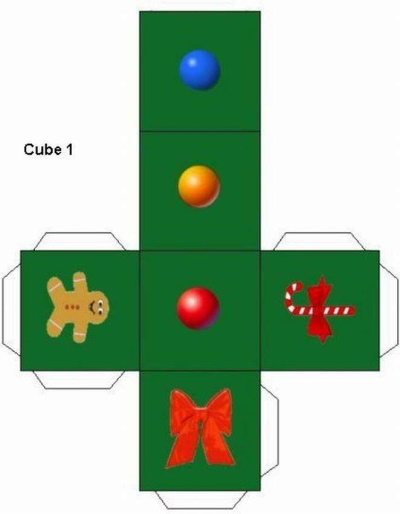
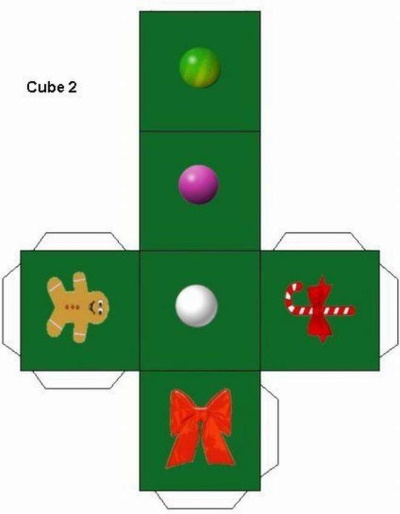
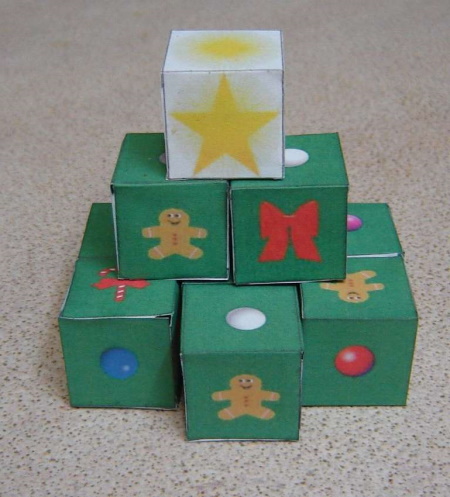
Cubes made of paper can be used to create Christmas tree decorations. It is enough to make a layout on bright paper, and then tie the cube with a thin satin ribbon, as a gift. From such "gifts" you can make a festive garland, which is suitable for decorating the hall in honor of a name day.
Cardboard cubes can become educational toys for children. You will need to make several cubes of the same size, and then write letters on the faces of all the figures.
With the help of such cubes, you can learn the alphabet and learn to form words. If you write numbers on the cubes, as well as mathematical signs, then you can conduct several lessons in mathematics.
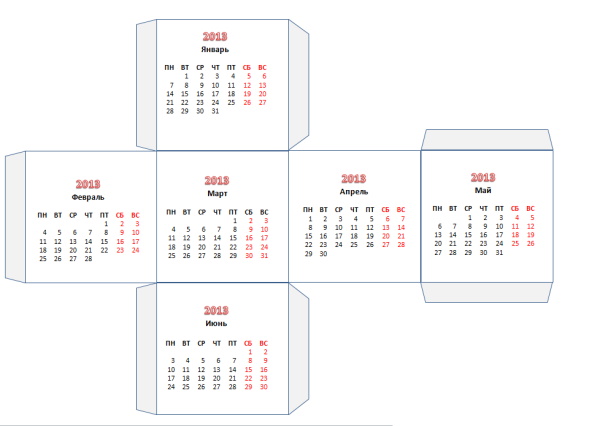
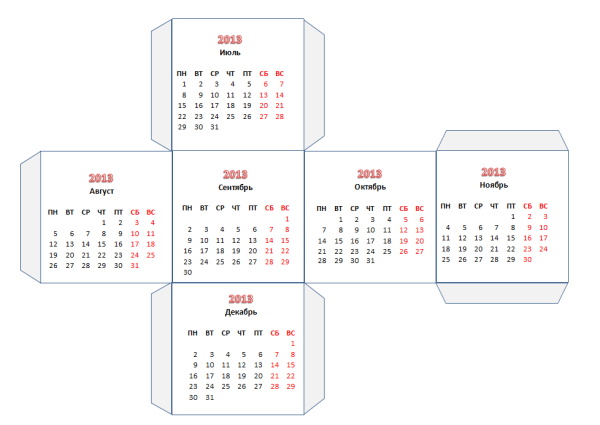
You can also make a desk calendar for six months from a small cardboard cube. To do this, you will need to print 6 calendar sheets on a printer, choosing the appropriate size. Then, using glue or double-sided tape, stick the sheets to the cube faces.
By analogy, you can make an unusual photo frame if you print your favorite photos instead of a calendar.


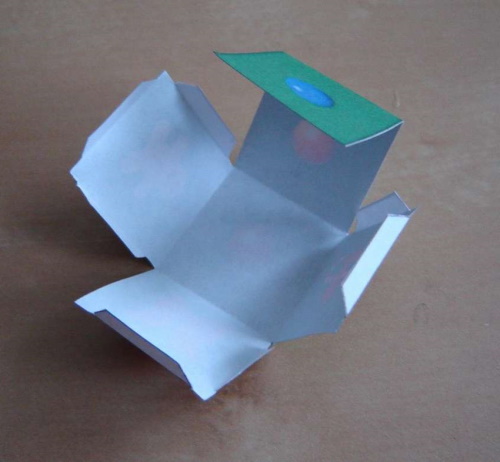
A large cube will make a good hiding place. To do this, you need to leave the top surface of the cube unsealed. A special "eye" will hold the lid and it will not open.
You can store various small items inside such a box, and to make the cube look attractive, you can paint it like a dice, drawing dots from 1 to 6 on the edges.
Origami cubes can be used to perform disappearing tricks to entertain children. The inflated cube will easily deflate if you gently squeeze it. The remaining flat strip of paper should be cleverly hidden in the sleeve. Then take it out again and quickly inflate it, covering the paper with your palms.
Making a paper cube with your own hands is not difficult. The main thing is to draw the correct layout and assemble the product according to the diagram, as well as use the appropriate tools and materials for the work.
Video about the craft
Paper cube - diagram: