It is rare to find a family that does not have a pet living in their home. Most often, such a pet is a cat. The choice is motivated by the fact that it has a well-developed intellect, does not require special attention and looks cute.
Often, a domestic cat becomes an object for a child to draw. The pictures created will be a great decoration for a child's room. Every time he enters his room, the young artist will look at them and be proud that he created these masterpieces with his own hands.
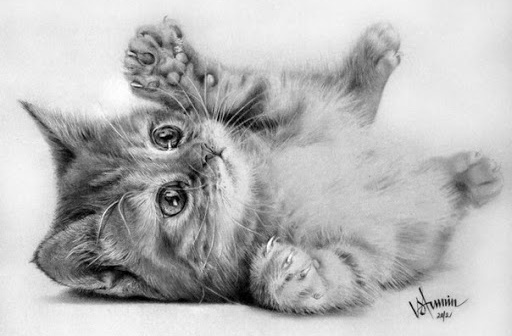
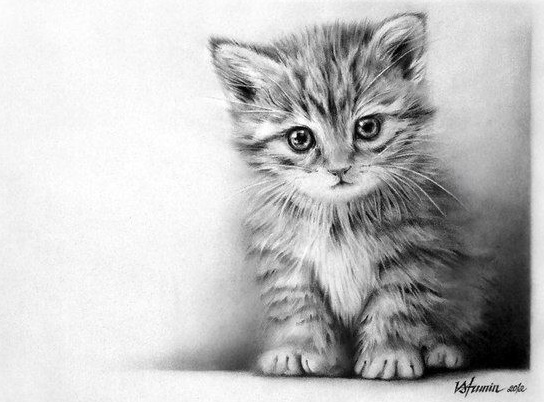
Kitten - pencil drawing
Drawing a cat is not difficult, and it is best to start with simple options, gradually moving on to more complex ones. The first option will not be very realistic, but it will look cute and attractive. Its main advantages are the ease of drawing and cartoon style.
All you need for this job is:
- sheet of paper;
- simple pencil;
- eraser;
- colored pencils or markers.
A cat (a drawing for children can be done in black and white or color) can be depicted by completing the following steps:
- Draw a large circle at the top of the sheet. This will be the initial outline of the head.
- Draw an oval under the large circle, stretched horizontally. This will be the kitten's body.
- Draw 2 straight perpendicular lines that pass through the head and intersect approximately in its center. These will be auxiliary lines.
- Start creating the shape of the face. To the left and right of the circle, draw 1 short arc line, which should be symmetrical relative to the vertical auxiliary line.
- Connect the lower ends of the two arced lines with one large arc, which runs as if it envelops the head from below.
- Start working on the upper part of the face. Draw a pair of ears, each of which is represented by a triangle, but not with straight lines, but with smooth ones.
- Connect the upper ends of the ears with a large arced line, just as in the previous step the arced line was drawn in the lower part of the face, marking its border.
- Draw the eyes. They will be large and expressive in a cartoon cat. At the same time, despite their size, they are easy to draw. It is enough to draw 1 straight horizontal segment at the bottom of the face: 1st on the left side of the face, 2nd on the right.
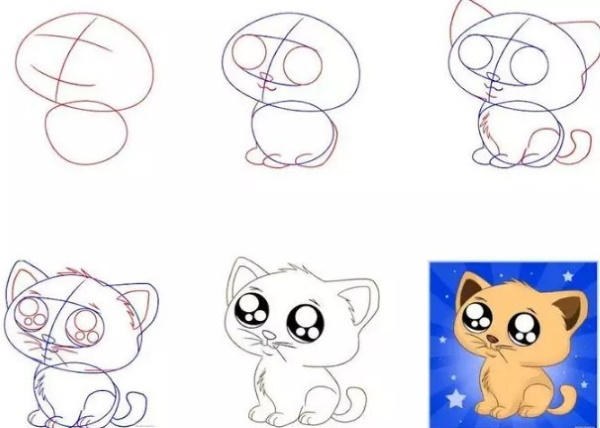
- Above each of the lines that represent the eyes, draw a large semicircle.
- Draw 1 wider semicircle above each semicircle.
- Draw a pair of eyebrows above the eyes and a mouth at the bottom of the face. The eyebrows are a pair of short lines, and the mouth is a small curved oval that should be located on a vertical auxiliary line at about the same level as the lower lines of the eyes.
- Proceed to drawing the body. It will be less pronounced than the head. You should start with the front limbs. Each of them is a large semicircle, which has some unevenness, demonstrating the hairiness of the paws.
- Draw the hind limbs and tail. To do this, draw one arc line on the sides, and at the bottom there will be another, long arc line, which will indicate the tail.
- Color the finished drawing.
Walking cat
A cat (a drawing for children can be done in statics or in dynamics) that goes to be depicted on paper will require a simple pencil and a sheet of paper.
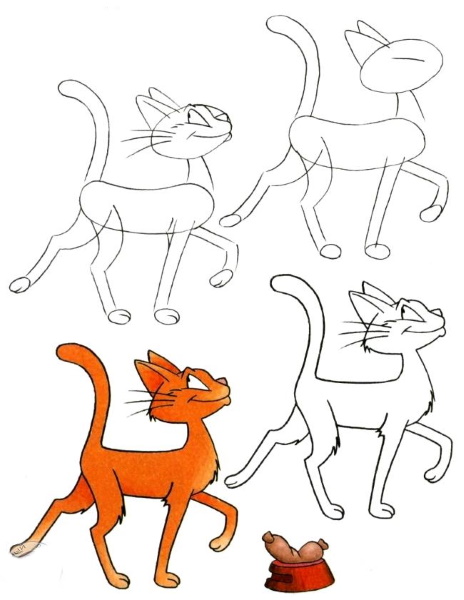
The stages of work will be as follows:
| Stage | Description |
| 1 | Create a character sketch. To do this you need:
|
| 2 | At the bottom of the drawing, draw 4 limbs:
|
| 3 | At this stage, it is necessary to detail the head and draw:
|
| 4 | At this stage it is necessary:
|
| 5 | At the final stage it is necessary:
As a result, his fur may become:
|
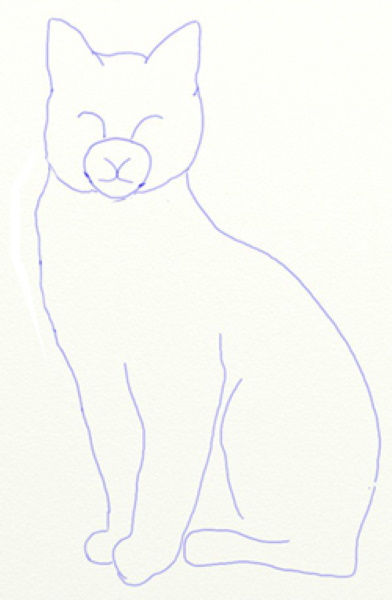
Sitting cat
A kitten (a drawing for children can be done in warm colors), who sits peacefully, evokes affection. To draw such a picture, you should prepare a simple pencil and a sheet of paper. If necessary, the image can be colored with colored pencils or felt-tip pens. Their colors can be different depending on what kind of fur the child wants to see on the character of his picture.
The work on creating the painting will be divided into the following stages:
- Create contours. To do this, draw 3 circles. One of them is in the upper left part of the paper sheet. This will be the prototype of the head. Below, draw another circle, but it should be slightly larger in size. This will be the torso. The 3rd circle is located in the lower right part of the paper sheet. This will be the back of the body.
- Add 2 lines to the circles, which will be the prototypes of the front legs. Both lines come from the middle circle - the one that is the prototype of the body. They go to the bottom of the sheet towards each other, but they should not meet or connect.
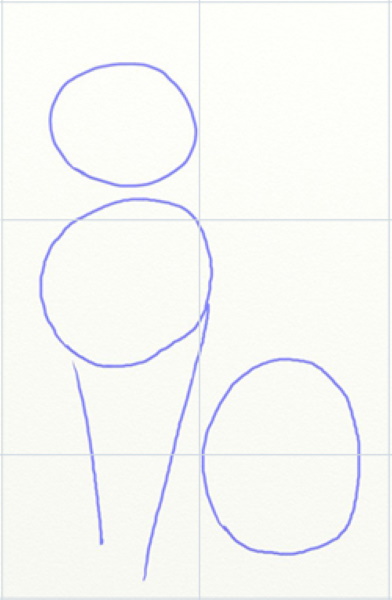
- Continue working with the contours. First, draw the contours of the tips of the paws. Each of them will be a small circle. There will be 3 of them. The first 2 are at the very end of the 2 lines drawn in the 1st stage. The 3rd circle is located slightly to the right of them. The 4th paw is not visible in this drawing, because the cat is shown in profile. This paw is hidden behind the animal's body.
- Draw the contours of the ears. They are located on the head and are small triangles.
- Draw a few more smooth lines that will mark the boundaries of the cat's body. These will be 2 short lines connecting the head and body. This is how the neck is drawn.
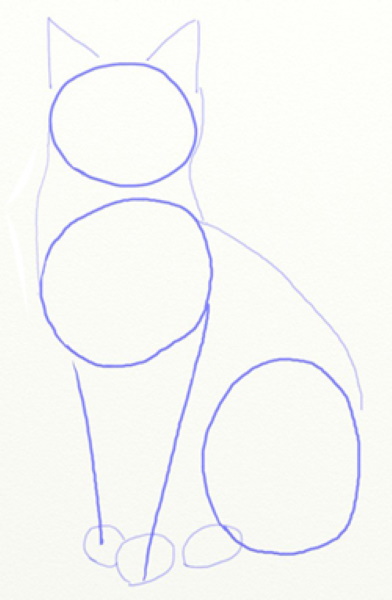
- Draw the 3rd line. This will be the back line. It is an arc and connects the torso to the back of the body.
- Create a general outline of the cat. You need to start with the head. At its bottom, draw a small uneven circle, which will indicate the muzzle.
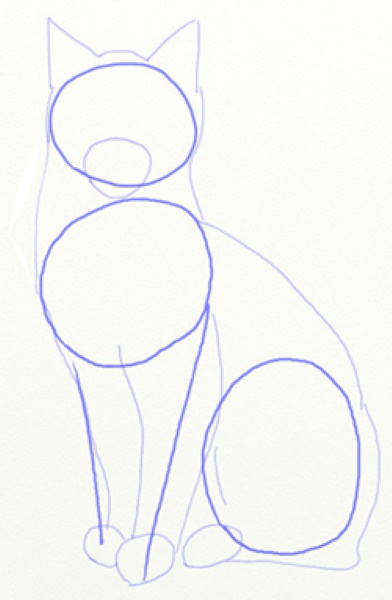
- Extend the back line downwards. It should go to the hind leg, and after that it remains to create the contours of the front limbs.
- Detail the drawing. The work is simple, but the artist must be very careful. To do this, carefully remove all the extra lines that were used as auxiliary ones.
- Draw the muzzle in detail. Above the small uneven circle located at the bottom of the head, you need to draw 2 symmetrical arcs that will indicate the eyes.
- Inside the circle that represents the muzzle, draw the nose and mouth. You can imagine them as just one capital letter "X" with smooth lines.
- Add some elements. For the eyes, draw 2 more arcs, but they should be a mirror image of the previous arcs. After that, in the resulting ovals, draw the pupils, which are very narrow in the cat - so much so that they can be imagined as small vertical strokes.
- Draw 2 lines from the eyes, which will become the borders of the nose.
- Go to the bottom of the drawing. Here you need to depict the claws on 3 paws. Each of them should be represented by a short dashed line. It is worth remembering that cats have 4 claws on their front paws and 5 on their back paws.
- Work on the ears, which need to be made smoother.
- Draw the mustache using simple dots and lines.
- Work on the eyes. It is important to observe the dimensions and make sure that they are located on one line. They should also have highlights that will add realism. However, this should be done at the final stage - during coloring.
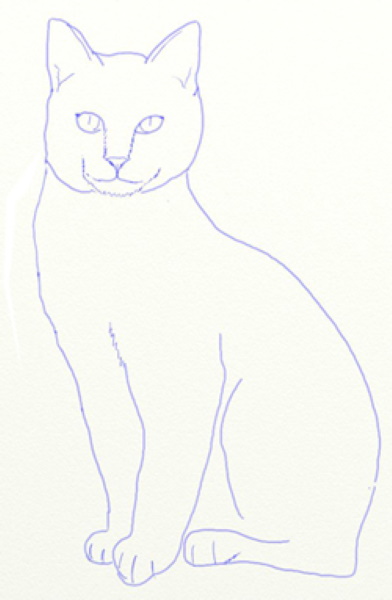
- Add shadows to the animal, which will give the painting volume.
In addition to the image, you can draw some objects nearby, for example, put a cat on the windowsill.
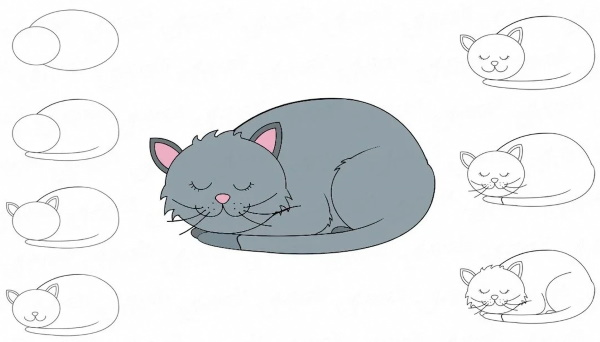
Copying
Children can draw a picture of a cat on their own or together with their parents. For example, you can draw a sleeping animal.
For this work it is necessary to prepare:
- a simple pencil marked B (soft);
- a simple pencil marked H (hard);
- A4 paper;
- eraser;
- ruler;
- tracing paper or colorless film;
- marker.
Once all the tools and materials are prepared, you can begin the creative process.
It will take place in the following stages:
| Stage | Description |
| 1 | First, you need to cover the finished drawing with tracing paper (or film), and draw a grid on it, using a ruler with a marker. If you plan to copy the drawing while observing all its dimensions, then you need to make a medium-sized cell. Redrawing should start from the head. If necessary, you can add auxiliary lines and dots at the same time. They will be used as a guide. When the head is drawn, you can move on to marking the eyes. Next, they are also drawn. For this, simple light strokes are applied. The mouth and nose are drawn in a similar manner. |
| 2 | It is necessary to draw ears, each of which will be a triangle. After the drawing is transferred to paper, you can round them, making them softer and more realistic. |
| 3 | This stage is drawing the body. During this work, it is important to adhere to the correct position of the part of the drawing in relation to the head. In general, the body should be represented by a long oval, because the cat is curled up into a ball. |
| 4 | Once the drawing is transferred to the transparent film, it should be placed under the A4 paper on which the final image of the cat is presented. It is important not to rush to outline the contour lines. It is recommended to use a hard pencil, because its trace is easier to remove with an eraser. |
| 5 | This is the stage of drawing the limbs and whiskers. In order not to make a mistake with the proportions, it is necessary to carefully compare with the original image. |
| 6 | Once the sketch is ready, you can begin to draw lines with a soft pencil, paying special attention to details such as the eyes, nose and mouth. |
| 7 | Additionally, add some protruding fur and small dots in the whisker area. |
If the child wants to color the picture, it is necessary to prepare colored pencils or paints.
Using the dry brush technique
A cat (a drawing for children can be done in both traditional and modern techniques), done using the dry brush technique, will help to create an image of a furry animal, similar to a realistic one.
The following materials and tools will be required for the work:
- brushes (bristles can have different stiffness);
- gouache or acrylic paint;
- a container with plain water;
- a palette for mixing paints and obtaining the desired color;
- fabric for tassels.
The process of creating an image includes the following steps:
- Create the outline of the cat. You can use ready-made templates for this.
- Dip a dry brush into the paint and then apply it to the paper using light dabs. It is important to hold the brush strictly perpendicular to the sheet. The brush will give the effect of texture.
- When changing brushes, pay attention to what marks remain on the paper after using a soft brush, and what marks remain after using a hard brush.
- After washing the brush in a container of water, dry it using a specially prepared cloth.
- Make the cat multi-colored. If you apply strokes of different colors, it will become more voluminous.
Drawing on wet paper
A cat can be drawn not only on dry paper, but also on wet paper. For this, a special technique of drawing with watercolor paints is used.
It has the following advantages:
- realistic wool;
- blurring of lines;
- lightness and tenderness of the design.
To draw a cat on wet paper, in addition to paper, you need to prepare the following tools and materials:
- several brushes;
- watercolor paints;
- container with water;
- sponge;
- napkin.
The work takes place in the following stages:
- Use a simple pencil to outline the contours. You can also lightly draw the eyes and muzzle.
- Wet the paper by running a damp sponge or brush over it. Do not rub the water too hard on the surface, as this may cause the sheet to roll up and become damaged. After wetting, remove all excess moisture with a napkin. The paper should shine as a result.
- Dip the brush into the desired color of watercolor and then move it across the paper. It will be easy to notice how the paint spreads across the sheet and becomes as if in a haze. Watching how the paper reacts to the paint, it is necessary to select the optimal amount of water on the brush.
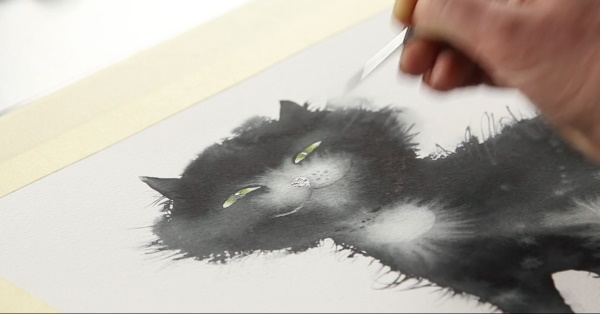
- Start drawing clear lines after the paper has dried.
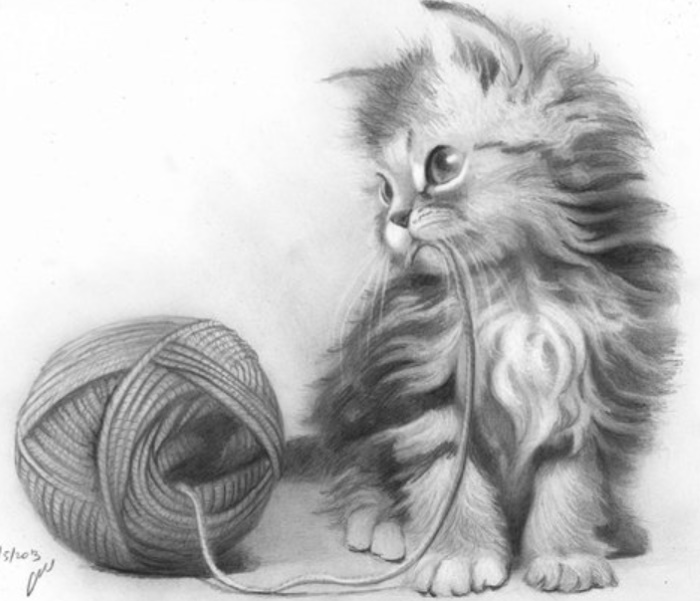
A cat is a graceful and beautiful animal, so there are a huge number of ways to draw even more ready-made drawings, made by both real professionals and novice artists - children or adults. Using ready-made images and listening to the advice of artists, everyone can learn to create beautiful masterpieces.
Video about drawing a cat
How to draw a cat for kids: