Snow Queen's Crown special, and does not look like the decorations of other queens. It is important for beginning artists to know about these differences in order to learn how to draw the image of the Snow Queen correctly. To do this, you need to read several instructions on drawing crowns, and also choose an image to copy.
Distinctive features of the Snow Queen's crown, how to display them in the drawing
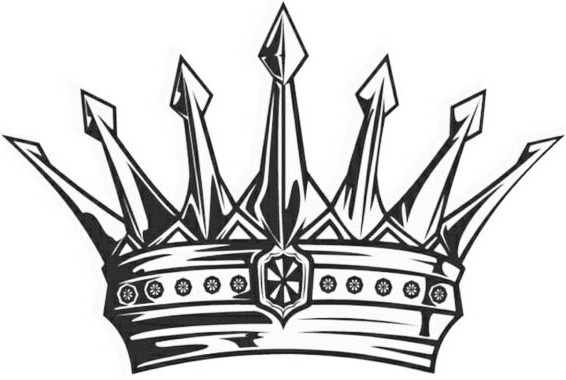
The Snow Queen's crown is made of ice, so it is painted in blue, light blue and white shades. The crown is pointed. The highest corner is in the center of the decoration, the rest of the teeth are smaller. The closer to the edges, the smaller the teeth. They should be the same on both sides. This is what a classic crown looks like.
You can slightly modify the decoration by adding round ice floes or crystals to the tops of the teeth. The corners can be narrow or wide. Sometimes artists use smooth shapes, making the corners of the crown rounded. In such cases, the decoration will need to be painted with a "winter" pattern, for example, snowflakes.
What do you need for drawing?
Tools needed for drawing:
- simple pencils;
- eraser;
- sharpener;
- ruler;
- art brushes;
- a container with water for washing brushes;
- palette.
You can color the pictures with any materials: paints, pencils, markers. The main thing is to choose the right paper.
| Sheet density | What can you draw on them with? |
| 68 g/m2 | With a simple pencil |
| 80 g/m2 | With colored and wax crayons |
| 120 g/m2 | Gouache, acrylic paints |
| 200 g/m2 | Watercolor, watercolor pencils |
The higher the density of the paper, the less susceptible it is to deformation from moisture.
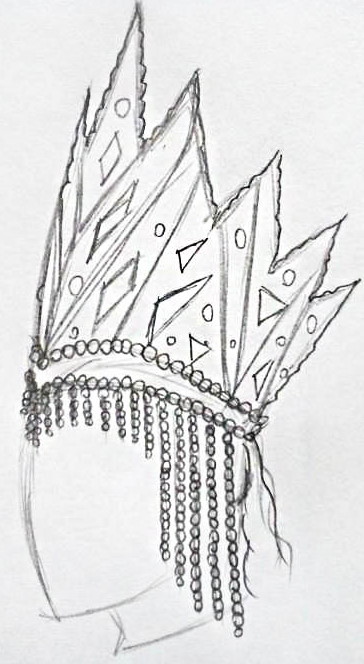
Step by step instructions on how to draw the Snow Queen's crown
This master class describes an example of an image where the crown is placed on the queen's head. The character will be depicted in profile, so only half of the decoration will be visible in the drawing.
The crown will be embroidered with stones, beads and lace. These are small details that will be difficult to draw for children under 7 years old.

To work you will need 2 simple pencils: hard and hard-soft, as well as colored pencils.
Sketch
The sketch is drawn with a hard pencil.
Procedure:
- Draw a schematic representation of the queen's head.
- Finish drawing the neck.
- Draw a straight vertical line from the top of the forehead. It will indicate the height of the crown.
- Draw a smaller line from the back of the head. This will be the edge of the crown.
- Use a smooth line to mark the bottom edge of the decoration.
- Add another line at the bottom parallel to the previous one.
- Connect the top points of both lines with a barely visible line.
- Using this line as a guide, draw 5 teeth.
Use an eraser to erase extra lines.
Detailing
Small elements should be drawn with a hard-soft pencil.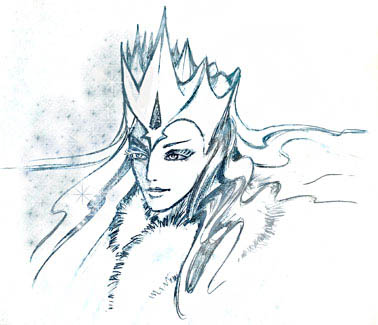
Procedure:
- Trace the crown along the contour. Trace the edges of all the teeth with a wavy line.
- Divide the decoration into several parts by drawing straight lines at an angle.
- Draw stones inside the resulting figures that will decorate the crown. They can be round, triangular, hexagonal or have the shape of crystals. The sizes of the stones should differ from each other. They can be arranged randomly, or you can make some light pattern.
- Use an eraser to carefully remove the sharp edges of each tooth, leaving only wavy lines.
- Draw beads along the bottom edge of the crown, embroidered in 2 rows.
Now you need to depict the fringe of beads. First, draw thin lines. Closer to the eyes, the fringe should be short, near the ears a little longer, the longest bead threads should be located at the edge of the crown. On each thread, draw small beads.
Coloring
For coloring you will need light blue, blue and dark blue pencils.
Procedure:
- Color the crown with a blue pencil, without touching the stones and beads.
- Color the beaded fringe.
- Use a blue pencil to color all the stones, as well as the beads sewn on in 2 rows.
Use a dark blue pencil to outline the drawing.
Pattern variations
The Snow Queen's crown can be drawn using various materials. The main thing is to preserve the appearance of its shape and paint it in the right colors. In the article, you can look at step-by-step instructions for drawing beautiful crowns of different shapes, as well as choose an image for copying.
The crown as a detail of the costume
The Snow Queen's crown (the drawing should be done on paper with a density of at least 200 g/m2) for a carnival costume can be made by hand. First, you need to draw a pattern of the decoration, then color it, cut it out with scissors, and fasten the ends. Before you start drawing, you need to measure the volume of your head using a measuring tape.
To color the picture you will need white and blue gouache, as well as a black felt-tip pen.
Procedure:
- At the bottom of the sheet, using a ruler, draw a line equal to the length of the head circumference +2.5 cm.
- Find the center of the line and mark it with a point.
- From this point, measure up a few centimeters (15 to 25). This will be the height of the front tooth.
- Determine the width of the teeth and make dot markings on the horizontal line.
- Using a ruler, draw sharp teeth, connecting their edges with dots.
- Draw a horizontal line under the base of the crown.
- Draw a large crystal in the center. Draw 2 small stones next to it.
- Trace the side and top of the crown teeth along the outline, creating a frame about 1 cm thick.
- Divide the crown into several parts with straight lines at an angle.
- Use an eraser to erase extra lines.
- Prepare 3 shades of blue paint. 1 – mix blue and white paint in a 3:1 ratio; 2 – mix blue and white in a 2:1 ratio; 3 – mix blue and white in equal parts.
- Paint the parts of the crown, alternating dark and light paint.
- Paint the diamonds with a medium saturation shade.
- Dry the drawing.
- Outline the crown with a black marker.
Now you can cut out the design with scissors and staple the edges of the crown into a ring.
Crown with balls on the corners
Such a crown can be drawn onto the queen in the picture, or drawn as a pattern and used to decorate a carnival costume.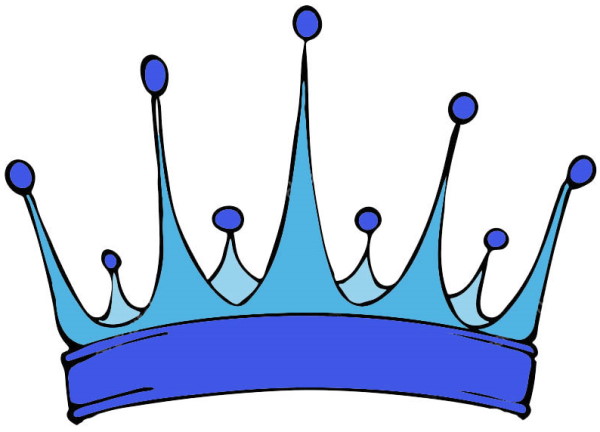
How to draw:
- Using a simple pencil, draw an arched line in the center of the sheet. If this is a pattern for a craft, the length of the line should be equal to the circumference of the head.
- Draw another line parallel to the previous one on top. There should be a small distance between them.
- Draw sharp and thin teeth on top.
- Draw small teeth between the large ones.
- Draw balls on the ends of each top.
- Color the crown base and balloons dark blue.
- Paint the middle part of the decoration blue.
Trace the outline of the drawing with a black marker.
Openwork crown
The Snow Queen's crown (the design made to decorate the carnival costume must be carefully cut out with a stationery knife) can consist of beautiful patterns, such as arches, curls, triangles and circles.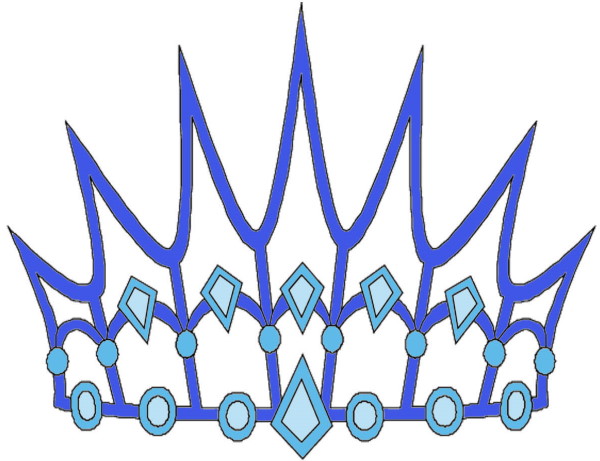
How to draw the Snow Queen's lacy crown:
- Draw a straight line with a simple pencil. This is the base of the crown.
- Mark the center of this line with a dot.
- Draw a line upward from the mark, which will indicate the height of the largest clove.
- Divide the crown base into 7 equal parts. Mark them.
- Draw the teeth schematically.
- Find the center of each clove. Make marks.
- Draw arched lines through each tooth. These will be the arches inside the crown.
- Leave 2 arches on the sides empty, and depict triangular crystals on the rest.
- Draw round stones at the base of all the arches.
- In the center of the lower part of the crown, depict a large crystal.
- Draw round stones in the center of the base of each tooth.
- Trace the lines that make up the crown to create a frame.
- Erase extra lines with an eraser.
Color the stones and crystals blue and the rest of the crown blue.
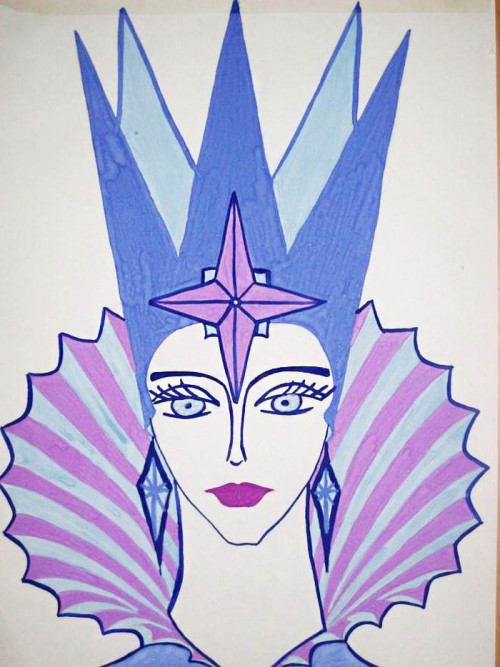
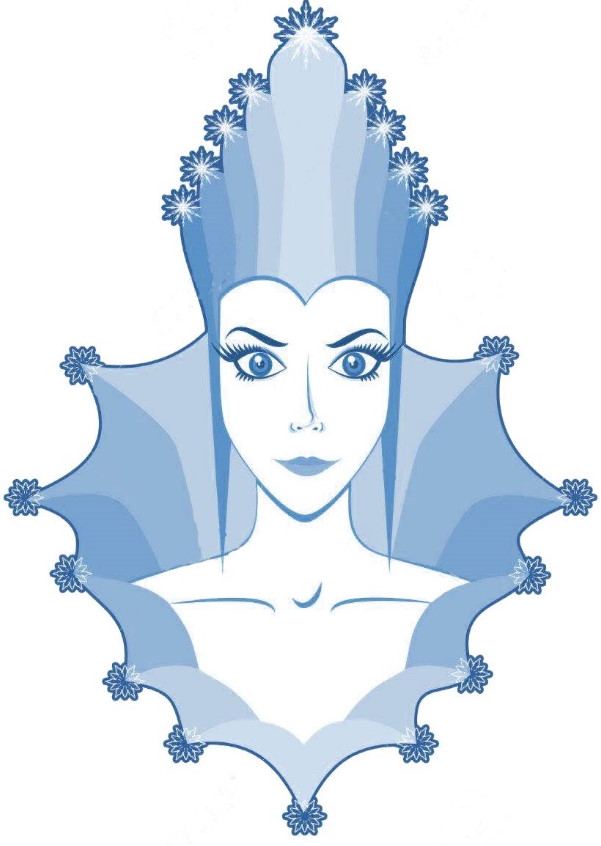
Pointed crown in the picture
The Snow Queen's crown (the drawing described in this master class is suitable for children aged 5 years and older) in this version does not have many details. It is decorated with only 1 large star.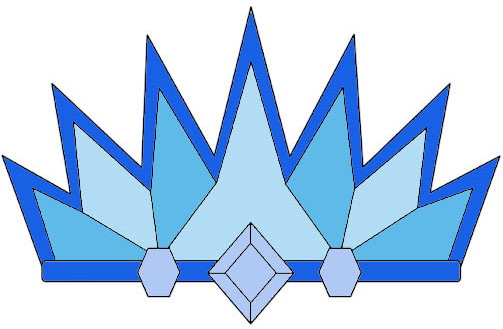
How to draw:
- Draw the queen's head. Finish drawing her shoulders.
- Draw a lush collar with sharp corners.
- Draw the queen's face.
- Draw an arched line above the eyebrows. This is the base of the crown.
- Draw 3 tall teeth. Their length should be the same.
- Between these teeth draw 2 higher ones.
- In the center of the crown, depict a large, four-pointed star.
- Use an eraser to erase extra lines.
- You can use any paints for coloring. Color the highest teeth light blue, and the shorter ones dark blue.
- Paint the star purple.
Trace the outline of the drawing with a dark blue marker and mark the edges on the star.
Ice Crown, Colored Pencil Drawing
Drawing an ice crown is easier than other options. Here you don’t need to measure anything with a ruler and try to maintain symmetry. In nature, there are no perfectly straight lines and clear shapes, so you can give free rein to your imagination.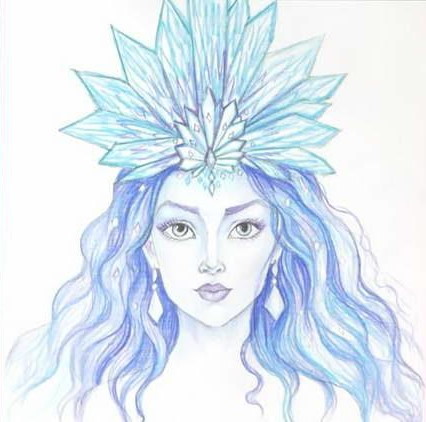
Algorithm of actions:
- Draw the queen's head with a simple pencil.
- Shape the face.
- Draw a sharp angle at the bridge of the nose.
- From the corner, draw 2 lines to the sides. These are the sides of the crown.
- Draw 1 tall crown tooth in the center.
- Draw the remaining teeth of any width and height, and in any quantity.
Shade the crown with a light blue pencil. Use a dark blue pencil to outline the drawing and highlight the shadows using short strokes.
Drawing with a felt-tip pen
When coloring a picture with a felt-tip pen, the transitions from one color to another are rough. Therefore, the crown should consist of several separate parts so that the colors of the details look harmonious.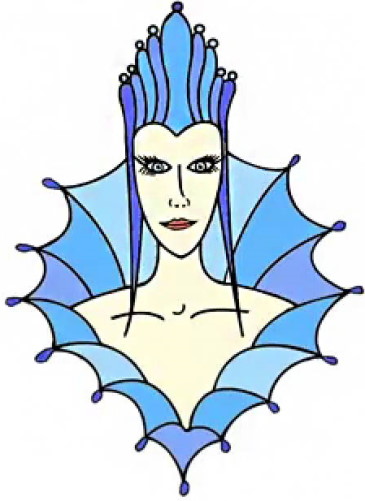
How to draw:
- Draw the queen's head with a simple pencil.
- Shape the face.
- Above the eyebrows, draw the base of the crown, consisting of 2 arched lines. The corner should be located above the bridge of the nose.
- Draw a thin line upward from the bottom corner. It indicates the height of the largest tooth.
- Use thin lines to outline the side parts of the crown.
- Draw the central tooth, slightly round its top. Draw a ball in place of the tip.
- Draw smaller teeth of a similar shape on 2 sides.
- Draw balls on all the tops.
- The side, smallest teeth, are lengthened so that their lower ends reach the queen’s shoulders.
- Color the central tooth, as well as the second ones on the sides, with a bright blue marker.
- Color the missing teeth blue.
- Use a dark blue marker to color the remaining teeth.
- Leave the balls white.
Outline the crown with a black marker.
Watercolor drawing
Watercolor allows you to make smooth transitions between shades, so you can draw a crown painted in a gradient style.
How to draw:
- Draw the queen's head with a simple pencil. Draw the face.
- Above the eyebrows, draw the base of the crown with a corner in the center.
- From the bottom corner, draw a thin line upward, equal to the height of the largest tooth.
- Mark the side parts of the crown.
- Draw a central prong with a rounded top. Draw a ball on the tip.
- Draw smaller teeth of a similar shape on 2 sides.
- Draw balls on all the tops.
- Extend the side teeth to the queen's shoulders.
- Lightly dampen the paper with a damp brush.
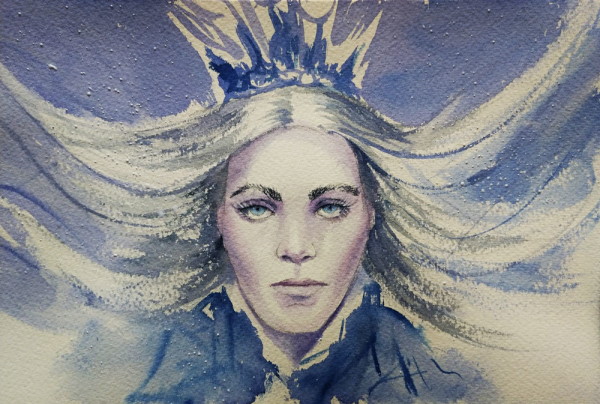
Using a thin brush, start painting the crown blue from the left edge to the center. You don't need to dip the brush into the paint. Each subsequent stripe should be a tone lighter than the previous one. Paint another part of the crown in the same way.
Black and white crown
The Snow Queen's crown (the drawing can be done with felt-tip pens, black gouache or artistic ink) can resemble a royal crown made of gold. To make the differences appear, you need to draw several snowflakes.
How to draw the Snow Queen's crown in black and white:
- Using a simple pencil, draw the base of the decoration in the form of an arched line.
- Sketch the lower part of the crown in the form of a flattened rhombus.
- Finish drawing the pointed teeth. The central one should be higher than the others.
- Use an eraser to remove excess lines.
- Give the bottom of the crown an oblong shape.
- Draw a wide rim with a stone in the center.
- Finish drawing the frame of the stone.
- Depict glare on its surface.
- In the center of the rim, draw several small circles and depict snowflakes inside them.
- Above the rim, highlight a wide line. Draw metallic highlights on it.
- Select the highlights on the bottom of the crown.
- Draw diamond-shaped stones on the ends of the teeth. The larger the tooth, the larger the stone should be.
- At the bottom, between the teeth, draw triangles, the base of which will coincide with the metal strip.
- Trace the tops of the triangles along the outline, creating a small frame.
- Mark the center of each tooth.
- Mark the edges on the top stones.
- Use an eraser to remove excess lines.
- Outline the drawing with black paint using a brush or felt-tip pen.
- Select all details.
- Paint over the highlights in a dark color.
- Highlight the shadows on the edges of the upper stones.
- Darken the teeth on the left side.
- Color the circles on the rim without touching the snowflakes (it’s easier to color with a felt-tip pen or pen).
When coloring a picture with pencils or felt-tip pens, you should highlight the shadows by applying strokes in one direction, otherwise the drawing will not look neat.
Examples of images for copying, tips for beginners
To draw a crown beautifully, you need to know a few secrets:
- The drawing that was made as a pattern for a paper carnival crown can be covered with glitter. To do this, mix PVA glue with glitter, and use a brush to apply glitter to individual parts of the decoration. Be careful with drawings made with gouache. It is better to apply glitter not with strokes, but with patting movements, so as not to rub the paint.
- You can outline the details not only in black, but also in dark blue or dark purple. These shades will visually soften the boundaries of individual details, and the crown will look more natural.
- It is advisable to paint the openwork pattern of the crown from the back side so that light paper fibers do not stick out between the patterns.
- The highlights on the stones and metal parts of the decoration can be highlighted with white paint after painting. The main thing is that the paint is thick and the brush used to apply it is thin.
It is not difficult to draw the Snow Queen's crown with your own hands. The main thing is to draw it in the correct shape and use suitable colors for coloring. If the main color has to be changed (there are no necessary shades of paint, it does not match the outfit, does not correspond to the style of the drawing, and other reasons), then it is necessary to add winter patterns so that the character's image remains recognizable.
Author: Frolova Ekaterina
Video about drawing snow queen
How to draw the snow queen: