Many creative professions are directly related to the art of beautiful writing. But calligraphy is not only enjoyed by designers. It can become a hobby for adults. Classes for beginners help develop cognitive abilities, and also help relieve stress and calm down.
Learning calligraphy is a difficult process, but following the recommendations of professionals will make mastering this art much easier.
What is calligraphy
The term has its roots in Ancient Greece. Literal translation: "beautiful handwriting".
In writing, calligraphers adhere to certain traditions and rules that determine the position of letters in the text. In the modern world, this is a unique skill that can even become a profession.
Calligraphy Tools for Beginners
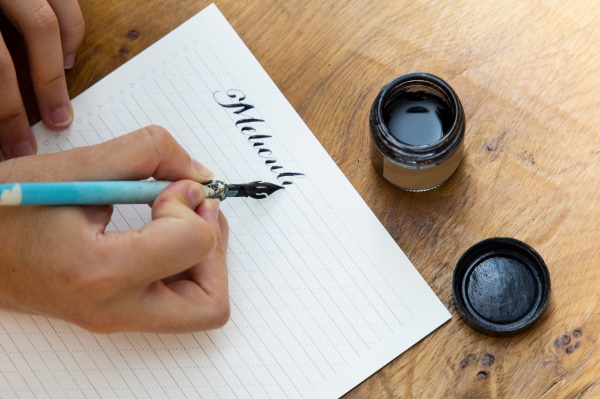
An important step in mastering calligraphy is purchasing the right equipment. Before you start working with a pointed pen, you need to learn how to use a fountain pen. The tool is a special holder with a metal tip. Thanks to its flexibility, you can experiment by making lines of different thicknesses.
Main tools:
- Feathers.
- Holders.
- Ink.
- Office paper.
Professionals recommend choosing tools from manufacturers who have proven themselves on the positive side.
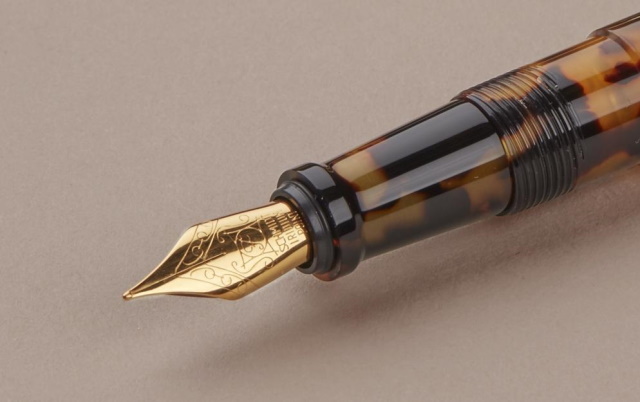
Selecting a Pen
Calligraphy for beginner adults can seem complicated. Learning begins with choosing special pens. Those intended for drawing and painting will not work.
Types of calligraphy pens:
- Pointed. These nibs are convenient to use for writing lines that smoothly transition from thick to thin, and vice versa, as a result of varying pressure intensity.
- Wide-pointed. The line thickness is adjusted by tilting the pen.
- Poster. Used to write large letters.
The latter type is not suitable for beginners. At the initial stage, it is recommended to choose a pointed or wide-pointed nib. A correctly selected tool will serve for many years.
Therefore, when purchasing, you should pay attention to the following criteria:
- The surface of the pen should be smooth, mirror-like, without chips, cracks or scratches.
- It is important that the tip of the tool is smooth and undeformed.
- A quality feather has teeth that are symmetrical and of the same size.
Beginners are advised to use a roller pen that is filled with ink. Experts advise purchasing a simple wooden or metal holder and a metal pointed nib. The beveled version is suitable for students who already have some experience in calligraphy. It allows you to change the angle and experiment, for example, when writing letters of the Latin alphabet.
Theoretical base for beginning calligraphers
Calligraphy is often compared to meditation. Measured movements calm and increase stress resistance. Exercises help develop aesthetic taste, perseverance and motor skills. Organization of the workspace is of great importance during classes.
Correct position of the pen
Calligraphy for beginner adults will be easier if you start learning by mastering the position of the pen:
- An even thickened line is obtained only under the condition of uniform opening of the teeth, which can be ensured by the correct positioning of the tool relative to the sheet.
- Parallel direction to horizontal lines of ruling will ensure the writing of elegant elements.
- When drawing thick diagonal or vertical lines, the hand should be turned so that the pen is parallel to the border along which it goes.

A perpendicular position relative to the sheet must not be allowed. The tip should not rest against the paper. Otherwise, the pen will not open and will tear the sheet.
Basic movements. Hand positioning
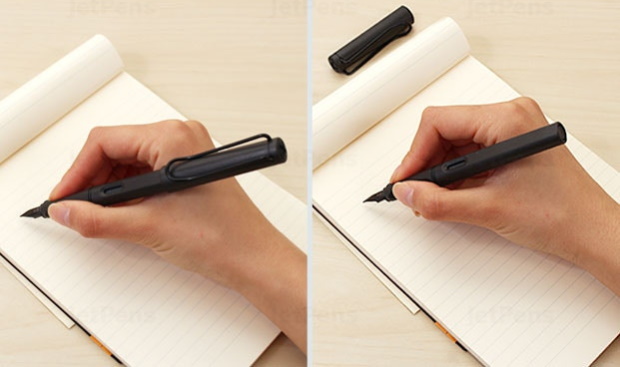
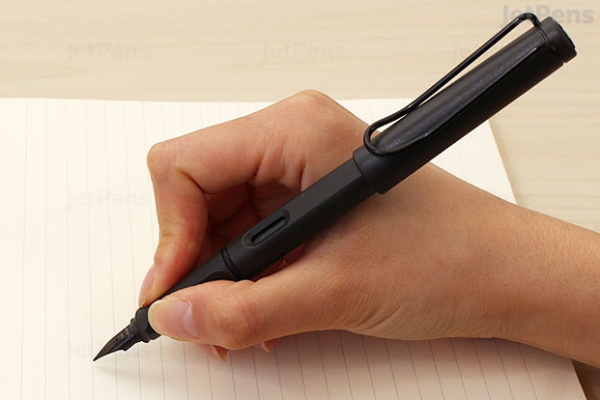
It is important to place your hand correctly:
- Place your palm parallel to the paper, at approximately a short distance from it.
- Clench it into a fist.
- Take the pen between your thumb and middle finger, place your index finger at the base.
- Hold your hand on the nails of your ring finger and little finger.
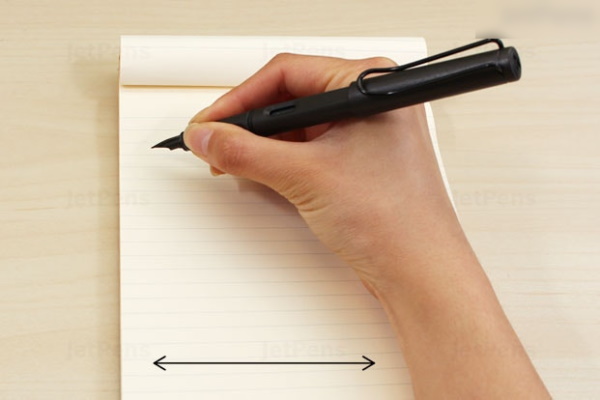
There is no need to squeeze hard. Only a relaxed brush will allow you to make correct lines.
Working with calligraphy copybooks
Masters recommend starting work with calligraphic copybooks. Visual perception allows you to copy the style. You can use copybooks for first-graders. Beginners are better off starting training using a simple pen or pencil.
Basic Calligraphy Exercises for Beginners
Calligraphy for beginner adults is a great way to improve your handwriting.
Exercises for a sharp pen
The beginner's course consists of four exercises on writing slanted and vertical lines, which will later be used to form letters. The difficulty of execution lies in adjusting the degree of opening of the pen to regulate the thickness of the strokes.
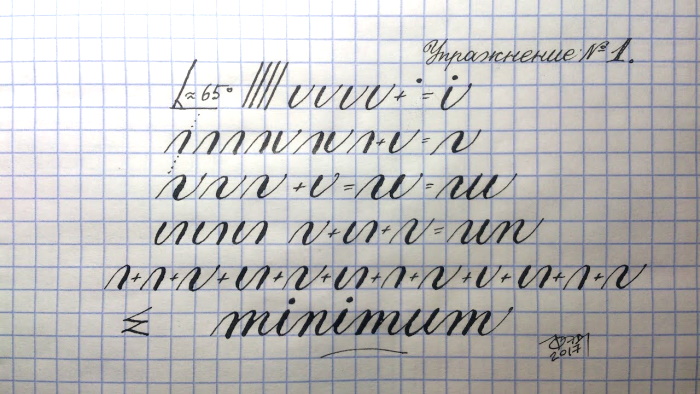
The exercises train the ability to smoothly decrease and increase the pressure. The peculiarity of the work of a sharp pen is that when the pressure increases, its antennae diverge, forming a thick line, and with a light touch - a thin one.
Basic exercises for a sharp pen:
- Start drawing a line from top to bottom by pressing the pen, so that the antennae separate and the pen begins to supply ink. Make a thin line next to it, barely touching the paper. Try to make them at an angle and keep the same interval between them. This exercise will help you understand the principle of operation of a thin pen.
- Connecting lines. Start from the bottom up with a thin line, smoothly turn at the top and continue to draw the pen down, pressing harder. It is necessary to monitor the distance, focusing on the thick line. Observe the slope. Try to make the smoothest transitions. You can increase the scale, capturing 2-3 lines.
- Exercise on writing rounded elements. Draw the pen from top to bottom, increasing the pressure at the beginning and weakening towards the bottom. Draw a thin line from bottom to top. Continue doing the exercise, forming a spiral. Keep the distance between the rounded lines, focusing on the thick elements.
- Horizontal writing. Start drawing a thin curved line from the bottom line. Increase the pressure on the pen and draw a horizontal line downwards, gradually reducing the pressure. Make a thin curl upwards and draw a line downwards, curl again, without pressing on the pen until the thick segment begins. You should get some kind of horizontal eights.
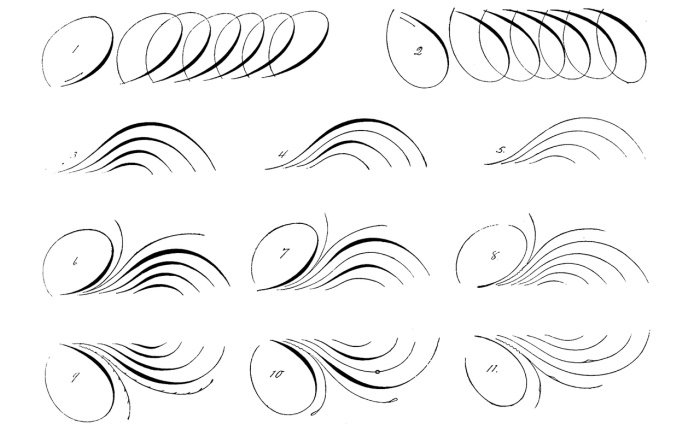
Calligraphy Lesson "Alphabet"
Beginners who want to learn how to write letters with monograms need to master the writing of the basic elements of letters.
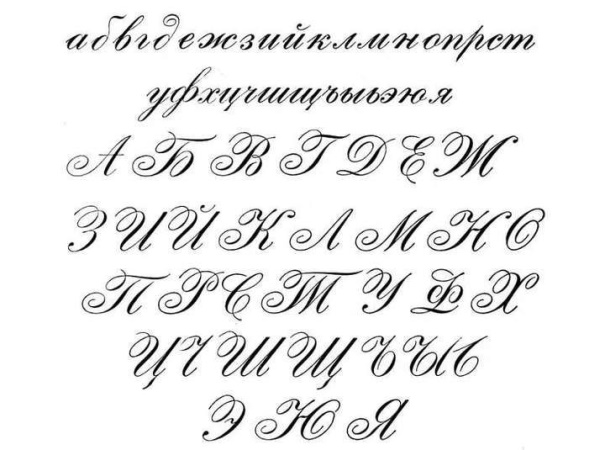
The following exercises will help with this:
- The flame-like line is slightly curved, reminiscent of a candle flame. To depict it, draw a thin stroke from top to bottom, smoothly turning into pressure, and finish with a thin, curved left stroke. Often this element is combined with a knot ending in the same cell as the thin stroke.
- Auxiliary elements. Start the vertical stroke with a dotted pressure, then loosen it, smoothly bending your fingers down and to the right, draw an oval with a thin line and lead it to the corner of the cell on the right.
A horizontal thin line with a beautiful loop: start by stepping back from the upper border, draw a thin line downwards, then write an oval by pressing lightly on the pen and finish the loop with a circular motion at the upper border.
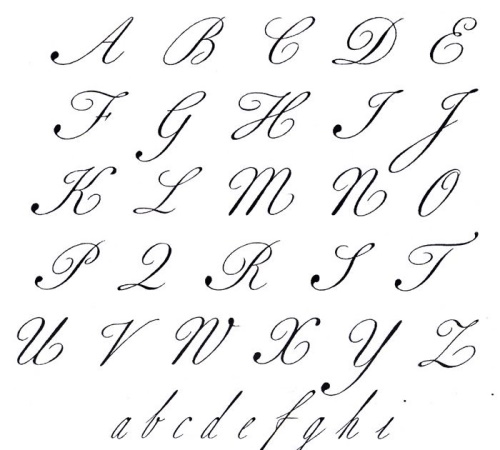
- Right and left semi-ovals. They are located in the boundaries between the slanted lines, and only the lower end in the form of a thin connecting stroke protrudes slightly. Similarly, write semi-ovals to the right.
- The lesson should be finished with an exercise in writing auxiliary loop-shaped strokes.: initial loop and rounding, wavy element.
Calligraphy Lesson "Numbers"
When depicting numbers, the same elements are used: thin and regular strokes, ovals and semi-ovals, auxiliary elements.
Arabic numerals in calligraphy are divided into 3 groups:
- First - 1, 7, 4;
- Second - 3, 6, 5;
- Third – 0, 2, 9, 8.
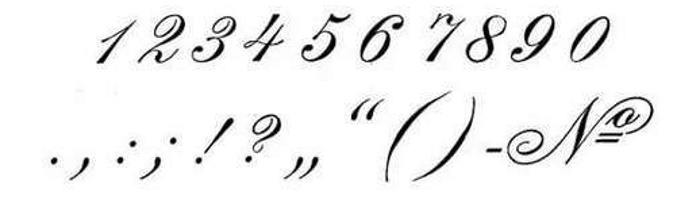
Exercises:
- Write the number 1 without a thin stroke, in 1 movement. Write 4 and 7 in 2 movements. In this case, write 7 with an extended “leg”, which makes it easier to perceive the digital values.
- The main element of the 2nd group is the semi-oval. Write the number 6 with pressure on the semi-ovals in 2 movements. Write the number 5 in 3 measures.
- The main element of group 3 is an oval. When drawing the number 2, start the movement from the top, making an oval to the left, then draw a right semi-oval, and finish with a wavy stroke at the bottom. Write the number 9 in the same way, but with a large oval, which ends with an almost straight stroke with pressure. Write the number 8 from the top and to the right with 2 movements.
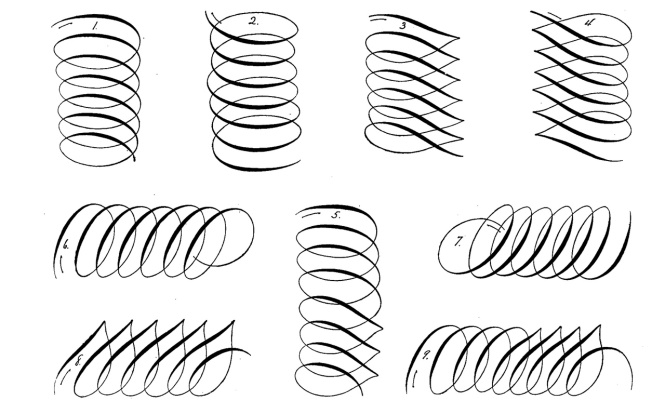
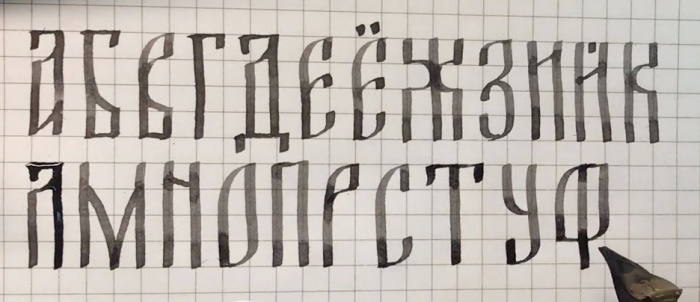
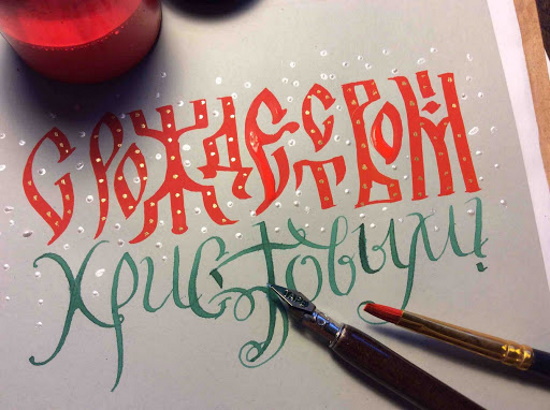
Calligraphy lesson "Slavic ligature"
Simplified writing of Slavic script for beginners. Exercise to be performed on a sheet of paper in a box with a broad-tipped pen. Hold the pen at 90° relative to the sheet. Perform movements with the whole hand.
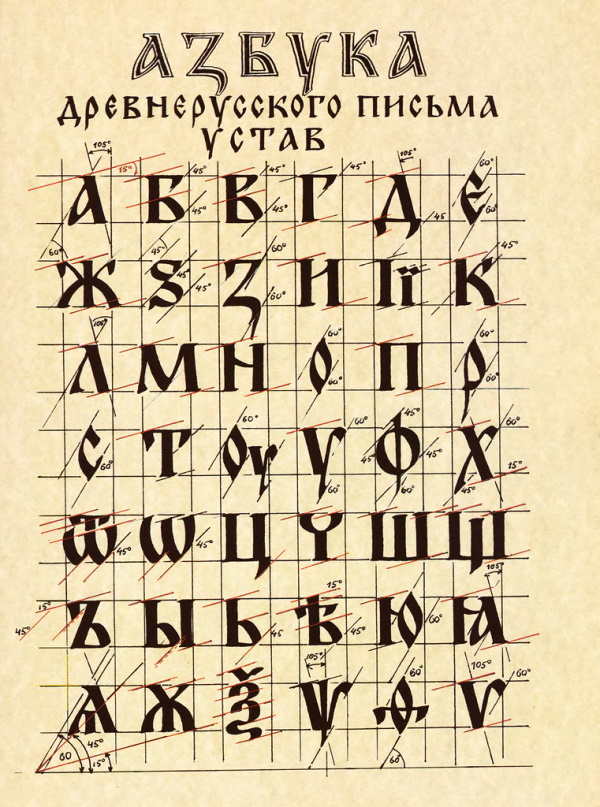
Basic exercises:
- Sticks. Make a short horizontal line with a wide pen, lightly touching the pen. Draw it down 2 cells. Continue writing sticks, increasing to 5 cells down. Then in reverse order.
- Comma. Make a notch with the pen at the top. From there, draw the pen, gradually moving to the left, right or middle, ending with a thin stroke.
- Lines. Draw horizontal thin lines, holding the pen strictly perpendicular to the sheet of paper. To draw vertical lines with a beveled top edge, place the pen slightly obliquely to the right or left. Draw a line of 4-5 cells.
- The letter "Az". Draw a thick vertical line of 15 cells. From the top to the left, make a horizontal thin line of 2 cells. In the last one, make a comma with a tail in the middle. Indent 4 cells, write a vertical line with the upper edge beveled to the left. Connect the top with a thin line to the main vertical line.
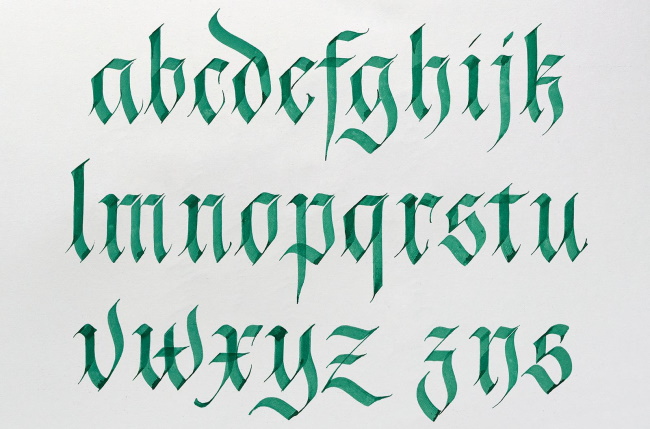
Gothic calligraphy
Calligraphy for Beginners Adults includes lessons for those who want to master the Gothic style of writing. The basic rule of this direction is the position of the pen to the surface of the sheet at an angle of 45°.
In Gothic calligraphy, there is a rule for the ratio of the thickness of the pen tip to the height of the elements, according to which it corresponds to:
- Capital letters - 6.
- Lowercase - 4.5.
- Ascending and descending - 2.
For exercises, use a sheet of paper with lines corresponding to the width of the pen or special copybooks.
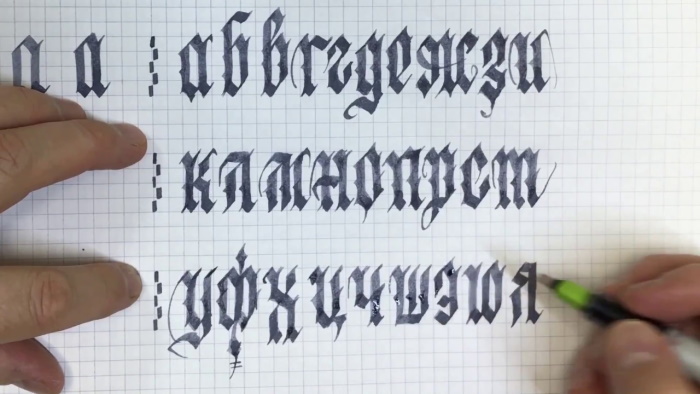
On paper prepared for Gothic writing, the following must be present in each line:
- upper and lower boundaries;
- two additional lines at the top and bottom;
- an additional line at the top between the lines for lowercase letters and ascenders.
The pen moves from left to right, or from the top stroke to the bottom.
Writing Hieroglyphs. Rules and Basic Features
When drawing hieroglyphs, the sheet of paper must lie strictly perpendicular to the table at 90°. They consist of basic features, having mastered which, you can learn to draw them beautifully.
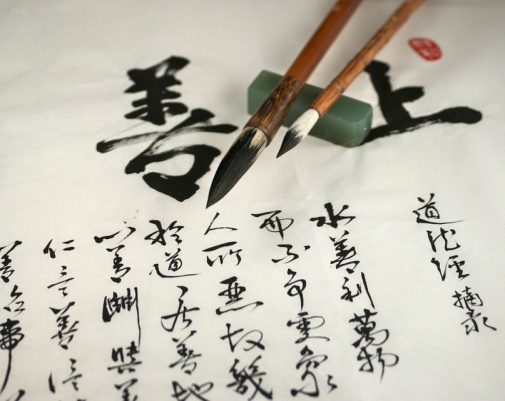
The main features of hieroglyphs for calligraphy:
- vertical;
- horizontal;
- deviated to the right and left sides;
- ascending;
- inclined intersecting;
- point right and left.
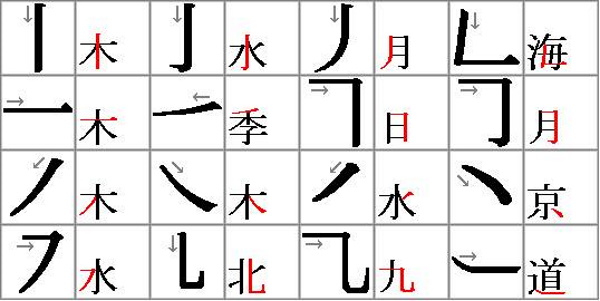
Writing rules:
- Write the hieroglyph from top to bottom and from left to right.
- First, draw horizontal or broken lines, then folding and vertical ones. Then write the lower non-intersecting one.
- Hieroglyphs with a left-leaning and right-leaning stroke should be written first, then the second.
- Draw the outer contour lines first, then the inner ones. Only then start drawing the horizontal lines that close the contour.
- Hieroglyphs with a vertical hook to the left, surrounded by similar strokes on the right and left, first make the central stroke, and then the rest of the elements.
- Lastly, write the period on the right.
- A hieroglyph consisting of a left-facing and a right-facing slant, starting with the first element and ending with the second.
- The wide horizontal line that emphasizes the character, and whose ends extend far beyond it, is written last.
- In hieroglyphs where the vertical line is located to the left of the horizontal line and does not intersect with it, first output the first element, and then the second.
- Any hieroglyph must fit into the framework of a certain square. Small ones are written enlarged, and large ones - on the contrary, densely. Going beyond the framework is not allowed. Therefore, when learning, it is recommended to use a sheet in a cage.
Brush Calligraphy Basics
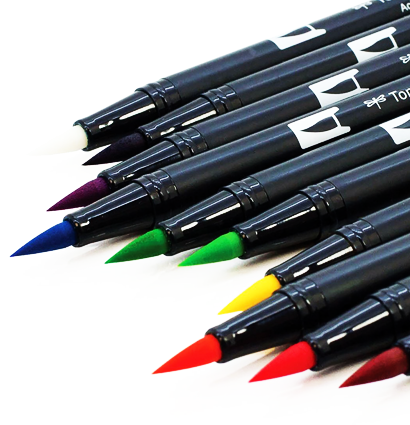
Brush calligraphy is especially fun for kids. For beginner adults, it is preferable to use a modern tool - a brush pen., which is a marker with a brush-shaped tip.
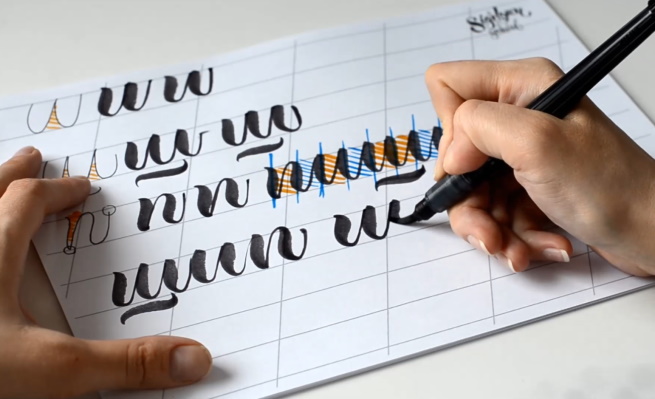
It is recommended to write elements on an inclined surface, but it is also possible on a horizontal one. A soft and flexible brush with stronger pressure allows you to create thick lines.
It is important to hold your hand correctly. To write thin strokes, hold the brush by the top. When writing thick lines, keep your fingers closer to the bristles. Hold the tool with your middle, index and thumb fingers. Dip the brush in paint or ink after each use.
Common learning problems and solutions
The main problems and methods for eliminating them when teaching calligraphy:
- The pen scratches the paper. The tool is held at a sharper angle relative to the sheet.
- Dashed line. The pen should be tilted closer to the table.
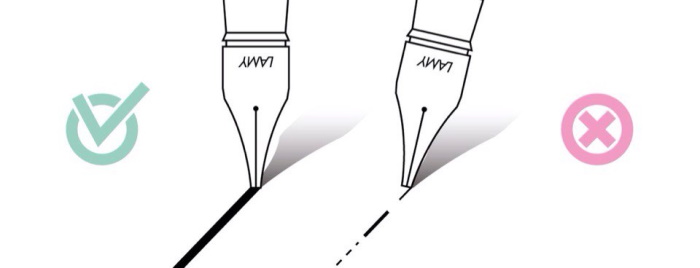
- A uniform downward stroke is not obtained. It is necessary to check the correct positioning of the hand, whether the ends of the pen slits touch the sheet with the same force.
- The ink is bleeding. This is due to poor quality paper. It needs to be replaced.
- The hand is shaking. Any exercise should begin with a warm-up to warm up the muscles.
Where to apply calligraphy skills
Typewriting and book printing have supplanted calligraphy, despite this, the art of beautiful writing remains in demand in the modern world. Handwritten inscriptions are still used in interior design and icon painting.

Calligraphy has acquired a special value due to its individuality, it is actively used by designers, home bakers, wedding planners, event planners, urban environment planners, as well as those who want to highlight their message and individualize it.
Branding and design
Calligraphy has recently become increasingly popular. It is used to create logos, design posts on social networks. You can see this just by going outside. Logos and signs are designed using calligraphy. Inside cafes, you can often see walls with menus written in chalk.

The style is ideal for advertising and designing environmentally friendly products. Handwritten lettering will emphasize the “naturalness” of the brand. Calligraphy is an additional skill that any modern designer should have. Sketches can be written by hand, and then converted to digital format and finalized.
Creating fonts
Calligraphic fonts are used in the design of postcards, invitations and informal documents. A separate area is the creation of calligraphic writing.
Handmade cards and invitations
Learning calligraphy allows you to make original handmade cards for friends and family.
Having mastered the art of beautiful writing and developed your own individual style, you can accept orders for the production of exclusive invitations to special events and postcards.
Painting clothes
Using fabric paints, you can transform a white T-shirt, shoes or accessory into an exclusive, designer wardrobe item. You can apply the inscriptions by hand, or draw a sketch and send it to print.
Interior and exterior painting
Fans of large-scale works can try their hand at painting walls, floors or furniture. The story of calligrapher P. Lampas is a vivid example of the use of calligraphy as a successful commercial project. By painting walls and selling large canvases, the young artist earns good money.

You can start learning calligraphy at any age. The Japanese introduce children to this art from the age of 2. For adults, classes are no less important. They will help to reveal internal resources and are an excellent training for brain activity.
Calligraphy for beginners has a positive effect on a person's psycho-emotional state. The art of beautiful writing can become not only a hobby, but also an additional income.
Video about calligraphy
Calligraphy for Beginner Adults:
This is the most complete and understandable guide I have found! I will add to my favorites