Sew up a hole in clothes in such a way that no one would even suspect its existence – this is art. The main ways to achieve this result are the use of different types of darning and some life hacks.
Before you start sewing, you need to carefully consider the size and degree of unevenness of the hole, and also keep in mind the type of damaged fabric. A narrow tear in a straight line is much easier to sew up than a large tear with snags.
How to sew up holes in clothes correctly
Darning means replacing the fibers of a fabric with new thread after they have been lost due to tearing, burning or wear. If the repair is done perfectly, the garment can be completely invisible. The invisible darning method requires considerable experience and practice.
The basic guidelines and requirements for quality clothing repair are as follows:
- To make the seam look almost perfect, you should always remember an important rule: the thread used for darning should be the same color and the same thickness and texture as the fibers in the fabric of the garment being repaired. Only if the stitches are not visible on the front side, you can ignore it.
- If the fabric is thick and hard (denim, leather or multi-layered), you need to use a sharp, massive needle to pierce it without much effort. If the material is soft or thin, you can take any needle, but it is still advisable to choose a thinner one.
- The size of the needles depends on their gauge - the larger the product, the smaller it is. For example, an 8-gauge needle is very thick, so it is best suited for heavy woven materials, and 16-gauge is one of the thinnest, so it is chosen for darning more delicate fabrics.
- For knitwear, you need to use a needle with a rounded tip, and for woven materials, use a needle with a sharp tip.
- Cotton, nylon, silk, jute, mixed and any other thin and soft fabrics are best sewn with lighter needles, the length of which can be 3-5 cm or even more. If you use a thick needle (about 1 mm thick), visible holes may remain in the material.
- It is acceptable to wear a thimble to avoid pricking your finger while darning. If your hand hurts, use a hard board to push the needle through thick fabric. Some heavy materials, such as denim, need to be pressed against a flat, stable surface.
- It is important to make sure that you have enough thread. To make an approximate calculation, you can put the thread on the torn area of the item and measure about 25 cm more than it seemed when measuring. A neat darning will require a large volume of thread, plus you will need an additional piece of it longer than the needle to tighten the last securing loop. It is necessary to take into account: the thicker the fabric, the more thread you will need. You can take twice as much if the material is thicker than 5 mm.
- When inserting the thread into the needle, you need to make sure that its tip is tight and not split. If it is separated into fibers, you should wet it, then roll it into one piece with your fingers so that it easily passes through the eye of the needle. If problems arise, you can also use a special threader.
- Once the thread is inserted, you will need to tie a small knot at one end to prevent it from slipping out of the fabric after the needle.
- If you plan to mend a torn garment made of knitwear, you will have to put in more effort. Knitted items have much larger gaps between the fibers than other fabrics. First, you will need to tie a knot in the thread with a needle to hold the end in place.
Basic methods
There are several ways to sew up a hole (life hacks and original ideas will help make this place completely invisible). This depends on the size and complexity of the damage, as well as the thickness and structure of the torn fabric.
Hand darning
Careful hand sewing is the best way to make darning stitches. It is necessary to use the thinnest needle – only in this case the result will be perfect. In addition, it is advisable to pull the sewing thread from the thing being repaired itself (longitudinal fibers from an inconspicuous area). If this is not possible, choose nylon or silk thread for thin fabric, and cotton for thick fabric.
Basic rules for hand darning:
- Avoid choosing a highly twisted thread that will show through on the fabric.
- Darning stitches are made from the back side.
- The stitches are placed over a larger area than from edge to edge of the hole.
- When sewing, do not use tight stitches, especially towards the end of a row (with subsequent washes, the thread will shrink and the seams will become visible as folds).
- First, the seams are sewn in the direction of the longitudinal grain.
- It is necessary to constantly make small and even stitches.
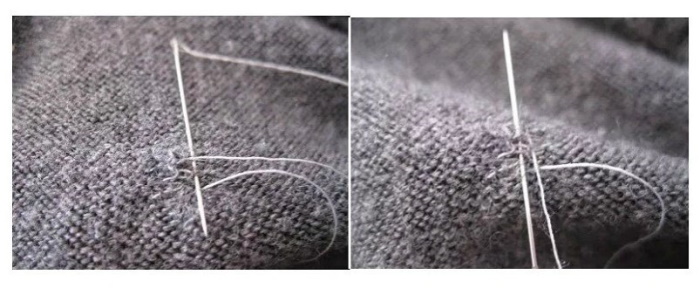
The process of hand darning is carried out as follows:
- It is necessary to trim the uneven edges of the hole along straight lines and place them as close to each other as possible.
- After forming the smallest possible hole, you need to make a mark around it at a distance of 1-1.5 cm from the edges, and secure the fabric in this position by tightening the loops in a circle.
- Next, starting from the top corner, make continuous stitches parallel to each other. It is important not to forget to go through the same number of fibers in the fabric each time (for example, 1 or 2).
- When passing the thread through the hole, it is obvious that you will not be able to make any running stitches, so you just need to make them straight, connecting the edges.
- The rows of darning should be spaced equally apart and should go through the same number of fabric fibers everywhere.
- When the stitches reach the beginning and end of each row, you need to wrap small loops of thread - this will help prevent the thread from shrinking in the future and avoid folds.
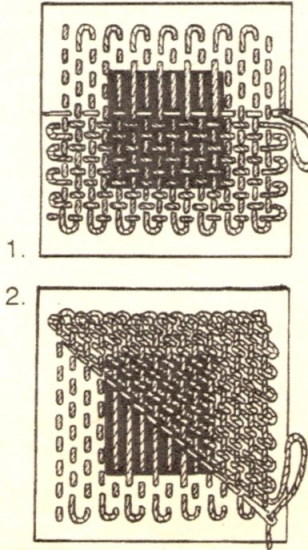
- Once you have finished covering the stitches lengthwise, you should begin doing them crosswise, using the weaving technique. This requires alternately wrapping and leaving the crosswise fibers untouched, and repeating the same over the hole. This process practically weaves the fabric back into its original state.
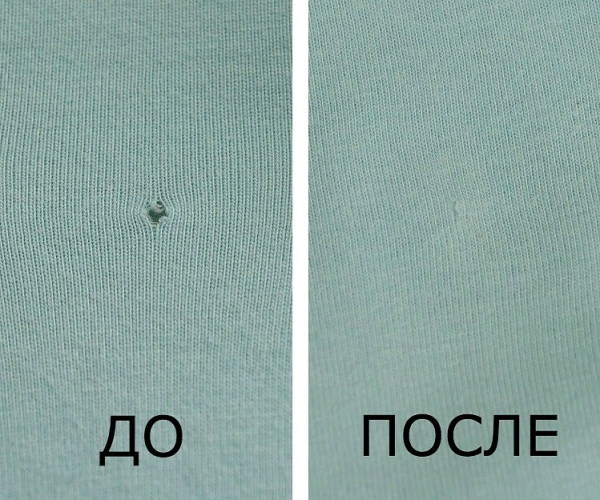
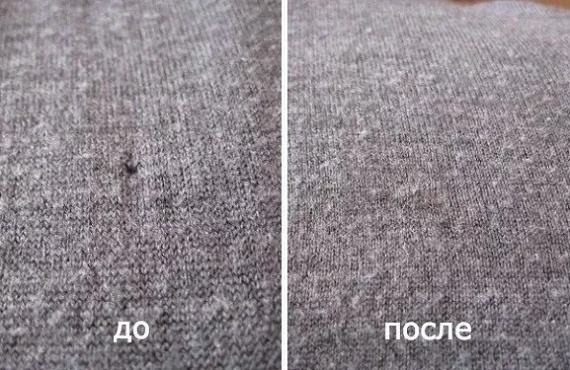
Once the work is completed, the darned area will look completely integral - as visually natural as the original fabric.
There are different types of darning, each of which allows you to make clothing repairs invisible.
| Type of darning | Peculiarities | How to do it |
| Straight | Connects fabric tears in a straight line without gaps between the edges of the damage. | 1. A straight tear may have loose threads and uneven edges - just fold them carefully to make the joint look smooth. 2. Attach a piece of stabilizing fabric to the folded tear. This will ensure that there is no gaping space when the edges are sewn together. 3. Then make the same darning stitches as described in the main instructions, over the straight tear. |
| Diagonal | Repairs severe and large irregularly shaped tears. | The first lengthwise stitches are made as described in the basic instructions, but the crosswise weave is made diagonally. This provides a more flexible darning, but not as invisible and concealing as the regular one. |
| Visible | If the darning cannot be made invisible, it is sometimes done with a contrasting thread to make it
decorative element. | The darning should be done according to the basic instructions, but the stitches should be done with a contrasting colored and thick thread instead of an inconspicuous and thin one. The result will be very noticeable and eye-catching - this allows you to disguise traces of clothing repairs as a decorative element, if you can’t make it hidden. |
| Machine | Recommended for thick and heavy fabrics that are difficult to repair manually. | Place a removable stabilizer or fine mesh under the hole and sew darning or zigzag stitches (depending on the type of sewing foot you have attached) very close together, covering the damaged area and replacing the lost fibers with thread. |
Patch
You can also sew up a hole (life hacks allow you to make traces of complex repairs into a decorative element) if a piece of fabric is missing. To do this, you will need two new fabric scraps - to replace the missing fragment and the outer patch.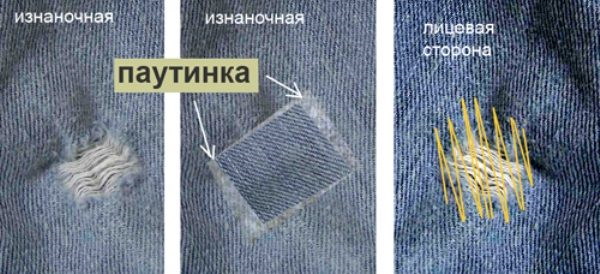
The process of repairing an item is carried out as follows:
- You need to estimate the size of the missing piece of fabric. The most difficult type of holes to mend are worn or torn areas, as well as frayed areas on the knees of trousers or on the elbows of a jacket. You should not try to mend such damage without an internal patch - this will only wrinkle the fabric, change the shape of the garment and create an untidy appearance.
- If the hole is worn through to the seam line or somewhere in the middle of the garment, it is necessary to reinforce this area. To do this, you need to cut a small piece of fabric of the same quality and color as the item being repaired to the required size and place it under the edges of the hole, face up.
- Then you need to move the edges of the hole as close to each other as possible without wrinkling the fabric.
- Using a small zig zag stitch on your sewing machine, stitch around the edges of the damage, catching as much of the fabric (added and repaired) as possible so that the patch will hold well.
- Sew a new piece of fabric over the repaired area, carefully selected by size (using machine stitches or by hand). If the clothes are casual, it is recommended to use additional pieces of fabric in a contrasting color or with a pattern to form and sew patches in several places, and not just over the repaired damage. This will make the traces of the repaired item a design element.
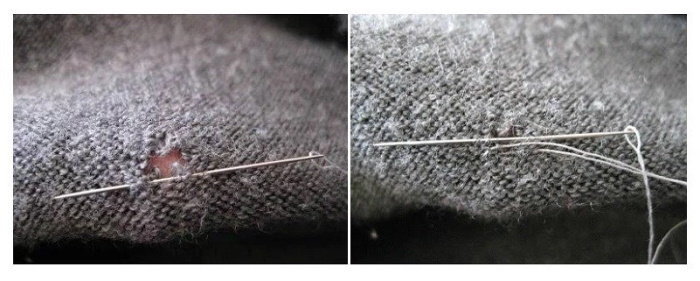
How to sew up a hole in knitwear
Sewing up a hole (life hacks for stretchy and stretchable fabric) on a knitted item is not the easiest task, but it is doable. This type of clothing repair simply requires a different approach, which requires following certain rules. At the same time, the instructions for sewing up a hole in knitted fabric include only a few steps.
The most recommended and easiest way to repair torn knitted clothing is to sew on patches.
To do this you will need:
- sewing machine;
- machine sewing needle for stretch fabrics (size 10 recommended);
- sewing pins;
- polyester thread (it is necessary to match its color as closely as possible to the clothing being repaired);
- a piece of knitted fabric to form a patch.

The process of sewing up a hole in knitted fabric is performed as follows:
- From a spare piece of knitted fabric, cut a patch that is 2-3 cm wider than the hole in the garment.
- Place the prepared piece over the damaged area of the item and pin it in place.
- Using a zigzag stitch, sew the patch to the fabric. If it covers a large hole, you will need to stitch it several times for strength and reliability. If the patch is compact, it is enough to stitch it from side to side several times.
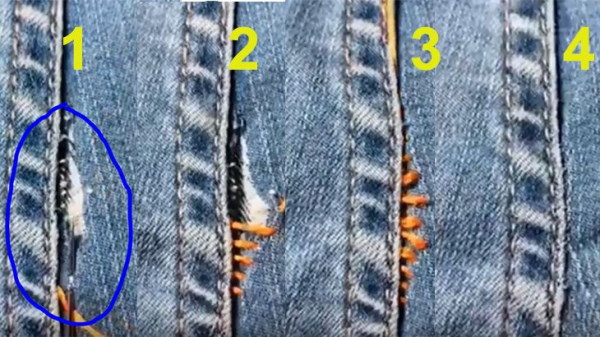
How to mend a hole in jeans
There are many life hacks that allow you to sew up a hole in jeans neatly and unnoticeably. However, there is no single most correct or recommended method. Experts recommend choosing a method based on the size of the damage and the desired style of repair.
One of the popular options is to sew up the hole with a machine stitch from the inside:
- Cut off any loose threads from the edges of the hole.
- Turn the jeans inside out and sew them with a zigzag machine stitch, repeating it several times.
- If the hole is too big, you will need to add an internal patch, which can be secured with a straight or zigzag stitch.
How to sew on a jacket or down jacket?
Repairing a jacket or down jacket is a difficult task for many people, since synthetic slippery fabrics with a bulky lining are extremely rarely items for sewing at home. There are several ways to repair demi-season or winter clothing.
Polyester jacket with synthetic padding
If the damage to the surface of a polyester jacket is significant and cannot be mended with darning threads, a patch must be prepared. As a rule, such items come with an additional piece of fabric in a separate package. If this addition is missing, a new piece of the same fabric must be selected and purchased.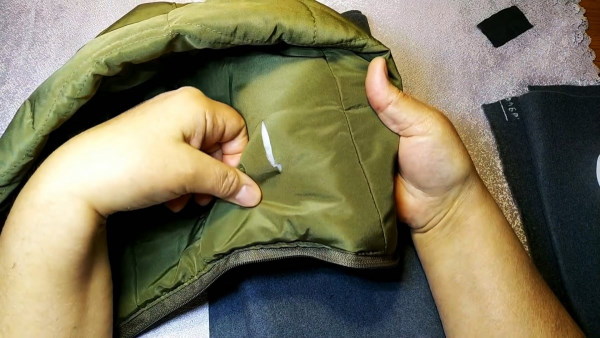
In addition, you will need:
- patchwork;
- large, sharp scissors;
- sewing glue.
The process of mending a hole in a polyester jacket is as follows:
- It is necessary to cut off all pieces of thread sticking out from the damaged area of the jacket.
- Cut a patch to match the size of the hole (but slightly wider).
- Apply sewing glue to the back of the prepared patch and attach it over the damage.
- Press down on the jacket with a heavy object and leave overnight for the glue to dry.
Bologna jacket
Since bologna is not the easiest fabric to sew and mend, it is recommended to glue small damages on a jacket made of it. You will need instant glue, a decorative patch of a suitable color and a solvent.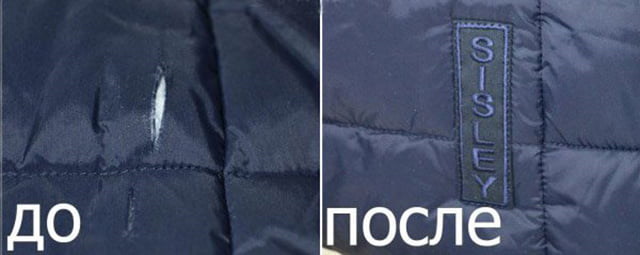
The process of restoration of damaged bologna clothing is carried out as follows:
- Cut out a patch of appropriate size.
- On the reverse side, wipe the fabric areas in the cut areas with acetone to remove any greasy stains.
- Apply a thin layer of instant glue to the back of the patch.
- Move the edges of the hole on the jacket towards each other and seal with a patch.
- Place the jacket under a heavy object overnight.
Down jacket
If a small hole appears on a down jacket, it can be sewn up by hand without using patches or stripes.
It's done simply:
- Cut off any hanging threads from the edges of the hole.
- Carefully rip open the damaged part of the down jacket along the seam and turn it inside out.
- Sew up the damage from the inside with small, even stitches, and then sew the item back along the seam.
On the pants
To repair damaged trousers, you can use the instructions for jeans, taking into account the characteristics of the fabric (stretch or not). The methods for sewing up holes also depend on where they are formed.
Rupture at the seam
This type of damage is very easy to stitch up:
- Thread the needle and tie a small knot at the end.
- Insert the needle into the damaged trousers from the inside so that the knot at the end of the thread is hidden.
- Thread the thread with a small stitch and pull it out at the edge of the seam fold.
- Sew the edges of the tear with small, even stitches, catching a few mm of fabric on both sides.
- Next, sew the two halves of the trouser leg with a thin needle (no thicker than 6 mm), using the straight stitch technique. At the end of this step, the needle should be on the front side.
- Pull it to the wrong side and begin sewing the edges of the seam that has come apart, pulling the thread and moving the parts of the fabric.
- On the final stitch, pull the needle through the loop of thread and tie a knot, repeat 2-3 times.
Holes on the knees
If you need to neatly sew up a hole in your trousers at the knee, the easiest way is hand sewing.
The process of execution is as follows:
- Use sharp scissors to remove any threads hanging from the edge of the hole.
- Turn the product inside out and sew with small stitches, then repeat the stitch several times over the completed lines.
- Tie the remaining thread 2-3 times into a knot and cut off the excess.
- Iron the repaired area of the trousers with a hot iron to make the seam less noticeable.
Lifehacks
Sewing up a hole (there are numerous life hacks and original methods) is not too difficult if you follow all the requirements of the step-by-step instructions.
In addition, sewing and clothing restoration experts offer some additional tips and recommendations:
- The best patch for repairing clothes is one made from fabric cut from the same item. The patch can be taken from anywhere where there is excess material - a wide turned edge, facing, increased seam allowances. If you manage to cut out 2 identical pieces of fabric to make one internal patch and one external, and fix the latter using the invisible stitch technique, the traces of the repair will be completely invisible.
- A patch made of a colorful material is applied only to items of similar colors. When applying patches to fabric with a pattern and a checkered pattern, patches that are fully compatible with the base are used.
- One of the best methods to cover holes unnoticed is to combine darning stitches with the addition of a patch. You need to select a fabric of a suitable color and similar quality, or a contrasting knit patch. In the second case, traces of clothing repair are disguised as a decorative solution, so it is recommended to sew the patch with thick and bright threads using large, noticeable stitches.
- You can also hide the traces of a hole being mended using embroidery. The advantage of this method is that you add decorations at the same time as repairing the clothes. However, in some cases it is impossible to completely hide the damaged fabric under the embroidered design – even if you make it voluminous and multi-layered, the thickness and structure of the area stands out compared to the rest of the area without damage.
Other life hacks that allow you to mend a hole in clothing and disguise the seam include creating a design from sewn-on rhinestones, beads, and complex appliques.
Video about sewing holes
How to sew up a hole nicely and neatly: