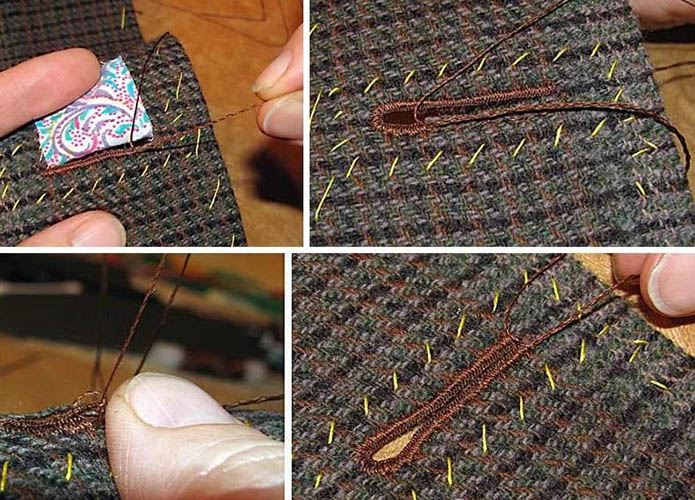
Loop of threads, created by hand, often acts as a partner for a button on a clasp or a hook. However, before creating a part, it will be necessary to initially determine its future location on the product, considering that clasps with such loops are acceptable to use in those areas on finished items where they will not experience high loads, otherwise they may break.
The thread detail should not be exposed, so it should be located inside the product. To obtain a less noticeable loop, it is recommended to use threads that match the tone of the main material.
How to make a chain stitch by hand?
You can make a buttonhole by hand in the form of an airy chain of threads, which will perform functional and decorative functions on a dress or blouse.
Often, the fabric of the product, a roll, a round or corset cord are used to decorate the air loops. You can also use regular threads to create the details. However, in this case, the fasteners should not experience high loads, since they can break, unlike traditional options.
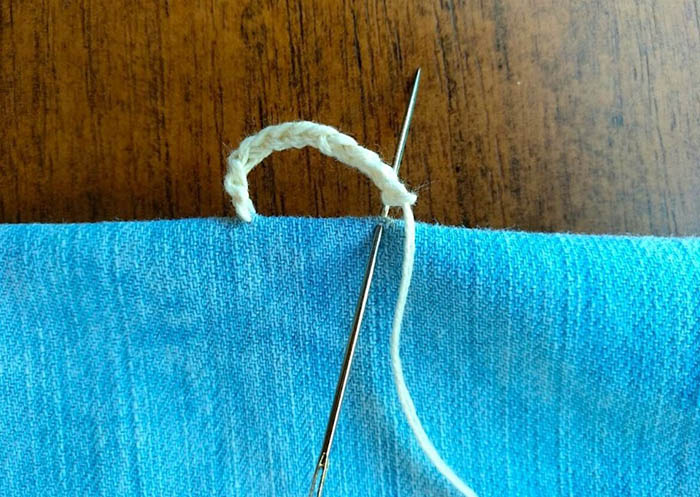
To create a loop, you will need a regular needle, as well as cotton floss or yarn that matches the shade of the product. Wool threads are not suitable.
Step by step instructions:
- Secure the thread on the wrong side, bringing the needle to the front side at the starting point of the loop. Throw the loop over your finger, insert the tool into the second loop point on the wrong side and bring it out at the first point on the front side.
- Perform similar manipulations 4 times to get a thick loop. Holding the product with your left hand, throw the thread over your index finger, passing the needle through the loop.
- Pass the tool through the second loop located on the index finger. Remove the finger and tighten the thread, pushing the resulting knot into the loop base.
- Continue adding new stitches to keep the stitches tightly attached to each other.
- Once you reach the end, secure the mark firmly on the back side.
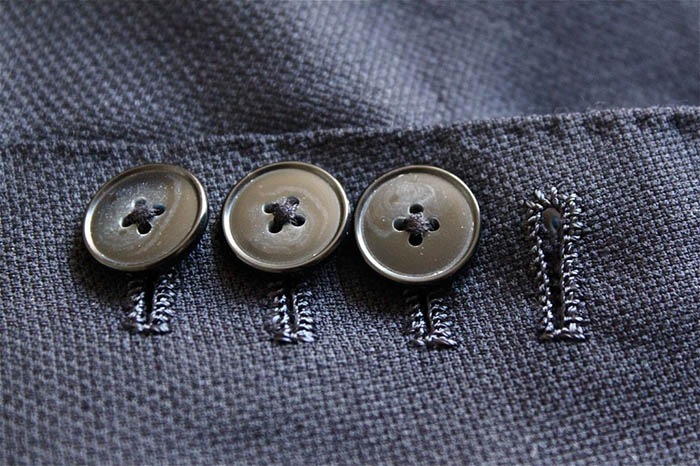
Overcast loop
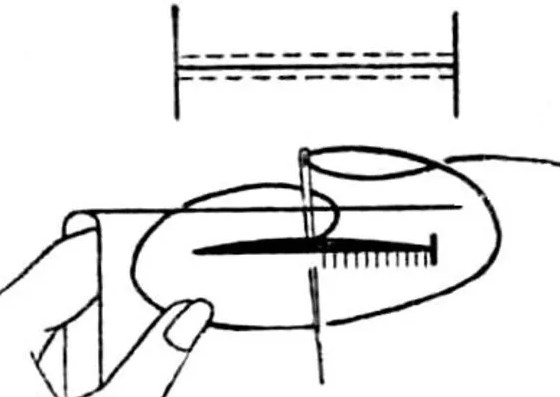
You can make a buttonhole by hand using the overcasting method, which is suitable for items made of lightweight fabric. First, you should mark the length with the width and location of the buttonhole using chalk.
From the inside, it is necessary to apply adhesive material to the area where the loop is located and attach a thin cloth to seal it and prevent the part from unraveling and stretching during processing.
Step by step instructions:
- On the material, at a distance of 3 mm, lay a hand stitch parallel to the marking, preventing the material from fraying and stretching during overcasting.
- Fold the material along the central loop basting, cutting with a blade or scissors. Overcast the loop cuts with bias stitches, simultaneously pushing out the lower fabric layer and hiding the adhesive interfacing.
- Wrap the loops with strong, thick thread in the form of frequent loop stitches so that they hide the oblique wrapping stitches.
- After finishing overcasting one side of the loop, make 3 securing seams, which will be located perpendicular to the loop cut. Additionally, tighten 2 loop ends. Overcast stitches.
The fastenings can be located on 1 or 2 sides of the part, and the length must match the width of the overcast loop. A smooth, sharp, thin, short needle is required for the work. The thread should not be long, otherwise it will get tangled and interfere.
Slit loop
You can make a welt stitch on a thick woolen material by hand. For overcasting, you need to use threads that will keep the part flexible, putting a thin cord inside the overcasting. It is good to form a loop stitch knot from silk, cotton threads or floss, since they will not spring.
The thread should be shiny, smooth and twisted. Mixed and lavsan threads are not suitable for buttonhole design, as they will fray. As a result, the detail will unravel and become covered with fluff.
To create a slotted loop you will need the following:
| Stages | Description |
| Loop size determination | It is necessary to measure the thickness and diameter of the button. The obtained data should be added together, as a result, you will get the preliminary length of the slit detail. However, such a calculation can be used for thin material. If the fabric is dense, you need to add an additional 2 mm. The decorative element should pass freely through the loop, without stretching the corners of the cut with the edges. |
| Preparing the area for the loop | Often the detail is placed on the slits, waistband and sides. As a result, it will be made on 2 fabric layers. The layers of material should be pre-fastened so that they do not move relative to each other during further manipulations. For fastening, you can use an adhesive web, the width and length of which will be 1 cm larger than the loop cut. You can also wrap the perimeter of the detail with small stitches on the bias. Additionally, you should baste the side edges with bias stitches, making one vertical behind the loop. In this case, the stitches should not tighten the fabric layers. |
| Loop marking | When sewing a coat and jacket, a loop with an eyelet is used. It is recommended to use a punch for the cut or carefully cut with scissors. To get a neater cut, you can use a template made of thick paper, placing it on the material, directing it clearly along the loop axis and marking the eyelet with the end of the loop with chalk. |
The loop frame is represented by two forward needle seams placed along the outer edging of the future piece. It is able to strengthen the seam, and the stitches hold the cut edges of the fabric threads, preventing them from crumbling.
Step-by-step instructions for making a loop frame:
- Thread a long thread through the needle so that you can make the frame without interrupting it with one thread.
- Secure the thread from the wrong side at the end of the future loop with 2 back stitches.
- Sew the frame with a running stitch, the length of which should be 3 mm. Make one stitch at a time, pulling the needle perpendicular to the material.
- Make the first circle. The seams should be exactly between the 3rd and 4th weft fabric thread from the loop axis.
- When passing a straight loop section, lay seams around the eyelet at an identical interval.
- Complete the second round, filling the space between the seams of the first round.
- Get rid of the weft fabric thread protruding as a loop axis. Carefully pick it up and cut it at the beginning and end, carefully pulling it out.
- Cut the loop with scissors on a straight section along the thread.
- Once you reach the eye, cut it out carefully, without deforming the frame thread.
The cord allows you to press the edges of cut fabric threads, as well as create an unstretched and clear loop edge.
To make and secure the cord for the loop, you need to do the following:
- The cord is made from the thread used for overcasting the piece.
- Grab the 2 ends of a 100 cm long thread and twist them in the direction the twist is directed.
- Combine the ends so that the thread twists in half. Repeat the same action. The result should be a cord of 4 thread folds 25 cm long. Fix the end of the cord with tape so that it does not fly apart.
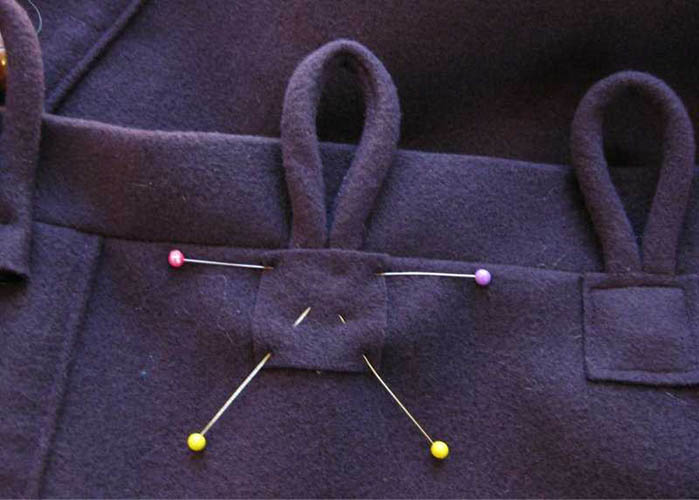
When overcasting one side of the loop, the other side may crumble. To prevent this problem, use a small piece of fabric, wrapping it around the other side of the part and pinning it with a pin from the inside.
To sew buttonholes on heavy fabric, you need a buttonhole stitch with a cord insert:
- Pierce the needle from the wrong side into the lower corner of the loop on the left.
- Bring the tool to the front side, putting the fold of the cord on it and fixing it to the fabric with a small stitch. Bring the needle back to the front side.
- Hold the work vertically, fixing the cord with your thumb. Stick the needle from the bottom up through the slit and tighten the thread so that a small loop remains. Pass the needle through it from the bottom up, tightening the loop.
- When tightening the loop, direct the needle perpendicular to the fabric surface so that the loop scar is on the front side. Thanks to this, the decor will run along the overcast threads without fraying them.
- After overcasting 1 cm, tighten the cord a little, forming a clear loop edge. Continue the loop stitch, make an eyelet and turn the work. Remove the piece of fabric that was used to protect the second side of the loop. Sew the latter and tighten the cord as needed.
- When the stitches reach the end of the loop, pull the cord through and check the element. The cord is not stitched with a loop stitch, so it should move freely inside the seam.
- To close the loop, join the first and last loops through with 3 seams and secure with a cord. Cut off the tape, inserting the cord into the needle.
- Bring the tool out to the back, then to the front, creating a rivet loop. Bring the needle back in and secure, hiding the edges between the layers of fabric.
As a result, the material cut for the loop will be fixed 3 times: with a rib, a cord and a frame. Due to this, the hand loop will be strong enough.
From the tucked cord
It is possible to make a buttonhole manually using a tuck cord, which looks unusual and beautiful on the finished product.
Step by step instructions:
- To create the cord, cut a 3 cm wide strip of fabric on the bias.
- Sew the loop with 1.5 mm seams. The strip should resemble a funnel. After sewing the loop, carefully cut off the excess material along the stitch.
- Turn the loop out with a needle, securing the tool to the remaining thread and pushing the blunt edge inward.
- Sew the finished piece of dart cord to the garment.
Small details are an important part of the image, so they require much more attention when sewing things than the selection of seams, fabric, its shade and style. In this regard, it is necessary to know the types of buttonholes, as well as how to make them by hand. To create details, you can use regular threads with a needle or a sewing machine.
Video on how to make a loop
How to make a chain stitch from threads: