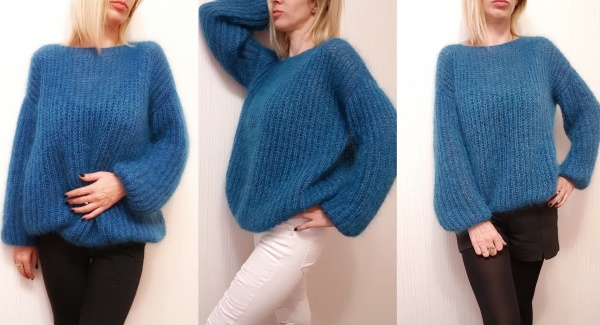
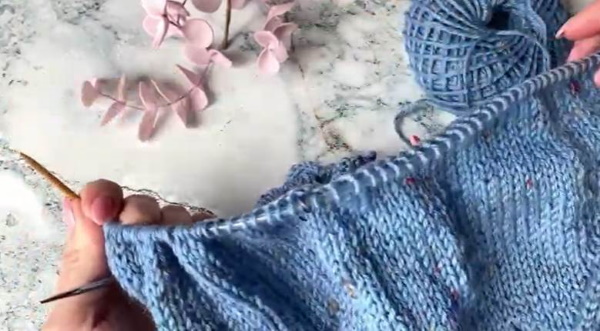
The fashion for oversized clothes began about 2 years ago. Many women now have clothes 2-3 sizes larger than they are used to wearing. Oversized jumpers are a versatile part of a basic wardrobe. They can be worn with jeans, skirts, heels and sneakers.
If you can't choose a model, color or style of sweater in the store, you can knit it. You can choose any pattern schemes, combinations of textures and shades of yarn to make a wardrobe item that is appropriate for almost any occasion.
How to construct a knitting pattern?
The oversized style implies not only a larger size than the woman has. The clothes have a characteristic tailoring, and differ in the way they are constructed. All models of oversized jumpers visually blur the figure. They do not emphasize the waist and chest. Sweaters of this cut are suitable for thin and plump women. However, with a very curvy figure, oversized clothes, on the contrary, will emphasize the flaws even more.
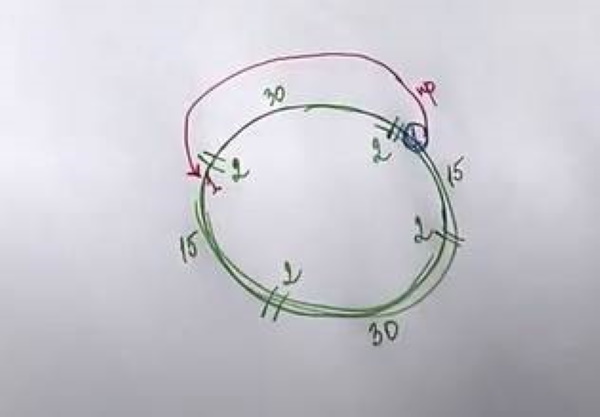
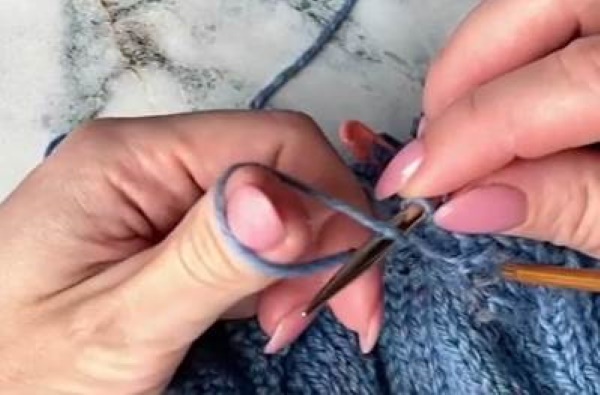
To knit a jumper of the right size that will fit your figure correctly, you need to first make a pattern. Calculations are based on a knitted sample of the yarn chosen for the sweater. To count the loops and the number of threads, you need to make a sample with the same pattern that will be on the jumper.
For example, you can knit a 10x10 cm square. If we assume that its length is 25 loops and its height is 20 rows, then it turns out that the knitting density is 2.5 loops in 1 cm of the length of the product and 1 cm in 2 rows in height. The calculation for constructing the pattern will be based on these 2 indicators.
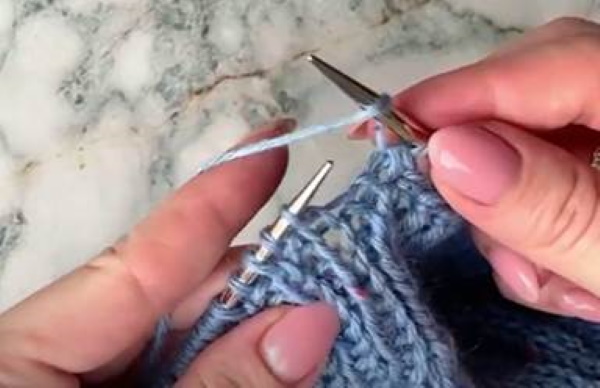
Important! Before counting loops and rows, the sample should be slightly stretched in different directions, you can even steam it with an iron. This will create an effect comparable to the result of wearing a sweater when it stretches a little on the figure. This life hack will help you measure the sample size more accurately and determine the size of the sweater.
For example, if you need to knit a jumper element 60 cm wide, you need to cast on 150 loops (2.5*60) for the main part of the fabric and add 2 edge loops to them. If the height of the element is 70 cm, you will need to knit 140 rows (70*2).
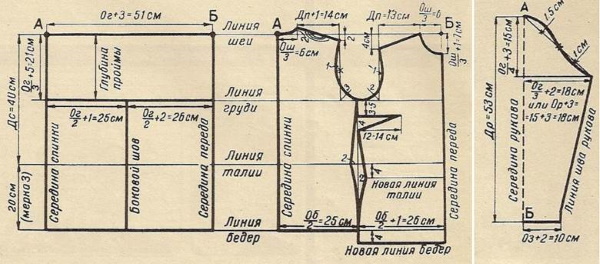
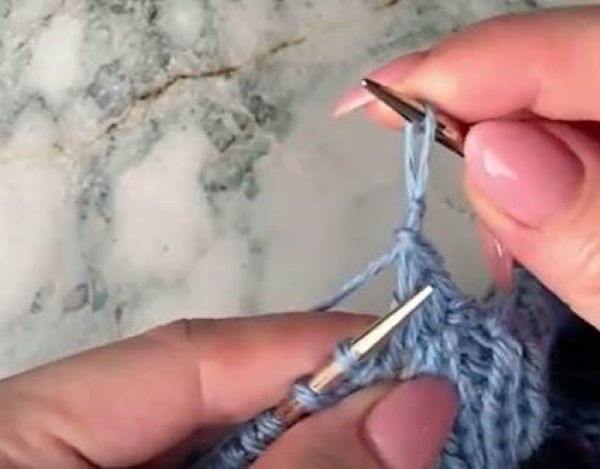
Based on the pattern, it will be easier to make additions and decreases of loops. If you need to narrow a sweater element by 1 cm, you will need to decrease 3 loops in a row (in 1 cm there are 2.5 loops, which need to be rounded up). An oversized jumper with knitting needles, the pattern diagrams of which are constructed correctly, will be knitted to the desired size if you check it with the drawings every 3-4 rows.
What yarn is suitable, how to choose
When choosing yarn, you need to focus on several criteria:
| Characteristic | Peculiarities | Examples, names |
| Thread structure | Since the jumper's style implies a deliberately large size, you should not buy thick yarn (more than 5 mm in diameter). Clothes made from such threads will make the image bulky and awkward. Preference should be given to yarn in the form of smooth laces and chains, the length of which is more than 50 m in a skein. | Lovely by Lana Grossa. The range includes 21 solid shades. The cost of a skein is about 700 rubles for 90 m (50 g). |
| Material | Preference should be given to natural materials that provide full air circulation and absorb moisture well. For a jumper, yarn that contains no more than 10-15% synthetic impurities to stabilize the fabric and protect against deformation during wear is suitable. Threads that contain 50% acrylic will not warm you in winter, since synthetics do not retain heat well. | Kena by Katia. 120 m of thread contains 25 g of yarn with a thickness of 4 mm. More than 80 shades in the manufacturer's assortment. The cost of a skein is 350-420 rubles. |
| Color and design | Since an oversized jumper attracts attention in itself, there is no need to overload it with complex patterns or textured threads. If you choose a style that involves asymmetry or decor, the color of the sweater should be monochromatic. For simple styles, on the contrary, you can choose textured threads. | Fluffy. The cost of a skein of alpaca threads is 650-800 rubles for 130 m. |
The jumper holds its shape well if it is made of wool or cotton yarn (Yarnar Jeans, Alize Cotton Gold). Nim made of angora, mohair, lurex are suitable. Wool is warm, and cotton yarn is strong and durable, resistant to shrinkage and deformation. Before calculating materials and constructing a pattern, you need to look at the shrinkage characteristics of the material, which are indicated on the yarn labels.
If you do not take into account possible shrinkage, then after the first wash the sweater will become at least 1 size smaller. If the jumper model is made of elastic threads, it is better to knit a seam version of 4-5 elements: front, back, 2 sleeves, collar. If the yarn does not stretch, you can make a seamless sweater using the circular knitting technique. Do not intentionally lengthen the sweater and its sleeves, so that the item does not turn out too big.
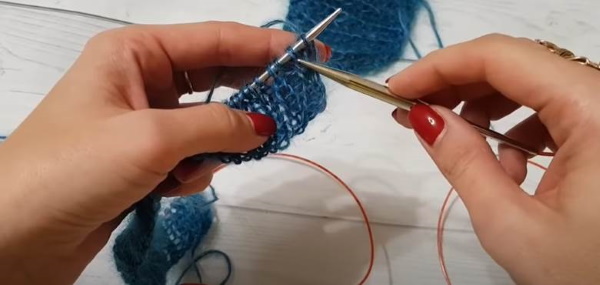
Abbreviations in knitting patterns and master classes
The following abbreviations are used in the master classes:
- P - loop;
- LP - front loop;
- IP – purl loop;
- KRP – edge loop;
- ND - yarn over;
- UB - decrease.
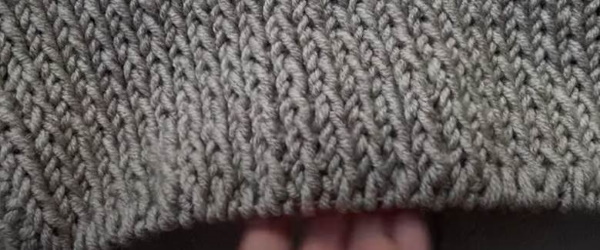
Knitting pattern for a jumper with English rib
An oversized knitted jumper, the patterns of which are clear even to beginners, in this master class will be made from kidmohair yarn in 2 additions (70% mohair and 30% polyamide) and silk. The sweater is knitted using the English elastic technique. When choosing threads, you need to make sure that they will hold the elastic.

To work you will need:
- knitting needles No. 3.5 for the elastic band along the edges of the jumper;
- knitting needles No. 6 for knitting the main fabric;
- 2 skeins or 210 g of kidmohair yarn (950 m per 100 g);
- 50 g silk threads (2000 m per 100 g).
Total yarn consumption – 260 g for size M-XL. The jumper is knitted from 3 threads: 2 folds of kidmohair and 1 silk thread.
Knitting measurements
To construct a pattern, you need to take measurements from the hips or waist, depending on the expected length of the sweater. You will also need to measure the chest circumference. These measurements for the pattern drawing need to be divided by 2, since the jumper is knitted from 2 parts: front and back. You also need to determine the width of the shoulders and the length of the sleeve (measured from the beginning of the shoulder to the wrist, 2-3 cm are added to the indicator so that the sleeve length has a small reserve for shrinkage).
To determine the neck diameter, you need to measure the head circumference and add a few centimeters to the value so that the armhole does not stretch when putting on and taking off the jumper. You need to determine the wrist circumference so that you can count the number of loops needed to knit the sleeves. Add 3-4 cm to the circumference.
Knitting technique, instructions
The bottom of the jumper and the edges of the sleeves are made with a simple 1x1 elastic band, and the main fabric is made with an English elastic band. The sweater is made of 2 identical shelves. The sleeves will drop 11 cm along the shoulders.
Instructions for knitting the front of the jumper:
- Cast on 58 sts using needles #3.5: 56 sts for the front + 2 krp.
- Work 5 rows with 1x1 elastic.
- Change needles to size 6.
- It is necessary to make increases on 2 sides of the shelf so that the width of the row is 78 P (62 cm). The volume reserve will be 7.5 cm on each side, which will create an oversized effect.
- Row 6 is also done with a rib pattern with increases. In this row, you need to make 22 yarn overs in every third loop.
- Knit with English rib stitch 58 cm in height of the front.
- To knit the neck, you need to divide the head circumference by 2, add 1-2 cm, calculate how many loops you will get in this segment, taking into account the knitting density.
- The resulting number of loops must be placed strictly in the center of the shelf. This is approximately 30 sts, which must be closed, leaving 24 sts on both sides of the upper part of the shelf.
- Knit both sides of the shelf to the height with knitting needles No. 3.5, corresponding to the pattern, close the loops.
An oversized jumper with knitting needles, the knitting patterns of which need to be adapted to your sizes, is made from 2 identical shelves. This style of clothing does not involve making darts or decreasing loops according to the figure.
To knit the sleeves, follow the instructions:
- Cast on 26 sts using #3.5 knitting needles, taking into account the edge sts.
- Work 5 rows with 1x1 elastic.
- Change needles to size 6.
- Knit the sleeves with English elastic to the desired height, calculated according to the pattern.
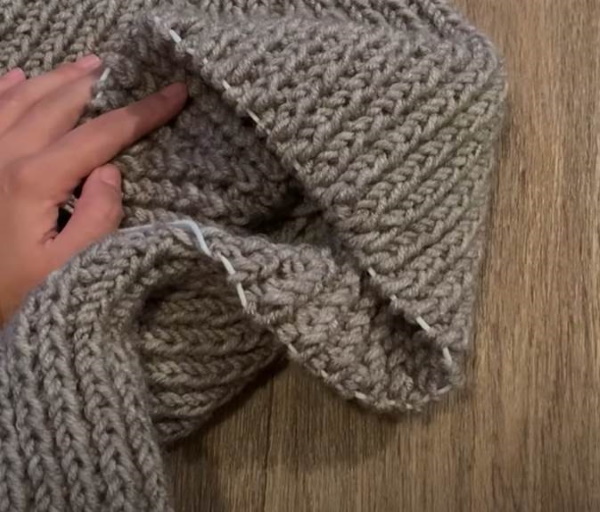
All elements of the jumper are sewn together with a connecting seam using the same threads from which it is knitted.
Oversized wool sweater with batwing sleeves in wool or cotton
This jumper option can be knitted from cotton yarn or woolen threads. The sweater model is distinguished by a shortened wide bottom. If you knit it with single-color threads, you will get a strict classic jumper that can be worn with trousers or a skirt. To make the sweater youthful, you can choose melange or bright yarn.

The master class uses Alize Superlana Maxi threads, but they can be replaced with any threads with similar characteristics of length and weight in a skein (100 g per 100 m).
Tools and materials for work:
- 10 skeins of yarn;
- scissors;
- needle for stitching parts;
- 4 pairs of circular knitting needles: No. 6 for 100 cm and 20 cm, No. 5.5 for 20 cm and 100 cm;
- knitting markers – 8 pcs.
The height and width of the jumper will be 58 cm, but after washing it will stretch, the parameters will change to 60-65 cm. The sleeve length will be 53.5 cm.
Step-by-step instructions for knitting a jumper
Knitting begins with work on the front:
- Cast on 77 sts on short knitting needles #5.5, join the circle by inserting the last loop of the row into the first. Thanks to this technique, 1 st will be reduced, leaving 76 sts in the work.
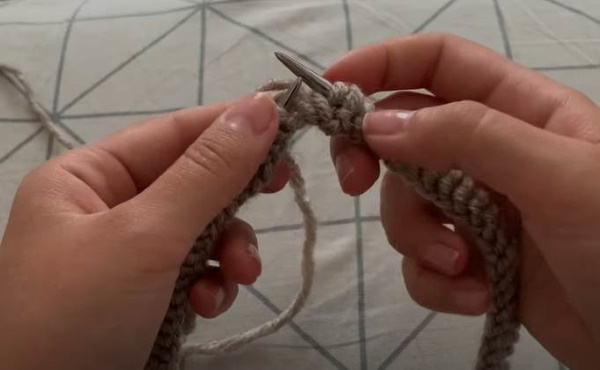
- Place a marker in the first stitch of a new row so that you can later tell when the round begins and ends.
- Perform 11 continuous circular rows with a 1x1 elastic band.
- Row 12 is knitted as LP.
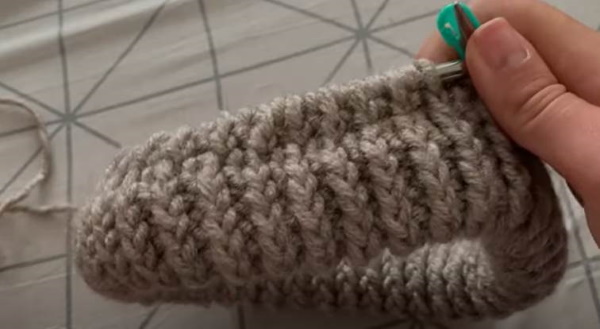
- In the 13th row, connect the beginning and end of knitting by inserting the knitting needle through the loops of the first row and knitting them together with the main loops.
- The spokes are changed to a tool with a diameter of No. 6.
- The new row is again made with a 1x1 elastic band, starting from the front row.
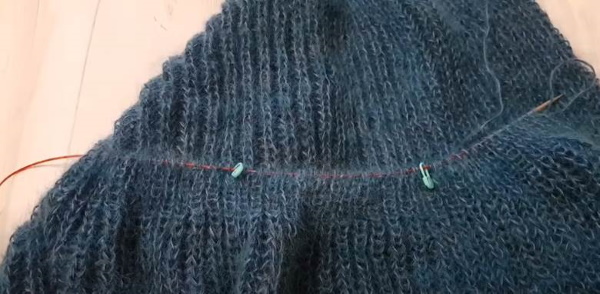
Next, we begin knitting the raglan lines. There will be 4 of them: 2 in front and 2 in the back. Each line is allocated 7 loops.
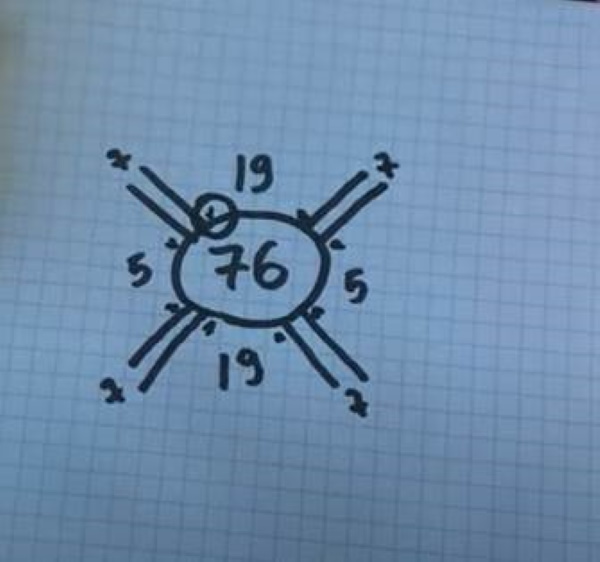
An oversized jumper with knitting needles, the knitting patterns of which are easy to draw yourself, is made using a seamless method. 5 sts are allocated for the sleeves, 19 sts for the front and back. Increases will be made in each loop located before and after the raglan line. It is necessary to divide the entire row with markers according to the pattern: 19-7-5-7-19-7-5-7.
This will allow you to see where you need to make increases.
- In the new row, knit all the back loops with an elastic band.
- After the 19th loop, make a yarn over before the raglan.
- Make raglan loops, which are also knitted according to the elastic pattern.
- Make a yarn over.
- Knit sleeve loops, yarn over.
- Knit a raglan elastic band, yarn over.
- Make the front shelf loops, yarn over.
- Knit raglan stitches, make a yarn over.
- Knit the loops of the second sleeve again and make a yarn over.
- Knit the last raglan line in the row and make a yarn over.
- The knitting algorithm is repeated with increases in each row until there are 71 sts in the front and back of the sweater. The row ends on the last raglan line.
Next you will need to knit with a 1x1 elastic band in circular rows. All markers can be removed, except for the one that marks the beginning of the row.
It is also necessary to release the sleeve loops:
- From the back side, you need to make an additional length in several rows. To do this, from the beginning of the raglan line, going after the sleeve loops, you need to knit all the loops of the back shelf with a 1x1 elastic band to the last loop of the raglan, located before the second sleeve.
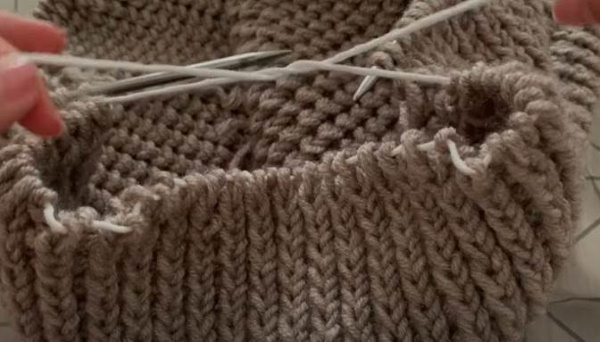
- Turn the knitting, remove 1 KP, knit the elastic band to the end of the raglan in front of the sleeve, the last loop is a purl, since this is an edge loop.
- Repeat additional rows a total of 4 times.
- Having knitted to the end of the row, you need to grab the first loop of the second shelf - the first loop of the next raglan line.
- Next, the jumper is knitted in a circle to the required length, leaving 3-4 cm unknitted.
- Change to knitting needles No. 5.5, continue knitting in a circle with an elastic band for another 5-6 rows.
- Close the loops and hide the end of the thread.
Next we return to knitting the sleeves:
- You need to knit the loops of the first sleeve in a circular manner, leaving 3-4 cm short of the desired length.
- Using knitting needles No. 5.5, finish the last 5-6 rows of the elastic.
- Close the loops and hide the end of the thread.
- Repeat the steps with the other sleeve.
As a decoration, you can crochet the bottom of the jumper and the end of the sleeves with a thread of a different color, and make voluminous embroidery on the front panel.
Oversized jumper with false braid
The jumper in this version turns out to be moderately voluminous. The master class uses Lain Du Nord Holiday Tweed yarn. In total, you will need 8 skeins of thread and knitting needles No. 4. The calculation of materials and the number of loops is suitable for size M.
The knitting pattern for an oversized sweater includes several techniques: elastic, false braid and garter stitch.
Step-by-step instructions for knitting a sprout
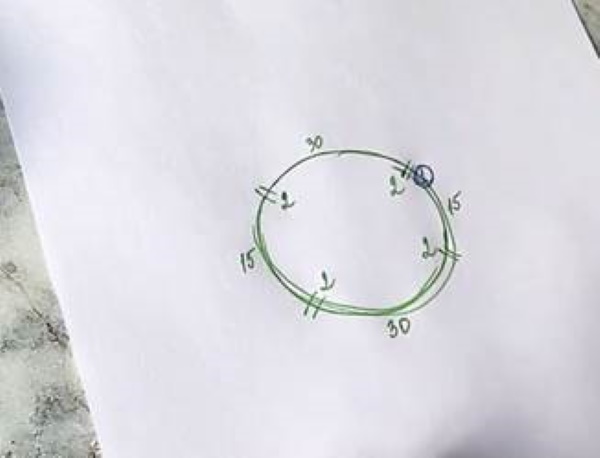
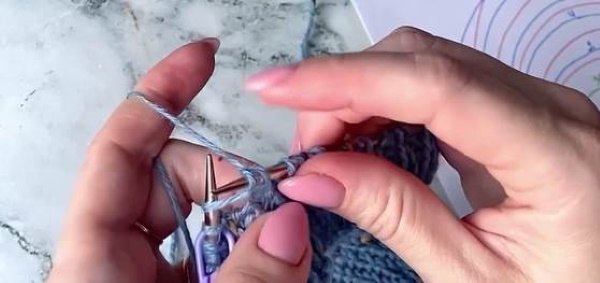
Knitting begins with a sprout. This is a mandatory part for the correct fit of shoulder products. It is performed with a raglan in a circle with shortened rows.
Preparation and start of knitting the neck:
- Cast on 98 stitches.
- Knit 8 rows in a circle with a simple 1x1 elastic band.
- Mark the raglan lines with markers. Allocate 2 sts for each line. Separate 30 sts for the front and back panels, and 15 sts for each sleeve.
The loop before the first raglan line will be the beginning of the row.
Knitting pattern of a sprout
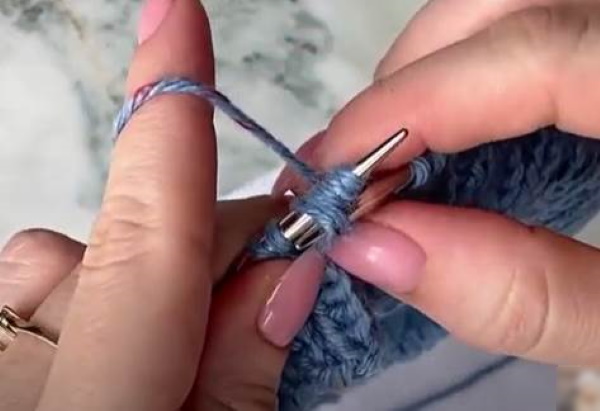
The first row after the elastic band should be knitted in a circle, making increases on the raglans.
On the front side you will need to make 2 yarn overs.
Turn the knitting and knit a row without increases. From the main circle, additionally knit 3 P at the end.
In the next row, make 2 increases again: 1 P on each side. After finishing the row, knit 3 more P from the main circle.
Then return without increases with a purl row, knit another 3 P from the main circle. On the front side, again perform a row with 2 increases and 3 P from the main row of the sprout. Similarly, knit turning rows, alternating rows with increases and without. In total, you need to perform 10 rows from the elastic.
No loops are added to the front of the jumper. The result should be an irregularly shaped oval piece.
Sprout knitting algorithm
Before knitting the sprout, you need to place markers: 1 - the beginning of the row and 3 more to separate the sleeves and shelves.
Knitting algorithm after completing 8 rows of elastic:
- The beginning of the first row is located at a distance of 1 loop from the raglan line. Knit it as LP, make a yarn over to your side, 1 LP. There should be a marker here indicating the beginning of the row. It needs to be transferred to the working needle.
- Next, 1 more LP. The last 2 front loops, between which there was a marker, are the raglan line.
- Next make 1 ND on yourself and knit LP to the next marker, which should be placed between the loops of the raglan line. Before the raglan make 1 ND, then 2 LP with a marker transfer, again 1 ND and 1 LP.
- Turn knitting.
- Bring the knitting needle forward and remove the loop, turn it from the front wall of the loop to get 2 P on the knitting needle.
- Next, knit the loop that was an increase in the previous row with a crossed IP.
- 2 IP on the raglan line, then 1 more crossed purl loop at the place of the increase.
- Continue knitting the IP according to the pattern until the next increase before the raglan line (up to the first marker). At the increase place, a crossed IP is made, 2 IP at the raglan place, 1 crossed IP, 4 regular IP.
- Turn knitting.
- Remove the first loop and twist it so that another 1 P is formed from its front wall.
- Next, perform all odd rows (3, 5, 7, 9) in the same way as the first, each time knitting an additional 3 LP from the main circle at the end of each row.
- All even rows (4, 6, 8, 10) are knitted similarly to row 2, additionally knitting 3 IP from the main circle at the end of each row.
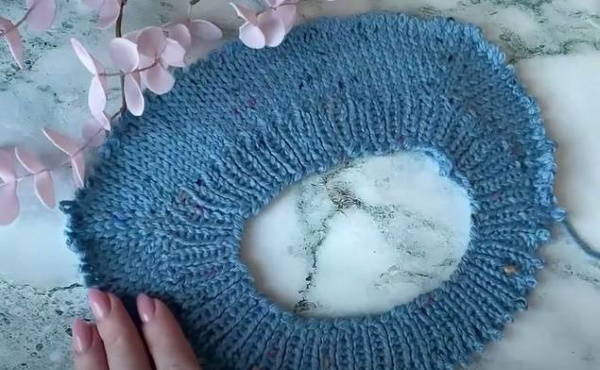
When 10 rows are knitted, you need to carefully remove the knitting from the needles and steam it. In order not to lose the loops, you can string them on a thread.
Braid pattern diagram
The pattern of the false braid will be located in the middle of the front shelf vertically. There will be 3 braids in total, with an overlap in every 10th row.
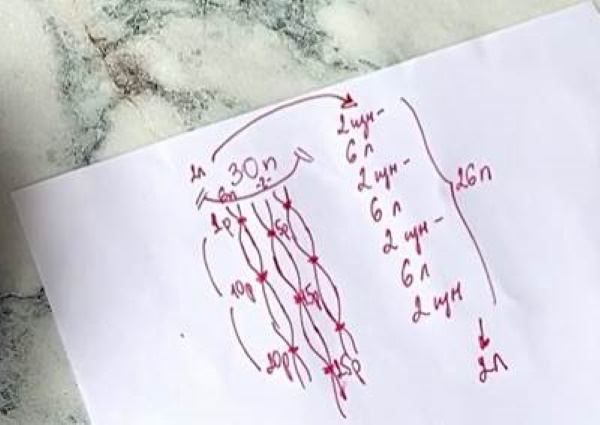
The pattern repeat is 26 sts. The cable loops are knitted as LP, and those around are knitted as IP. All increases on the sides of the pattern repeat, which will be added during the process of casting on loops, will be knitted.
Knitting the main part of the sweater
After steaming the knitted sprout, you need to insert the knitting needles into the loops again.
Then continue knitting:
- The row starts with a loop after the raglan line. You need to make a yarn over, knit 2 LP to the beginning of the pattern, then according to the pattern. In this row there will be the first overlap of the braid.
- 2 IP according to the pattern before the tourniquet.
- Skip 3 sts on needle, pick up next 3 sts.
- Remove them from the knitting needle, put on the hooked loops, and then the skipped ones, changing their positions.

- Knit these 6 loops as if they were RP.
- 2 IP, 6 LP, 2 IP and again cross the next 6 P, knit them as LP, 2 IP, 2 LP, raglan line increase and 2 RP raglan.
- Continue knitting to the end of the row.
- The next row is knitted without increases. Yarn overs should be knitted with crossed loops, and the remaining loops - according to the pattern without changes.
- In every odd row, yarn overs are made on the raglan lines.
- Knit to row 5.
- In the 5th row there will be a twist of the middle braid. All loops are knitted according to the pattern, except for the elements of the middle braid. These 6 P need to be swapped and knitted as LP, similar to those in the first row.
- In every 5th row there will be braid overlaps. They will alternate 1 and 3 with the 2nd braid.
- You need to continue knitting until the length of the raglan line reaches 20 cm. Then you need to detach the sleeve loops.
- At the beginning of a new row, knit all the back stitches up to the sleeve start marker.
- Transfer sleeve stitches (up to next marker) to additional needles. If you don't have any, you can use yarn.
- Return to the needles with the main knitting. Next you need to form the undercut.
- Make 5 yarn overs on the needle (using the method of casting on stitches).
- Next, knit the stitches according to the main pattern from the second knitting needle, skipping part of the sleeve. Continue to the second sleeve.
- Repeat transferring the sleeve loops to additional needles. Cast on 5 sts for the second undercut. Connect both parts of the sweater.
- Continue knitting in a circle without increasing the pattern. From the shoulder you need to knit 50 cm.
- The last 9 rows are worked using a 1x1 rib pattern.
- Close the loops of the elastic. To do this, make a yarn over. If the loop is knit, the yarn over should be towards you, if the loop is WS, the yarn over should be away from you.
- Knit the next stitch according to the pattern (LP or IP).

- Grab the yarn over loop and pull the knitted loop through it.
After closing the loops, the thread needs to be secured, cut and hidden.
Knitting sleeves
The loops of one sleeve need to be transferred to the working needles:
- Bring the working thread and knit the sleeve with face loops in a circle without increases.
- Having reached the undercut part, you need to pick up 10 loops from the 5 edge loops that you cast on earlier. This will help avoid gaps where the parts are joined. Place a marker after the cast on loops and continue knitting the LP.
- Knit in a circle, making decreases in every 6th row. The loops are decreased immediately after the marker. To do this, 2 P after the marker are knitted together.
- Continue working until you have 100 circular rows in total.
- Go to knitting a 1x1 elastic band. In the first row, it is done by knitting 2 P together: 2 LP, 2 IP. This will allow you to decrease half of all the loops at once.
- Continue knitting with the elastic pattern for another 10 rows.
- Close the loops in the same way as in the main part of the jumper.
The second sleeve is made in the same way. Oversized jumpers are often self-sufficient and do not require decoration, since decorative elements make the image heavier than they complement it. When knitting, you can choose a small pattern to add texture to the sweater. It is better to choose simple patterns, otherwise the already voluminous jumper will seem even larger.
Video on how to knit an oversized jumper with knitting needles
How to knit a summer offersize jumper: