The dove is one of the most recognizable symbols, a symbolic gesture denoting peace and harmony. This image remains relevant and significant in the context of modern culture, so the art of its depiction does not lose its value.
His drawing is an activity that helps develop creativity and imagination.
Necessary materials and tools
During the drawing process, various tools and materials may be useful. They serve to facilitate the creative process or improve the result.
| Tools and materials | Brief description |
| Pencil | They can have different hardness and softness of the lead depending on the manufacturer. Hard is suitable for initial general contours and finer lines, and soft is for detailed elaboration of individual sections of the drawing and adding shadows. You can use the following recommendations as a guide: · use H-pencils ("en") when preparing a preliminary sketch of the drawing; · choose an HB pencil for preliminary lines or sketches of details of the face and body; · try 2B and 4B for darker areas and shadows. |
| Sanguine | Made from kaolin and iron oxide, it imitates the color of natural sanguine, a reddish-brown natural material. Sanguine is often used to paint portraits and figures, providing them with impressive expressiveness and color saturation. |
| Charcoal pencils | Made from charcoal powder pressed with water-soluble binders, charcoal pencils are distinguished by their soft, velvety lines. |
| Sepia | Sepia adds a distinctive tone to drawings and can be used to create realistic images or to give your work a vintage look. |
| Stencil | This is a tool consisting of a plate with holes of one shape or another. Using it, you can apply repeating elements to a drawing. Stencils are often used to create patterns, ornaments, or repeating elements, adding variety to a work of art. |
| Rulers | They can be used to measure distances, create straight lines or control proportions. They come in a variety of sizes and shapes. |
| Kneaded erasers | Their peculiarity is that they do not leave marks on the processed area of the paper, but can stain it. Due to this property, the kneaded eraser is used to process paper with high density and volume or to create complex effects. However, the kneaded eraser does not erase the line, but turns it into a blurred or shiny trace. |
| Pressed erasers | Made in the form of a small block. They remove pencil lines of different hardness and can be used both for correcting small details and for general image editing. They are a universal tool and are suitable for any type of paper. |
| Paper | It should be thick and smooth, white or cream-colored. It is important to pay attention to the paper being uniform in texture and without bubbles and creases. Drawing paper and Whatman paper are considered universal options. There are many brands of drawing paper: Arches, Saunders Waterford, Canson, Goznak and many other manufacturers. More budget-friendly paper options are available from Pastel Factory, National Paper Company and Alt. |
Master classes
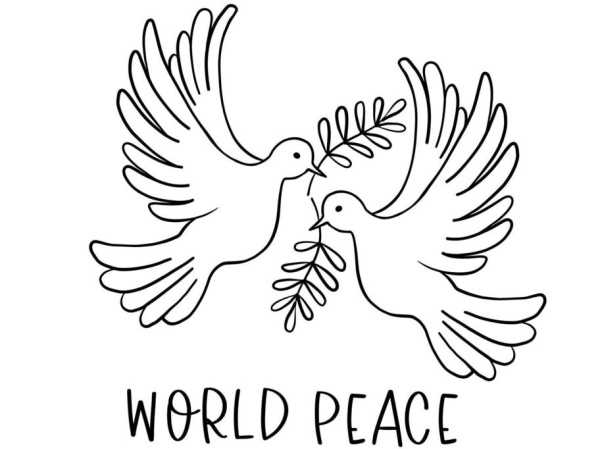
The dove of peace in the picture evokes associations with calmness, serenity. This concept can be reflected in the composition, harmony of colors and the overall attractiveness of the picture.
This symbol should be characterized by dynamism and lightness - its pose can symbolize the desire to fly, and not statics.
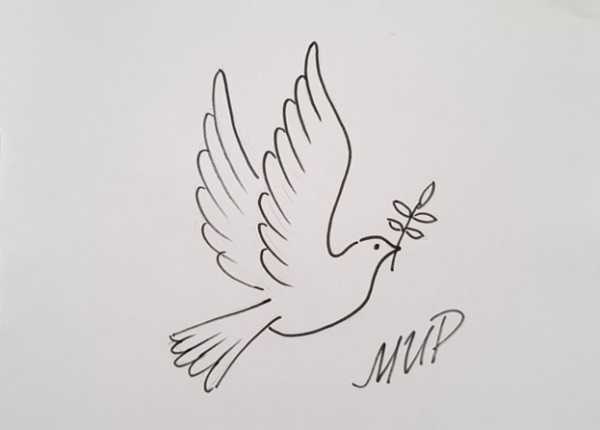
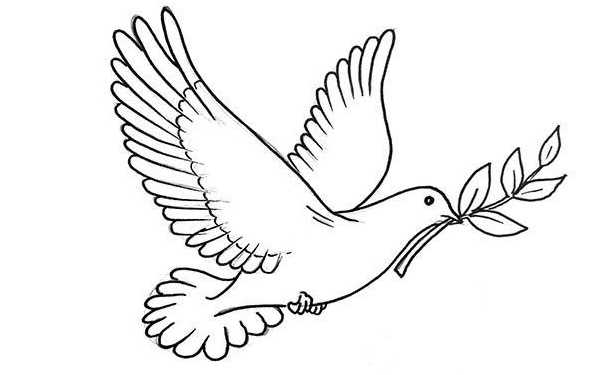
Simple schematic with olive branch
Instructions for creating a schematic image of a dove of peace:
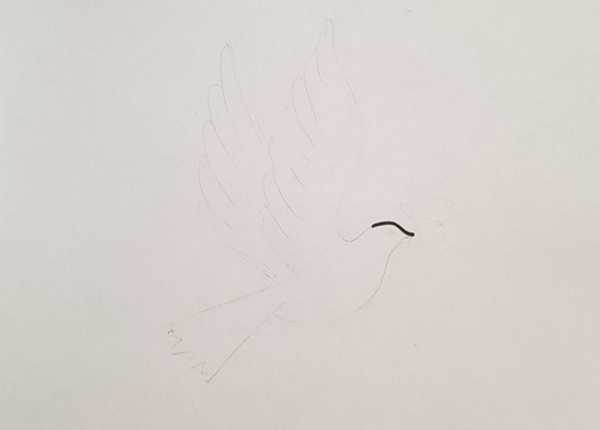
- Start by drawing a curved line that resembles a bump. This will be the top of the dove's head.
- Draw another curved line downwards under the top of the head. It will mark the bird's chest and belly.
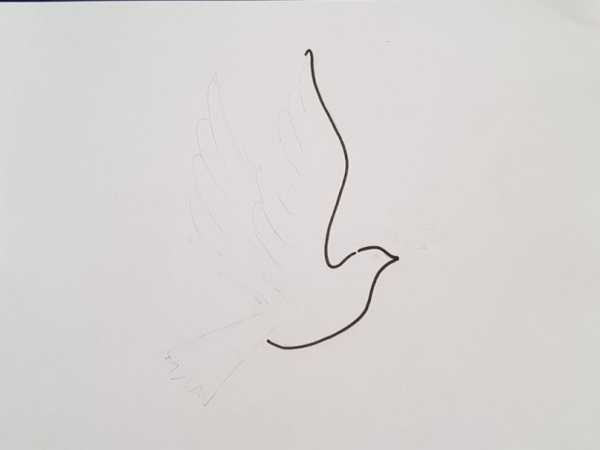
- Draw a curved line upwards from the chest and belly. This will become the outline of the wing.
- Using thinner and smaller lines, depict feathers on the wing contour. Schematically indicate them with strokes.
- Add a 2nd wing next to the 1st. Repeat step 4 to draw the wing feathers.
- Draw the tail of the dove using a line with uneven zigzags and curves.
- Place a dot in place of the eye.
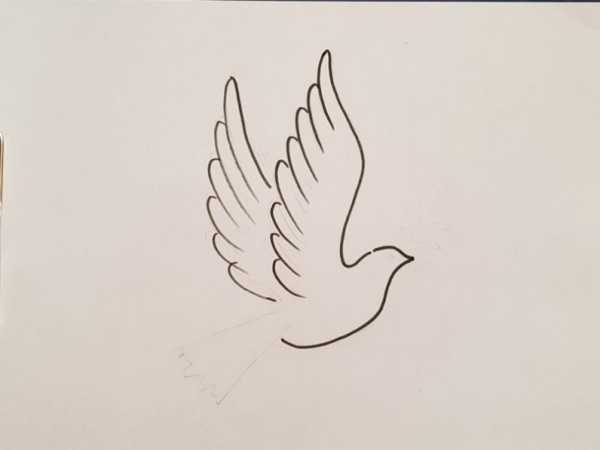
- Add a schematic image of an olive branch to the bird's beak, symbolizing peace. It can be located in the direction of the beak or at a slight angle from it.
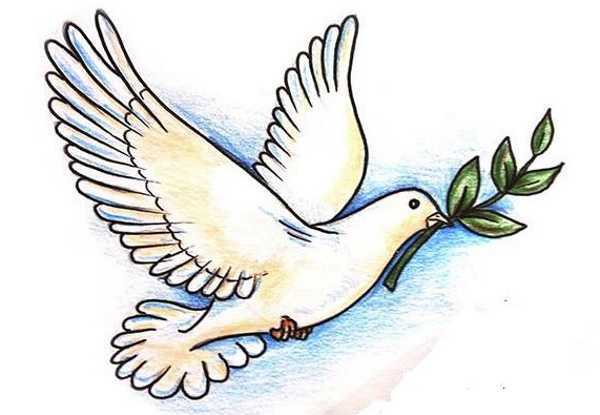
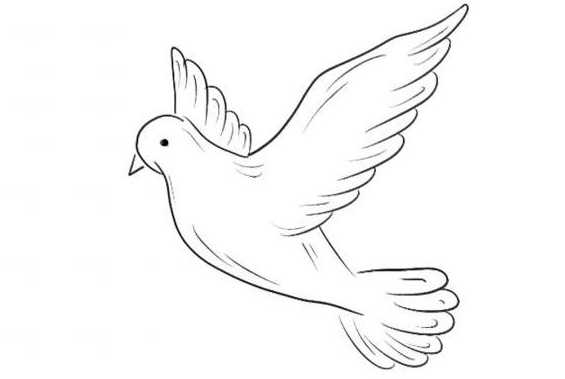
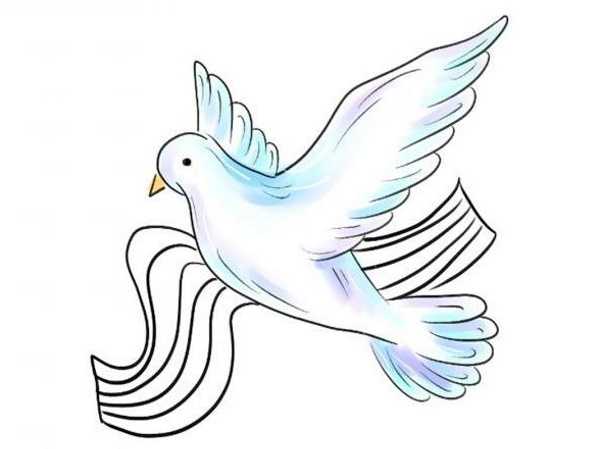
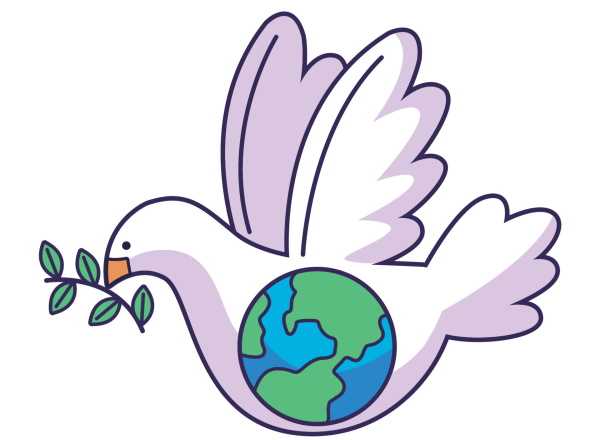
Colored drawing
The dove of peace in the picture can be depicted with an olive branch using a step-by-step master class:
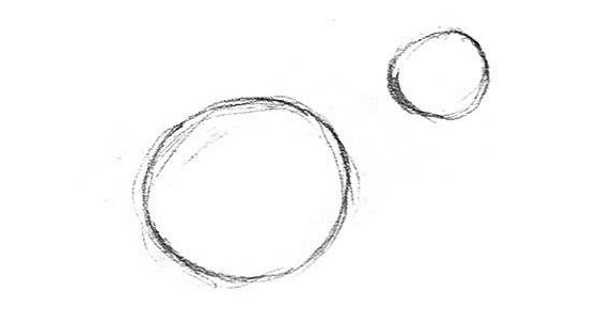
- Start by creating 2 circles in the center of the sheet. The distance between them will determine the size of the pigeon's head: the smaller it is, the smaller the head will be.
- Draw the outline of the 1st circle with a less thick marker to be able to remove auxiliary lines. Use a medium-soft pencil for clearer lines. Do not press too hard on it to avoid leaving hard-to-remove marks.
- Using a smooth line, combine the 2 circles so that the result is the head and body of the bird. It is important to give the pigeon's body a shape reminiscent of the Latin numeral "S".
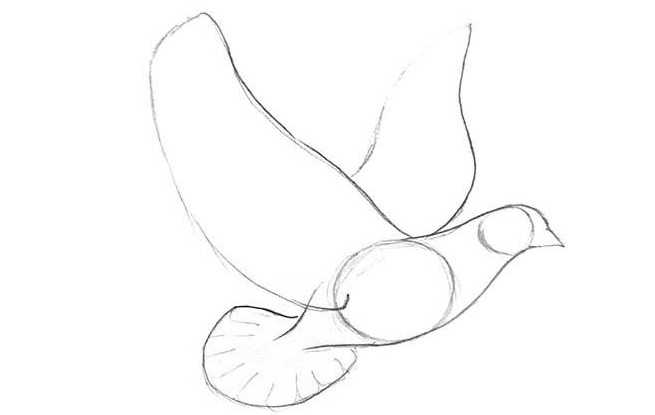
- In the upper part of the resulting contour, sketch out the bird's tail. The line should be thin and slightly curved. The tail should be slightly shorter than the pigeon's body and wedge-shaped. Point the end of the tail slightly upward.
- Add a beak by drawing a short line at the bottom of the head.
- To create a flight scene, draw the wings so that they are slightly spread out from the body.
- Mark lines on the wings and tail to indicate feathers. Use 2 thin and sharp pencils for this. Make the lines more visible in the area of the bird's body and less visible in the area of the wings and tail.
- Remove all auxiliary lines with the tip of the eraser, leaving only the outlined contours.
- Color the dove's eye using 2 contrasting colors - the main one and an additional lighter one for highlights.
- Draw the tucked paws with the thinnest lines.
- Mark an olive branch and 5 small leaves on its tip. The olive branch and the beak should not merge.
- Highlight the necessary lines with a brighter pencil. Darker lines will make the image three-dimensional.
- Color the olive branch with green and brown pencils to make it look real.
- The background is tinted with light blue and blue pencil, creating a smooth transition of colors from one shade to another. It is necessary to achieve smooth transitions of colors.
- Paint the bird's body evenly, using pencils of different shades of blue, light blue and beige: White should be used only for the plumage.
- Partially paint the beak with dark brown.
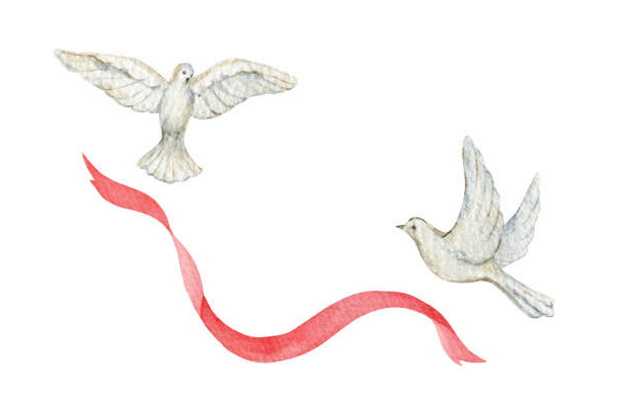
With the St. George ribbon
The dove of peace in the picture is often depicted with the St. George ribbon in pencil using the following sequence of actions:
- Form the basis of the drawing, starting with the head. Draw a small circle. Draw a line down for the back and draw a schematic tail (it should be rounded).
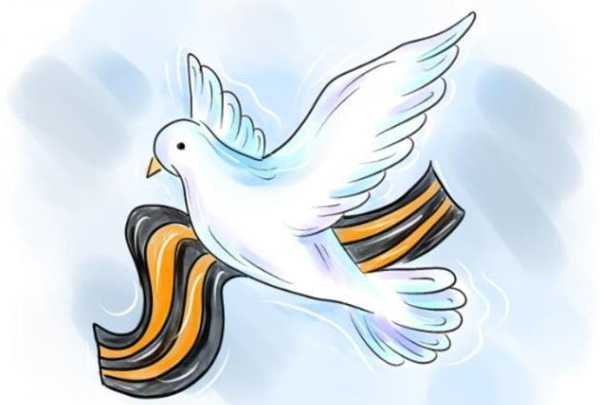
- Under the line that marks the back, mark the arc of the bird's belly.
- From the tummy down to the tail, draw 2 thin lines, indicating the future wings.
- Mark a small triangle in the bird's head, outline the contours of the beak. Slightly above it, depict the bird's eye in the form of a circle. It cannot be made large.
- The tip of the tail should be slightly rounded upwards.
- The wings will resemble a triangle, the apex of which reaches almost to the end of the bird's body. The outlines of the wide wings should be smooth and light.
- Remove all auxiliary and unnecessary lines that do not carry any semantic load and are not related to the main drawing using an eraser.

- Use smooth lines to outline the outline. Make sure the outline is clearly visible and adds completeness to the whole image. Add more details to the drawing: claws on each foot of the bird and a sharper beak.
- Partially paint the dove with the chosen color, for example, blue or turquoise, adding volume to it. Use different shades of blue and purple to create the effect of depth and perspective.
- The dove's beak can be painted light brown, highlighting it against the background of the drawing. Do not use too dark or bright shades for the dove, so that it does not look bulky and unnatural.
- To draw a ribbon, draw a curved line upward from the beak stem and a second one slightly below the first one, bringing it to the tip of the tail.
- Paint 2 stripes on the St. George ribbon orange. Leave the rest black, creating a visual contrast.
- Paint the sky with blue and purple shades. To highlight the highlights on the bird and the St. George ribbon, add a few strokes of white.
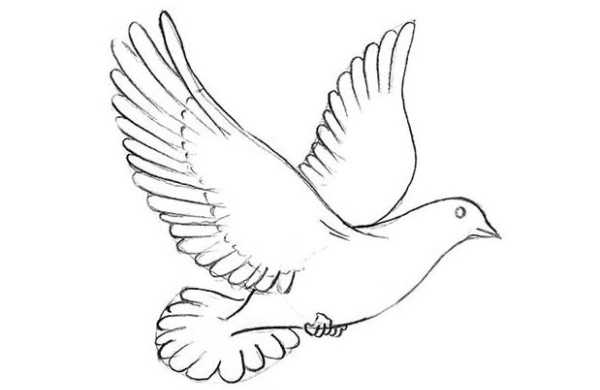
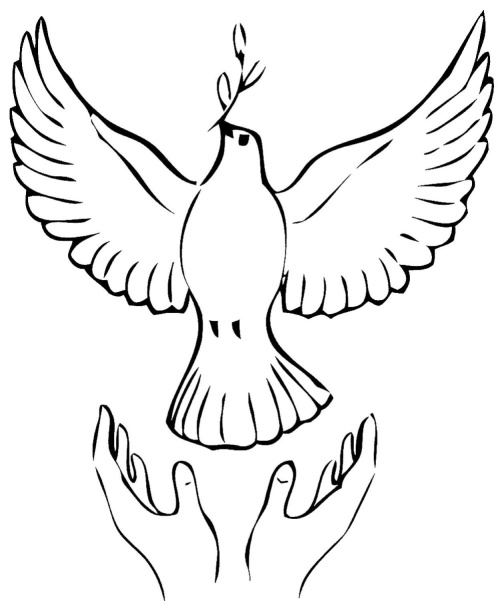
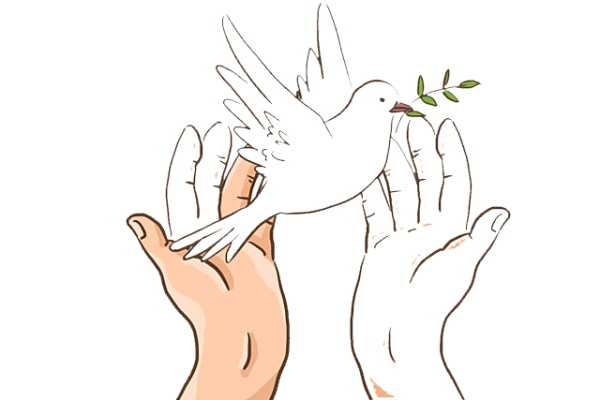
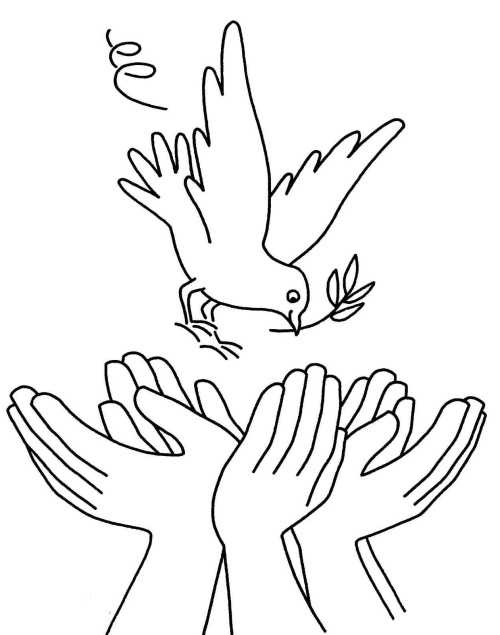
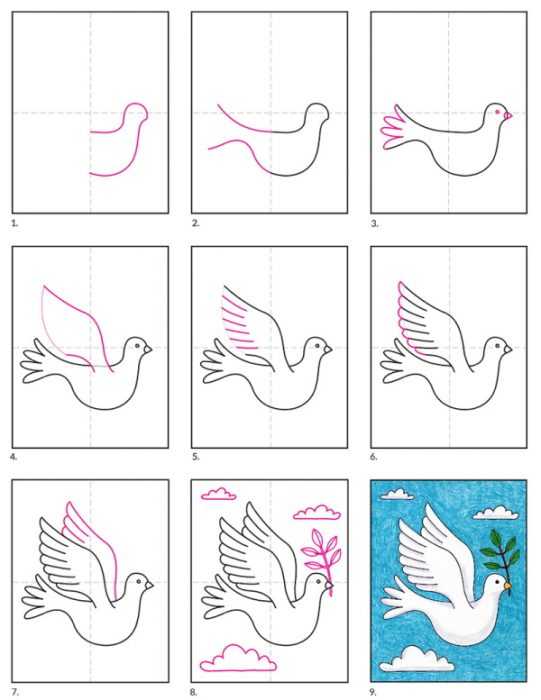
A dove with outstretched wings flies out of a man's hands
The dove of peace in the picture can soar upward, released from human hands:
- Draw 2 circles. Place them in the center and leave a small distance between them - this will be the head and body of the pigeon.
- Connect the circles to get the outline of the pigeon's head and body. To do this, draw a smooth curved line connecting the circles from above.
- Add curved lines where the circles connect on the sides and bottom. When drawing the head and body of the bird, make sure that the head is slightly turned to the side.
- Add a long tail to the body. Curve the tail line smoothly upwards, draw it downwards, slightly stopping short of the contour line drawn through the centers of the circles. Mark the structure of the tail with thin lines, gradually adding volume. Its tail feathers create a cascade effect - from narrow to wide.
- On the dove's head, draw a small curved beak. It should be directed slightly forward.
- Draw 2 small triangles, symmetrically located on 2 sides of the pigeon's body. The triangles will symbolize the bird's tucked paws.
- Determine the size and spread of the wings: draw slightly curved lines diverging to the sides from the place where the body turns into the tail. To determine the wingspan, focus on the actual proportions of the pigeons.
- Using thin pencil strokes, depict the feathers on the bird's wings and tail.
- Erase the extra lines. You have a basic outline.
- Draw the dove's oval eye as a dot. Determine the position of the eye in the center of the head.
- The dove holds an olive branch. Draw it in the bird's beak. Use smooth lines to convey the curved shape of the branch.
- Finish the drawing with a picture of human hands. Draw 2 palms with fingers spread out to the sides. This will symbolize that the bird is flying out of the hands. Add details to the picture of the fingers.
- Highlight the desired lines with a brighter pencil.
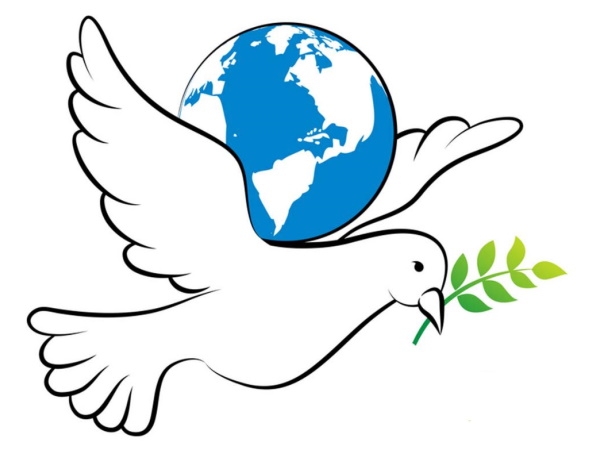
Carrying the globe on its wings
Step-by-step master class:
- On a clean sheet of paper, draw 2 circles in the center of the sheet. The distance between them should correspond to the scale of the future drawing. The smaller circle will become the dove's head.
- Connect the circles to form the bird's head and body.
- Draw the bird's tail. To do this, draw 2 lines down from the body. These will be the outlines of the tail. Detail the lines obtained, giving the tail a realistic look.
- Draw a slightly curved beak, drawing a smooth line from the bird's head. It should be directed forward and slightly to the side. The line that outlines the beak can be slightly sharpened at the tip, and the rest can be rounded.
- To the left of the bird's body, draw a smooth curved line to the right side of the sheet. You can shift it slightly upwards. You should get the outline of the bird's wing, which seems to cover the space above. Repeat this action on the other side of the bird's body.
- Place the wings so that it holds the globe. To give the drawing a more complex look, complement the wings with the upper and lower lines of the wing, depicting neat figured arcs along the edges. Add details in the form of plumage on the wings.
- Erase the auxiliary lines that are not needed in the drawing.
- You can depict an eye using a dot.
- Draw an olive branch, placing it in the bird's open beak. It may cling a little to the top of the beak where the curve begins.
- Draw a circle between the wings - this will be the globe that the bird holds.
- Draw the outlines of the continents on the planet. For example, you can draw America, Africa, Europe and Asia larger, and draw them with coastal details.
- Highlight the desired lines with a brighter pencil or use colored contours.
- Green is associated with nature and life. It will look harmonious for an olive branch. You can use another shade, for example, yellow.
- To make the drawing realistic, it is necessary to apply conventional designations of the oceans to the globe. This is done using blue or light blue pencils.
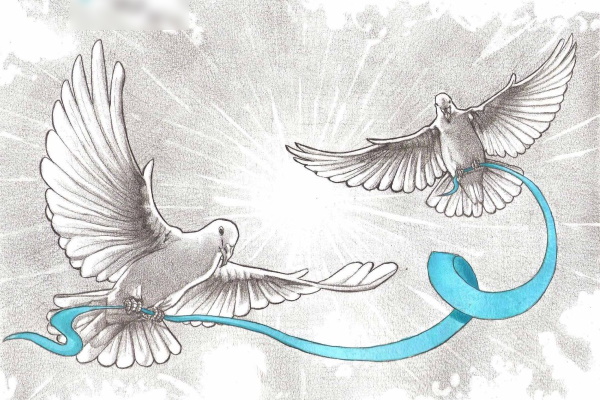
Two doves against the background of the sun carry a ribbon
There may be several doves in the picture.
By following the steps provided, you can create an artistic illustration with 2 peace symbols:
- Draw a rough outline of the nearest pigeon using small lines. This will give an idea of the proportions of the bird. The outline of the pigeon's body should be close to an oval.
- Draw the head, tummy, and tail in more detail.
- Draw the beak, legs and bent claws. Keep the overall shape of the pigeon as smooth and neat as possible.
- Determine the appropriate size of the bird and the span of its wings in the air. Add feathers to the wing and tail.
- Extra lines should be removed so as not to distract attention from the main object and the background.
- Add eyes by drawing small dots. It is important to maintain the sense of depth in the drawing: a transparent pupil of a lighter tone can help with this. You can use a sharp pencil.
- Create the 2nd dove following the directions in the previous steps, but it will be more schematic and less detailed. Its dimensions should be slightly smaller, since the bird is further away. Avoid repetitions in the drawing.
- Create both figures with different artistic and expressive details. For example, the tip of the tail of the 1st dove can be raised, and the tip of the tail of the 2nd can be lowered.
- Draw a ribbon that the doves are holding. Place it between them so that it secures the composition and creates an additional line. It connects the figures of the birds, helping to perceive them as a single whole.
- Work on shadows and light, which will help express volume and show how one form flows into another. Use light pressure of the pencil to convey subtle nuances of highlights.
- Create shadows from the wings, making them denser closer to the body of the birds and lighter as they move away. Pay attention to the expression of the head and beak, creating the impression that the birds are looking at each other.
- Color the ribbon with a blue pencil. Choose a soft pencil to get the desired color gradation. Use a soft pencil to create a sense of space and add depth to the drawing.
- Create a background with the sun in the center of the sheet using hatching. The intensity of the hatching should be such as to create a feeling of lightness and airiness of the background without strong highlighting in the drawing. This will give a feeling of a smooth transition from the foreground to the background.
Tips for Beginners
Key points to help aspiring artists learn how to draw a dove of peace:
- Determine the proportions of the bird and start by drawing the basic contours. The dove is often represented as a silhouette with a rounded chest, an elongated long neck and a small head with a beak.
- Choose simple shapes and avoid complex designs that may cause difficulties during the drawing process.
- Practice will help you develop your skills. The more you draw, the more confident you will be at it.
- To make your drawings look more lively and natural, pay attention to lighting and spatial depth.
- Work on the background landscape. Depending on the composition you choose, you can draw a branch, hands, or a clear sky. To depict a cloudy background, use pencil shading or hatching techniques. A smooth transition of tones will give the background airiness.
- It is important not only to draw the picture correctly, but also to convey its inner content. Focus on how you want to show the desire for peace.
The style and technique of drawing a dove may vary. You need to experiment, study the basics of composition, perspective and light and shade - and the works will become more expressive.
Following the general principles of depicting the peace symbol makes the result more professional, but following only these principles without taking into account your own ideas about beauty will not give the desired effect.
Video about drawing
Dove of Peace - Drawing: