Despite the different storylines, all the fairy tales are united by two main aspects - magic and the presence of a castle in this story, where the princess is. If magic is difficult to depict on paper, then a stone structure with towers and a large number of windows and massive gates can be drawn even by children.
General rules of work
The castle (a drawing for children can be done in different versions) begins with a sketch of a medieval or fairy-tale image that has formed before the eyes.
Usually, a medieval castle, which is often depicted in history books, is characterized by having a subdued coloring, compared to a palace. Although in children's paintings it is painted in bright colors. When depicting a castle, it is important to follow the rules for choosing a background color. If children use paints during their work, the paper canvas should be tinted in advance.
The choice of background color is influenced by the chosen theme of the painting:
- if you are going to create a drawing of the Snow Queen's ice palace, you will first need a cold blue color;
- For the Palace of the Sun, the base is made yellow or pink.
To depict the structure itself, you can use different materials and tools.
These could be:
- paints;
- pencils;
- felt-tip pens;
- fountain pens;
- wax crayons.

An interesting result can be achieved by combining materials, for example:
- A drawing done with watercolors can be additionally outlined with felt-tip pens, but they should be brighter than the paints.
- If you are drawing fairy-tale palaces that exist in your imagination, then you can safely add paints with a shiny effect to such drawings.
Since drawing a castle is a difficult process, the outline is first outlined with a simple pencil, but you should not press too hard on the tool.
Before you begin the creative process, you need to correctly position the sheet of paper on which the drawing will be created.
If:
- the castle will be directed upwards, then the album sheet should be positioned vertically;
- If the structure is wide, the sheet should be placed horizontally.
For coloring we use:
- paints;
- colored pencils;
- crayons.
Considering that the structure consists of a large number of small elements, drawing and coloring should be done with the tip of the brush, trying to hold it vertically in your hand. In this case, it is necessary to regulate the pressure to obtain shades of the desired brightness.
Additionally, you can use:
- plasticine;
- applications;
- glitter;
- colored paper cutouts;
- pieces of fabric.
The easy way
The castle (a drawing for children of a medieval palace based on simple geometric figures) is transferred to a paper base with a simple pencil. To make the lines of geometric figures (square, rectangle, triangle) even, a ruler is used.
All work can be divided into the following stages:
| No. | Stage | Description |
| 1 | Prepare a sheet of paper for work | Divide the album sheet into 4 equal-sized parts to determine its center. Do not take this step lightly. It is important because each geometric figure depicted must be proportional. |
| 2 | Build the general outline of the building | The following figures must be depicted:
|
| 3 | Draw towers | This castle will have only 3 towers and each of them should be represented by an isosceles triangle. It is not necessary to make all sides of the triangle equal, but 2 of its sides should be equal. The left and right towers should be on the left and right elongated rectangles, respectively. The central tower will be located at the top - on the last square drawn. There should be small indentations in the form of thin stripes between the rectangle and the triangle. They should be slightly longer than the sides of the rectangles they are drawn above. The triangle that will be drawn above should be slightly wider than this stripe. We are talking about the base of the triangle - its bottom side. The sides should be equal and, joining at the top, form a sharp top. The left and right triangles should be the same size, and the central triangle, which will be located above the square, can be made slightly lower. |
| 4 | Perform brick finishing | It is necessary to give the structure relief, using a horizontal row of small squares for this purpose. They should be located on the 1st and 2nd floors. On the lower floor there should be approximately 2 times more squares. At the same time, there should be gaps of the same size between the squares. If the width of the squares is 2 cm, then the distance between them should be approximately 2 cm. The result will be uniform protrusions on each of the 2 floors. |
| 5 | Draw window openings and gates | It is recommended to create as many windows as possible. However, it is important to ensure that they are at the same distance from each other.
For example, on the top floor, represented by a square, there can be only 1 window, and on the middle floor there can be 3 openings. On the bottom floor, windows may not be drawn at all, but 1 of them should be depicted on the left and right towers. The top window should be in the middle of the square that represents the top floor. In order not to make a mistake with the location of the 3 central windows located on the 2nd floor, the rectangle representing this floor should be mentally or with the help of barely noticeable lines divided into 4 equal parts. It remains only to draw 1 window on each border of such a part. There will be 3 of them in total, and they will be located at the same distance from each other. Moreover, the outer windows will be at the same distance from the side borders of this floor. The windows drawn on the right and left towers should have the same dimensions. They should be placed at the level of the 1st floor border - closer to the triangular tops. The gate is on the lower floor and is drawn in much the same way as the window. It just needs to be wider. |
| 6 | Draw the missing elements and then do some nice shading. | You should start with the openings. The borders of the windows and gates should not be just lines, but numerous figures similar to small ovals, but only with intentionally uneven sides. This will imitate beautiful stonework. This is not an easy job: it is important to be patient, because the total number of openings is not small. Each of them should be decorated with about 10-15 stones. To demonstrate that the gate is wooden, several vertical lines should be drawn on it. After that, it is necessary to depict the bricks. To do this, it is not the bricks themselves that will be drawn, but the spaces between them. On the lower floor, you can make 10 rows of bricks, on the middle floor - 7, on the upper floor - 5. It all depends on what the original floors turned out to be in height. There can be 13 rows of bricks on the side towers. To show the boundaries of the rows, it is enough to draw several horizontal lines along the structure, using a simple pencil for this. Next, it remains to mark the places where the bricks are joined in each of the horizontal rows with short vertical lines. Here it is important to remember the basic rule of brickwork: each vertical line of the joint should rest against the middle of the next brick located above. When the castle is completely brick, you can move on to drawing the tiles on all 3 of its triangular towers.
The tiles are a set of shapes that look like circles, but their edges should be slightly curved. After decorating the towers with tiles, all that remains is to do the shading, which will help to give the drawing a natural look. For shading, use a soft pencil. |
From a fairy tale
The castle (a drawing for children can be fairy-tale or magical) from a fairy tale should be large and significant, have many peaks and towers. At the same time, the structure should be elegant and strict at the same time. There should also be magical elements that will be an excellent decoration.
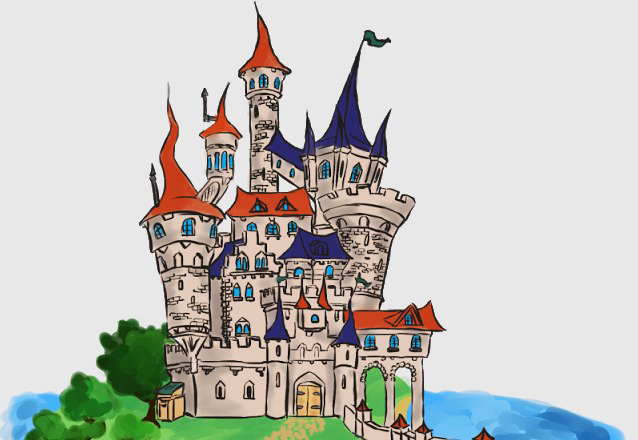
The stages of its depiction on paper are as follows:
- Outline the palace. It can be surrounded by nature, but the main compositional point should be the building. The palace should occupy almost the entire album sheet. The structure of the building should be outlined freely. A rainbow in the form of a huge rocker can rise above the castle. This element will add a fairytale quality to the picture.
- Specify the architectural features of the structure. It is necessary to give shape to the tops and window openings. In this case, you can break some shapes, for example, the roofs of the towers can be curved, thus resembling the hats of wizards.
- Draw the tridents and work on the crowns of the trees surrounding the trees.
- Clarify all the details. The drawing should ultimately represent a completed linear work. The image of the building should be fully formed.
- Remove all unnecessary lines that were previously used for construction.
- Colour the picture using bright colours.
With the Snow Queen
Children really like the tale of the Snow Queen. That's why they are interested in drawing her castle.
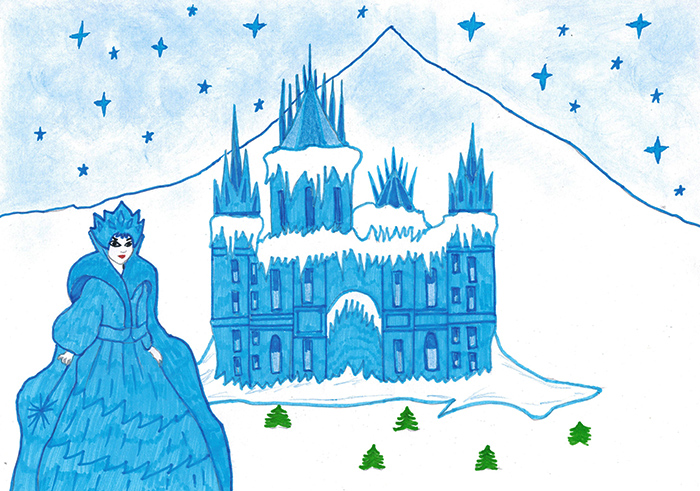
Castle (a drawing for children can convey the atmosphere of various fairy tales, for example, G. H. Anderson) of the Snow Queen you should draw by following these steps:
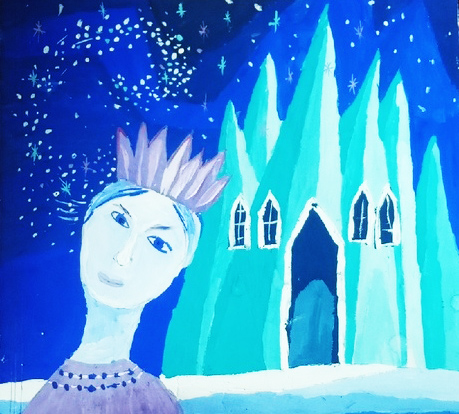
- Outline the palace, which should have the shape of a house - a square and a triangular roof rising above it.
- Add a raised platform under the palace on which it is located. Its edges should be uneven, because it is a high glacier.
- Draw several wavy lines on the glacier, thereby demonstrating its slippery and cold surface.
- Carefully detail the structure. Inside the square and triangular outlines that were depicted in the first stage, draw a multitude of towers. Each of them should be represented by a vertically elongated rectangle and decorated with an isosceles triangle on top.
- Draw windows in each tower. They can be represented as small rectangles or squares.
- Paint the palace. Here, mainly blue and light blue colors are used. These are the ice blocks on which the palace of the mistress of cold is located. The palace itself is painted in the same shades.
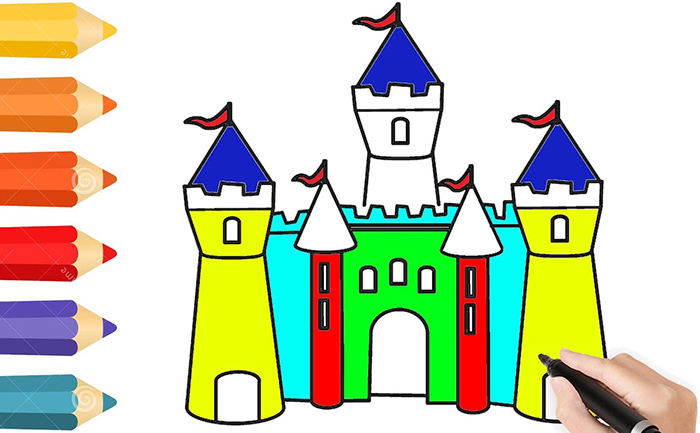
Multicolored drawing
Drawing a colorful castle for children or together with them is done using simple techniques.
A colorful castle can be drawn in the following steps:
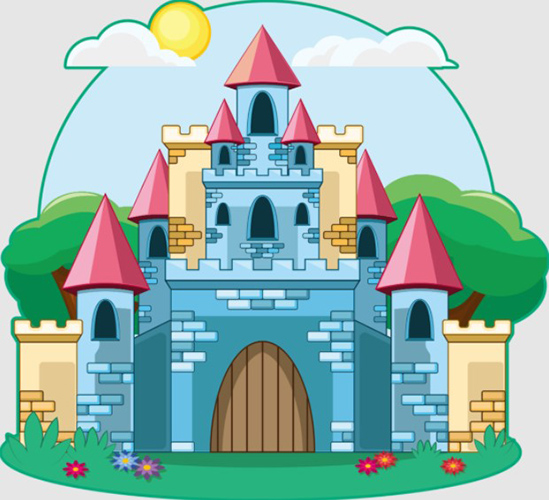
- Mark the horizon line on paper and draw an elongated rectangle above it. Draw an elongated semicircle inside the rectangle.
- Draw another room on the side. Another similar line must be drawn around the semicircle that serves as the gate. A zigzag line is drawn on top, and a high tower must be added to the left.
- Add the following elements using the same principle: towers at the bottom with square tops, tall elongated towers with triangle roofs. You can add any number of towers, the main thing is to try to make the drawing beautiful and harmonious.
- Add window openings and brickwork on the walls.
- Draw flags above the triangular towers.
- Add lines and gates.
- Add a background, which could be, for example, the outline of a city or a dense forest.
- Color the drawing. For this, you can use an unusual purple color and combine it with a warm yellow shade. The flags rising above the tops of the castle can be red.
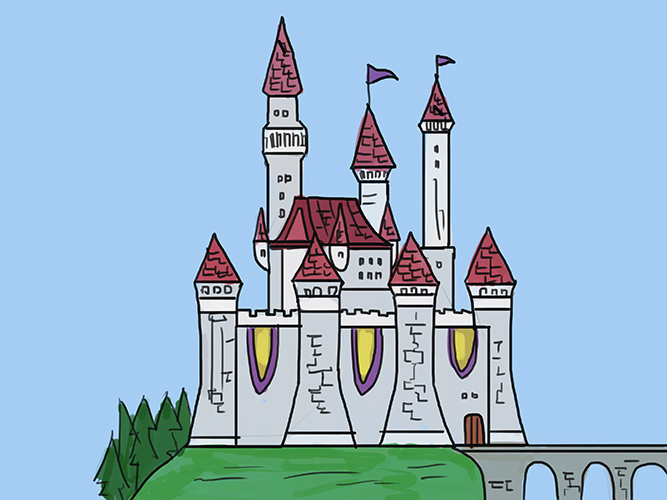
Medieval building
An example of drawing a medieval castle can be done in the following steps:
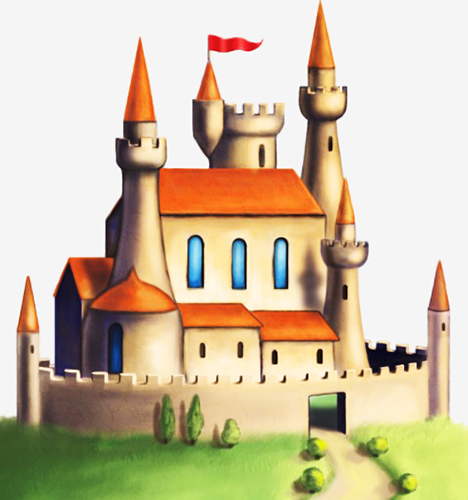
- Using lines and shapes, draw out the bases and sharp peaks for each part of this huge structure on paper. The bottom of the towers is shaped like cups, and their tops should be represented by pyramids.
- Draw horizontal rows of bricks.
- Remove all auxiliary lines and then color the building itself and the background.
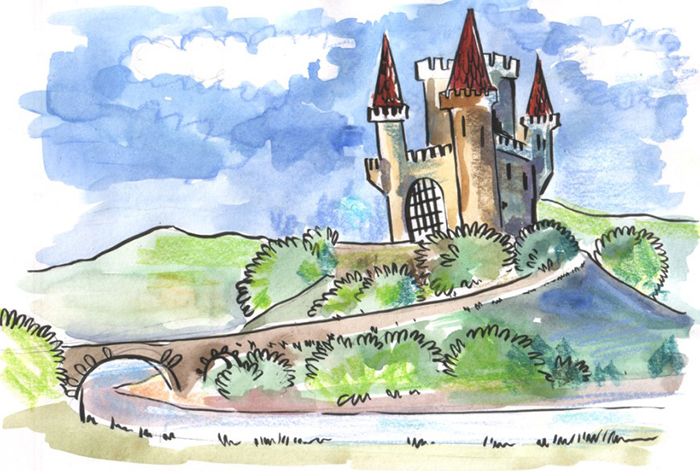
Watercolor
Before creating a colorful painting, you need to prepare the following materials and tools:
- simple pencil;
- eraser;
- palette;
- watercolor;
- brushes;
- container with water.
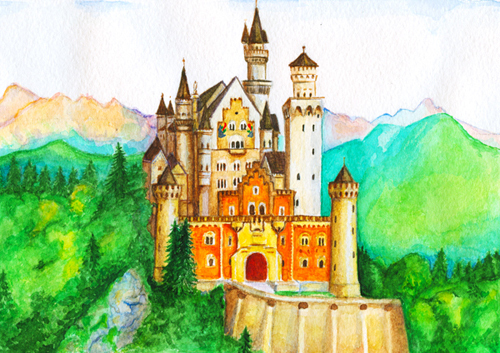
The stages of work will be as follows:
- On a piece of paper, use a simple pencil to mark the outline of the hill and its highest point on the left side, where the castle will be located. It must be depicted as an unfinished rectangle, on top of which there will be a triangular roof.
- On the slope of the hill, mark a vertical segment and connect it with a horizontal line to the tower. On the right side, add several more rectangles.
- On each of the rectangles, draw different roofs - triangular and flat.
- Draw the outline of the castle, and on each roof mark the chimney in the form of an elongated rectangle.
- Draw small windows on each of the towers.
- To color the picture, take paints, brushes and a container of water.
- Paint the sky above the castle light blue.
- Use blue paint to mark the clouds.
- Add volume to the hill by mixing black paint with white.
- Add a dark green shade to the hill.
- Use blue paint and ochre mixed with brown to paint the castle building.
- Paint the roofs grey and blue.
- Outline the window contours in brown.
- Add stone texture to the tower walls.
- Draw lines over the roofs.
Landscape with a castle
In order for the landscape, which stands against the backdrop of the castle, to be as realistic as possible, it is necessary to harmoniously arrange all the objects, construct them correctly, and then form the volume.
To do this you need:
- Mark the horizon line. It is important to determine its exact location, as it has a significant impact on the perspective of the landscape. Mountains and trees are often located on this line.
- Mark the largest objects.
- Refine the details of the drawing: draw windows and small trees.
- Work with light and shadow. For this, use an HB pencil.
- Add volume with tone. Window openings, places under trees and surfaces located on the shady side are subject to shading.
Any child will enjoy drawing castles, especially if you give the structure an unusual, whimsical shape and add bright elements.
Video about drawing
Master class on drawing a princess castle: