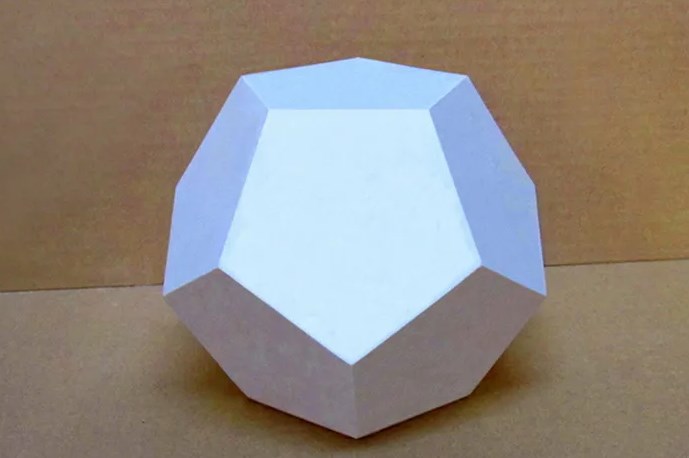
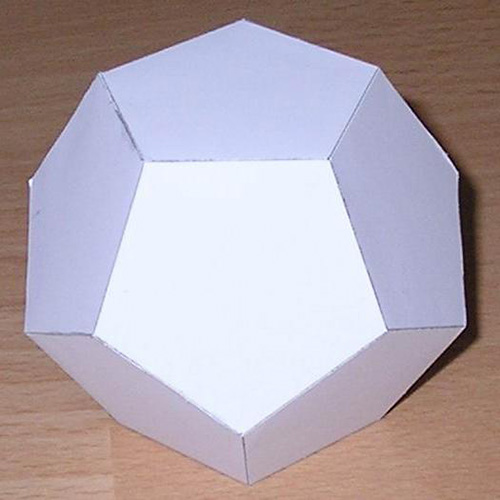
A dodecahedron made of paper or cardboard can be used as a model for classes with children. The student can be shown the shape of the figure, and together they can count the faces, angles, and edges. Also paper and cardboard figures Can be used for desktop decoration, as a prop in a photo studio or for room decoration.
Before you start working, you need to learn how to make a pattern for gluing yourself.
Features of the figure, how many faces and angles does a dodecahedron have
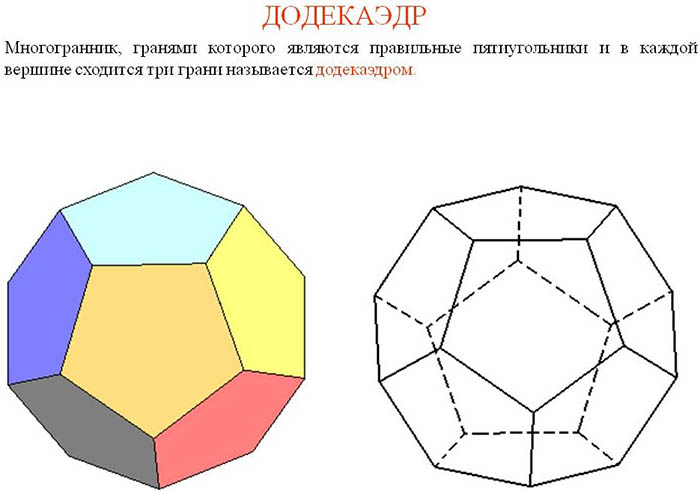
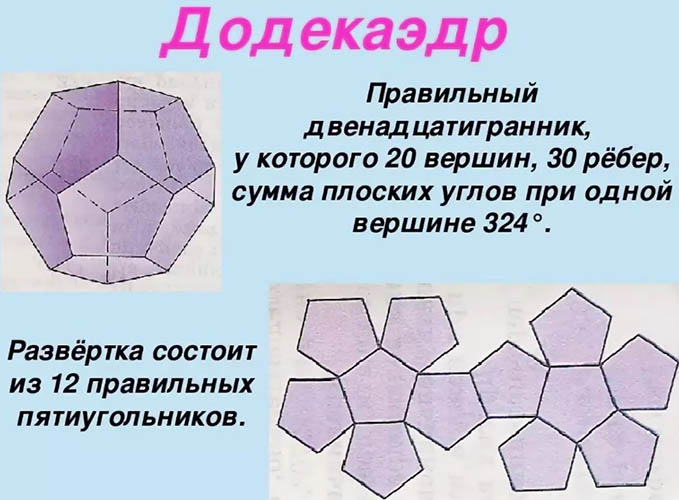
From ancient Greek, the word "Dodeca" is translated as the number 12. The word "Hedra" means "face". The figure is called "Dodecahedron", which means twelve-sided. It is a three-dimensional geometric figure consisting of 12 faces. Each face is a pentagon with equal sides. In geometry, the Dodecahedron is considered a Platonic solid.
The table shows the characteristics of the figure:
| How many sides does 1 face have? | 5 |
| Total number of faces of the figure | 12 |
| How many edges are attached to the vertex? | 3 |
| How many vertices are there in total? | 20 |
| How many ribs are there in total? | 30 |
Since the face of the dodecahedron has the shape of a regular pentagon, the volumetric geometric body is also regular. Each vertex is common to 3 pentagons. If you add the plane angles, you get 324 degrees. The dodecahedron has 15 planes and 15 axes of symmetry.
What you need to make a dodecahedron with your own hands
To assemble a dodecahedron from paper or cardboard.
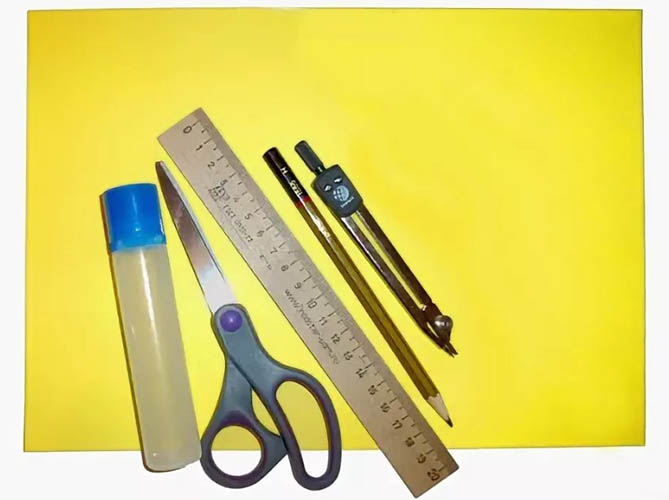
You need to prepare all the necessary materials and tools:
- cardboard for children's creativity;
- paper or strong corrugated cardboard (you can cut a sheet from a moving box or from the packaging of household appliances);
- simple pencil;
- ruler;
- compass;
- scissors, stationery knife;
- glue stick or Moment glue.
The paper on which the drawing will be transferred must be thick. You can use album sheets, watercolor paper or printer paper. Sheets with a density of less than 80 g/m2 are not suitable for work, since the figure made from them will be flimsy and will not hold its shape.
How to make from A4 paper
The creation of a paper dodecahedron takes place in 6 stages:
- sizing;
- creation of a template of 1 face for ease of drawing;
- drawing up a development;
- cutting out the finished pattern;
- forming lines along which the paper will be folded;
- gluing the figure.
You can glue the edges together using a glue stick or PVA. It is desirable that the liquid glue be in a bottle with a dispenser. This will make it easier to apply. For products made from thick cardboard, you need glue that hardens quickly, so that you do not have to hold the figure in your hands for a long time waiting for gluing. You can replace the glue with thin double-sided tape.
It is not recommended to use hot glue. It is too bulky. Small gaps will form between the gluing allowances and the walls of the figure. The craft will be uneven and will look unattractive.
Size calculation
The dodecahedron (the pattern for gluing which in full will not fit on 1 sheet of A4 paper) is made from 2 sheets. If you try to make a figure from 1 sheet, it will turn out very miniature, and gluing the parts of such a bouquet craft is very difficult.
To construct a drawing of 1 face, you need to draw a circle. Its optimal size is 5 cm. Half of the scan with faces of this size will fit neatly on 1 sheet of paper. If you want to make the figure larger, you need to take into account that the scan must have allowances for gluing. The minimum width of each gap is 5 mm.
Preparing a cardboard template
A dodecahedron (the pattern for gluing will consist of 2 parts, with 6 faces in each) can be made of paper using only 1 template in the form of a regular pentagon.
How to fill in the drawing of 1 face:
- On a sheet of thin cardboard, draw a circle using a compass. Its diameter is 5 cm.
- Find the center of the circle. Draw 1 vertical and 1 horizontal line through this point.
- Inside the circle, step back 1 cm from the horizontal line. Put a mark on the border of the upper left sector of the circle. Call the point the letter "A".
- By analogy, place a mark on the upper right part of the circle. Call the point the letter "B".
- Find the top of the figure. This is the intersection of the vertical line and the boundary of the circle. Call the point the letter "C".
- From the center of the circle, step down 2.5 cm.
- Draw a horizontal line 3 cm long. The vertical line inside the circle should divide the new line in half. That is, 1.5 cm should remain on each side.
- The ends of the new horizontal line are called points "E" and "D".
- Connect point "E" with point "A".
- Connect mark "A" with the top of figure "C".
- Draw a line from point "C" to point "B".
- Connect point "B" with mark "D".
Finally, you need to check whether the sides of the pentagon are equal. If these indicators are OK, then the workpiece can be cut out with scissors.
Construction of the development, drawings
A dodecahedron (the pattern for gluing is constructed in the center of the sheet) can be assembled from 2 drawings.
How to make 1 part of the scan, using a cardboard template:
- Place the template on the paper with the top facing up.
- Trace the workpiece along the contour.
- Turn the cardboard template sideways. Connect the right side of the figure to the left side of the already drawn shape. Trace the cardboard template along the contour.
- Move the template to the upper left side of the central figure. Trace the blank along the contour.
- Move the template again, placing it sideways to the upper right side of the central figure. Trace the blank along the contour.
- Align the side of the template with the right side of the central pentagon. Trace the template along the outline.
- Finish drawing the last edge by analogy.
- Add allowances for gluing. On the upper parts of the pattern, these allowances should be located on the left side, and on the lower parts of the pattern, on the right side.
- The edges of all seam allowances must be beveled.
- By analogy, you need to make another scan on the 2nd sheet of paper.

Cut out both figures along the outline.
Working with a finished form, gluing
How to assemble a dodecahedron:
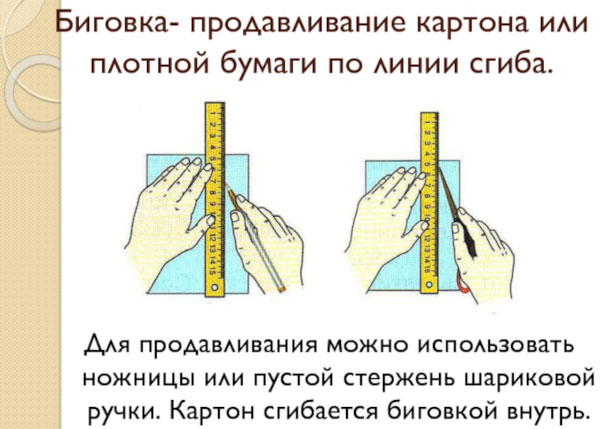
- To make the paper fold easily, you need to press all the fold lines around the central figure. For this purpose, you can use the edge of a ruler or the back of scissors.
- Fold all gluing allowances inward.
- When assembled, each scan should resemble a hemisphere with edges. Glue should be applied to the allowances for gluing, and then carefully connected to the edges of the figure. The fold lines on the "ears" for gluing should coincide with the edge of the edge.
- Assemble 2 reamers separately.
- Glue the halves of the dodecahedron together. Wait for the glue to dry.
You can decorate the finished dodecahedron with colored paper or glue photographs or calendar sheets onto the edges.
Great Dodecahedron Made of Cardboard
The dodecahedron (the pattern for gluing can be made according to a template, just like for creating a paper figure) made of cardboard can be of any size. The pattern drawing should also be made in 2 parts.
What kind of cardboard is suitable for work:
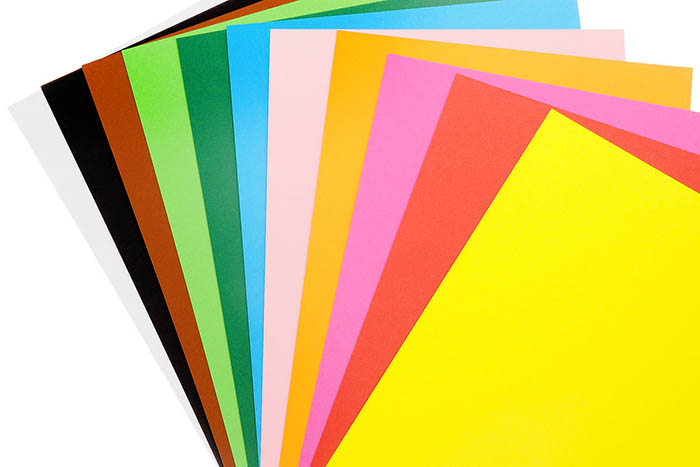
- Colored (children's). A good option for creating a dodecahedron with a facet that is no more than 5 cm high. Children's cardboard is thin, so it will be very difficult to make a large figure. You will have to cut out all the faces separately and draw additional allowances on them for gluing.
- Printing. A denser material used in printing. This cardboard is used to make book and diary covers, as well as packaging for small items. It is used to create hardcover books and notebooks, as well as for packaging small items. A dodecahedron made from this cardboard can be of any size. It will be strong and stable.
- Packaging. Thick cardboard with a corrugated texture, consisting of several layers. From such material you can make large figures, which can later be used to decorate your home interior, or serve as a decorative object for a photo studio.
Usually, packaging and printing cardboard are brown. The finished figure made from such material can be painted or covered with beautiful paper.
Features of working with rigid cardboard
Packaging and printing cardboard is a rigid material that is difficult to work with.
To make a neat dodecahedron, you need to know a few tricks:
- The drawing is built directly on cardboard. To avoid mistakes when building the drawing, you need to use a long ruler (30 cm or more). With a smaller tool, it is easy to get confused and draw an uneven pattern, which will not allow you to assemble the figure correctly.
- Thick cardboard should be cut with a stationery knife. It is inconvenient to cut such material with scissors, as you will have to press on the tool with great force. There is a high probability that your hand can slip off the handle of the scissors. This can injure you or ruin an even cut.
- Packaging and printing cardboard is difficult to bend and press. To make the parts bend easily, all the fold lines must be very carefully cut with a stationery knife, making dotted cuts. Do not cut all the way through. It is enough to make cuts only on one of the layers of cardboard, on the inside of the figure.
- After cutting, you need to cut off all the burrs and remove any unevenness on the cardboard.
- The allowances for gluing should be secured one by one. The glue should be applied to the entire strip in a thick layer, and then the excess glue should be removed with a napkin.
- The cardboard must be smooth. Before work, you need to make sure that the sheet is not bent or torn. Excess creases and tears will spoil the appearance of the figure. In some cases, these defects can disrupt the integrity and symmetry of the structure.
- It is not recommended to use cardboard with a glossy surface for work. Such material is difficult to glue. You will have to wait a long time for the glue to dry.
- The finished product should be painted after the glue has completely dried. Liquid can get on the glue that has not dried and dilute it. The glue will lose its viscosity and will not connect the parts properly.
- On single-layer cardboard, there is no need to make cuts on the fold lines. It is better to press them with the back of scissors or the edge of a ruler.
- Before assembling the finished product, you can pre-assemble the figure, fixing the allowances for gluing with pieces of double-sided tape. This method will help to eliminate inaccuracies that cannot be seen in the drawing.
When choosing packaging cardboard, it is important to pay attention to the number of layers. It is not recommended to use material consisting of more than 4 layers. This is too thick cardboard, which will be difficult to cut and bend. It is also necessary to remember that the thicker the material, the wider the allowances for gluing should be. Thin strips will not be able to hold the edges in place. The connection will be unreliable.
Preparing and cutting out the template
The dodecahedron gluing pattern described in this tutorial will be constructed without using a template.
Procedure:
- Prepare 2 sheets of cardboard.
- On one of the sheets draw a circle with a diameter of 10 cm.
- Divide the circle into 4 parts by drawing a vertical and horizontal line through its center.
- Mark the corners of the pentagon with dots.
- Connect the dots using a ruler.
- Check if all edges match in length.
- Draw 5 more identical figures from all sides of the pentagon. Their sides should become common with the sides of the central pentagon.
- Draw allowances for gluing. On the upper edges they should be located on the right side, and on the lower ones – on the left side.
- On another sheet, draw another scan, repeating instructions 1 through 8.
Cut out the parts with a utility knife, applying a ruler to the drawing.
Connecting the edges
Before joining the parts, it is necessary to make cuts on all the lines that form the central figure, and also cut the fold lines of the gluing allowances. Then you need to bend all the edges to the center.
Apply quick-drying glue to the entire surface of the gluing allowances. Connect the parts one by one, fixing the gluing place with your fingers. Remove excess glue. Leave large drops until completely dry, then carefully cut them off with a stationery knife.
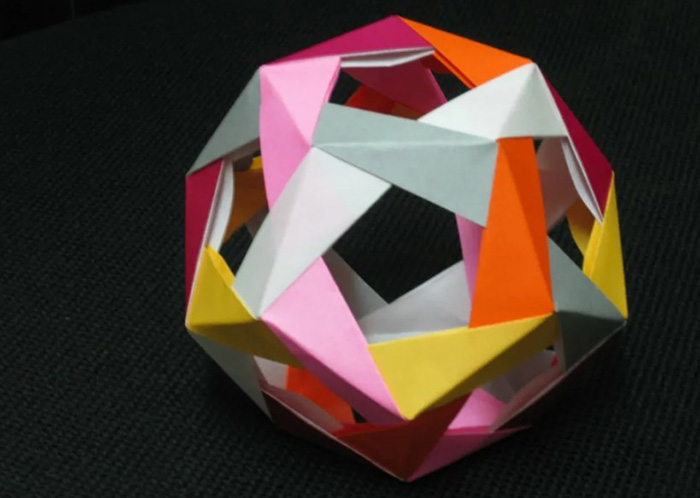
Dodecahedron with holes on the faces
You can make a beautiful dodecahedron out of colored paper, with holes on the edges. This figure is made without using glue. The edges consist of modules that are simply inserted into each other.
For work you will need paper of 3 colors. From it you need to cut 10 squares of each color. Size of squares: 10x10 cm.
What to do next:
- 1 any square will fold in half.
- Fold 1 layer so that the edge coincides with the fold line.
- Turn the paper over and fold the 2nd layer in the same way. You should get an accordion of paper.
- Fold the top corner of the strip so that its right edge matches the left.
- Turn the strip over to the other side. Fold the top corner in the same way.
- A rectangle has formed between the corners. It needs to be folded diagonally. For convenience, you can use a ruler, placing it from one corner to the other.
- Iron the fold line well.
- The first module is ready. The remaining squares need to be folded, repeating the instructions from 1 to 7.
- All parts have 3 layers inside. To connect 1 module to another, you need to open 1 part and insert the tip of the other part between the top and middle layers. The corner of the inserted module should be perpendicular to the corner of the other module.
- The next part needs to be inserted in the same way, but in the 2nd module.
- Move the part down. It should now be positioned between models 1 and 2.
- The corner of the first module must be inserted between the salts of the last one and pushed down. The connection must be reliable. The paper must not jump out or slide.
- 4 piece must be inserted so that it is parallel to the module of the same color.
- The other part should be placed in a similar way. Modules of the same colors should be parallel to each other.
- Continue adding new modules. On the 7th part, the shape of 3 faces is already formed. It will be easier to assemble the dodecahedron further. You just need to add a new module to form the shape of the face.
- By analogy, insert all the parts into each other. It will be difficult to connect the last corners, since you will have to unfold the modules. The main thing is not to pull the corners to the sides too much, otherwise the parts in another part of the figure may come apart.
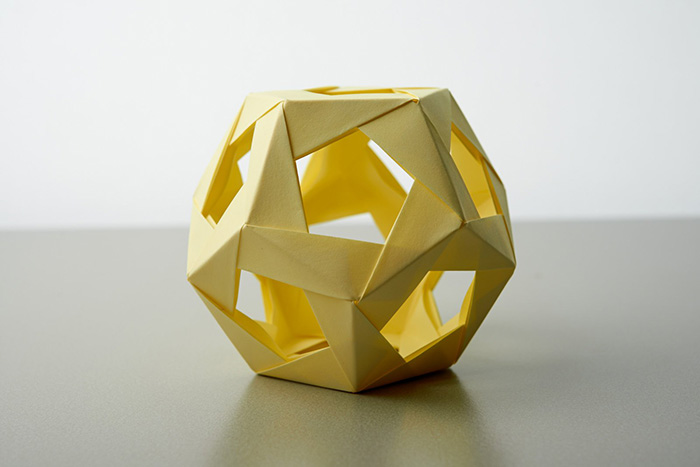
The dodecahedron with holes on the edges, made using the origami technique, is ready. It can be used as a desktop decoration.
You can make a dodecahedron with holes on the edges from thick cardboard.
This will require slightly modifying the drawing:
- Draw a pentagon in the center of a piece of cardboard.
- Draw 5 more of the same figures around the central figure. They should have common sides with the figure located in the center.
- For convenience, you need to number the figures. It is better to start the report from zero. Let the central figure be marked with the number "0", and the rest - with numbers from 1 to 5.
- From the left side of figure No. 1, draw another pentagon.
- Add another shape, placing it above pentagon #2.
- Add one more shape above the 3rd and 5th pentagons.
- Above figure #4, draw 2 pentagons.
- Draw allowances for gluing.
- Draw a smaller pentagon inside each shape.
- Using a ruler and a utility knife, cut out the workpiece along the outline.
- Cut holes inside each shape.
- It is important to ensure that the width of the dodecahedron frames is not less than the width of the allowances for gluing. Otherwise, these "ears" will be visible through the holes, and it will not be possible to glue the dodecahedron neatly.
- Make slits on the fold lines. Fold the cardboard.
- Apply glue to the gluing allowances one by one and fix them. Wait for the glue to dry.
The finished figure can be painted in different colors.
It is not difficult to assemble a dodecahedron from cardboard or paper with your own hands. The instructions will help novice craftsmen prepare an accurate layout for gluing. In order for the figure to be strong and stable, it is necessary to choose the right materials and use the right tools for the job.
Video about the craft
How to make a stellated dodecahedron: