Brooches from beads have gained popularity at the end of the 19th century and remain fashionable jewelry today. To learn how to make such accessories by hand, novice craftsmen need to know what tools and materials are suitable for the job, and should also read step-by-step instructions for creating simple brooches of different types.
Materials and tools for creating a beaded brooch
The list of tools needed to create bead brooches can be found in the table.
| White paper | A stencil is drawn on paper, according to which the work will be done. It can be contour, colored or detailed, that is, you can mark the position of the beads. |
| Glue | To create your first works, you can use transparent glue "Moment" or "Crystal". For assembling more complex items, you can use hot glue in a gun or special adhesive solutions designed for working with felt. |
| Needles | Needles thinner than sewing needles are created for bead weaving and embroidery. The size of the needle should be selected taking into account the diameter of the hole in the beads. The needle should slide freely through the beads, and also confidently pierce felt, fabric and artificial leather. |
| Scissors | Tools with long, thin blades are suitable. |
You will also need artificial leather. It is used to trim the back of the finished product to enhance its aesthetics.
Beads are sewn onto felt.
It is divided into 3 types:
- Material made of natural wool. Holds shape well, easy to dye. Expensive. Can be used to create brooches.
- A soft fabric with a mixed composition. Not suitable for embroidering brooches, as it does not hold its shape well.
- Synthetic fabric, dense, resistant to high water temperatures (during washing). Does not wrinkle, holds shape, is easily pierced with a needle. Suitable for making medium-sized brooches.
- Hard and dense felt, which contains viscose. Suitable for embroidery with large beads and creating voluminous items.
You also need high-quality threads for the work.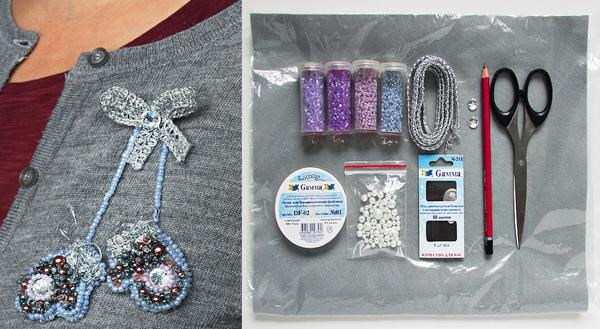
What types of threads can be used:
- Cotton and linen. They are smooth, pleasant to the touch, and also have a wide range of colors. Disadvantages: they quickly tear and rot in high humidity.
- Synthetic. Durable, not affected by moisture. Disadvantages: can cause an allergic reaction on the skin of the master.
- Reinforced. Durable, strong, not affected by the environment. Disadvantages: high cost, ability to cause allergic rash on the skin of the master.
Rash and other reactions to the last 2 types of threads can only be caused by prolonged contact with the materials. If the master works on the product, sewing it with such threads for no more than 2 hours a day, then these troubles can be avoided.
Beads
Beads vary in size, shape and hole diameter. These parameters depend on the country of manufacture.
What types of beads are there:
- Material made in China. Often you come across defective beads. They have uneven edges, holes of different diameters and look cheap. Experienced craftsmen advise beginners not to buy such beads. Products assembled from this material will look sloppy and unattractive, despite the experience and efforts of the craftsman.
- Czech beads. The complete opposite of the material described above. All beads are even, smooth and shiny. Defects are extremely rare and in small quantities. Such beads produce high-quality and beautiful crafts.
- Japanese beads. Even better than Czech. Its only drawback is the high cost.
- Material made in India and Taiwan. The beads easily split, have uneven edges. Often there is a defect. The paint quickly fades and peels off. The color palette is poor. There are no bright shades. It is better to give preference to another manufacturer.
Sometimes, in order to save money, craftsmen create works consisting of several types of beads. This method of work is not suitable for everyone. It is important to remember that high-quality material will last longer, and the one that was bought for modest money will deteriorate sooner. After a while, the brooch will look worse than if it was made entirely of 1 type of high-quality material.
Additional decor
How can you add variety to your beaded jewelry:
- Chain of rhinestones. Small multi-colored or single-color rhinestones are fastened with a metal, movable chain. Such ribbons are used to trim products along the contours, make various loops, tassels and other additional elements. The ideal size of rhinestones on a chain for a harmonious combination with beads is 2 mm.
- Glass beads. You can use imitation pearls, cat's eye and translucent beads. Suitable bead sizes: 3-6 mm. Sometimes you can use 8 mm beads.
- Sequins. They can be round, oval and square. The color palette is varied. Sequins can be used to cover empty spaces between rows of beads on an embroidered brooch.
- Rhinestones of any type and color. They perfectly imitate precious, cut stones. Often large rhinestones are woven or sewn into the center of the product. Small rhinestones can fill the outline of the product.
- Glass beads. Often used to create voluminous, woven brooches. On items in the form of insects and animals, glass beads imitate paws, wings and legs.
- Feathers. You can use natural colored feathers or artificial ones. They are attached to the base of the product with glue.
You can also use lurex threads and chenille wire as decoration.
Accessories for beaded brooches
A beaded brooch (for beginners, it is important to familiarize yourself with all types of fittings and choose the appropriate option) should be securely attached to clothing. Craft stores offer a large selection of fittings for creating beautiful products.
Settings
The fastening looks like a small saucer with a voluminous, textured frame. On the back there is a fastening in the form of a pin (like on badges). Beads, rhinestones and beads are attached to such fittings using glue. For transparent beads, there are settings with holes and holding tabs. Such a brooch base is suitable for beginner craftsmen who have not yet mastered the skill of weaving and bead embroidery.
Pendants
They look like settings, but instead of pins they have a loop, like pendants. A ring is threaded through the loop, and through it a chain on which the brooch will hang.
Jewelry mesh and tape
Jewelry mesh is available in 2 versions: synthetic and reinforced. Sometimes you can find a mixed version. Synthetic meshes are elastic and can be of different colors. Sometimes with the addition of lurex. They are hollow inside. Jewelry meshes are strong, sewn into a sleeve. The diameter of the sleeve can be different. They hold their shape well. Usually these tapes are used for filling with beads or stone chips. They can also be used to cover large beads.
Reinforced tapes are not prone to fading and abrasion, but are sensitive to high temperatures, acids and other aggressive conditions. Also, reinforced nets should be stretched smoothly and carefully. It is not recommended to fill them with a large number of beads or attach heavy, metal beads to them. To fix such tapes, use crimp beads, which are called "crimps", as well as glue and transparent threads.
Auxiliary fittings
What else can be used to create brooches:
- Rings. They are needed to make pendants. The rings can be double or single. To fix the ring on the setting loop, it needs to be slightly loosened with nippers. The loop is inserted into the resulting hole and the ring is closed again.
- Spacers. These are special spacers. They are inserted between small beads and large beads. Spacers can be of different shapes: long, round, oval, flat.
- Fastening in the form of a small needle. The needle is attached to the setting. When it pierces the clothing, a cap is placed on the back of the tip, which is securely fixed with a clamp.
- Pins. You can use regular pins, but models with loops will look better. They allow you to fix the brooch securely and evenly.
Regular pins are more difficult to weave with bead thread, however, you can glue the product to the non-opening edge of the clasp.
Types of beaded brooches
Beaded brooches differ not only in the type of fastening on clothing. They can also be divided into 2 types, by the technique of execution: embroidered and woven. Further in the article you can read about these types of products in more detail.
Embroidered
A beaded brooch (for beginners, it is better to start classes using hard felt, and then move on to less dense fabrics) is embroidered on felt or thick fabric, like denim. This fabric holds the weight of the beads well, does not stick out or stretch. The master cuts out a blank of the desired shape, makes marks on the fabric, and embroiders the pattern, filling in the outlines of the sketches.
Such brooches should be stored separately from each other. The items should not touch each other or come into contact with other jewelry. It is not recommended to wear an embroidered brooch under outerwear.
The service life of embroidered brooches depends on the quality of the beads and threads used for the embroidery. Cotton threads and fishing line deteriorate faster than lavsan or transparent monofilament.
Wicker
Braided brooches are not as flat as embroidered ones. They can be voluminous and have complex shapes.
The type of product depends on the beading method.
What are the techniques:
- Mosaic. Products made by this method are durable and dense. They hold their shape well.
- Nebele or "fish bone". Flat weaving, where the beads are arranged in a herringbone pattern. This weaving method is usually used for simple items that will later be pinned to a backing.
- French. The loops are collected in a circle. The method is used to create large flowers.
- Parallel weaving. One of the simple ways to create three-dimensional products from beads. Experienced craftsmen know how to weave complex and three-dimensional forms.
Weaving techniques can be combined. You can also dilute your work with other types of art, such as polymer clay molding, drawings, or thread embroidery.
Where to start and how to choose the most effective combination of materials
A beaded brooch (for beginners, markings should be done not only on paper, but also on felt) should be drawn on paper. The sketch will help you think through the location of all the details, as well as the color of the beads and additional decorations.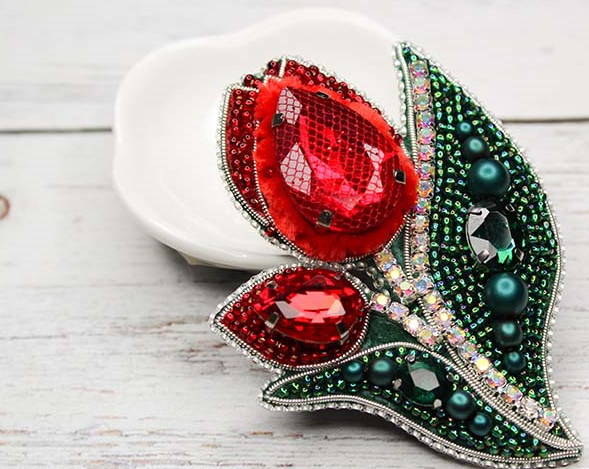
To get a beautiful product, you need to know how to combine different materials:
- Beads and seed beads. The base of the product consists of beads. Beads are decoration. Round beads can be braided with bead thread. For embroidered brooches, it is better to choose flat half-beads, which will be easy to sew to the fabric backing.
- Beads and stones. The combination of a shiny stone and matte beads looks expensive and original. You can make a bead braid for a flat stone. This method is called "cabochon".
- Beads and feathers. The feather or fluff can be a contrasting color to the beads, or be monochrome. You can combine beads, seed beads and feathers to create a brooch that will decorate an evening dress.
All materials must be of high quality, otherwise it will not be possible to make a neat and durable decoration.
Master classes on creating a beaded brooch, weaving and embroidery patterns
Beginners are advised to begin their acquaintance with the art of creating bead brooches by making flat items. Although the variety of materials tempts you to make something extravagant and unusual, to develop the skill you need to learn how to create simple works. First, you should learn how to lay the beads evenly, as well as attach fasteners to finished products with high quality.
Further in the article you can look at several step-by-step master classes on making simple brooches.
Brooch pin
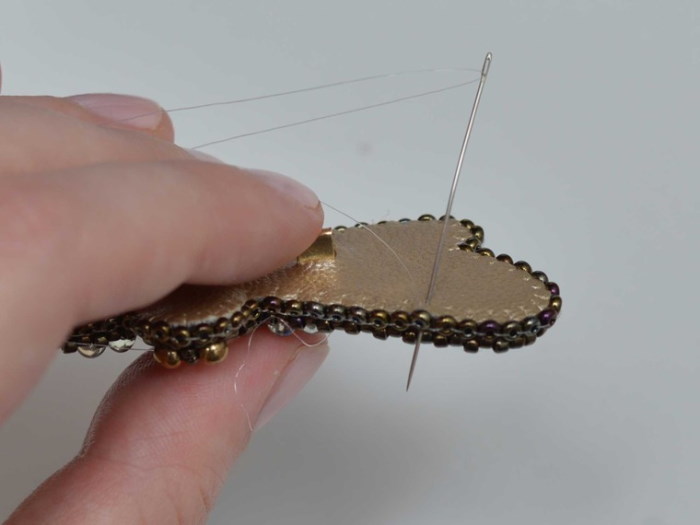
This master class describes a heart-shaped brooch pin. When creating such a brooch, you will need to thread the needle through the beads several times. If the tool is difficult to pass through the holes in the beads, do not press on it. The beads may split. It is better to change the needle to a thinner one.
For work you will need round beads and a chopping block. The color can be any.
How to weave:
- Weaving is done from the middle to the left side, then to the right. Pick up 1 bead on a thread 220 cm long. Add 8 more beads and secure 2 rows using the direct weaving technique. Go through the rows 2 times to fix them. This should also be done in all rows.
- Finish row 2. At the beginning of a new row, add 1 bead. Finishing row 3, remove 1 bead.
- In the 4th row, remove 1 bead at the beginning and add it at the end. Start the 5th row by adding 1 bead.
- Remove 1 bead at the end of row 5 and at the beginning of row 6.
- In the 7th row, remove 2 beads, from the beginning and from the end.
- Remove the bead that was secured first in the weaving. You need to pass the thread along the weaving so that it comes out on the 2nd half of the heart.
- Add 1 bead at the end of the new row. This bead will start the new row.
- Remove a bead from the row that began with an increase.
- In a new row, remove 1 bead from the beginning and add 1 to the end. A new row will start with this bead.
- Remove 1 bead from the end of the new row. Also remove 1 bead from the beginning of the next row.
- In the new row, remove 2 beads, 1 from the beginning and 1 from the end.
- String 1 bead onto this thread and go through the cutting row.
- Add 1 more bead. Go along the row of cutting and bring the thread out near the first bead.
- Go down the row of the chop. To hide the thread, you need to pull the needle out of the bead of the longer row.
- Repeat step #13 for each row of felling.
- Fill the row in the center with 1 bead of the cut. Design the lower corner of the heart. Go around the bead and bring the needle out into the collected cut along the entire row.
- In the side rows, pull the needle out between the 1st and 2nd beads. Pick up 1 bead and pull it out through the 2nd bead of the row, to a new gap. Also weave a bead between the outer beads.
- Fasten the thread. Trim off the excess.
All that remains is to glue the heart to the pin.
Brooch-pendant
Pendant in the form of a four-leaf clover with a ladybug. This pendant-brooch is woven in a simple parallel beading technique.
To work you will need:
- light green beads;
- 1 pearl bead;
- green wire;
- red beads
- black beads
- neutral colored wire 0.3 mm.
How to weave:
- Start weaving with 8 beads.
- In each new row, remove 1 bead from the beginning and end until there is 1 bead left.
- Secure the bead with wire by twisting its ends several times.
- Collect 3 more of the same leaves.
- Gather the leaves into a quatrefoil.
- Close the middle of the clover with a pearl bead. It can be glued on.
- Draw a pattern for assembling a ladybug on paper. The optimal width of the beetle is 4 beads. Place the black beads in the center. Draw a head consisting of 2 rows and 3 beads.
- Assemble the ladybug according to the diagram.
- Using glue, attach the beetle to one of the clover leaves.
- Insert a double ring between the bead and the wire, at 1 of the corners of the clover.
The pendant can be hung on a bead thread or a cord.
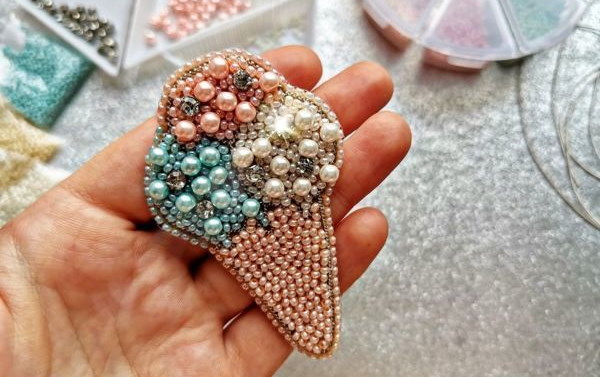
Embroidered brooch
The creation of an embroidered brooch takes place in 7 stages:
- Creating a sketch.
- Steam treatment of felt.
- Transferring a design onto fabric.
- Treatment of threads and beads with an antiseptic solution.
- Performing embroidery.
- Removing excess thread.
- Decorating the back of the brooch and securing the pin.
Before you start working, you need to prepare the materials:
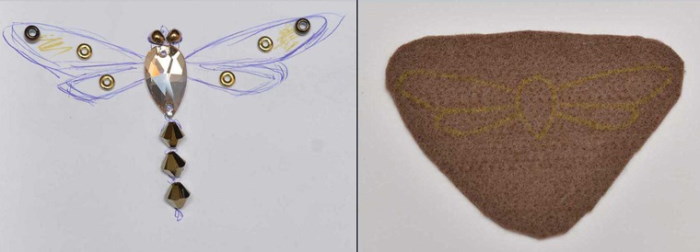
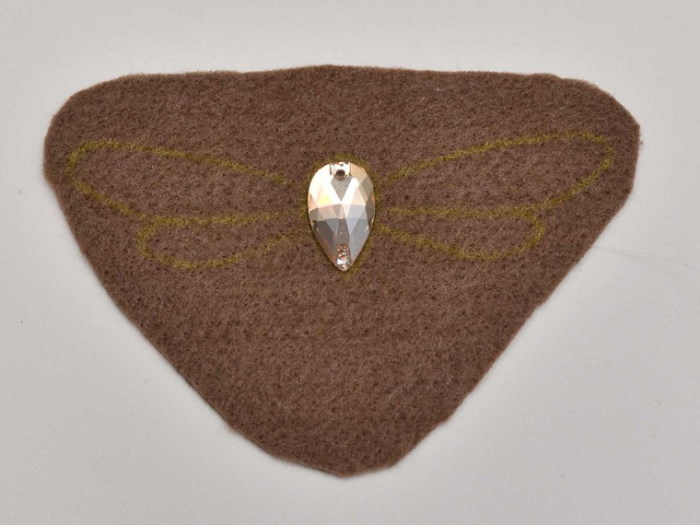
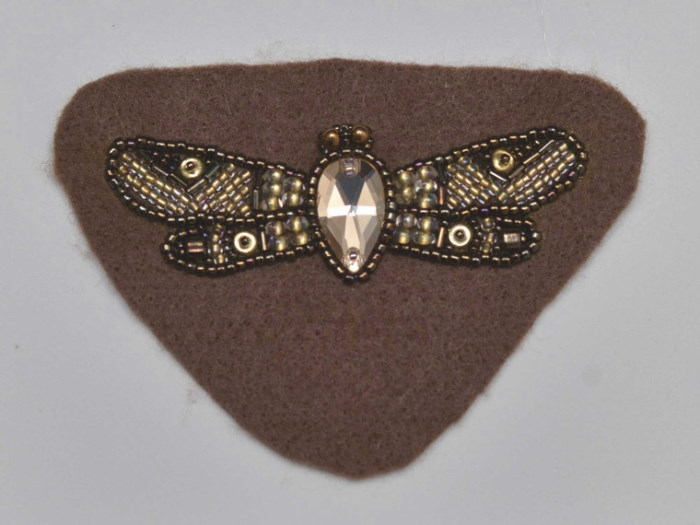
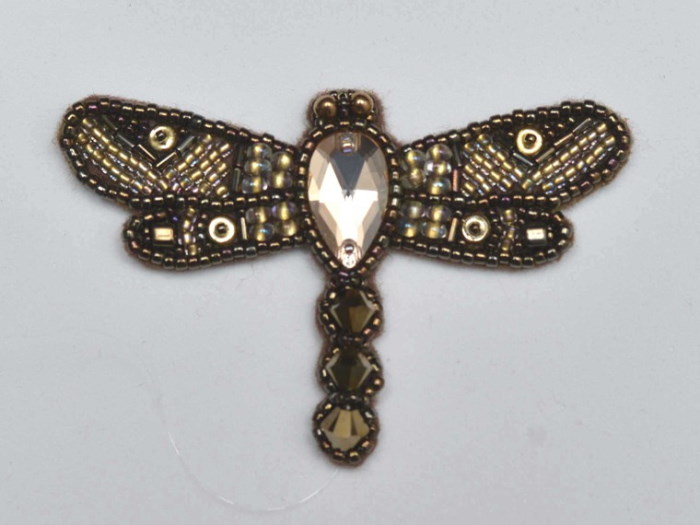
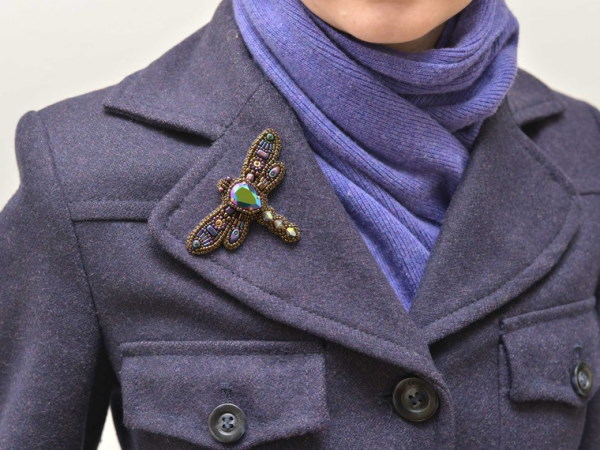
This master class describes a version of a brooch in the form of a butterfly.
What you will need for work:
- piece of felt;
- a piece of skin;
- scissors;
- sheet of cardboard;
- beads of several shades;
- glass beads;
- rhinestones, beads, bicone;
- nylon threads;
- wire;
- needles;
- hot glue;
- pencil.
The template can be printed or drawn by hand.
Next steps:
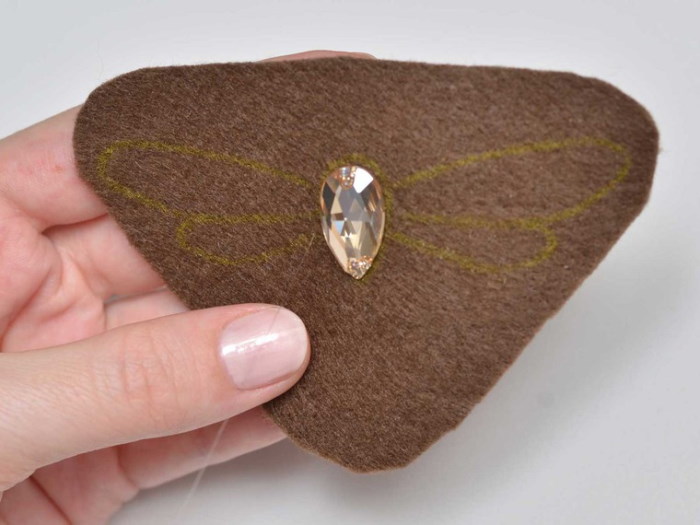
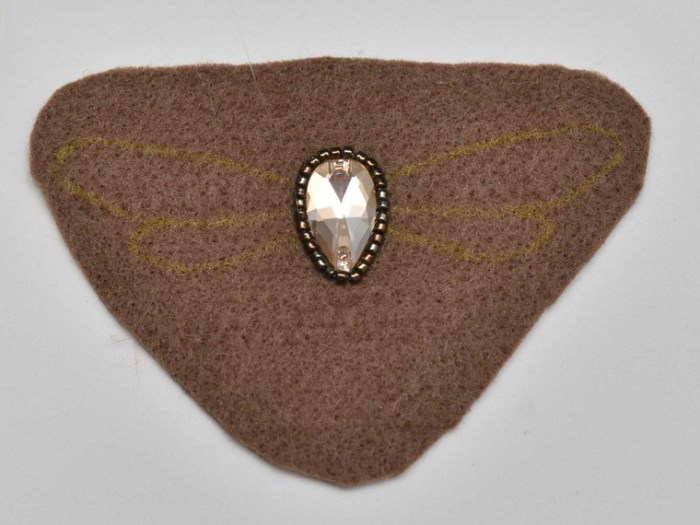
- Transfer the template to the fabric.
- Glue large rhinestones (oval or teardrop-shaped) to the central parts of the wings.
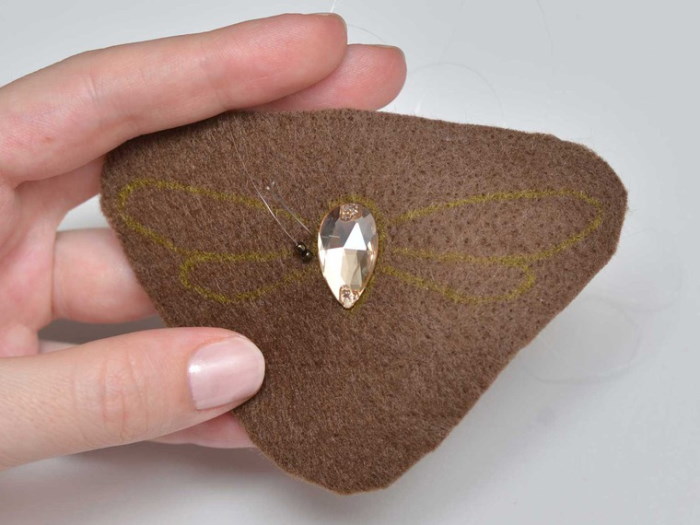
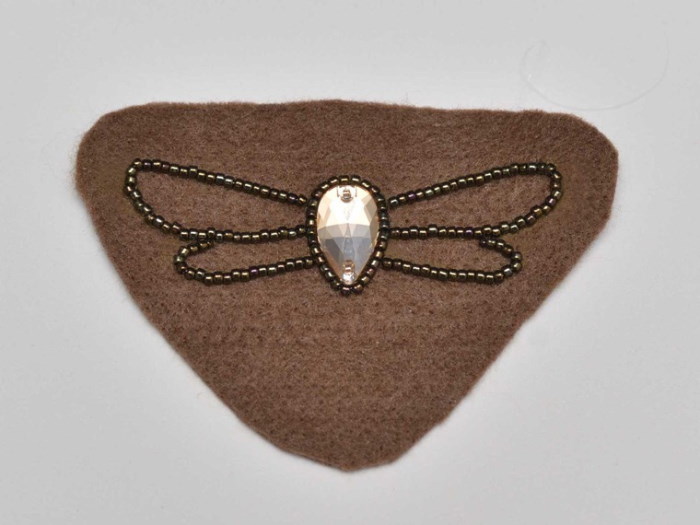
- Sew beads around the outer contour of the figure.
- Separate the lower wings with beads of a different color.
- Sew the inner edges with glass beads. Fill in the empty spaces.
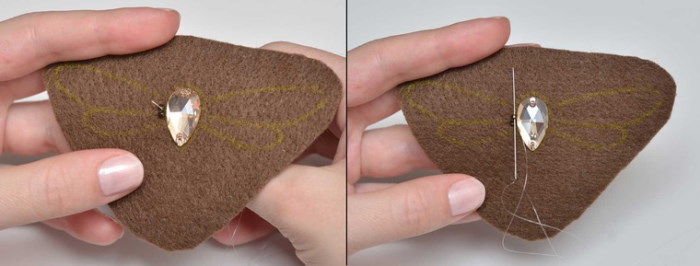
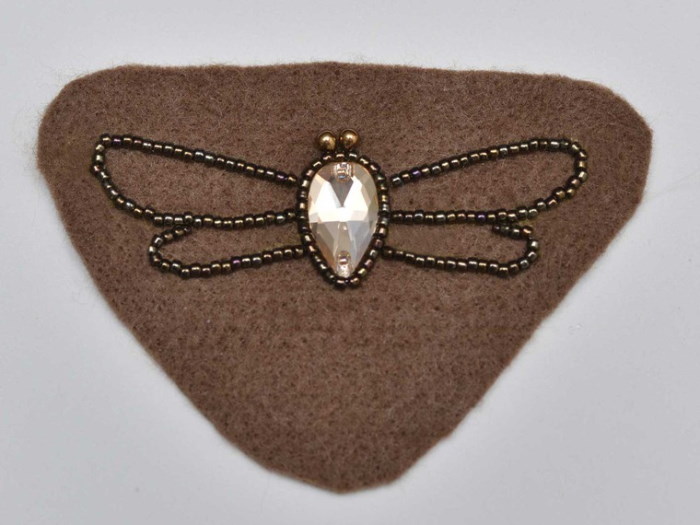
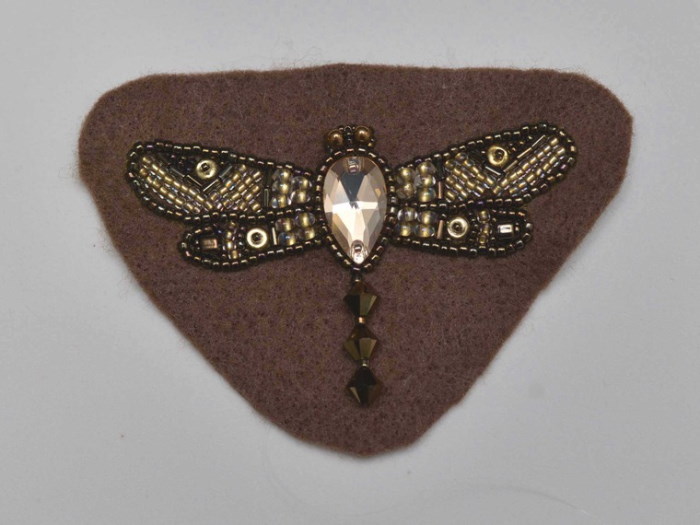
- Form the head from a large bead.
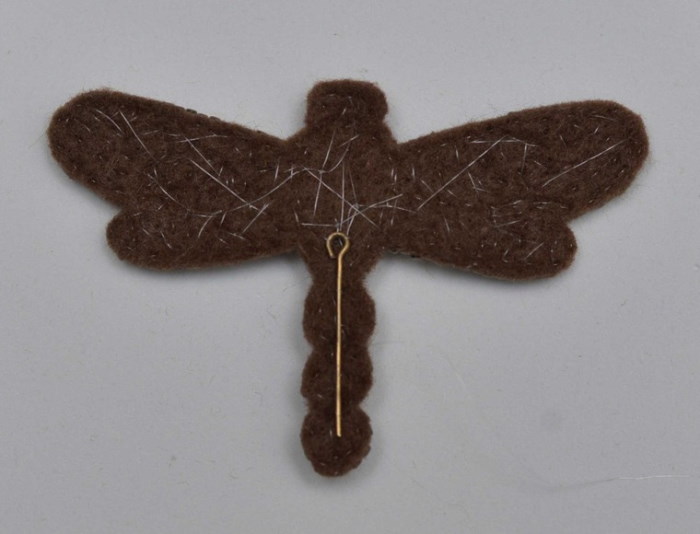
- Cut out the blank from the fabric so as not to cut the threads.
- Make the butterfly's antennae from wire. To do this, thread a piece of wire through the last element of the butterfly's body. Pull the ends out from below.
- Secure the ends, bring them out and cut off the excess.
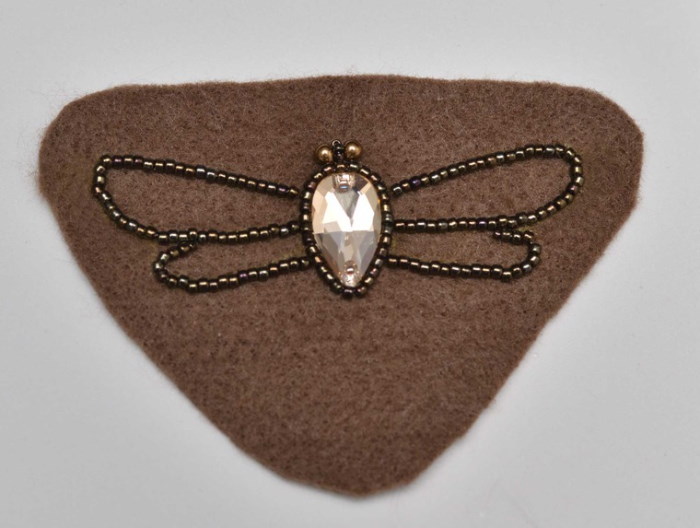
- Place a bicone on each mustache and braid it with wire.
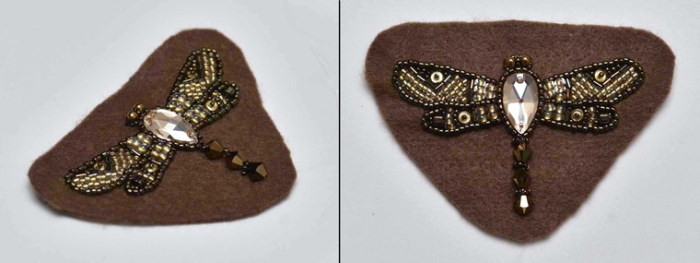
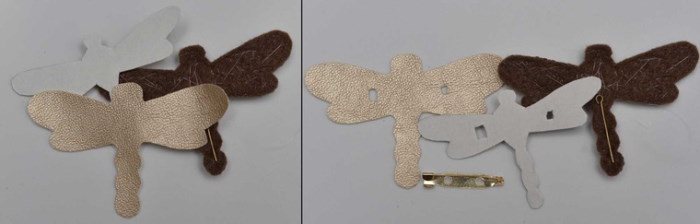
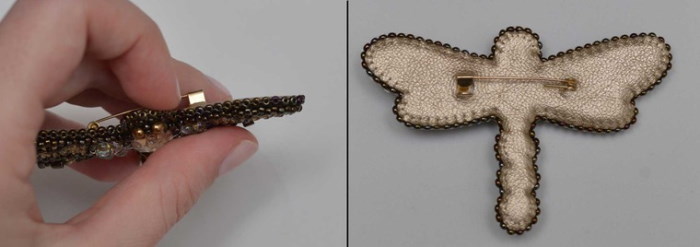
- Cut a backing out of cardboard in the shape of the blank. Glue it to the back of the brooch.
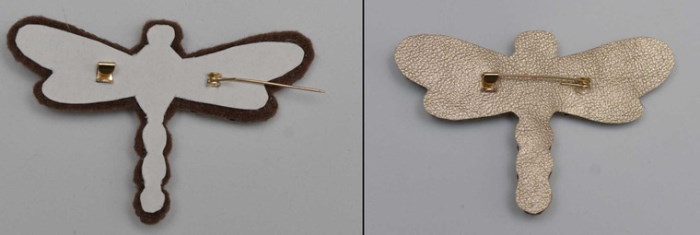
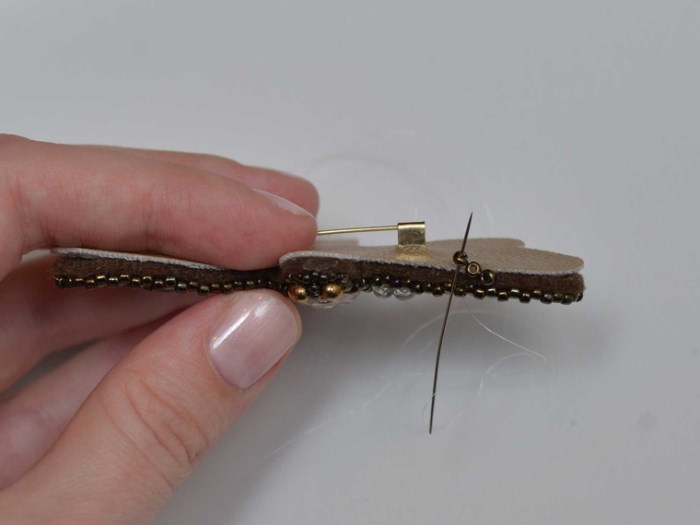
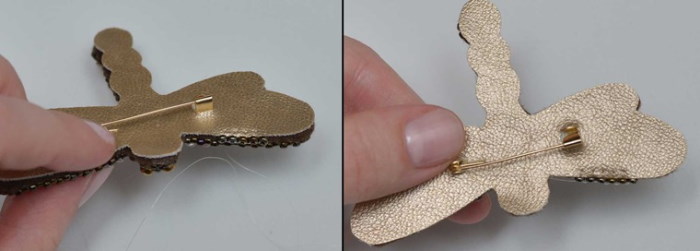
- Cut the lining out of the leather.
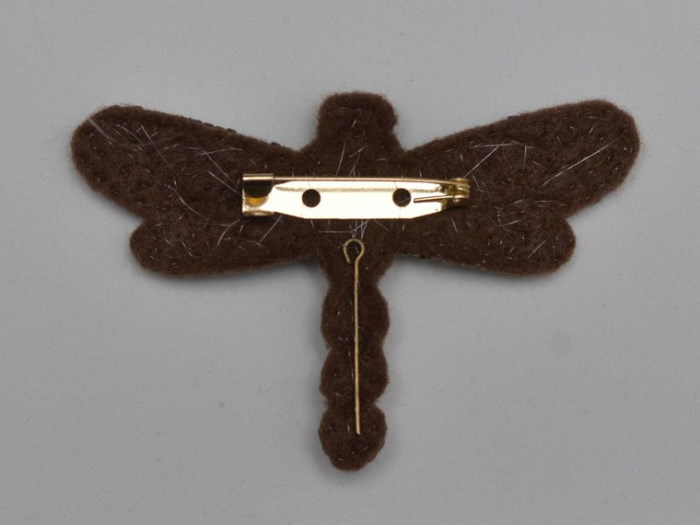
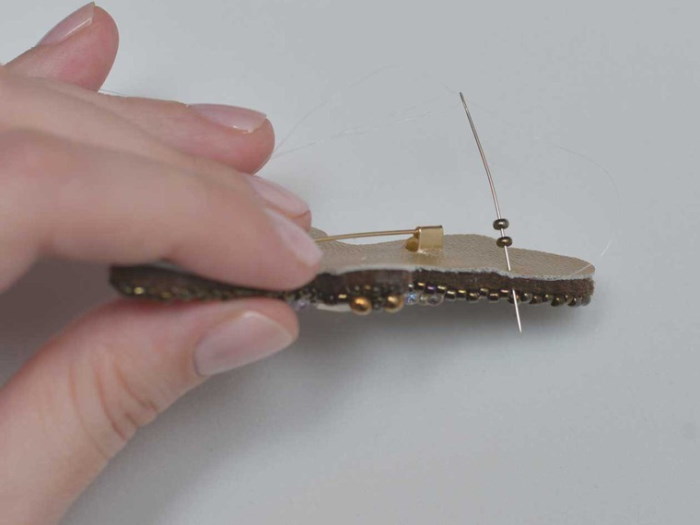
- Use a pencil to mark the location of the fastening on the leather.
- Make cuts using scissors.
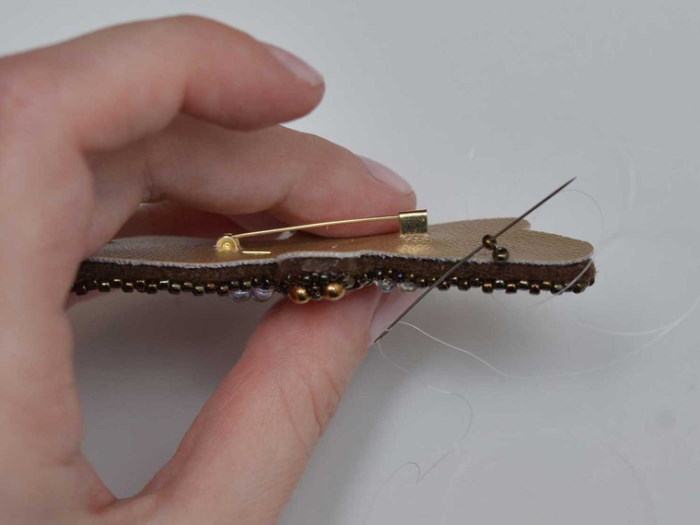
- Secure the clasp.
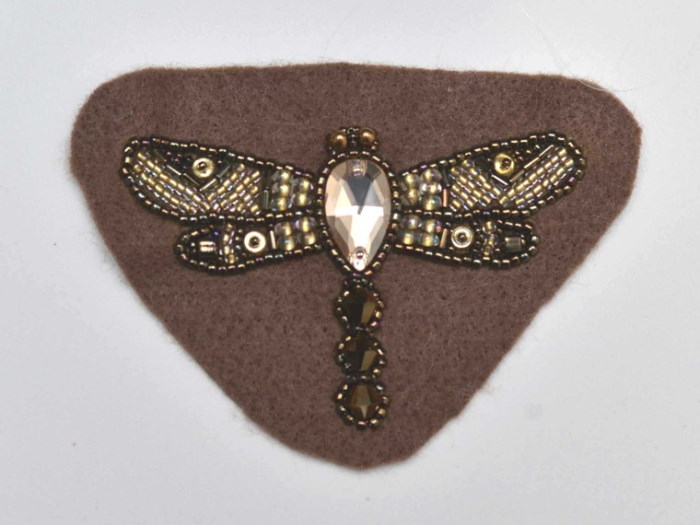
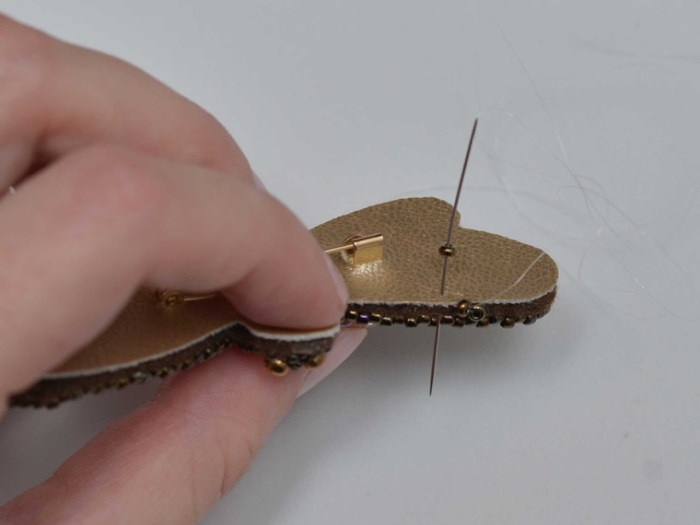
- Glue the leather to the cardboard backing of the brooch.
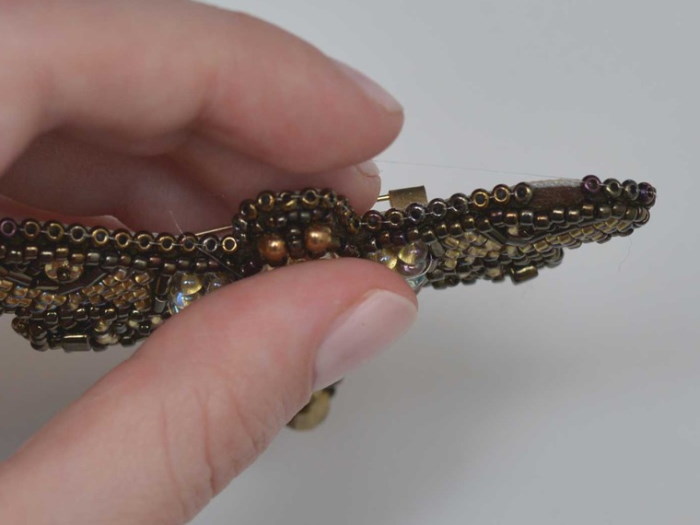
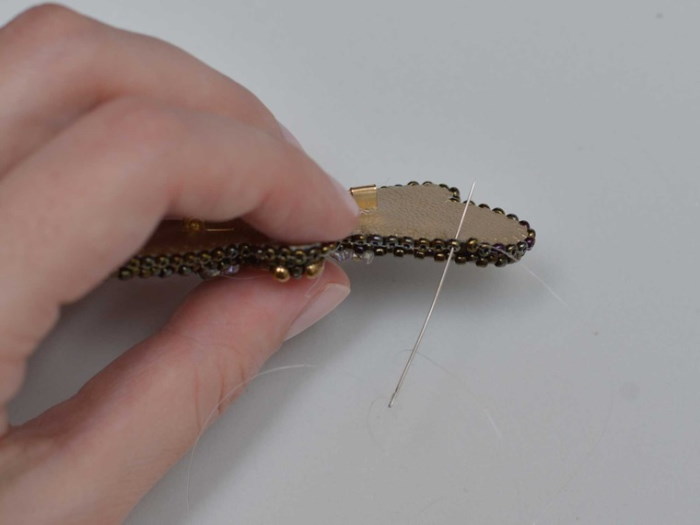
The edges of the leather can be trimmed with beads or glass beads.
Ideas and schemes of other brooches
A beaded brooch for beginners should be simple. You can weave a figure of the desired shape from wire, fishing line, or do embroidery.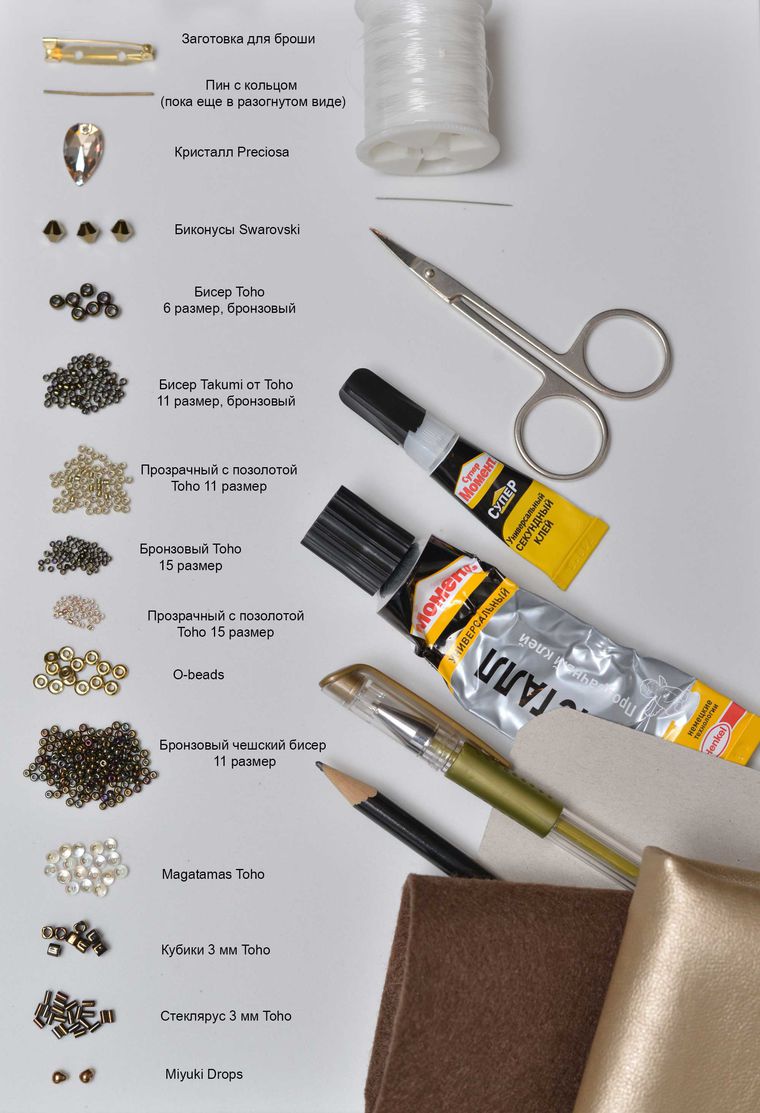


What brooches can be made as a first work:
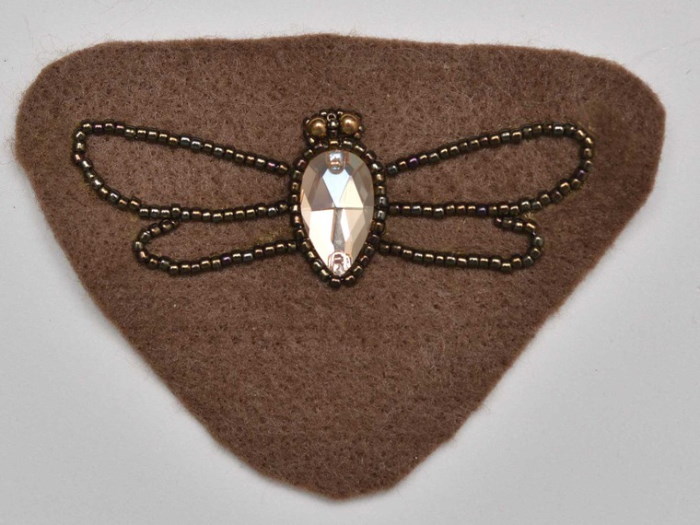
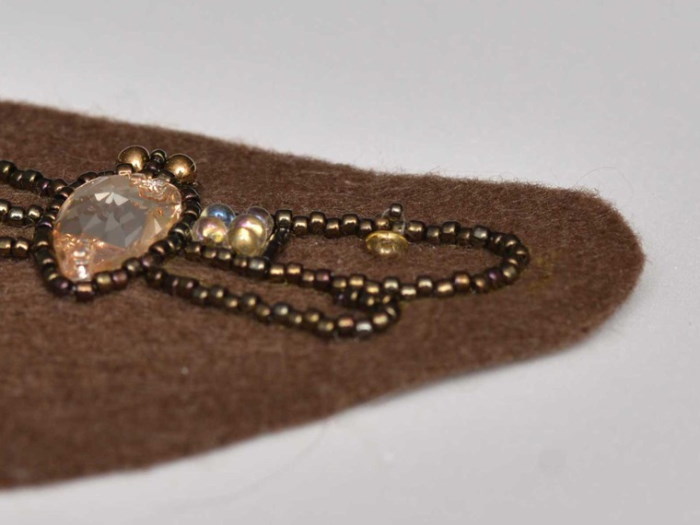
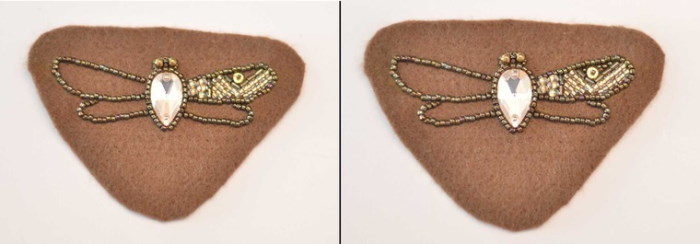
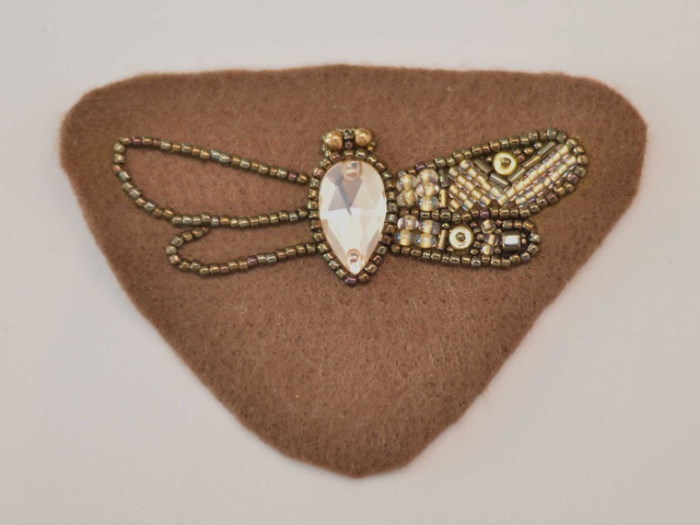
- Dragonfly. The figure is woven using the parallel beading technique. You will need wire and round beads for the work. First, the body and head are woven. Then 2 separate wings. Then the figure is assembled into one whole and attached to a pin.
- A drop with tassels. A large rhinestone is sewn into the center of the blank. It is trimmed with 5 rows of beads, along the contour. The blank is cut out of felt. 3 short bead threads are sewn to the bottom. The backing is glued to the fabric and the fastening is fixed.
- Sunflower flower. A large black bead is sewn to the center of the blank. The petals are embroidered with yellow beads. A leaf is embroidered with light green beads. You can insert a dark green bead, imitating the veins on the leaf. The blank is cut along the contour, the edges of the petals are sewn with orange beads, and the edges of the leaf are sewn with dark green beads. The brooch is connected to the backing and the fastening is fixed.
It is not difficult to learn how to make beaded brooches. Step-by-step instructions and graphic diagrams will help beginners. It is also important to remember that all materials for work must be of high quality so that the work remains beautiful and intact for a long time.
Video about beaded brooches
DIY autumn beaded brooches: