Beaded baubles are jewelry made from small glass or plastic beads strung on a thread, fishing line or wire. These elegant accessories can be made in various shapes and designs, which allows everyone to create a unique piece of jewelry that suits them.
People started making such jewelry in ancient times. They used these items as status symbols, religious amulets, or simply for beauty. However, the real heyday of beaded baubles came in the middle of the 20th century.
Necessary tools and materials
| Name | Brief description |
| Beads | These are small, often round or close to this shape, glass or plastic beads of various shapes. The sizes of beads can vary greatly, from microscopic beads with a diameter of several millimeters to large ones comparable in size to peas. Popular countries producing beads: Czech Republic, Japan, China, India. Czech is considered one of the highest quality and most exquisite. Thanks to the long history of production in the Czech Republic, they have developed technologies for creating beads that are passed down from generation to generation. Japanese beaded products are distinguished by unique shades and excellent quality. |
| Glass beads | Considered one of the subspecies of beads, they are hollow cylinders made of glass or crystal. These tubes can vary in shape, diameter and size.
There are glass beads of various shapes. They can be straight, curved, wavy, and also have different geometric patterns and patterns of colored glass beads. Some glass beads have additional decorations. They can be transparent, matte, pearlescent, change color at different lighting angles, or imitate other materials, such as wood or metal. Some tubes have flat side surfaces, which allows you to decorate flat objects with them. Others can be curved or have complex geometry, which allows you to create jewelry with volumetric elements. |
| Beads | Among the types of beads, one can note not only traditional glass beads, but also beads.
They can have various forms, such as:
They are made from a wide variety of materials, such as:
Glass allows for a variety of colors and shades, as well as creating various effects such as shimmer and transparency. Plastic can imitate other materials such as gemstones and natural materials. Beads made from natural materials add naturalness and originality to jewelry. |
| Threads | Depending on the type of product, you can use fishing line, wire, monofilament or reinforced thread. |
| Beading needle | It should be thin, strong and have a sharp tip. The needle allows you to string beads on a thread and pass it through the holes in the beads. |
| Accessories | Clasps, charms, connectors and other additional components will help make the decoration elegant and functional. |
| Nippers and scissors | Nippers are needed to remove excess wire, and scissors help to neatly trim threads and fishing line. |
Schemes with description of works for beginners
Using the bead weaving technique, you can create an original bauble that will become a real decoration for your hand. The master classes describe the weaving process, including the choice of materials, the pattern and methods of fastening.
"Spring" on a wire
For the "Spring" bracelet, it is recommended to choose medium-sized beads so that it turns out quite voluminous and appears as a bright accent on the wrist. Approximately 50 g of beads of different colors will be required for the bracelet.
You will need a thin wire "Memory" with a thickness of about 0.6 mm. It is recommended to purchase a wire about 2.5 m long to create a standard size bracelet.
To weave the Spring bracelet, you need to follow a certain process:
- Form the base of the bracelet by twisting the wire into a spiral.
- String beads on a wire. It is recommended to make 12 beads so that the bracelet turns out to be dense and beautiful enough. To do this, you need to string a certain number of beads on a wire and pass it through the neighboring bead. Then place a large bead.
- Repeat this sequence until the wire runs out.
- To finish and secure the bracelet, twist the end of the wire around the last bead several times to create a secure attachment. Then gently tighten the wire to close the spiral base of the bracelet and give it a finished look. All that remains is to carefully trim the remaining wire and close its end so that it does not damage the skin.
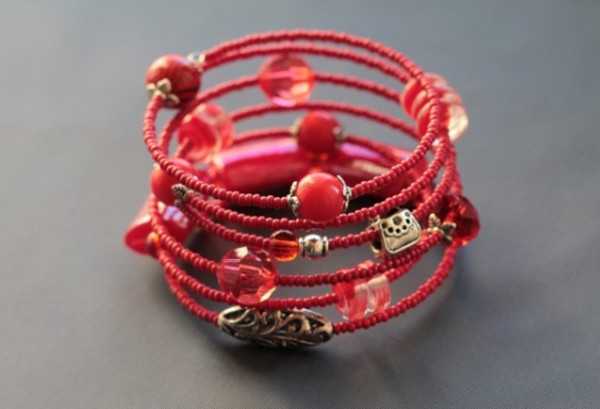
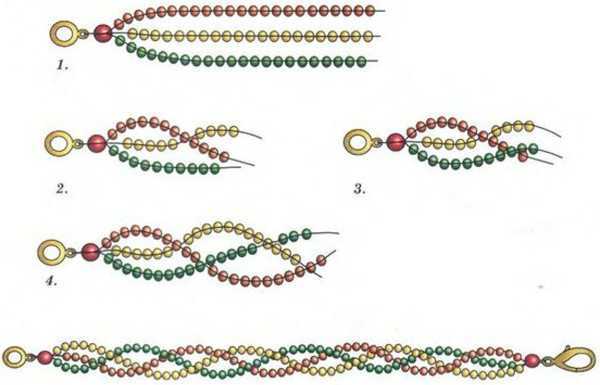
Technique "Tourniquet"
Baubles woven from beads using the "Tourniquet" technique involve twisting several threads of beads together. Tourniquets can be used as an independent decoration or as a decorative element in other baubles weaving techniques.
For beginners, it is recommended to start with simple cords, using only a few colors and a simple combination of beads.
An important point is the uniform and careful twisting of the bead threads when creating a tourniquet. It is necessary to control the tension of the thread so that the tourniquet is of the correct shape and does not fall apart after removing it from the needle.
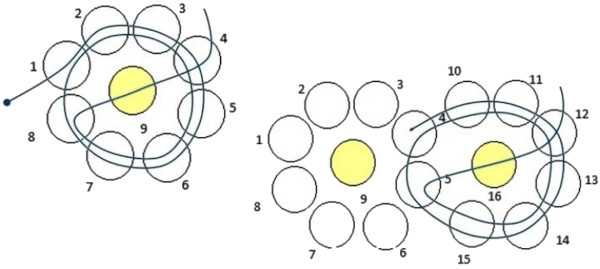
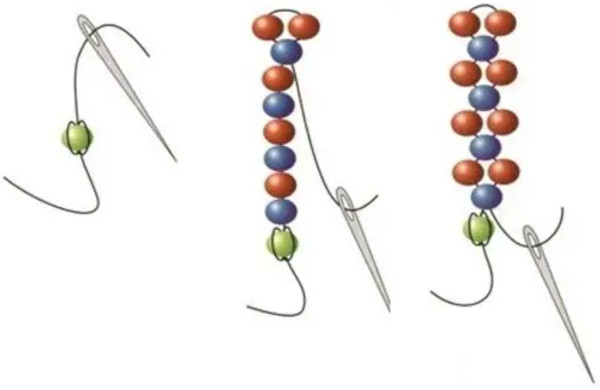
In the technique of "Spiral cord" with glass beads on a reinforced thread
To get started, you will need the following materials:
- beads;
- glass beads;
- reinforced thread;
- beading needle;
- scissors.
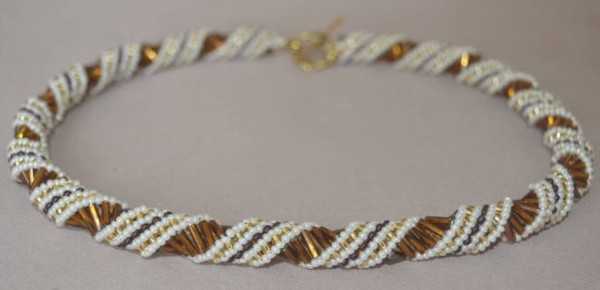
It is recommended to stop at small beads, size 10/0. You will also need about 20 g of beads in each color and 10 m of reinforced thread of medium thickness (35).
Beading process:
- It starts with stringing beads on a thread. 10 beads are used in each row.
- A ring is formed, the pattern of which consists of 4 beads.
- The thread is passed through one bead and pressed to form a spiral.
- These steps are repeated until the desired length of the bracelet is achieved.
- Decorating a bracelet with bugle beads. Fix the end of the reinforced thread so that several bugle beads do not slip off.
- Carefully close the bracelet. Thread the thread onto a beading needle and pass it through the last beads. The thread loops are carefully tied, forming a stable clasp. Excess thread should be carefully cut off, leaving 2-3 cm for reliability.

It is very important to ensure sufficient density of the weave so that the bracelet looks beautiful and stays firmly on the wrist. Density can be added by increasing the number of rows in the cord and increasing the number of beads in each row. It is recommended to add 2-3 beads in each row to achieve the desired density.
“Terry” using the “Twist” technique with beads on a fishing line
It is recommended to use beads with a diameter of 3-4 mm. For a medium-sized bracelet, you will need about 200 g of beads of different shades, which can vary from neutral to bright colors. To weave the bracelet, you will need a fishing line on which the beads will be strung, and a wire that will be used to create the blank.
The fishing line should be strong and stable, it is recommended to choose a fishing line with a thickness of 0.4 mm. To create a blank, you should use a wire with a thickness of 0.8-1 mm. For a medium-sized bracelet, you will need about 15 m of fishing line.
To create a bracelet using the "Tourniquet" technique, you will need to follow the step-by-step process:
- Making a bracelet blank. Wrap the wire around your wrist to determine the length you need. Leave a small amount of wire for securing.
- Using pliers, bend the wire into a semicircle to create the base of the bracelet.
- String beads onto the fishing line according to the pattern. The number of beads in a row and the number of rows depend on the chosen pattern and the desired size of the bracelet.
Weaving a bauble from beads. Scheme. - Weave a tourniquet, maintaining the density of the weave.
- To secure the bracelet, you can use a dab of glue to secure the end, or close the bracelet with a snap or clasp.
- Cut off excess wire and remove the remains so as not to damage the skin.
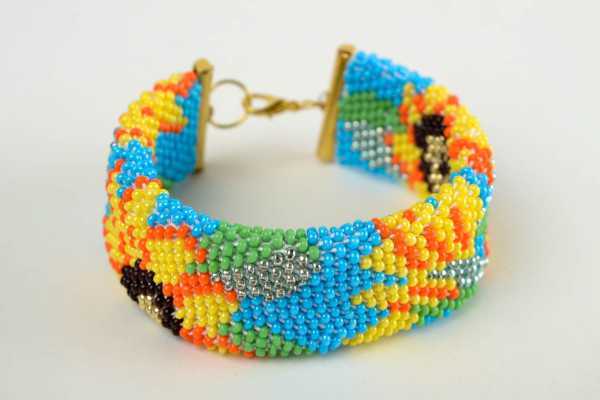
Cross Stitch Technique
Beaded baubles in the "Cross" technique are one of the main and most common ways of creating patterns. It is based on the simple principle of interweaving threads and beads, creating a pattern resembling a cross. Unlike other techniques, the cross technique offers a more precise and accurate execution.
The beads must be of the right size so that they can be easily pushed through the needle and fit tightly on top of each other when making a design. The technique allows you to create various patterns and images, from simple geometric shapes to complex paintings. The cross technique allows you to achieve a high degree of detail.
Single-color bracelet in the "Cross" technique on a fishing line
To create such a bracelet you will need a set of beads of one color, fishing line and some wire. It is recommended to use beads with a size of 7/0, as it is convenient to work with.
For a single-color bracelet, you will need about 20 g of beads of the chosen color. It is recommended to use a fishing line with a thickness of about 0.4 mm. The length of the fishing line will depend on the size of the wrist, but about 5 m should be enough.
The process of weaving a bracelet can be divided into several stages:
- Marking the base of the bracelet. To do this, attach a wire to the fishing line, the short side of which should be pressed at the very top point of the fishing line, and the long side should be held in your hands.
- String beads onto the fishing line. The density of the weave affects the width of the bracelet, so it can also vary. For a bracelet width of 1 cm, you will need about 15 bead rows with 20 beads in each row.
- String all the bead rows will be strung.
- Leave a small tail on the fishing line, which will be used to secure the bracelet. Pass the wire through the last bead and tie it in a knot so that the bracelet stays on your wrist.
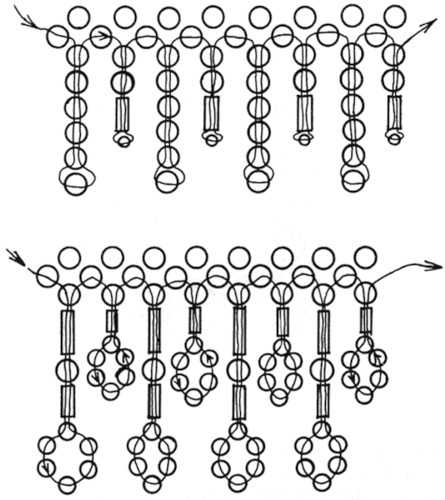
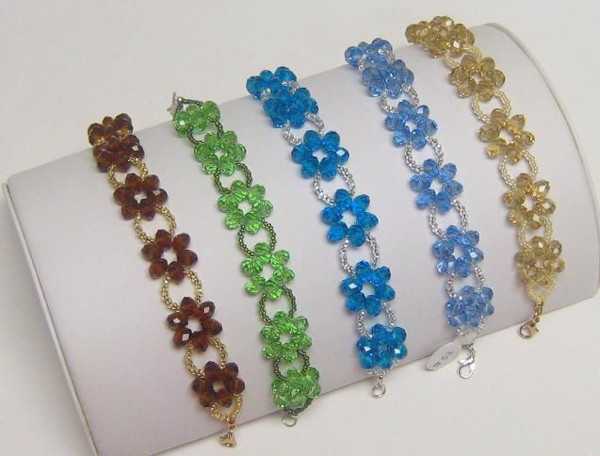
Technique "Flower"
"Flower" is used to create colorful and realistic flower arrangements. The essence of the technique is that each pattern, as if a separate petal or part of a flower, is fixed on the base.
To create this effect, the craftsmen take beads of different sizes and colors to convey the nuances and strokes of the color scheme. The "Flower" technique requires careful work and attention to detail.
Chain in the technique "Flower" on a reinforced thread
You will need size 10/0 beads.
It is recommended to use 10-20 g of beads of each color:
- pink;
- lilac;
- blue;
- white.
As a basis for the bracelet, it is recommended to use a reinforced thread with a thickness of 0.3 mm and a length approximately 20-30 times greater than the length of the bracelet.
Step by step process of weaving this bracelet:
- Place the required number of beads of each color on the working surface in the order corresponding to the weaving pattern.
- Pass the reinforced thread through the first bead to secure it to the thread. Tighten the thread, leaving a small tail to secure the bracelet after it is finished.
- Weave according to the pattern. The number of beads in a row and the number of rows depends on the desired length of the bracelet. It is recommended to weave several flowers at the same time to create a more harmonious and beautiful design.
- When the desired length of the bracelet is reached, finish the work by passing the thread through the last bead and tightening it to create a closed circle. Secure the tail of the thread to ensure the reliability and durability of the bracelet.
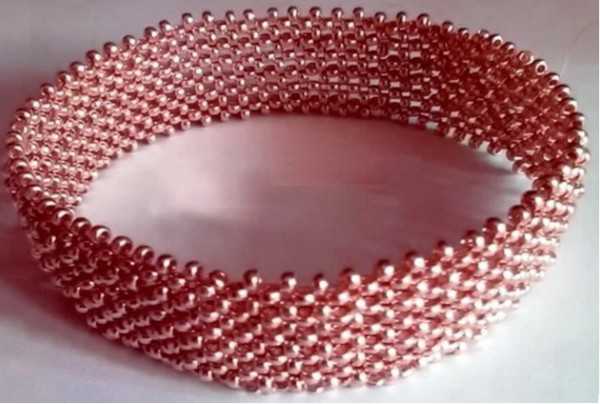
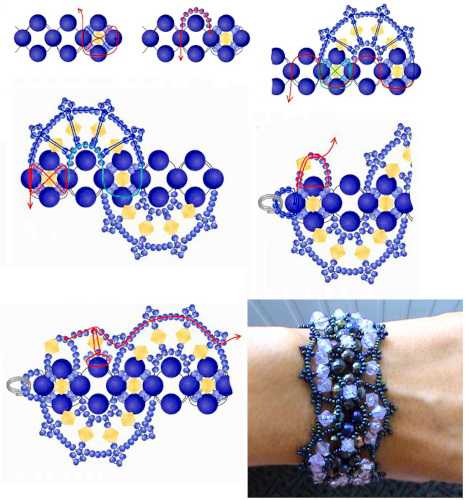
Technique "Canvas"
Beaded baubles in the technique are based on the creation of a dense mesh resembling fabric. For this, thin threads or wire are used, on which beads are strung, creating various patterns and designs. In the process of work, it is necessary to be attentive and careful in order to maintain the correctness and symmetry of the mesh.
Paired bracelets with a heart in the "Canvas" technique on a reinforced thread
These decorations not only look beautiful and delicate, but also symbolize deep love and friendship between two people. The best size beads are medium-sized, about 8/0, as they are not too small and at the same time quite convenient to use. It is recommended to use several different colors to create an interesting and bright design.
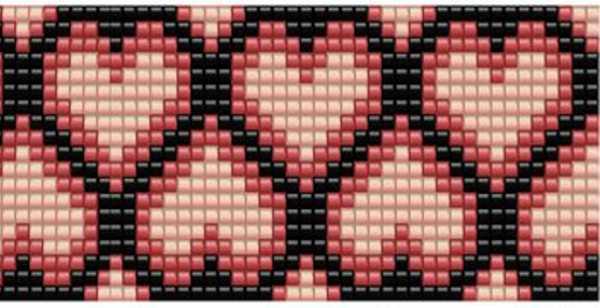
To create bracelets with a heart, you need a reinforced thread with a thickness of 35, so that the bracelets are strong and durable, approximately 10 m long.
The process of weaving bracelets consists of several stages:
- Measure the circumference of each person's wrist and add about 3-4 cm for allowance.
- The number of beads in a row and the number of rows depend on the size of the bracelet and the desired effect. One row can consist of, for example, 12-15 beads. The beads are strung through the middle of the row of the previous weaving. The density of the weaving can be changed depending on preferences. For dense weaving of beads, it is important to pull the thread to eliminate the possibility of slipping of beads.
- Once the bracelets reach the desired length, wrap the thread around the last row of beads and secure with thread.
- Add decorative elements such as pendants. This will give the bracelets additional charm and personality.

As you progress, you will need to make sure that the bracelets are all the same length, so it is a good idea to measure and compare them from time to time.
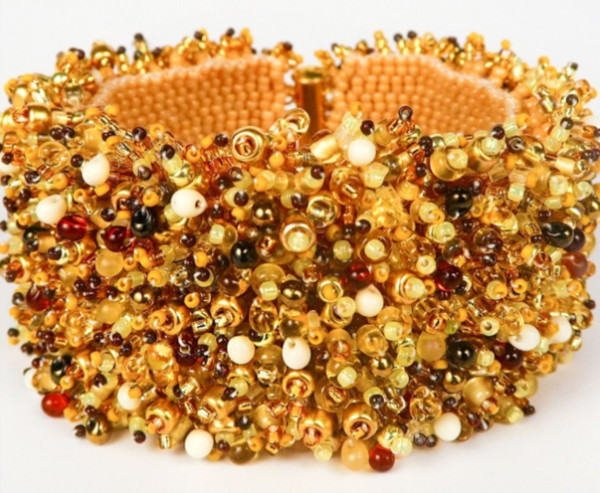
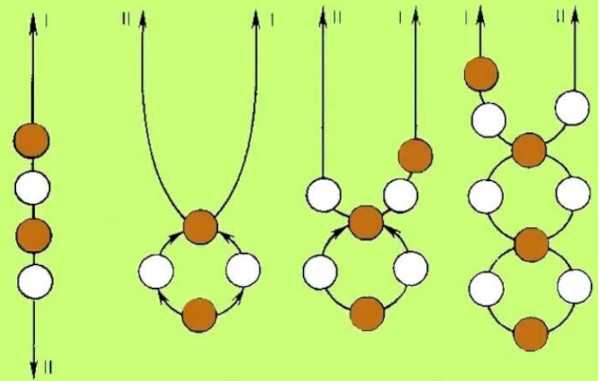
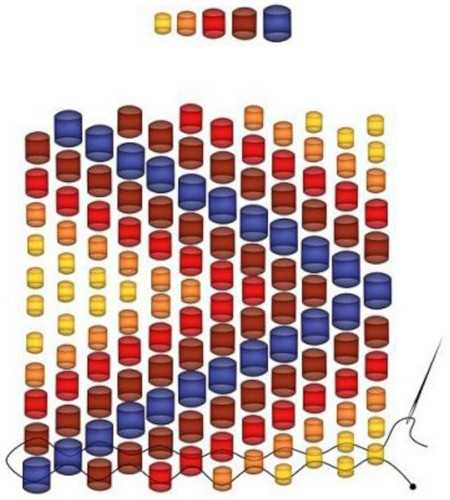
Mosaic technique
Beaded baubles in the "Mosaic" technique are decorations made by creating patterns and designs from small beads that are connected to each other in a special order.
This technique is based on the use of multi-colored beads that create mosaic patterns similar to those seen in ancient mosaics.
To create a pattern using the Mosaic technique, beads of different colors are placed on the base in a certain sequence, which allows you to get clear and bright contours of the image. This technique requires patience and accuracy, since each bead must be precisely placed in place to form the desired pattern.
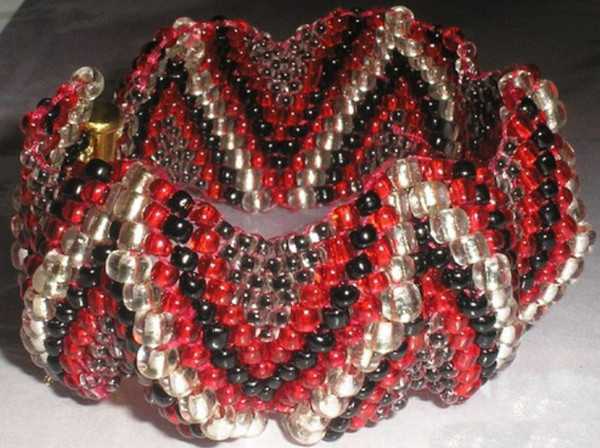
“Zigzag” using the “Mosaic” technique on monofilament
For the Zigzag bracelet you will need beads, the size of which is 7/0, in the amount of about 25 g. It is advisable to choose beads of different colors to create a spectacular mosaic pattern. You will also need a monofilament of 0.25 mm thickness, about 10 m.
The monofilament supply threads must be secured to the bracelet clasp. The number of beads in a row depends on the chosen pattern, but on average about 12-15 beads.
The number of rows also depends on the chosen pattern; there can be from 10 to 15. To get a denser weave, you can increase the number of beads in a row or add additional rows.
- The weaving is done according to the following scheme: the first row is beads of one color, the second row is the lower half overlapping the upper, the third row is the opposite, the upper half overlaps the lower. This creates a zigzag effect. When weaving, you should pay attention to the fact that the weaving is neat and even.
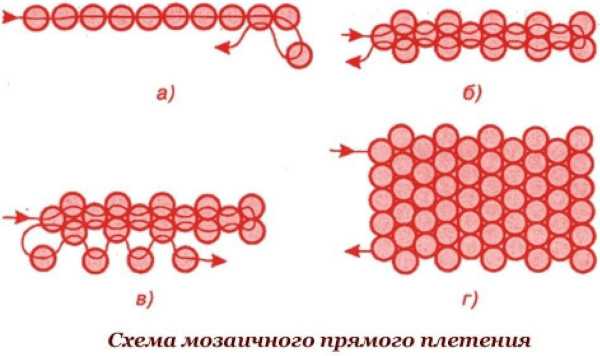
- To finish the bracelet, secure the monofilament to the clasp. It is recommended to use a knot or pendant so that it does not come undone during use of the bracelet.
Technique "Scythe"
Beaded baubles in the "Braid" technique have a unique structure, creating the effect of dense weaving. To make the "Braid", you need to use a thin metal wire frame or a special base, which will facilitate the weaving process. Beads are strung on a fishing line and fixed to the base by weaving with special knots.
The resulting structure is durable and does not lose its shape over time.
"Marshmallow Braid" in the "Braid" technique on reinforced thread
To create the "Marshmallow Braid" bracelet, you need to buy beads 2-3 mm in size, weighing about 30 g. To achieve a spectacular final result, it is recommended to use beads in several colors, such as black, white and purple. You will also need a reinforced thread 0.6 mm thick, about 15 m.
How to weave:
- Start by preparing the thread and inserting it into the needle.
- Several knots are made to secure the beads to the thread.
- Basic weaving in the "Braid" technique. Beads are strung on a thread according to the pattern.
- Secure the bracelet with several knots at the end of the thread. The remaining part of the thread is cut off.
It is important to pay attention to the density of the weaving - it should be even and not too tight, so that the bracelet is comfortable to wear. As you progress in working on the pattern, you need to ensure that the beads are distributed evenly along the entire length of the thread and do not roll.
Tips and tricks
First, before you start making baubles, you need to choose the right materials. You need to use high-quality beads and threads so that the decoration looks elegant and attractive.
Secondly, creating complex patterns and knots will require a certain amount of time and patience. You need to start with simple baubles and gradually increase the complexity to achieve better results.
Thirdly, you can't forget about symmetry in beaded jewelry. You need to carefully monitor that each side of the bauble is the same to get a smooth and attractive look.
Video about weaving baubles from beads
Mosaic weaving of a bauble from beads: