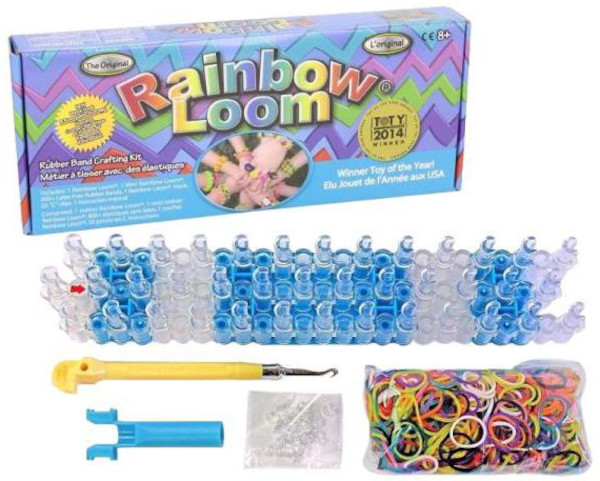
Rainbow Loom – Technique of weaving bright jewelry from multi-colored rubber bands.
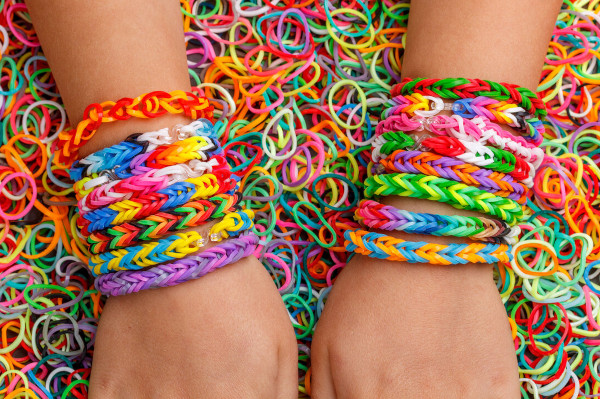
Weaving from rubber bands, as a technique in handicrafts, appeared in 2010 thanks to the Malaysian Chong Chun Ng, it is widely used in children's and adolescent creativity, is quite simple to implement and allows, with precise execution of patterns using a machine, fingers or other available materials, to make ordinal and ultra-fashionable bracelets that beautifully encircle the wrist.
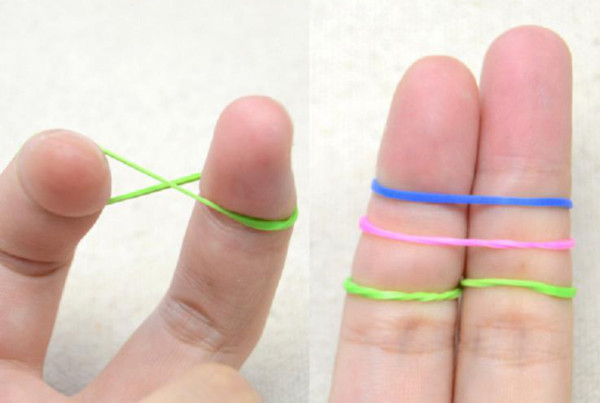
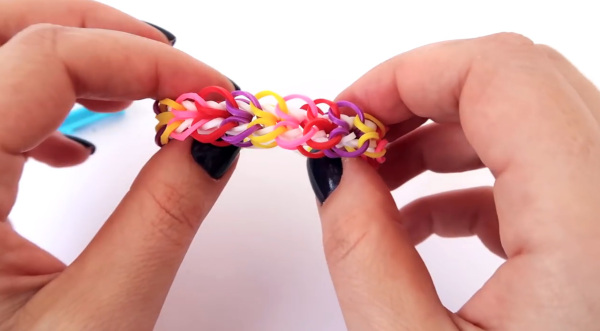
Finger weaving pattern
Weaving is a popular creative trend, common among adults and teenagers aged 8-16. Easy-to-make jewelry can be woven without special tools on your fingers, using colorful rubber bands from the Rainbow Loom children's craft set and an S-shaped clip.
To create the product you will need:
- Place a rubber band twisted into a figure eight on 2 fingers of one hand. Add 2 more multi-colored rubber bands to it.
- Remove the lower elastic band from the left side through the top and place it between your fingers so that it secures the opening. Repeat the action with the right loop.
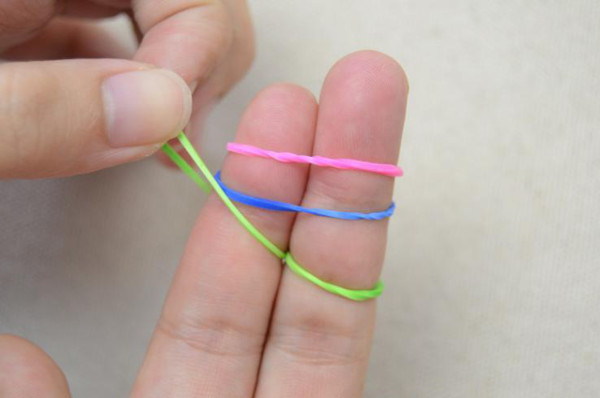
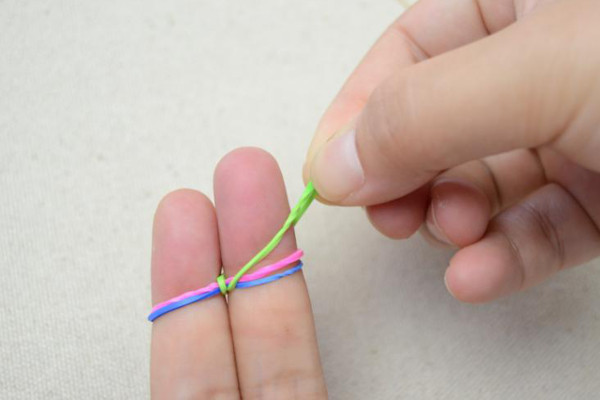
- Add a new elastic band on top, and remove the remaining one from below through the top of the fingers, placing it in the space between them.

- Continue knitting in a similar manner until you reach the desired size of the decoration (adding a new elastic band and removing the bottom one) so that there are always at least 3 elastic bands on your fingers at the same time.
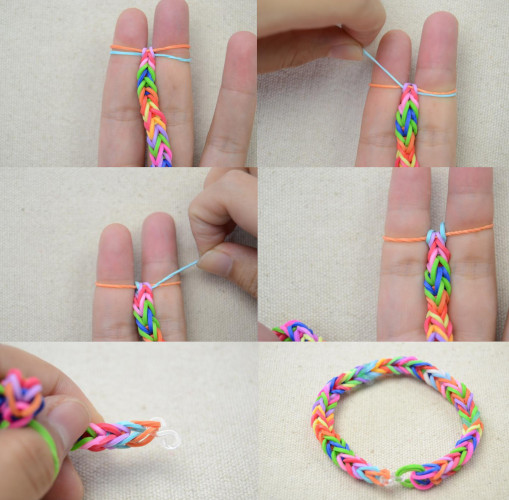
Step-by-step instructions for creating a rubber band bracelet for finger weaving. - To complete the work, first pull the upper of the two remaining rubber bands up and then down to the middle of the structure. Attach a clasp to the remaining loop, connecting the parts of the decoration.
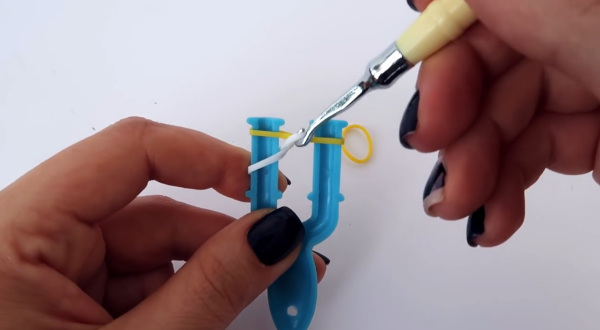
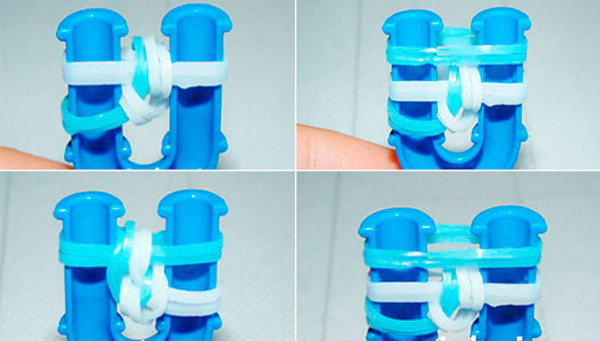
On a slingshot
Experts suggest making bracelets from rubber bands for weaving (product patterns can be found on the Internet) on a plastic slingshot.
When creating a decoration, you need to:
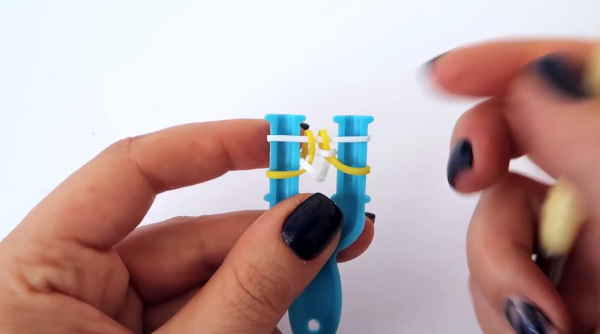
- Having placed the slingshot in a comfortable position, twist it into a figure eight and put a cream-colored rubber band on it. Add a new rubber band of a light blue shade on top.
- Using the hook threaded through the orange ring, grab the bottom cream elastic band and sweep it into the middle of the slingshot.
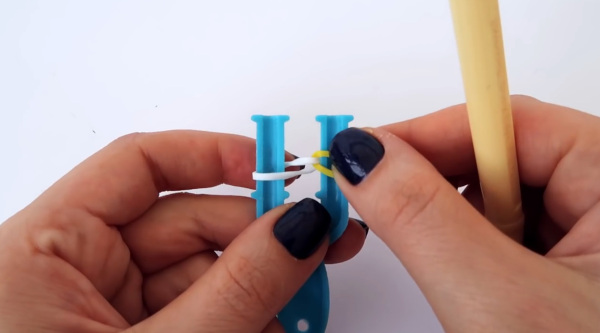
- Place the orange loop twisted into a ring on the left column of the slingshot, and place a cream elastic band on top of both supports.
- Using the hook placed in the center of the orange elastic band, grab the cream elastic band located below it and sweep it into the center of the product.
- Place the orange ring on the right side of the slingshot. Place the cream rubber band on top.
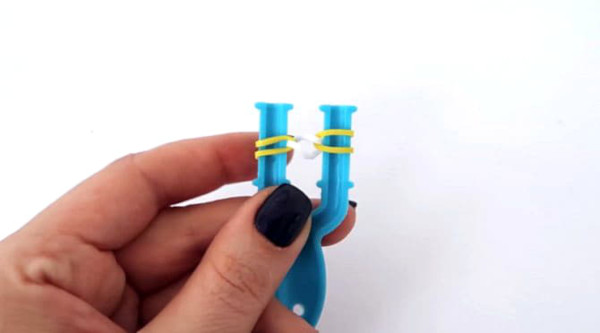
- Pass the crochet hook through the top orange ring, grab the rubber bands below and drop them into the middle of the slingshot.
- Continuing to work in a similar manner, weave the decoration to the desired size, and then put a cream elastic band on the slingshot.
- Hook all the lower loops into the middle of the decoration. Move the ring on the right support to the left part of the slingshot. Secure the product with a clip.
- With the second part of the clasp, grab the initial loops of the decoration.
When weaving, professionals advise not to limit your imagination and use material of any shade, alternating it in random order.
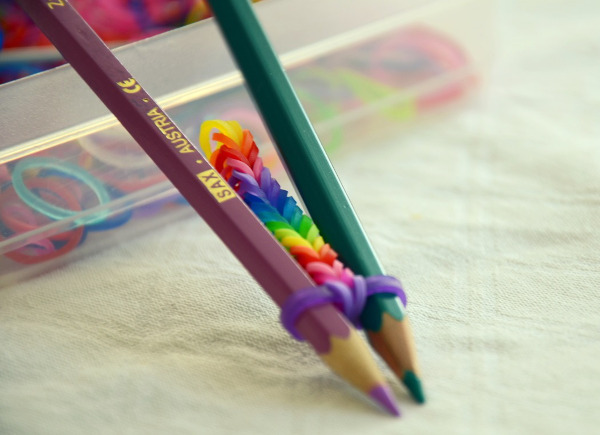
On pencils
Experts recommend making bracelets from rubber bands for weaving (the diagram clearly shows the process of making jewelry) in the absence of a machine or slingshot using 3 pencils tied together with electrical tape (scotch tape).
You will also need the following for the product:
- multi-colored rubber bands (about 70 pcs.);
- hook (knitting hook is fine);
- S-shaped clasp.
During work you should:
- Put the elastic band twisted in a figure eight on both pencils at the same time. Fasten the hook at the intersection of the threads.
- Add a black elastic band on top, then using the hook, slip the left loop off the white elastic band below and drop it into the space between the 1st and 3rd pencils.
- Transfer the right black loop to the left column.
- Add a new black elastic band. Remove the white loop with a hook from the right pencil and place it in the center of the structure.

- Move the black loop from the left to the right column. Do the same with the remaining loops (swapping them - from right to left and vice versa).
- Pull the red elastic band over the pencils and spread the previously created loops. Throw the upper black loop to the center of the product.
- Swap the red loop (from right to left). Put a new white rubber band on the pencils and sweep the black loop into the middle of the structure.
- Transfer the white top loop from the right pencil to the left one so that both loops are on it, and then use the hook to drop them into the space between the 1st and 3rd pencils.
- Change (from right to left) the red top loop. Pull a new elastic band of the same shade onto the pencils. Use a hook to pick up the black loop below and sweep it to the center of the structure.
- Add a white elastic band to the decoration and throw the bottom black loop over it.
- On the right pencil, leave the white eraser and transfer the upper red loop that was previously located on the left column to it.
- Drop both white loops into the middle of the piece.
- Place the loop on top onto the pencil on the right, and swap all remaining loops.
- The decoration is knitted in a similar manner to the required size. To complete the work, add a black elastic band to the product, and throw the red upper loop into its middle. Swap the remaining loops on the pencils at the top.
- Pull a new white elastic band and throw the lower loop from the left pencil into its middle. Put the upper and then the lower white loops on it and throw them into the middle of the product.
- Place the bottom red loop between the 1st and 3rd pencils. Place the right black loop on the left column.
- Add a white elastic band, drop the red loop into its center, and instead of it, put on the top and then the bottom black loops and drop them into the space between the 1st and 3rd pencils.
- Transfer the left upper loop to the right post, attach the clasp to it and connect the parts of the decoration.
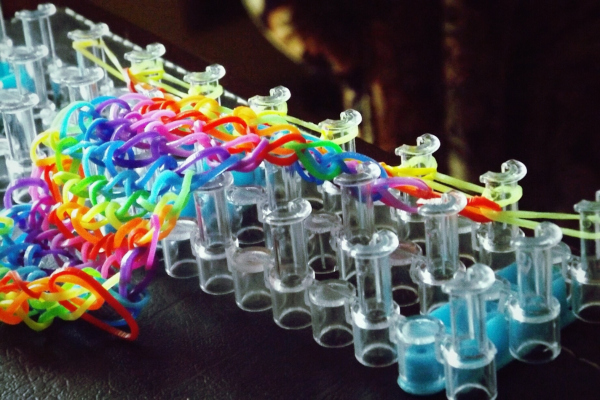
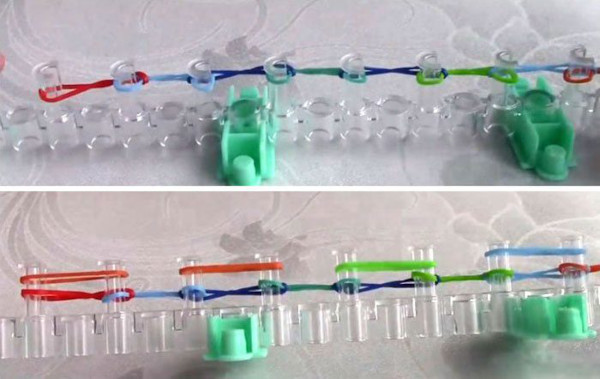
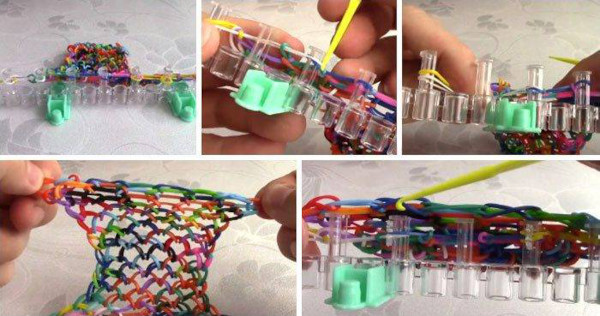
On the machine
Bracelets made from rubber bands for weaving (product patterns can be found in the box for children's creativity) according to the idea of the creator of the Chon Chun NG movement should be made on a special machine.
You can purchase it together with the Rainbow Loom set and use it to make a variety of decorations of any complexity.
You can weave a French braid bracelet from:
- rubber bands of 2 colors (20-30 pieces of each color);
- machine;
- clip fasteners;
- hook.
When working on decoration, you need to:
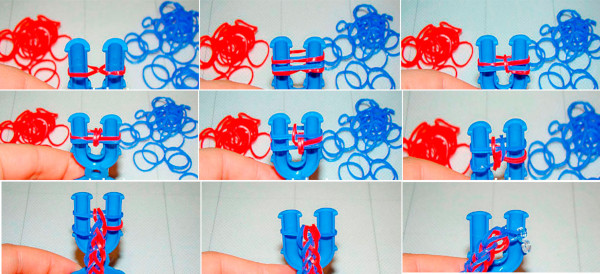
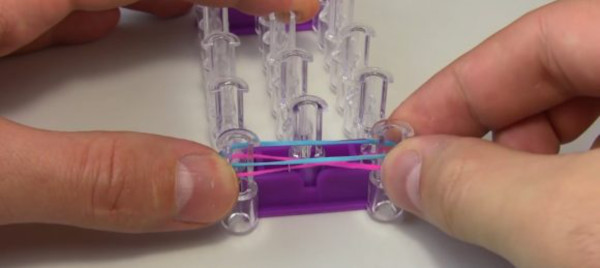
- Twist the elastic band into a figure eight and pull it over the posts of the machine.
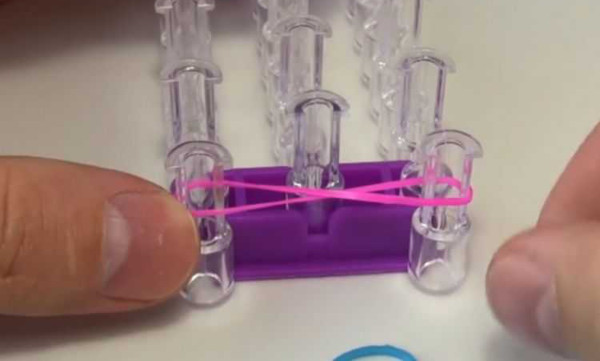
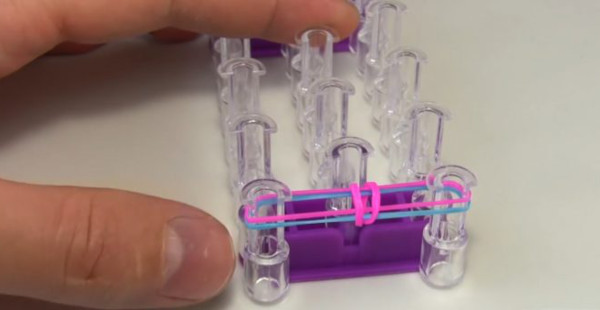
- Place 2 new rubber bands on top of it without twisting them.
- Use a crochet hook to drop the bottom elastic band into the middle.
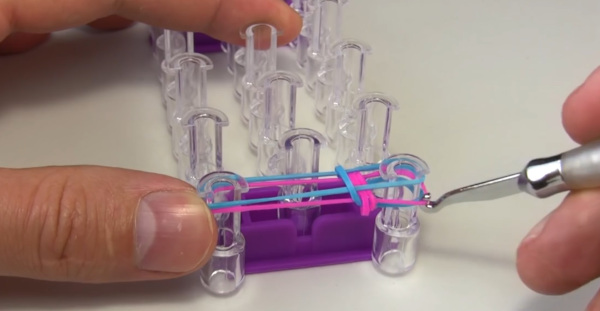
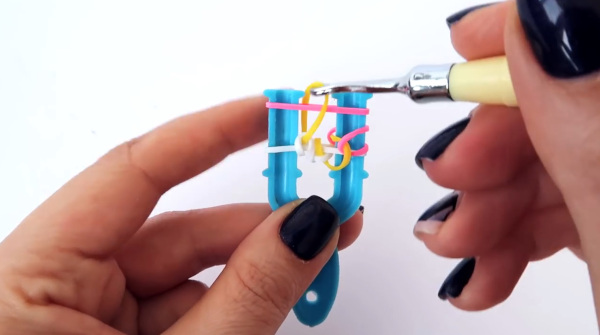
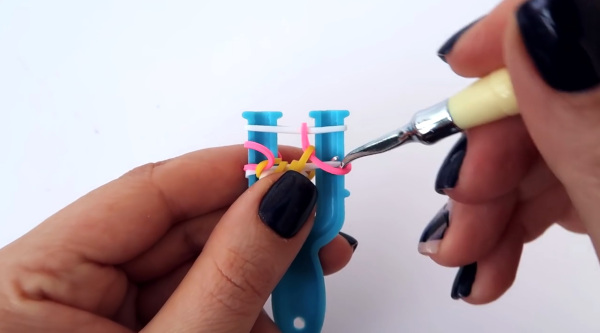
- Add a new elastic band to the loom, and then, using the hook, drop the 2 loops located at the bottom (blue and pink) to the left.
- Pull the additional elastic. Using the hook, drop the lower blue loop on the right and the middle left loop.
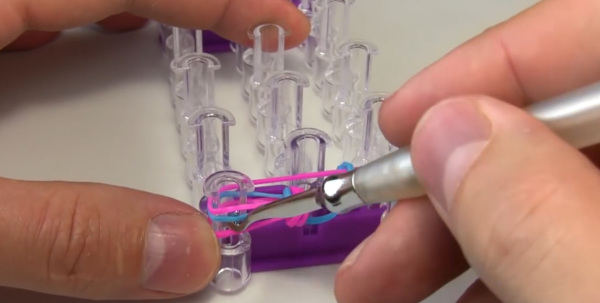
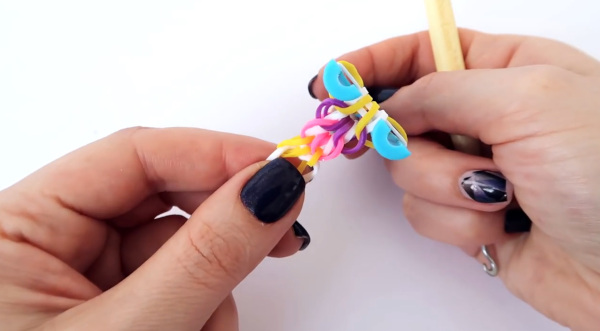
- Add a blue elastic band to the product and repeat the weaving process. Work on the product in a similar manner until the desired size is reached.
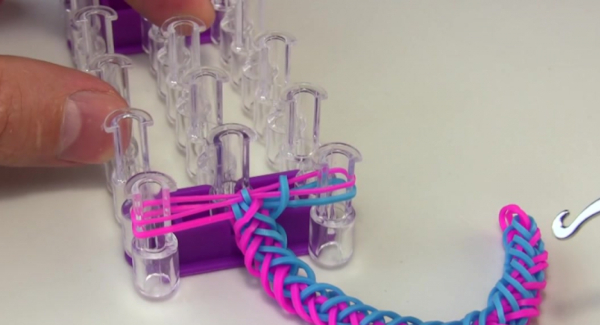
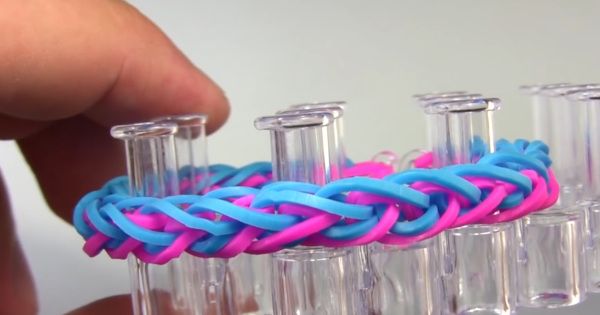
- To complete the weaving, move the remaining lower loops to the middle, put the clasp on them and fasten the decoration.
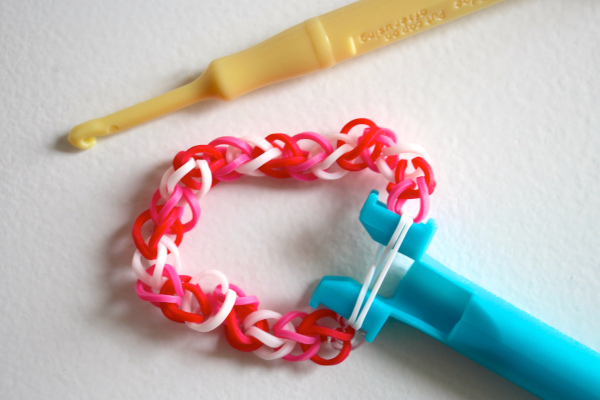
On a crochet hook
Bracelets made of rubber bands can be woven using a regular crochet hook. To do this, you will need:
- Twist the elastic band in a figure eight and pinch its middle between your fingers with the loops facing up.
- Take the hook and pass it through the loops and pull out a new ring, placing it in the middle of both loops.
- Form a closed circle from the second ring (squeezing it with your fingers), and then pull the 3rd ring through it as well.
- Weave the decoration to the desired size. When finished, place a fastener on the ring.
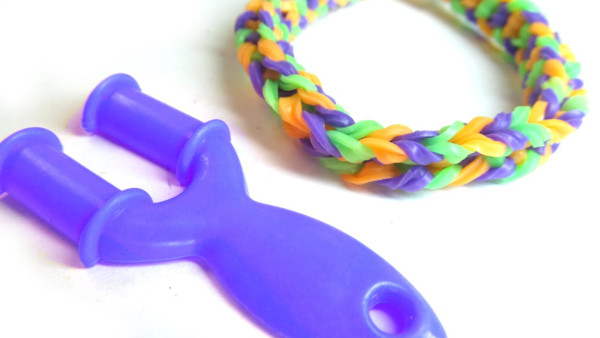
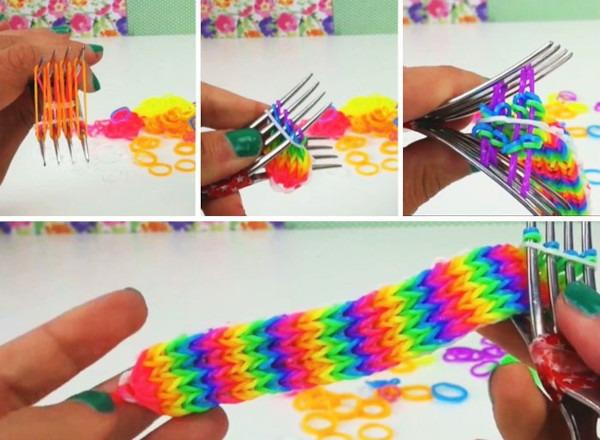
"Rainbow Bracelet" on a Fork
The weaving pattern for the first rubber band bracelet made by the creator of the technique, Chow Chong, involved using a regular dinner fork, and its shape resembled a rainbow arc.
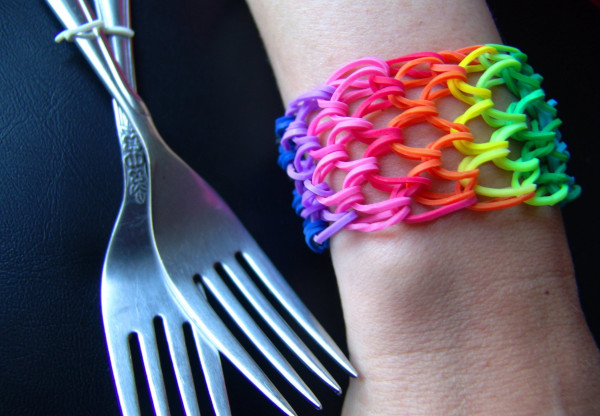
In order to repeat the author's work you need to:
- Place the first rubber band, folded in half and turned upside down like a figure eight, on the two middle prongs of the fork.
- On the 2 outer teeth (right and left), similarly attach 2 additional rubber bands.
- Remove the first elastic band from above the upper loops of the workpiece and move it down.
- Place a new elastic band twisted in half (without the “eight”) on the middle teeth and remove the previous row over it.

- Continue working according to the scheme: 1 elastic band in the center – 2 – on the sides. Perform 2 rows of each shade in a similar manner. You can grab the elastic bands with your fingers, toothpicks or a hook.
- Once the strip reaches the required length, finish weaving by transferring the loops from the edge to the middle teeth and the lower loops to the upper teeth.
- Place a new elastic band twisted into a ring over the 2 central loops. The loops should be strung over it, and the last 2 should be placed one above the other (the lower one above the upper one).
- Remove the finished product from the fork, attach the clasp and fasten it with the first loop.
- Straighten the resulting decoration by widening the loops with your fingers.
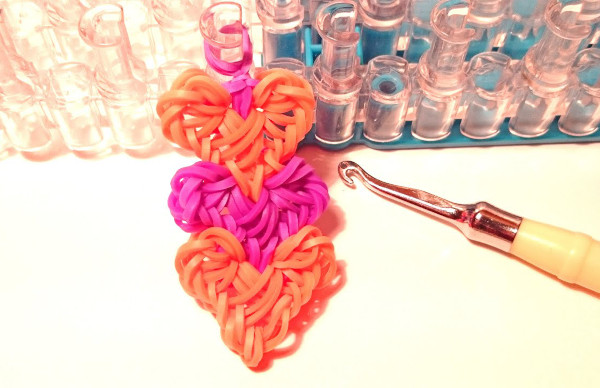
Bracelet "Angel Heart"
Rubber band bracelets for weaving (product patterns are presented in the YouTube channel video tutorials) "Angel Heart" is woven on a plastic slingshot using:
- colored rubber bands from the Rainbow Loom Bands set;
- hook;
- clip fasteners.
When making jewelry, you need to:
- Twist the white rubber band thrown over the slingshot in a figure eight. Place the yellow one on top of it and use the hook to move the white loop to the left.
- Transfer the yellow rubber band to the right branch of the slingshot, place a rubber band of the same shade on top, and sweep the lower white loop into its middle.
- Move the top yellow rubber band from the right fork to the left one so that the white rubber band is completely in the middle of the structure.
- Stretch a white rubber band over the columns. Drop the yellow loops into the middle of the slingshot.
- Add a pink elastic to the decoration. Using the hook, move the yellow loop from the left to the center and place the pink elastic on the right side of the slingshot.
- Attach a new pink elastic band and drop the yellow loop from the left column. Move the pink elastic band located at the top from the right side of the slingshot to the left.
- Stretch a white rubber band onto the tool. Sweep the pink loop into the middle from the right column, and then with the hook passed through it, grab the white one and drop it into the center of the structure. The same should be done with the loops located on the left side of the slingshot.
- Alternately stringing and dropping multi-colored rubber bands into the middle, weave the remaining links of the decoration in a similar manner.
- Once the decoration reaches the required size, move all the lower elastic bands to the middle of the product, put a clasp on them and connect them to the initial loops.
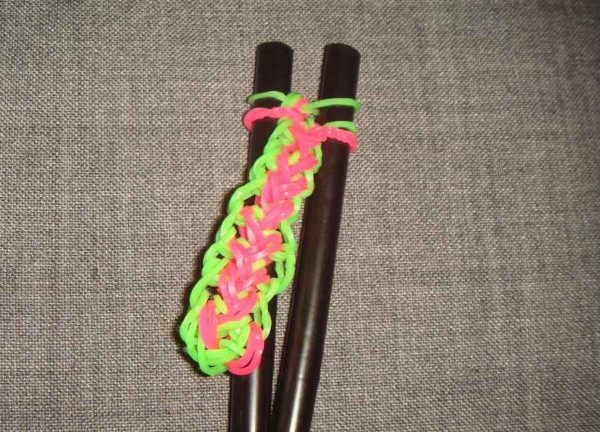
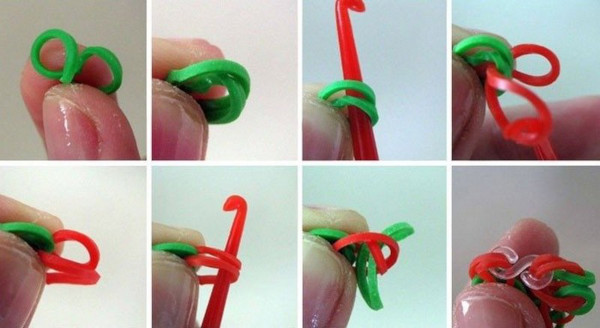
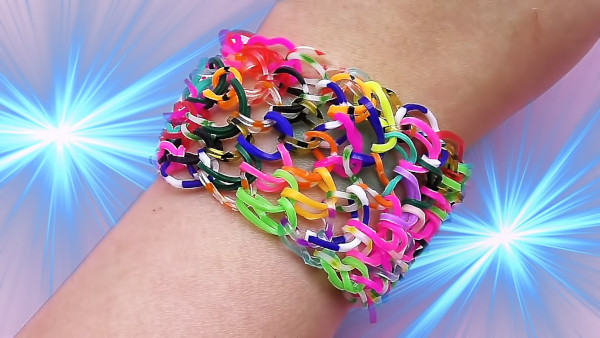
Simple Dragon Scale Bracelet
The Dragon Scale bracelet is made from pink and green rubber bands.
You also need to use:
- a slingshot or 3 pencils taped together;
- plastic clasp;
- hook number 3.
To create a bracelet you will need:
- Take a green rubber band, twist it into a figure eight and place it on the slingshot. On top of it, without twisting, stretch a rubber band of a different shade.
- Using the hook, slip the bottom loop removed from the right column into the middle.
- Alternating colors, put a new elastic band on the fork and drop the loops located at the bottom of the left column into the middle of it with a hook.
- Add a pink elastic band. Swipe the lower loops from the left side of the fork to the center.
- Weave the decoration in the same way, and to finish it, use a crochet hook to pull out the central loop from the bottom elastic band.
- Place the remaining rubber band on the right side of the slingshot on the left post, remove the loops and secure the clasp to them.
Volumetric bracelet "Dragon scales"
The volumetric bracelet "Dragon scale" is made on a machine with 4 columns. The construction will be fixed with an S-shaped clasp.
When weaving you need:
- Having shifted the middle row of the 3-row machine by 1 column, put 2 rubber bands on each of them.
- Work begins with the 1st column of the bottom row and the 2nd middle column, shifted to the left of the row.
- Add 1 elastic band to: 1st column of the 2nd row, 2-3rd columns of the bottom row and 3rd column of the middle row.
- Turn the machine around after 2 rows are completely filled. Put a double-twisted elastic band on the middle column located at the edge.
- Transfer the elastic band located at the bottom of the outer middle column to the part of the machine that catches it on the back side.
- Repeat the action with the remaining rubber bands.
- Remove the loops and put the clasp on them.
Bracelet "Hearts"
It is recommended to weave the Hearts rubber band bracelet on a regular 4-row loom, using only 2 rows. During work, the tool should be positioned so that half the distance between the posts is occupied by the nearest row.
The spaces between them should face to the right.
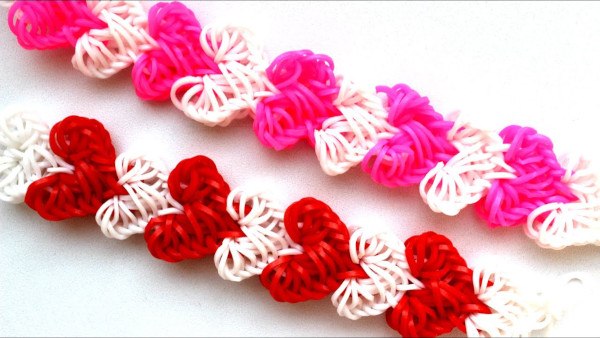
For work use:
- multi-colored rubber bands;
- hook;
- S-shaped clasp.
When weaving you need:
- Twist the red elastic band 3 times and put it on the 1st post.
- Place 2 red rubber bands on top of it (on the 1st near and 1st far column).
- Use a hook to grab the triple elastic band and drop it into the middle of the structure.
- Place 1 elastic band on the 1st and 2nd posts of the near and far rows. Grab the lower elastic bands located on them with a hook and drop them to the center.
- Add 1 rubber band to each column.
- Using a hook, grab and drop the 3rd (bottom) elastic band on the 1st column (near and far rows) into the middle. Leave the 2nd column unchanged.
- Pull new rubber bands, and then use a hook to drop the 3rd rubber band from the 1st columns. You need to repeat the weaving in a similar manner until 7 rubber bands are put on the 2nd column of both rows at the same time.
- Holding the elastic bands with your hand, use the hook to transfer (together or one by one) 4 pieces from the 2nd column of the near row to the 1st.
- Repeat the action with the rubber bands of the 2nd row, and then use the hook to transfer 3 rubber bands from the 2nd column of the near row to the 1st. There is no need to remove the rubber bands from the 1st column.
- Using a hook, remove and then, without twisting, put on 3 rubber bands from the 1st column of the far row to the near one.
- Take 3 elastic bands from 2 posts (near and far rows) and transfer with a hook to the 1st.
- Remove the triple elastic band in the middle to secure the red “heart” and start weaving the second (yellow) “heart” by placing a yellow elastic band on the posts of each row.
- Remove all the red rubber bands from the posts to the middle of the yellow ones.
- Put on a new yellow elastic band and weave a yellow heart in the same way.
- Alternate the "hearts" until the decoration reaches the desired size. To complete the work: put 1 elastic band on the posts of each row and throw all the loops onto them.
- Transfer all the elastic bands from 2 columns to 1. Add additional elements to the product and use a hook to grab and drop all the lower loops into the middle of the structure.
- Place the clasp on the remaining loops removed from the machine, connecting the parts of the decoration.
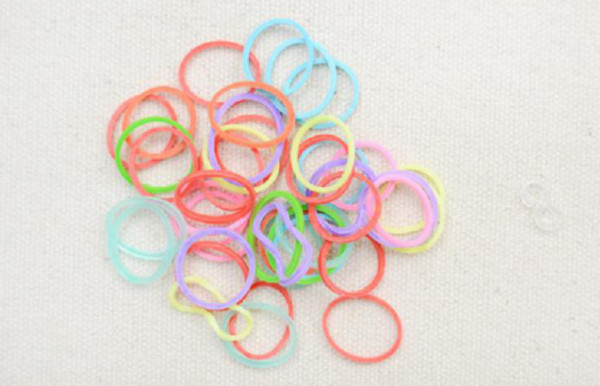
How to choose rubber bands for braiding
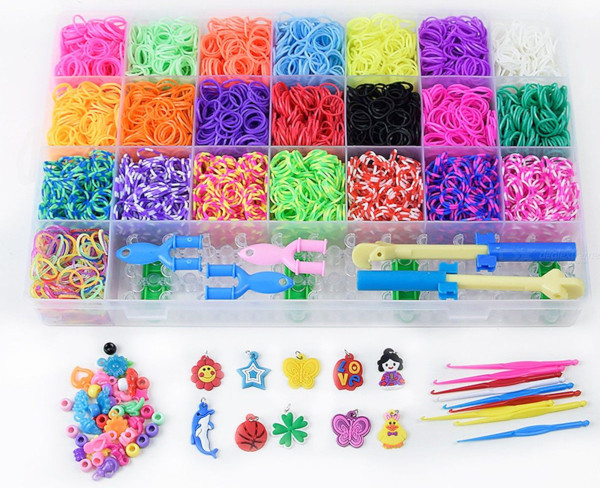
When creating ultra-fashionable bracelets, special weaving kits are used, which include:
- more than 4500 rubber bands of different shades (including those with reflective particles);
- slingshots and machines, varying in shape and size;
- special hooks;
- S-shaped clip fasteners.
Experts recommend choosing only products of proven brands for creativity, focusing on the quality of the rubber bands, their ability to quickly take their original shape when stretched and the absence of a toxic odor. The machine or slingshot for weaving should not have roughness or nicks.
Popular brands producing products:
| Rainbow Loom | The company, founded by fashion designer Chung Chun Ng, makes rainbow-colored rubber bands that come in sets:
|
| Loom bands | A subsidiary brand of Rainbow Loom, which makes 21 shades of rubber bands for weaving, with a luminous and solid surface. The kits also include looms of different configurations, hooks, beads and slingshots. |
Experts note that high-quality, safe-to-use products from well-known brands:
- Must be packed in cardboard (not polyethylene) packaging. Cases for rubber bands are purchased separately.
- It does not stain during use and does not emit an unpleasant odor.
- Must be permanently marked with the brand logo.
Before weaving, it is recommended to open the set of rubber bands and leave them in the fresh air (on the balcony or window) for several hours (or overnight), which will help get rid of the specific smell. If you have a sensitive sense of smell, you can also use a weaving material made of latex or rubber.
Rubber band bracelets are a modern fashion creative movement that was created by Chinese tycoon Chung Chun Ng.
Easy-to-learn patterns allow children and adults to use their imagination and special tools, fingers or cutlery to make a variety of bright Rainbow Loom jewelry, popular among Hollywood movie stars, among others.
Video about weaving a bracelet from rubber bands
Weaving a rubber band bracelet "Double Infinity" on a slingshot: