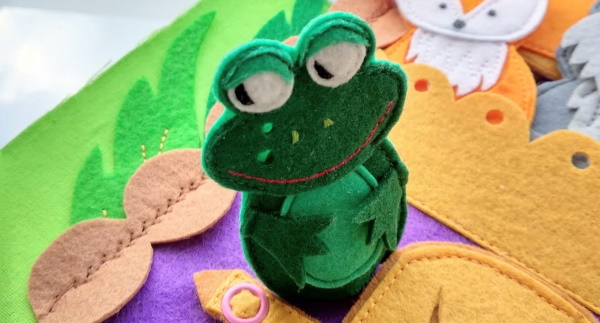
A frog sewn with your own hands from felt can be given to friends as a gift or used for games with children. To make a beautiful toy, It is necessary to look at several step-by-step master classes, as well as select a suitable pattern.
Ideas for sewing a frog from felt
A felt frog (the pattern can be of any size and shape) turns out bright and soft. Most often, needlewomen are inspired by cartoon images.
Popular toy models, sewn in the image of famous characters:
- traveling frog;
- toad from the cartoon about Thumbelina;
- princess frog;
- "Frogs" from the cartoon "Meet the Robinsons";
- Kermit the Frog.
Souvenir toys intended for interior decoration are also popular. They look like rag dolls. In some sewing options, the paws and head are attached to buttons so that the parts of the toy's body are more mobile.
Necessary materials and tools
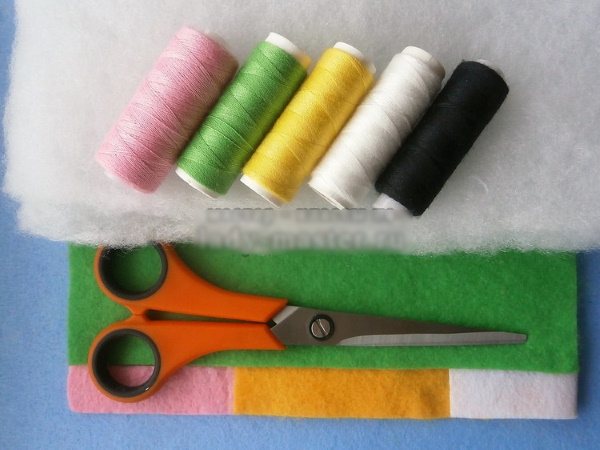
The table lists the main tools and materials, as well as their purposes:
| Material | Purpose |
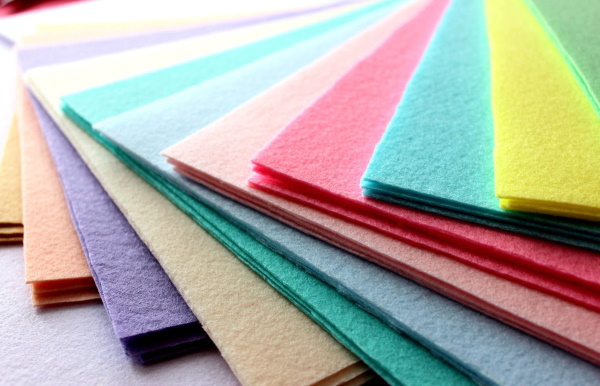
| Felt | To sew toys you need soft felt. |
| Sewing threads | It is advisable to purchase a large set containing threads of different colors. |
| Sewing needles | Standard size needles will do. A thick needle will leave unsightly holes in the felt, and small needles are inconvenient to sew with. |
| Thick paper or cardboard | Material needed to create patterns. |
| Felt-tip pen or water-soluble marker | Required for transferring patterns onto fabric. |
| Scissors | Experienced craftsmen advise purchasing special tools for cutting fabrics. They will be sharp enough and more convenient to use than regular office scissors. |
| Buttons | They are needed to decorate toys or imitate eyes if it is not possible to purchase special eyes for toys. |
| Scraps of calico or cotton fabric | Needed for sewing clothes, as well as making other decorations. |
| Sewing machine | It is necessary for sewing large toys, as well as for processing the edges of fabric scraps. |
| Pins | They are needed to fix the parts before sewing them together. |

The list of materials and tools may vary depending on the toy model, so the master classes presented later in the article contain lists that additionally list everything needed to sew a specific type of felt frog. Satin ribbons can be used as decoration for toys. Usually, needlewomen tie them around the neck of felt frogs, tying the ends into a lush bow.
You can tie a small bow and sew it to the top of the doll to make a toy for a girl. The hems of dresses and the bottom edges of costumes are decorated with lace or shiny braid. You can sew beautiful buttons of unusual shapes onto toy clothes, and also embroider them with beads.
In craft stores, you can buy special eyes to decorate the frog's face. They can be glass or plastic. Some models of eyes are attached to fabric and fixed with plastic nuts on the back side. This type of decoration is considered the safest for making toys intended for playing with children. The baby will not be able to tear off the small eyes and accidentally swallow them.
For decorative frogs, eyes without fasteners are suitable, which can be sewn or glued to the felt. If it is not possible to buy ready-made eyes, they can be made from medium-sized black buttons. However, many needlewomen do not like this kind of decor. The toy seems to lose its cuteness. Therefore, they often cut out 2 circles from white and black felt, then sew them as eyes, placing large white circles under the black ones, of a smaller diameter.
If you don't have any alternative materials in stock, you can carefully embroider the muzzle with black threads. This should be done before sewing the front and back parts of the head pattern. To ensure that the embroidered eyes and nostrils are positioned symmetrically, you should mark the felt with a water-soluble marker.
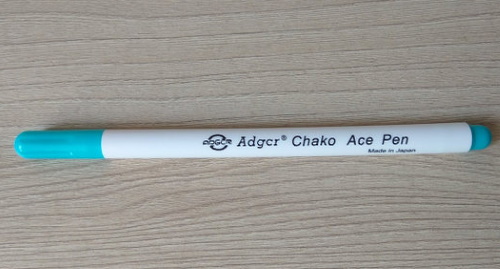
Then, after making, the toy will have to be rinsed in cold water so that the marker ink dissolves. A regular felt-tip pen will not work for creating such marks. The pigment will not dissolve properly in water, but will only spread and form unsightly spots and stains on the felt.
Construction of patterns and templates, instructions for sewing a frog from felt
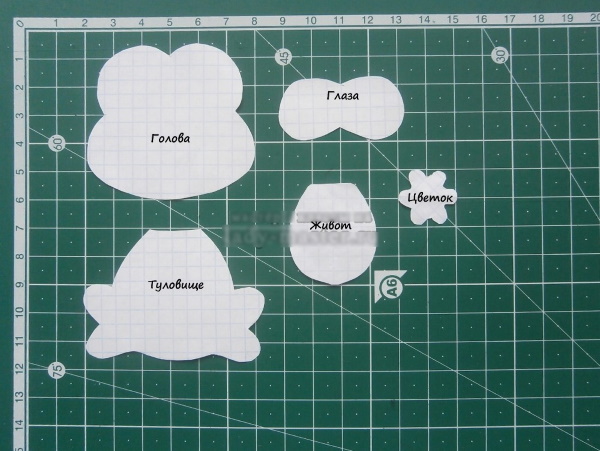
A felt frog (the pattern should be slightly larger than the toy, since you need to take into account the seam allowances of 0.5 cm) can be sewn using a hand-drawn pattern. It is not necessary to use drawings and measure the parts with a ruler. It is enough to make a sketch of all the parts of the body separately in 1 copy. When transferring the pattern to the fabric, each part should be outlined with a marker 2 times to get 2 halves that will be sewn together at the next stage of work.
The legs and arms of the toy can be drawn on paper in 1 copy, when transferring the pattern to fabric, it will be enough to turn the cardboard over to the other side to get an identical paw, but in a mirror image. Therefore, further in the article, information will be presented on how many parts the pattern consists of.
The standard consists of 4 parts:
- 1 hand;
- 1 leg;
- body;
- head.
Information about additional elements will be provided in the step-by-step description. This master class describes a work consisting of only 2 parts. The toy will be one-piece, that is, the body parts do not need to be sewn on separately.
What you will need for sewing:
- green felt;
- cardboard and pencil;
- eraser;
- felt-tip pen;
- scissors;
- green and black threads;
- filler.
Algorithm of actions:
- Use a pencil to draw a frog with widely spaced legs on cardboard. Draw bulging eyes on the head, which will rise slightly above the crown.
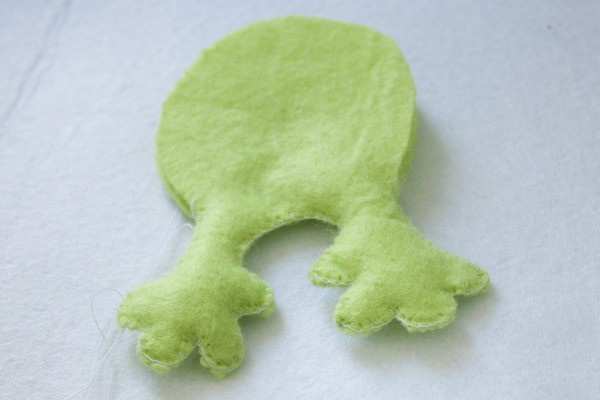
- Cut out the blank and trace it onto the fabric twice.
- Cut out 2 parts, sew them together with green threads, leaving an opening for stuffing at the bottom of the body.
- Stuff the toys with filler.
- Sew up the hole.
- Using black thread, embroider the frog's eyes, mouth and nostrils.
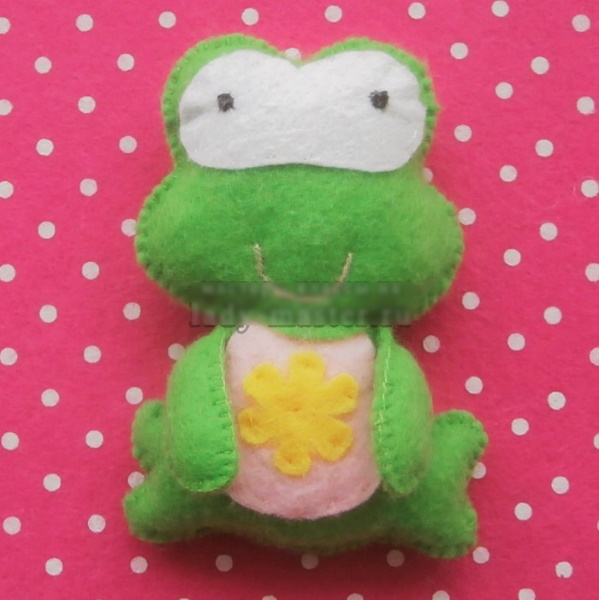
The finished toy can be decorated with satin ribbon, buttons or sequins, or left as is.
The Traveling Frog
A felt frog (the pattern for this model consists of 4 parts that need to be traced on felt 2 times) may differ in shape from the character of the famous cartoon. In order for the frog to be called a "traveler", you will need to create some attribute that is typical for people who are fond of traveling. In this master class, we will sew a camera from felt of a different color. It can be replaced with plastic sunglasses, or sew a cardboard map to the frog's paw.
What you will need for work:
- felt of white, brown and green colors;
- synthetic padding for stuffing;
- a piece of calico fabric;
- sewing threads of black, green, red and white colors;
- 2 medium sized black buttons;
- a piece of red cord;
- thick paper or cardboard to create a pattern;
- scissors;
- dark colored felt-tip pen.
Algorithm of actions:
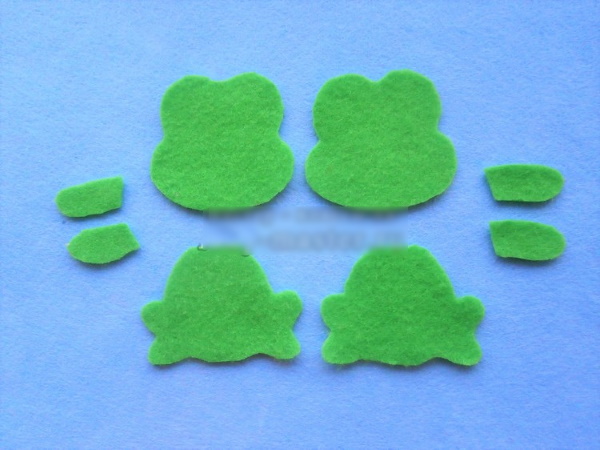
- Draw 2 parts of each body part on paper. Cut them out.
- Place the templates on the green felt. Trace around the outline and cut out.
- Connect all the elements together and sew. Leave unsewn holes at the ends.
- Turn all pieces inside out to hide the seams.
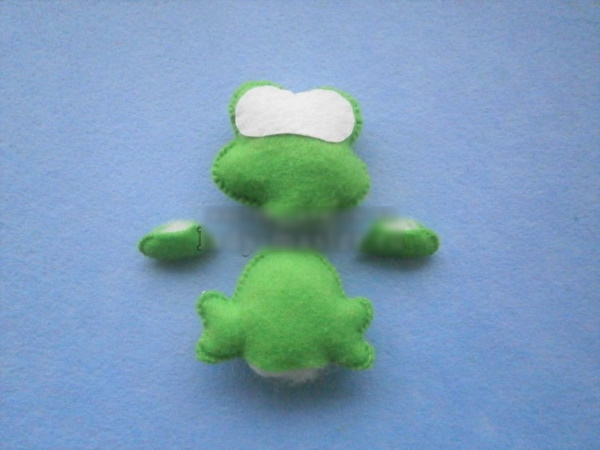
- Stuff the body with padding polyester. Sew up the hole.
- Stuff the paws. If the padding doesn't go through well, you need to push it inside the part with a pencil.
- Fill in all the other parts in the same way, sew up the holes in them with green threads.
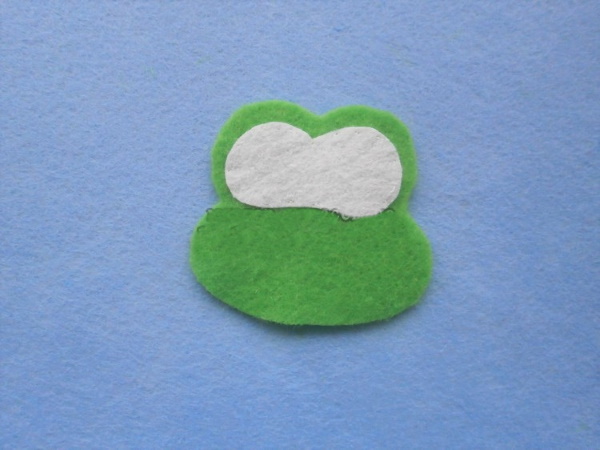
- Draw eyes on white felt. Cut them out. Sew them to the frog's head with white thread. Sew buttons on top, placing them in the center.
- Using green threads, sew the frog's legs and head. It is advisable to do this with a blind stitch so that the threads are not visible.
- Burn a piece of red cord (about 5 cm) on both sides with a lighter so that its ends do not unravel. Sew it to the frog's head in the form of an inverted arc. The cord will imitate a smiling mouth.
- Embroider the frog's nostrils with black thread.
- Cut 2 rectangles 7x17 cm from the chintz fabric.
- Place the pieces with the right sides facing out and stitch the edges on the machine.
- From the top edge of the piece, move down 2 cm and make another line.
- Sew the edges of the rectangle together.
- Gather the top of the skirt with a thick thread, threading it through the drawstring with a pin.
- Put a skirt on a frog.
- Draw 2 rectangles 3x3 cm on brown felt. Cut them out.
- Sew the pieces together with white thread.
- Draw a round lens and a button on the rectangle. Sew the pattern with white threads along the marked lines. You will get a small camera.
- Cut a strip of felt, 5 cm wide and 15 cm long. Sew its ends together. Attach a camera and hang it on the frog's neck.
The felt toy "traveling frog" is ready.
The Frog Princess
A felt frog (the pattern for this model consists of 6 elements, additional ones will be 1 detail for the crown and a circle for the collar) will be bright and elegant. The dress can be sewn from any fabric. This master class uses colored calico.
Materials and tools:
- red, yellow and green felt;
- pencil;
- cardboard;
- felt-tip pen;
- set of colored threads;
- synthetic padding;
- pins;
- plastic eyes for toys;
- 2 buttons of unusual shape.
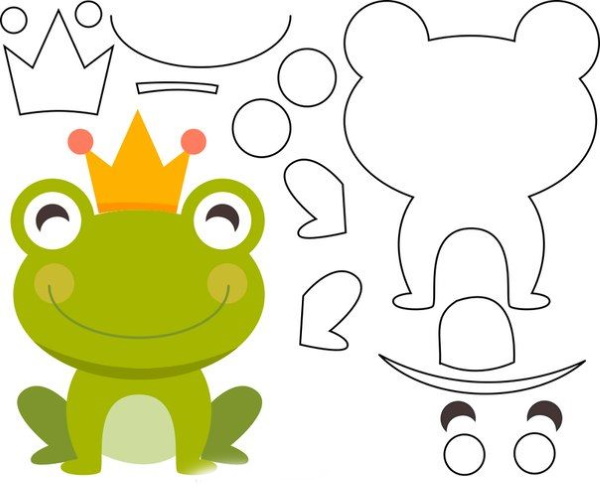
Algorithm of actions:
- Draw all the elements of the pattern on cardboard. Transfer them to the fabric (2 copies of each part) and cut out with scissors.
- All the pieces should be green except for the circle for the collar. The crown can be cut out later when the work is almost finished.
- Cut out the pieces, fold them in pairs and secure with pins.
- Inspect all elements and cut off excess if necessary.
- Sew the body. The seams should be even, as they will be on the front side. It is advisable to sew with green threads, if there are none in the set, you can use white ones.
- Fill the body with synthetic padding and sew up the hole.
- Sew the paws separately. Stuff them with padding polyester, sew them to the body.
- The circle intended for making the collar is sewn along the edges with red thread and pulled to the center.
- Sew the collar to the place where the head is attached.
- If the plastic eyes have clasps, they need to be attached to part 1 of the head pattern before sewing. In other cases, you will first need to sew the head, fill it with stuffing, sew up the opening and attach the head to the body, and then sew or glue the eyes. You can replace the eyes with buttons.
- Embroider the mouth with red thread.
- The frog needs to be dressed in a colorful sarafan. To do this, you will need a rectangular piece of chintz, which should be stitched on a machine along the edges, and then gather the top edge with an elastic band or strong thread.
- The resulting skirt needs to be pulled up to the collar and the slit sewn up.
- Cut out 2 “straps” from chintz, sew them to the skirt on 2 sides, throwing them over the frog’s neck.
- The hem of the sundress can be decorated with lace or sequins.
- Sew 1 button to the junction of the skirt and straps, in the front.
- Cut out 2 crown pieces from yellow wind and sew their tops and edges together.
- Fill loosely with stuffing and sew to the head.
The frog princess is ready.
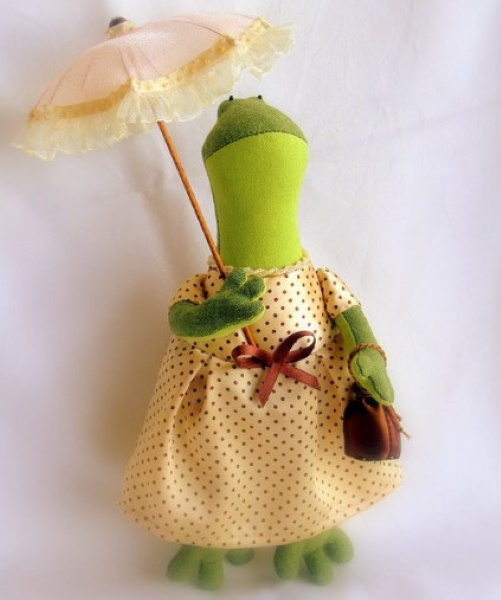
Souvenir toy
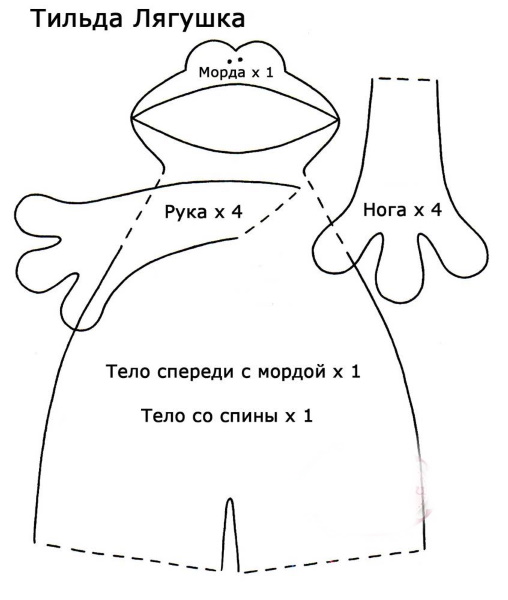
The Tilda pattern is considered the most popular version of a felt toy that can be given to friends as a gift. This frog looks like a souvenir doll. It can be used for interior decoration, and also to complement the contents of a gift box.
To work you will need:
- felt in 2 colors: dark green and light green;
- synthetic padding;
- set of threads;
- cardboard;
- pencil;
- glass granulate;
- eyes for toys (preferably made of glass, with special fasteners);
- satin ribbon;
- some nice buttons.
The felt should be 2 shades of green close to each other.
Algorithm of actions:
- Draw the pattern details on cardboard and transfer them onto the fabric.
- Cut out the material, taking into account that the pattern of the belly and the front part of the head, as well as the front parts of the paws and feet should be made of light green fabric.
- Sew the body parts together, leaving an opening for stuffing.
- Assemble the remaining parts in pairs, sew along the edges, leaving openings for the filling.
- Stuff the body tightly. Add granulate to the bottom.
- Sew up the hole through which the filling was inserted.
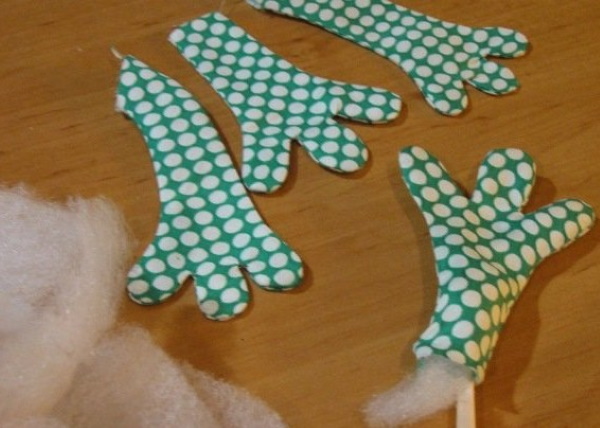
- Fill the paws with synthetic padding as tightly as possible.
- Attach the eyes to the front of the frog's head.
- Embroider the frog's mouth and nostrils with black thread.
- Cut a 20 cm long piece of satin ribbon. Tie a fluffy bow around the frog's neck.
- Sew a few pretty buttons onto the belly.
The souvenir toy is ready. Now you can give it to your friends.
How and with what can you stuff toys?
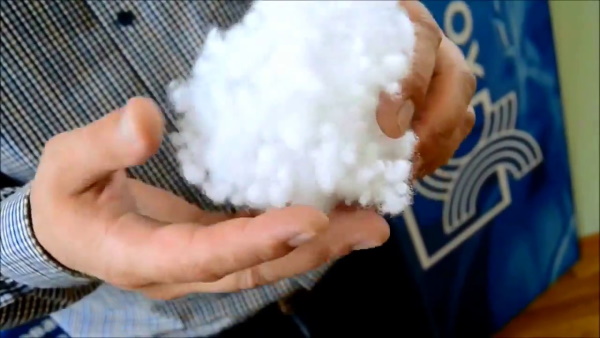
High-quality stuffing of a felt toy is a guarantee of a presentable appearance. In order for the toy not to lose its shape for a long time and to be suitable for use for 5-10 years, holofiber should be used as a filler.
The advantages of this filler:
- it is machine washable;
- dries quickly after washing;
- It allows air to pass through well, so even if it is not completely dry, fungus will not appear inside the toy;
- holds its shape well and does not roll;
- does not cause allergic reactions.
Another advantage is the low cost of the material. Experienced needlewomen do not always buy holofiber. It can be taken out of an old pillow or an unnecessary soft toy. If the material is slightly compacted, it can be fluffed up with your fingers. Then it will become soft and airy again.
What else can you stuff felt toys with:
| Type of stuffing | Its features |
| Cereals, seeds, decorative stones | Before filling toys with cereal, it must be burned in the oven to avoid pests. Such toys cannot be washed. |
| Dried herbs and flower petals | The scent of herbs has a calming effect, but the filling will require sewing a lining of thick fabric so that the sharp stems and seeds do not pierce the felt. |
| Fabric scraps | Suitable for stuffing small toys. Inside a large product, the flaps may become crumpled, causing the toy to lose its correct shape. |
It is not recommended to use cotton wool for stuffing. It is soft, but it is difficult to distribute it evenly inside the finished product, and cotton wool does not hold its shape well and dries for a long time after washing. Toys should be stuffed gradually, introducing the filler in small portions. The product should be kneaded periodically so that the stuffing is distributed evenly inside it.
Narrow parts can be stuffed with holofiber using a pencil. Small pieces should be carefully pushed inside and lightly tamped. Ready-made patterns and step-by-step master classes will help you sew a beautiful frog from felt with your own hands. Experienced craftsmen advise beginners to choose toy models for their first work, consisting of a minimum number of parts.
Video on how to make a frog out of felt
How to make a frog from felt: