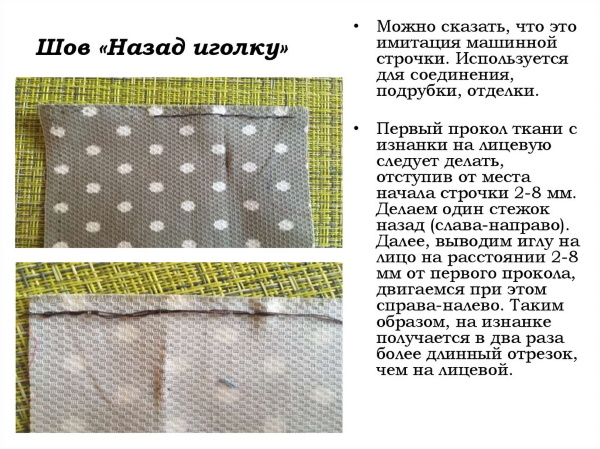
One of the basic stitches, the backstitch, is used for a variety of purposes. Everyone who does needlework should know how to do a backstitch step by step. The literal translation from English is as follows - backstitch. In order to sew a line with such a stitch, you do not need much experience in embroidery and sewing.
Where and why is the seam used?
The backstitch, which can be performed step by step in both sewing and embroidery, is used in various cases. In hand sewing, such stitches help to firmly connect clothing parts to each other.
Backstitch is popular in sewing because the stitches of such stitches are very strong. If we are talking about cross stitching, then in this type of creativity such stitches serve to give greater clarity to the pattern. Some designers publish such embroidery patterns in which without backstitch it is impossible to see the pattern that the author created.
The step-by-step backstitch in cross stitch helps to highlight small details, such as flower petals or facial details. To prevent the backstitch from merging with the main embroidery, it is customary to use contrasting threads, for example, dark threads can be used to highlight light fragments. Children can also do the backstitch, so they can use it to embroider a small, simple picture.
Materials and tools
Before starting work, you should purchase tools and materials from the following list.
All of them can be purchased at craft stores:
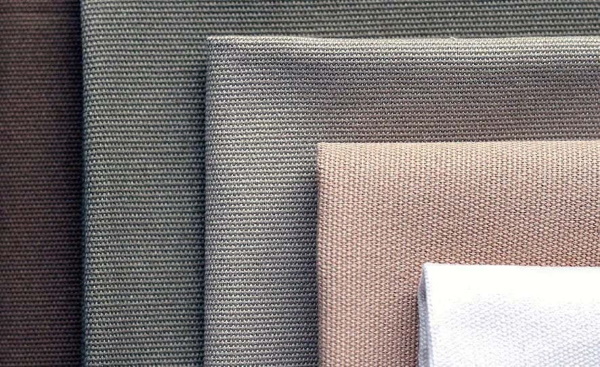
- Textile - canvas, linen or cotton fabric. Linen fabric is suitable for beginning embroiderers, since the fibers of the fabric are clearly visible. More experienced needlewomen can also embroider on cotton fabric, since the fibers of such fabrics are not as visible as on linen fabrics.
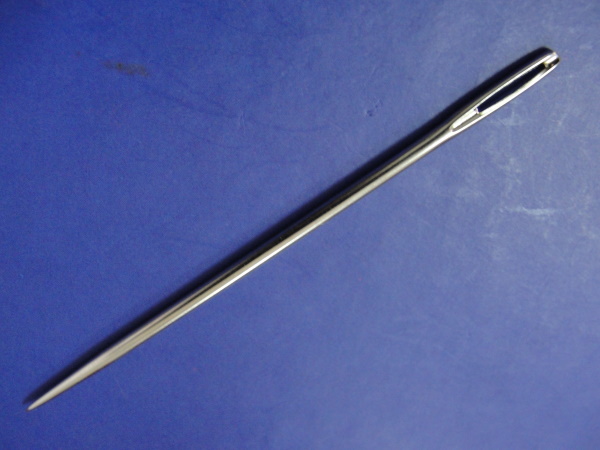
- Needle, which should be combined with the thickness of the fabric. To ensure that the needle holes are not too wide, you should choose thinner needles. You should also consider how many folds the embroidery will be made in. So, if the embroidery should be done in 2 folds, you can choose a needle with a not very wide eye. The more folds, the larger the eye of the needle will be.
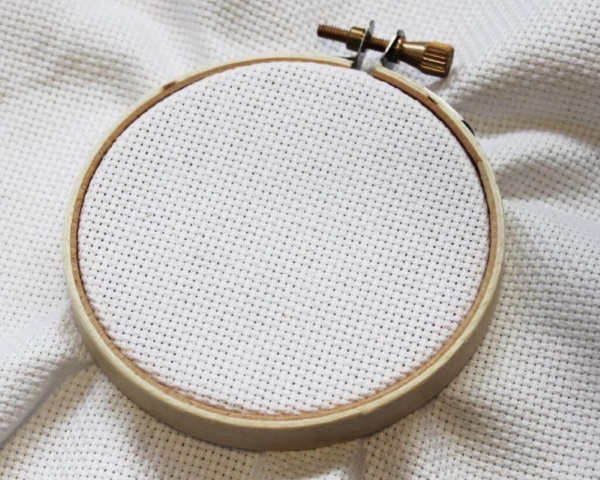
- Embroidery hoop are necessary for those who are going to cross stitch. They help to avoid sagging of the fabric. For hand sewing, hoops are not required.
- Sharp scissors.
- Threads floss or any other threads that are available to the needlewoman.
Execution order
Iron the work material immediately before you start sewing. Some fabrics may shrink, compress, and to avoid deformation of the seam line or pattern, you should iron the fabric. Also, in some cross stitch kits, the canvas may wrinkle and look untidy. For this reason, before you start embroidering, you need to iron the canvas from the back side.
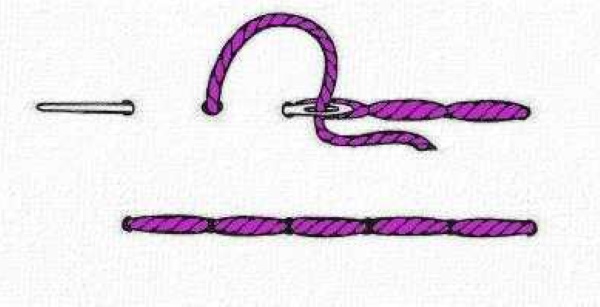
When starting work, you need to secure the thread in any convenient way. There are several ways to secure the thread at the beginning of work. So, you can tie a knot at one end of the thread. If the embroidery will be done with an even amount of thread, you can secure the thread with a loop on the back side.
To do this, thread both ends of the thread into the needle so that a loop is formed at the end. Then pierce the fabric with the needle from the back side, bringing the working thread to the front side. To secure the loop and thus the beginning of the stitch line on the fabric, you need to make a stitch diagonally, capturing the loop. When tightening the stitch, the threads will tighten, so the stitches will not unravel during work.
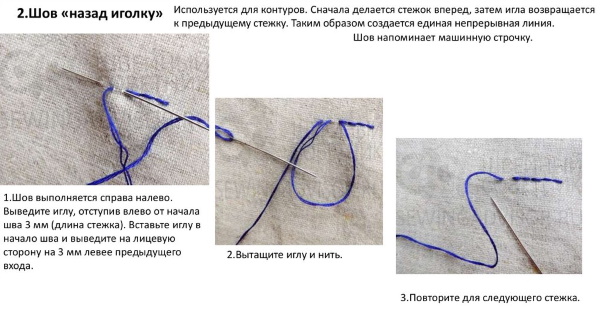
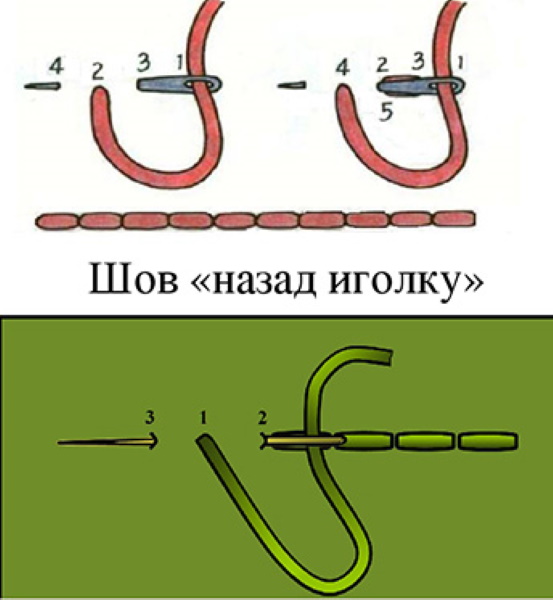
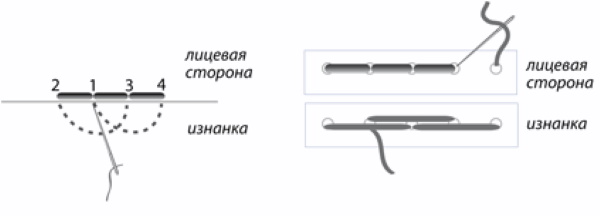
Backstitch stitch should be done step by step according to the following instructions:
- Secure the thread in any way on the back side of the product, bring it to the front side at point 1.
- Count the required distance according to the number of threads and make a puncture with a needle at a new point 2.
- The distance between points 2 and 3 should be the same. Pull the fabric from the wrong side to the front side at point 3.
- Points 1 and 4 should match. The only difference is that the fabric should be pierced from the front side to the back side. Repeat the stitches according to the same principle until the end of the line.
At the end of the stitch line, you need to secure the thread. It is important to do this correctly, because otherwise the sewn item will fall apart, and small details will not be visible in the embroidery.
The following types of knots at the end of a stitch line can be distinguished:
- Rolled: Roll a loop of thread from your finger, pull the end and form a knot.
- Back stitches: stitches that make the seam stronger and more durable.
- Fixing: used to secure a permanent, non-basting seam.
The disadvantage of a rolled knot can be considered its sloppy appearance. The thread can fluff up when you remove it from your finger. In addition, when embroidering with satin threads, rolled knots can come undone, since satin threads are quite slippery to the touch. A threader can help secure the thread after stitching the entire line. So, you need to pull the threader through the eye of the needle, tuck the thread in the corner.
After bringing the end of the working thread to the opposite side, make sure that this end of the thread hangs down. Then the threader should be pulled out, and the long end of the thread should be wrapped around the needle. Move the turns to the eye of the needle, move them to the thread and lower them to the end of the thread. When completing the formation of the knot, these loops should be tightened. A more reliable way to secure the thread at the end of the line is to tie a knot and sew the stitch.
To do this, tie a knot on the working thread, pierce the fabric or canvas with a needle and pull the needle out 3 mm from the knot. Pierce the thread again next to the knot and stitch the stitch back. To make a securing knot, make a stitch back through several threads, leaving a small loop.
In the same place, sew 2 stitches. The needle should be brought out through the loop made at the beginning. The stitch is secured by tightening the loop. The thread is secured with a double stitch back, which is more durable. It is done at the beginning of the stitch line.
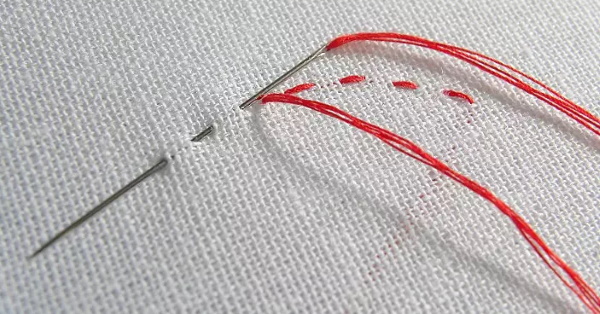
You can secure stitches using this method using the following instructions:
- Stick the needle into the fabric and pull the thread out so that it remains on the canvas.
- Sew the stitch back 3 - 4mm.
- Bring the working thread out at the place where the first puncture of the fabric was made.
- Make 1 more stitch.
- Continue sewing the line further.
The backstitch, which is performed step by step when creating clothes, is also used in cross stitching. Therefore, needlewomen need to know how to properly and carefully secure the thread at the end of the line. Since knots can cause unevenness on the canvas, it is not recommended to use this method of securing the thread. For this reason, the following methods should be used.
The loop method is considered the most suitable for embroidery with an even number of threads. The thread should be folded in half, threaded through the eye of the needle and a loop should be formed. It can be formed on either the front or back side.
To secure the thread with a loop on the front side, you need to:
- Determine the beginning of the embroidery.
- Pass the needle under the first cross in the upper left corner.
- Pass the thread through the resulting loop and pull it tight.
To secure the thread to the back of the canvas, follow these steps:
- Find the area where the embroidery was started.
- Prick the fabric from the wrong side at the top in the corner located on the left.
- Make a diagonal stitch.
- On the wrong side, insert the needle into the loop and tighten it.
- Pass the thread through 2 stitches.
Types of back stitches in embroidery (including beading)
Backstitch, or backstitch, can be used in some types of embroidery. In one of the English techniques, Jacobean embroidery, backstitch is used. In this technique, the stitch is used to outline the figure and fill the design. To make the stitches textured, they are often wrapped with contrasting threads. In the Assisi technique, first used in Italy, you can also find a backstitch.
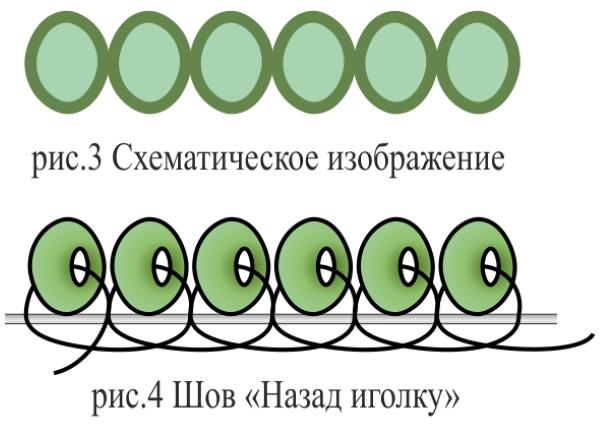
In it, the outline is stitched using a backstitch, and then the background is filled with crosses. The English blackwork technique is almost entirely based on backstitch. The image, made in one color, is created using a simple backstitch or a special Holbein stitch. The essence of the sashiko technique is to create the outlines of the images. The images must be symmetrical and neat; before starting to embroider, the outlines should be drawn with a pencil.
In the Indian techniques of chikanhari and kantha, the forward stitch is used both as a separate element and as the basis for more complex stitches. Craftswomen distinguish 4 types of back stitch in embroidery, including bead embroidery.
A brief description and name of these techniques is presented in the table below:
| Seam name | Description |
| Whipped thread | A simple stitch line is sewn back with a needle, then a thread of a different color should be threaded under each stitch. |
| Cascade | The seam must be done in the same way as a regular back stitch, but with one difference: the second thread should not be completely pulled, but laid in the form of a wave. |
| Double Cascade | Backstitches in this technique are performed in the same way as in the cascade technique. The difference between a double cascade and a cascade is that the second cascade should be performed with a thread of a contrasting color. The loops of such a seam should be placed next to the loops of the 1st cascade. As a result, several waves are formed next to each other. |
| Two-line | For this technique, you need to do more than 1 line of backstitch in one color. Then you need to pull the threads of double cascades. The thread must be passed through several stitches. |
When doing backstitch in cross stitch, it is necessary to remember some recommendations. So, if the pattern is large, you can separate the stitching of the stitches back needle: after finishing the embroidery of one fragment, you can immediately stitch the backstitch. This will save time when cross stitching. To prevent the stitch lines from being too thick and sloppy, it is recommended to embroider with a thread in 1 - 2 folds.
You should not make the stitches too long, as they may not look as neat, may stretch and distort the contours of the design. Thread pulling under unsewn parts of the canvas may spoil the appearance of the finished work. Cross stitch patterns often contain backstitch, so it is very important to be able to read them correctly. If backstitches need to be done in one color, they are marked in black.
Otherwise, stitches that highlight the contours are applied with lines of different colors. The colors and numbers of the threads are indicated in the key - decoding to the scheme. Thus, the step-by-step back stitch is found in sewing and cross-stitching or beading. However, in very large plots, backstitch is most often not used, since such pictures should be viewed from afar, without highlighting individual elements.
Video on how to make a backstitch step by step
How to do a backstitch: