White mushrooms can easily draw with regular pencils even children, since such a figure is simple, it has no small details. The sketch is created using straight and curved lines. In addition, a multi-color palette is not needed to color the drawing.
Simple pencil drawing
Before you begin the creative process, you should prepare the necessary materials:
- simple pencil;
- sheet of paper;
- ruler;
- colored pencils;
- eraser.
Step-by-step creation of the drawing:
| Step | Description |
| 1 | First, draw 2 cross lines in the center of the sheet to simplify the drawing process as much as possible. Using a ruler, draw long straight lines. Later, they will help to correctly draw all the details of the mushroom, and also determine its place on the paper. |
| 2 | Draw a large, voluminous leg, rounded at the bottom. Then its outlines are smoothly narrowed towards the top. |
| 3 | Draw an arc that intersects the horizontal line on the left. However, it is not connected to the vertical line. |
| 4 | On the right side, do the same thing using a pencil. You get a mirror image of the leg. |
| 5 | Draw an oval, slightly rounded hat. First, draw an uneven line, outlining the lower edge of the cap. |
| 6 | The arc is drawn from the end of the line. It should be adjacent to the upper part of the vertical line. |
| 7 | The manipulations are repeated in mirror reflection. 2 arcuate lines are connected at one point to form a round hat. |
| 8 | All the cross lines are carefully erased with an eraser, and the contours of the mushroom are drawn more clearly. |
| 9 | Finally, the picture is colored with pencils to make it more expressive. |
The second simple way to create a drawing of a boletus:
- First, 2 circles are drawn one above the other. They help to maintain all the necessary proportions of the picture. Later, this will be the leg.
- On both sides of the top ring, draw 2 more circles like Cheburashka's "ears". With their help, you can draw a hat.
- A “flattened” oval is drawn at the base of the leg.
- Once the landmarks have been marked, the shape of the mushroom can be easily drawn.
- All these “circles” are outlined with a freehand line using a simple pencil.
- All unnecessary contours are removed from the drawing using an eraser.
- The outlines of the mushroom are drawn in more detail.
- The hat is completely designed, and its edge is drawn with two lines.
- The outer surface of the hat is painted with a dark brown pencil, and the inside is painted with a light beige tone. The leg is shaded with gray.
The third version of the boletus drawing:
- They outline the hat by drawing a triangular shape with rounded ends.
- A thick, large leg is depicted in the middle under the hat.
- Between the bottom and top of the hat, a wavy line marks the border.
- The resulting drawing is colored using brown, beige, and gray pencils.
In the forest
It is not difficult to depict a white mushroom (a drawing for children should be simple) in the forest. You only need to draw tree trunks and grass.
Step by step instructions:
- Draw the horizon line at a slight angle.
- The contours of the trunks are outlined, placing them in the foreground.
- Continue drawing different trees to make the drawing more interesting.
- First, draw a spruce, and then a birch, which will hide it halfway.
- Stepping back a little to the right, they depict an oak or maple.
- In the background, the trunks of other trees are drawn. However, they are not detailed.
- The bark is drawn with uneven lines. The bases of the trees are made wide at the ground, then narrowed. The branches are depicted as thinner.
- The grass is drawn with short strokes. It should look in different directions and overlap the ground line, as well as the bases of the trees.
- The outline of the mushroom is drawn among the grass.
- Draw a horizontal ellipse.
- Then an arc is drawn above it, giving volume to the mushroom. Its ends are connected to the drawn oval.
- Draw a stem right in the center under the cap, drawing parallel lines diverging downwards.
- At the bottom, their ends are rounded and connected. You can draw several mushrooms if you wish.
- The picture is colored with colored pencils, after removing all unnecessary details with an eraser.
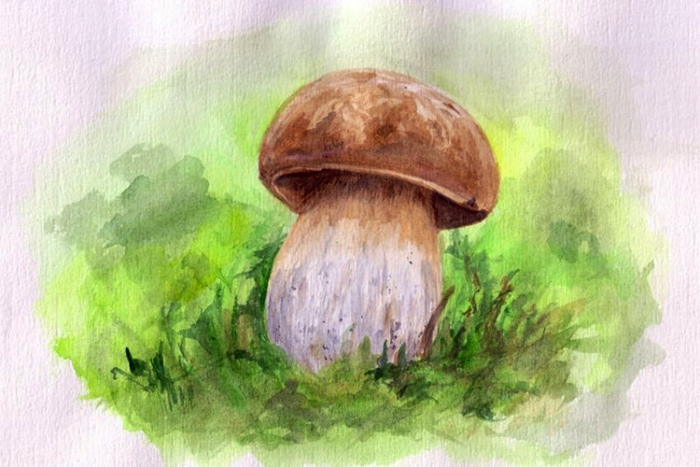
In the grass
This is one of the most popular variants of the porcini mushroom design.
Stages of work:
- To begin, the hat is drawn in the shape of a semicircle using a simple pencil.
- Draw a thick oval leg.
- On the right side, place a small mushroom if desired.
- They draw the contours, detailing the outlines of the mushroom.
- An arc is drawn across the bottom of the cap to separate its top.
- Draw a line to mark the place where the leg will start.
- The contours of a small mushroom are outlined. Auxiliary elements are removed with an eraser.
- Draw grass at the bottom. It should slightly cover the mushrooms.
- The hats are colored with brown pencils.
- A light highlight is left on the hats.
- The legs are shaded with a grey pencil, and the grass with green. The inside of the hat is made yellow.
- The white background is shaded with a blue pencil if it seems too empty.
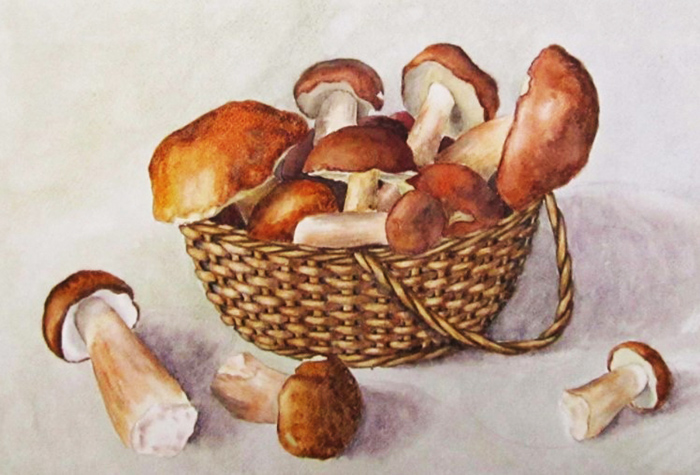
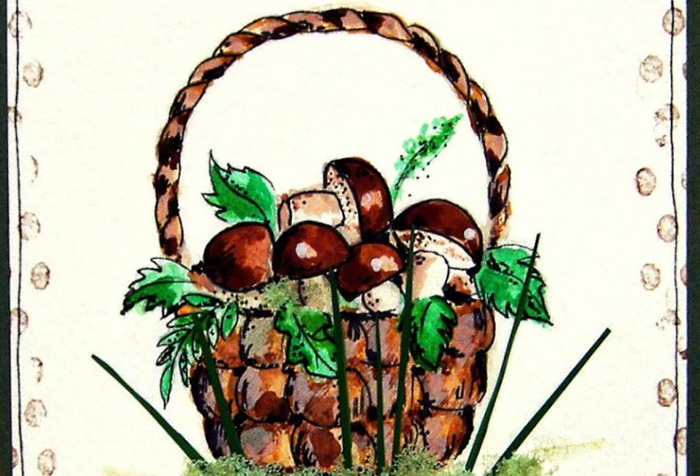
In a basket
White mushrooms can be depicted in a basket. It will not be difficult for children to make such a drawing.
The following tools are required for work:
- mechanical pencil;
- paper;
- eraser;
- colored pencils;
- Black gel pen.
Work process:
- A rectangle is drawn on the album sheet.
- A handle is added to the future basket.
- The basket is slightly narrowed towards the bottom.
- They draw the details of the basket, imitating the weaving of the base and the handle of the basket.
- Draw a piece of fabric peeking out of the basket.
- They depict mushrooms. The hats are drawn as semicircles, and the legs as rounded rectangles.
- Draw mushrooms lying next to a basket. It is desirable to depict them in different sizes. This way the still life will look much more interesting.
- They mark the surface of the table where the basket is placed. They draw a couple of leaves near it.
- The sketch is outlined with a pen.
- Pencil lines are erased with an eraser.
- The basket is colored with a dark yellow pencil.
- In some places the basket is shaded with a reddish-brown pencil.
- The inside of the hats is made light brown.
- The legs are painted with a grey pencil. The strokes are made as light as possible.
- The top of the hats is painted in brown shades. And then individual sections are darkened with chocolate tones.
- The fabric is painted in green tones.
- The mushrooms drawn next to the basket are colored in the same way as those inside it.
- The leaves are colored with yellowish hues.
- The tabletop is tinted with a blue pencil, and the shadows falling on it from objects are indicated in blue.
- Next, the background is made lilac.
Such still life is also painted with paints or felt-tip pens. The composition can be supplemented with berries, fruits or flowers, which will make it more complex and expressive.
Another version of the drawing of a basket with mushrooms:
- To begin with, the basket itself is depicted schematically. Various lines show its outlines like a bowl, as well as an arched handle.
- Fill it with mushrooms, drawing them with a simple pencil. The caps are drawn like ellipses, and the legs are in the form of elongated ovals.
- The mushrooms are arranged in random order. Some are arranged with their caps facing upwards. Others have barely discernible caps. Still others are turned so that only the stems are visible.
- Next to the basket, there is one mushroom lying on its side, with its cap visible from below.
- The number of mushrooms can be any.
- The basket and handle are shaded using a simple pencil.
- Make the contours of the mushrooms clearer.
- This drawing does not need to be colored.
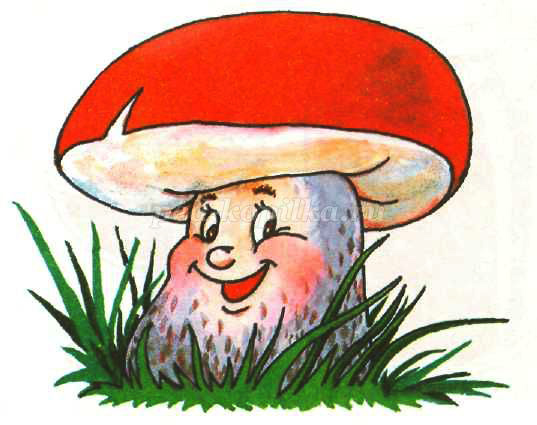
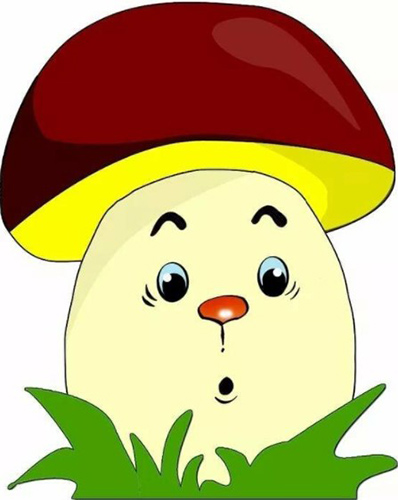
Cartoon mushroom
The white mushroom (a drawing for children should be bright and colorful) in the role of a cartoon character will be very popular with young artists. You can depict various types of fairy-tale mushrooms, for example, like a forest spirit or a house.
Step by step instructions:
- First, mark the size of the mushroom. At the top, where the hat will be located, make three light pencil strokes and draw one at the bottom.
- Draw the outline of the mushroom. Connect the marked strokes with smooth lines. Draw the cap at the top and the stem underneath.
- The cartoon mushroom gets a face. A small distance is drawn from the edge of the hat and the eyes are drawn.
- Then, curved eyebrow arches are drawn above them.
- Hair is drawn into the depths of the hat.
- In the center of the leg, a little below the eyes, a nose is depicted.
- They draw a mouth, and then add a mustache and beard to the fairytale mushroom.
- On both sides of the legs draw arms.
- A crawling caterpillar is depicted on top of the mushroom cap. Its head is drawn as a small round ball.
- They also draw eyes, a nose and a smile on her, and a mustache on her head.
- Grass is drawn at the bottom of the legs.
- Use an eraser to remove all unnecessary details and blots from the sketch.
Next, we begin to color the resulting picture:
- First, the hat is painted brown. A light highlight is made on it.
- The inside of the hat is tinted with a yellowish tint.
- The iris is made blue and the eyebrows are greyish.
- The lips are tinted with a pink pencil, and the cheeks are given a light blush.
- The moustache and beard are colored with light brown pencils.
- The “body” itself, legs and arms are shaded in beige tones.
- The caterpillar is painted yellow-orange.
- The grass is given an emerald hue.
There is no need to be afraid to make mistakes or experiment. The child can give free rein to his imagination and show his creative abilities.
It is necessary to start with large details. They are hatched evenly. Then smaller elements are painted over.
Another version of a cartoon mushroom drawing:
- They draw a hat. It is based on an oval and a semicircle.
- The leg is placed under the hat.
- They draw grass.
- This will be a mushroom house, so a door is depicted on the leg.
- A small window is drawn slightly above the doorway on the left or right.
- Small round stones are drawn next to the grass.
When the drawing is ready, it is colored.
The mushroom is fabulous, so it can be decorated in unusual colors:
- For example, a hat is painted with pencils in bright purple or light green shades.
- The leg is shaded with a turquoise pencil.
- The window is painted yellow, and the door is made orange or pink.
- The stones are painted in different colors.
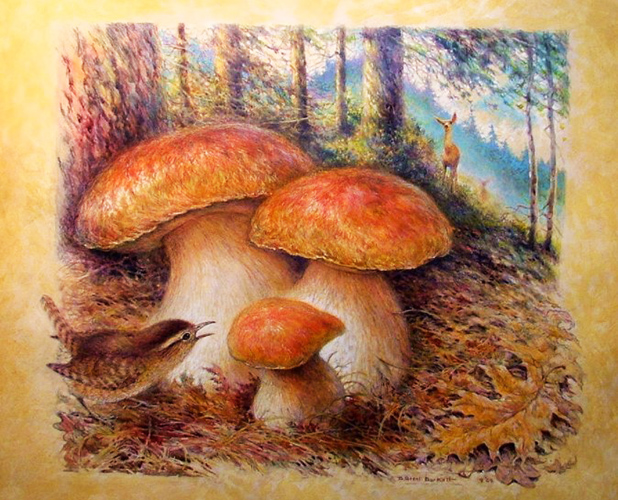
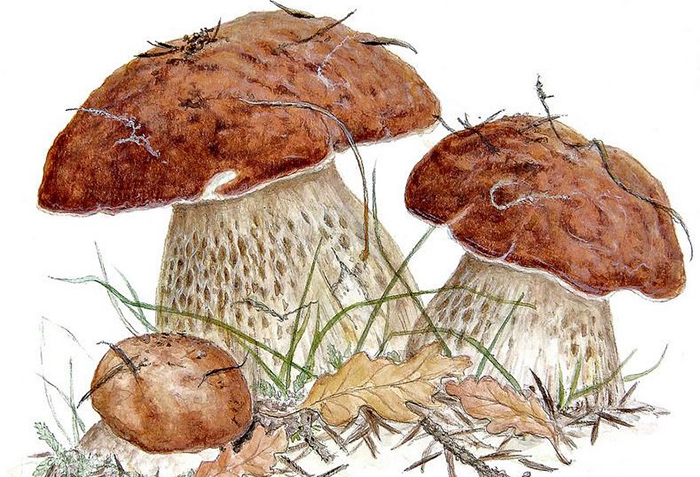
A few mushrooms
You can draw not one, but several porcini mushrooms at once (a drawing for children is usually painted in real shades). First, you need to study beautiful, clear photographs with your child in order to correctly depict and paint the mushrooms later.
There are pictures of mushrooms in specialized magazines or encyclopedias. They can also be copied from real mushrooms that grow in the forest, if possible. In natural conditions, only a sketch is made, and it is painted at home.
Step by step drawing process:
- To begin, draw a line representing the ground and the stems of three mushrooms.
- The hats are sketched out. At first they will look like little hammers. However, this is only a sketch for now. Then they will take on a more realistic appearance.
- Draw the cap of the first mushroom.
- Draw the bottom edge of the cap of a large boletus. Then draw its top.
- They depict the cap of the third mushroom.
- Draw grass and a leaf that will be placed on one of the hats.
- The sketch is outlined with a liner.
- The pencil sketch is erased with an eraser.
- The hats are colored with brown pencils.
- The inner areas of the mushroom caps are painted in beige shades, and the stems are painted in gray colors.
- Finally, the grass and leaf are tinted with green pencils.
The white mushroom can be easily drawn because it has a simple shape. Therefore, for children, such a drawing is not difficult to perform. Even kindergarten students can do it.
Video about drawing
Master class on painting porcini mushrooms with watercolors or gouache: