Beautiful drawings, intended for children to copy, should not only be easy to repeat, but also close in interest to the little person. One of the universal options, which will be interesting to work on for both boys and girls aged 4-10, is the image of a butterfly.
By drawing this insect, the child not only reveals his creative potential, for example, by inventing different reliefs of wings, but also learns about the world around him, in the process of discussing the components of his picture.
How to draw a butterfly outline?
The butterfly (a drawing for children must be created step by step) will turn out especially beautiful if you start drawing it from the outline. Having worked out the borders of the image in detail, it will be easier for the child to navigate the working surface in the future.
There are several ways to draw the outline of a butterfly:
| Butterfly outline drawing variant | A simple algorithm for its creation |
 | 1. In the middle part of the working plane, draw 2 diagonal lines intersecting in the center of the sheet of paper. The main lines should be slightly curved so that their upper parts are curved downwards more than the lower ones. 2. Taking the intersection point of the lines as the center, draw a small circle. 3. Draw an elongated oval close to the circle, placing it vertically. 4. Draw 2 more small circles (butterfly eyes) above the main circle. 5. Draw a horizontal line through the intersection point of the main diagonals, the ends of which should be directed slightly downwards. 6. Connect the extreme upper points of the main diagonals with the beginning and end of the dividing horizontal. 7. From the extreme points of the dividing horizontal line, draw a slightly curved line downwards, and then extend it to the extreme lower points of the main diagonals. 8. From the extreme lower points of the main diagonals, draw wavy lines upwards to the center of the image (the round part of the insect's body). The distance between the diagonals and the wavy lines should be no more than 3 cm at the widest part. |
 | 1. Determine the center of the working plane.
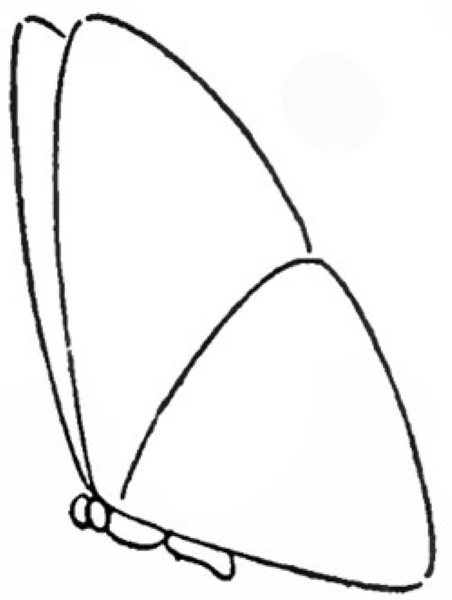
2. To the left of the middle, draw a vertical line at a slight angle towards the left edge of the sheet of paper. 3. From the bottom point of the vertical, draw a diagonal, directing it to the lower right corner. 4. Stepping back 2 cm to the right from the main vertical, draw another line that exactly repeats the direction and location of the first. 5. Connect the extreme top points of the verticals with a slightly curved line. 6. Step back from the point of intersection of the vertical lines with the horizontal by 2-3 cm, then draw a diagonal from the specified area, directed to the upper right corner. 7. Connect the extreme point of the diagonal with the end of the horizontal and the top point of the second vertical with smoothly curved upward lines. 8. Under the butterfly’s wings, on the horizontal line below, draw 2 semicircles, placing them close to each other. 9. Above the upper semicircle, draw 2 small circles (butterfly eyes). |
With a simple pencil
Beginning artists are advised to draw the butterfly with a simple pencil so that, if necessary, they have the opportunity to correct erroneously drawn lines.
You can do it like this:
| Butterfly outline drawing variant | A simple algorithm for its creation |
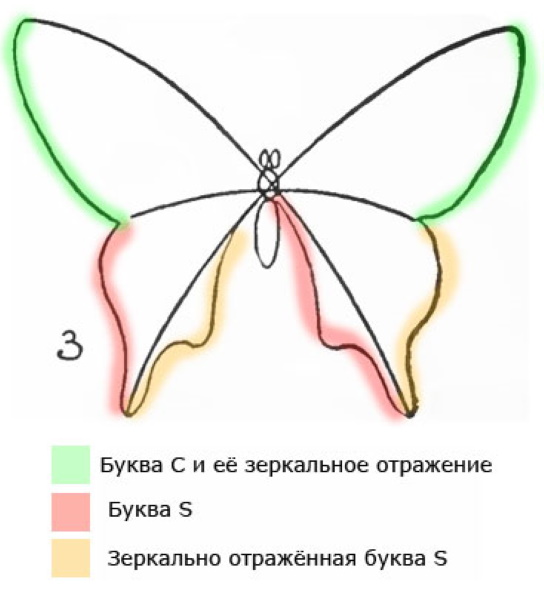
| 1. Determine the middle of the working plane, then draw a vertical line in the indicated area of the paper. 2. From the upper extreme point of the vertical, draw 2 smoothly curved mirror lines, directing them to the right and left upper corners of the sheet of paper used. The depth of the bends of the lines should be the same. 3. Between the diagonally directed lines at the end of the main vertical, draw a small circle (the head of the butterfly). 4. Step back from the bottom edge of the vertical line by 4-5 cm, then draw 2 smoothly curved mirror lines downwards from the indicated area, directing them to the right and left corners. 5. Connect the extreme points of the smoothly curved diagonals (butterfly wings) with wavy lines (at least 2 bends). 6. From the insect’s head, draw 2 straight lines, the ends of which must be twisted into a spiral. 7. Inside the wings, duplicate the line of the object’s boundaries, stepping back 1 cm from the main contour. 8. Fill the inner part of the wings with rounded figures of different sizes, placing them randomly. The drawing on the right wing should be positioned in mirror image to the drawing on the left. 9. If desired, color the image. | |
 | 1. Determine the center of the top edge of the sheet of paper you are using.
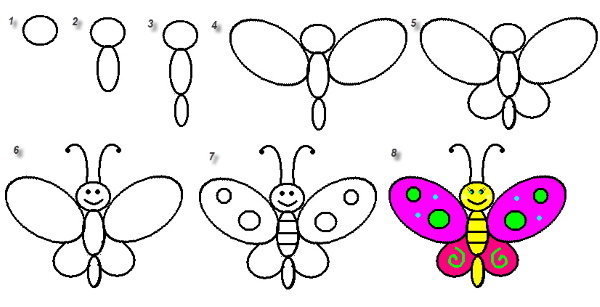
2. Step back 3-4 cm from the found point, then draw a small, even circle in this area. 3. From the lower border of the circle, draw an oval, placing it vertically. 4. Draw another oval close to the oval, but smaller and narrower. 5. To the right and left of the second figure from the top, draw 2 rounded ovals, placing them diagonally in the direction of the upper right and upper left corners (butterfly wings). 6. Draw semicircles below the ovals, directing them to the lower right and left corners of the working plane (butterfly wings). 7. From the upper border of the butterfly’s head, draw 2 lines, the ends of which must be twisted into a spiral (the insect’s antennae). 8. Inside the head, draw eyes and a mouth (dots and a semicircle). 9. Fill the inside of the body with horizontal lines located at a distance of 1 cm from each other. 10. Draw any design inside the wings (for example, circles or spirals). 11. If desired, color the image. |
With colored pencils
A butterfly (a drawing for children can be made with colored pencils, in some cases by first drawing the outline with a simple pencil), depicted in color, looks more realistic.
The easiest way to create such a picture is as follows:
| Butterfly outline drawing variant | A simple algorithm for its creation |
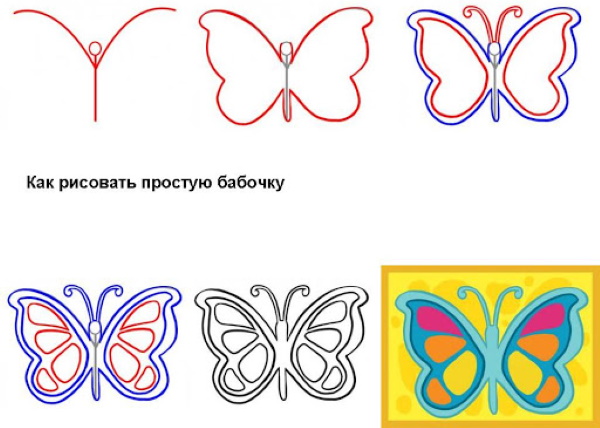
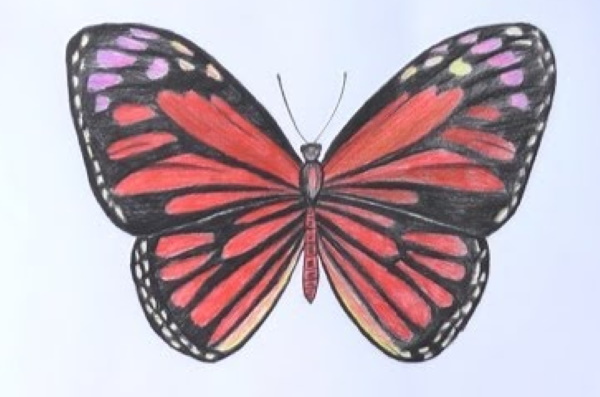 | 1. Determine the middle of the working plane, then draw a vertical line in the indicated area. 2. Step back 3-4 cm from its upper part, draw a small oval, placing it vertically (the upper part of the insect’s body). 3. Draw a small circle (the butterfly’s head) on top of the oval. 4. At the bottom of the upper part of the butterfly’s body, draw another oval, located vertically, drawing it narrower and more elongated. 5. Outline the contours of the insect’s body and head, creating a sense of the integrity of the objects. 6. From the middle of the sides of the upper part of the butterfly’s body, draw horizontal lines to the right and left, placing them at the same level. 7. Fill the lower part of the body inside with horizontal lines located at a distance of 0.5 – 1 cm from each other. 8. From the middle of the sides of the lower part of the body of the insect, draw semicircles with a downward bend, the extreme points of which should be located on horizontal lines. Correct the lower part of the drawn wings, transforming them into wavy lines. 9. From the extreme points of the horizontal lines, draw diagonal lines upward, directing them towards the right and left corners of the sheet of paper used. 10. Connect the extreme points of the diagonal lines with the middles of the side edges of the lower part of the butterfly’s body using smoothly curved upward lines. 11. Erase the secondary lines, then re-draw the outline of the butterfly, making the individual parts of the butterfly’s body whole. 12. Add detail to the image by drawing patterns inside the contours of the butterfly's wings. |
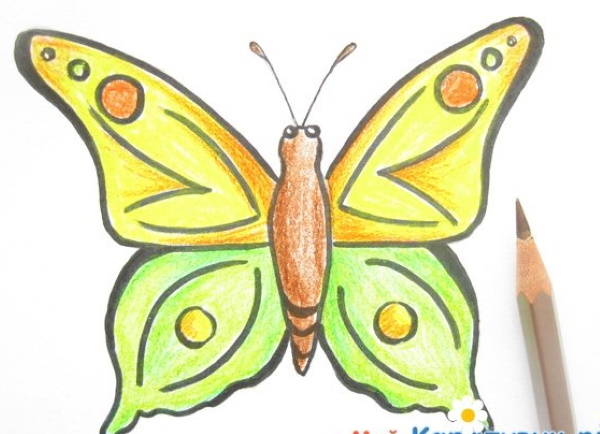 | 1. In the middle of the working plane, draw a small circle (the head of the insect).
2. From the lower border of the circle, draw an oval, pointed at the bottom, placing it vertically. 3. From the upper border of the head, draw 2 diagonal lines (butterfly whiskers). 4. Fill the lower part of the insect’s body with downward-curved semicircles, placing them at a distance of 1 cm from each other. 5. Draw wings close to the lateral borders of the insect’s body using straight and smoothly curved lines. 6. Draw 2 small circles (butterfly eyes) inside the head at the top. 7. Fill the inner part of the wings with drawings so that the relief of the upper wings is the same. The lower wings should also be decorated with identical drawings arranged in a mirror image. |
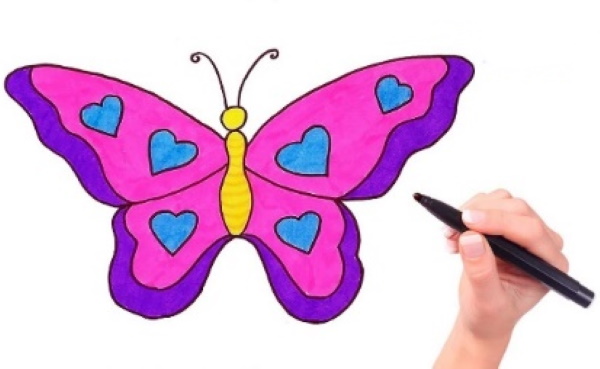
With felt-tip pens
Only the simplest possible images of a butterfly should be drawn with felt-tip pens. This is because, if necessary, it will not be possible to correct the created picture. The need to start the work over again can provoke negative emotions in the child, which will push him away not only from a specific activity, but also from fine art in general.
| Butterfly outline drawing variant | A simple algorithm for its creation |
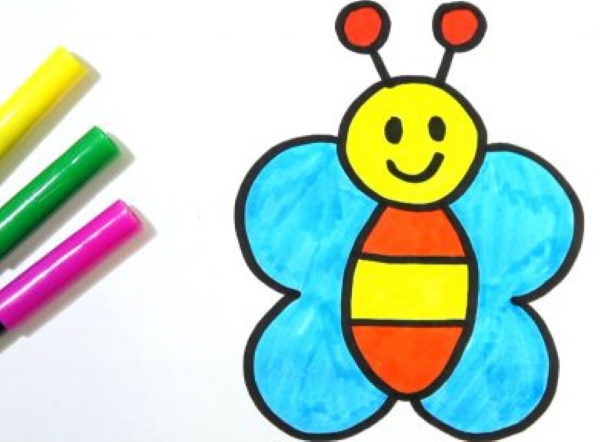 | 1. Determine the middle of the working plane. 2. Step back 3-4 cm from the found point, then draw an even circle of medium size (the head of the butterfly). 3. From the lower border of the head, draw a rounded oval, placing it vertically (torso). 4. Divide the inside of the body into 3 sections using horizontal lines, coloring them so that the middle is the same color as the insect’s head, and the areas framing it are a contrasting shade. 5. From the upper border of the head, draw 2 short lines, directing them slightly diagonally. 6. At the ends of the lines, draw small circles (butterfly whiskers). 7. Inside the butterfly's head, draw eyes and a mouth (dots and a semicircle with a downward bend). 8. Connect the middle of the sides of the head with the center of the lower border of the butterfly’s body using 2 semicircles that are a continuation of each other (wings). 9. The wings should be positioned symmetrically in relation to each other. |
 | 1. Determine the center of the working plane, then draw a small even circle (head).
2. Draw an elongated oval at the bottom of the head, placing it vertically. Adjust the side borders of the oval so that it looks like the body of a butterfly. 3. From the upper border of the head, draw 2 diagonals, the ends of which should be twisted into spirals. 4. Connect the upper points of the body with its lower border using identical deformed ovals, located in a mirror image close to the right and left of the insect’s body (wings). 5. Fill the inner part of the wings with any drawings so that the relief of the upper wings is the same. It is also recommended to finish the lower wings with mirror images, for example, hearts. |
With paints and watercolors
A butterfly (a drawing for children, used as a source image for copying, should be bright and clear), in the creation of which the child uses paints and watercolors, can look like this.
Table:
| Butterfly outline drawing variant | A simple algorithm for its creation |
 | 1. Determine the middle of the working plane, then draw a small circle (butterfly head) in the indicated area. 2. From the left border of the circle, draw a small rounded oval, directing it to the lower left corner (upper part of the body). 3. Draw another oval from the bottom to the upper part of the body, pointed towards the bottom (the second part of the insect’s body). 4. From the upper right border of the head, draw 2 straight lines, the ends of which should be twisted into a spiral. 5. Determine the midpoints of the lateral edges of the upper body on both sides. 6. Connect the indicated points with the upper border of the smaller part of the butterfly's body using rounded ovals so that the part located away from the body is 4-5 times wider than the part located close to the body of the insect (wings). The wings should be identical, but located in mirror image to each other. 7. Draw the lower wings under the upper ones using similar lines, connecting the lower point of the upper part of the body with the edge of the lower border of the upper wings. 8. It is recommended to color the inner part of the butterfly wings according to the wishes of the young artist. |
 | 1. Determine the middle of the working plane, then draw a small circle (the insect’s head) at the indicated point.
2. Inside the head, draw the eyes and mouth (2 semicircles curved upwards and 1 long semicircle curved downwards). 3. From the upper border of the head, draw 2 smoothly curved lines upwards, at the ends of which draw small circles (butterfly whiskers). 4. From the lower border of the head, draw a semicircle, strongly curved downwards (the body of the butterfly). 5. Draw 2 smoothly curved lines in opposite directions at the bottom of the body. 6. To the right and left of the butterfly, depict symmetrical wings, the extreme points of which should be located on the upper border of the insect’s head and on the lower edge of its body. |
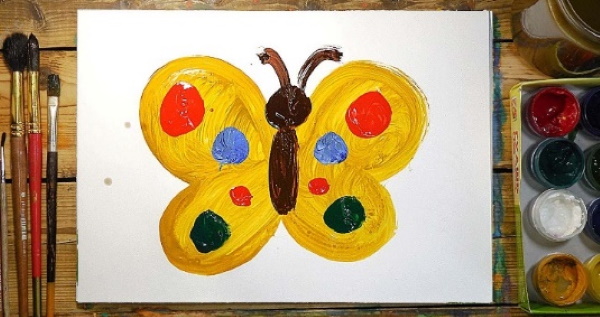
Gouache
The butterfly (a drawing for children, in the creation of which gouache was used) should be painted in contrasting colors with a dense pigment. Otherwise, the colors may mix with each other at the borders, which will lead to a deterioration in the overall appearance of the image.
| Butterfly outline drawing variant | A simple algorithm for its creation |
 | 1. Find the middle of the working plane, then, stepping back 2-3 cm upwards from the indicated area, draw a small circle (the butterfly’s head). 2. Draw the body to the lower border of the insect’s head, depicting it as an oval located vertically. 3. From the upper border of the butterfly’s head, draw 2 smoothly curved lines, directing their ends in opposite directions. 4. To the right and left of the butterfly’s body, draw 2 semicircles that are a continuation of each other, using them to connect the upper points of the side borders of the body with its lower edge (butterfly wings). 5. Draw circles of different sizes inside the wings, placing them randomly. |
 | 1. In the middle of the sheet of paper used, draw an elongated oval, placing it vertically (the body of the butterfly).
2. From the upper border of the main figure, draw 2 smoothly curved lines, directing their ends in opposite directions. 3. Step back 1-2 cm from the upper edge of the butterfly's body, draw semicircles to the right and left, the lower points of which must be located in the middle of the lateral borders of the insect's body. The lateral edges of the semicircles must be represented by wavy lines (upper wings). 4. From the extreme lower points of the upper wings, draw the lower wings, depicting them using similar semicircles, but directing them in opposite directions to the lower corners of the sheet of paper used. 5. Fill the inner part of the wings with gouache lines of contrasting shades. The width of the stripes should be no more than 3 cm. |
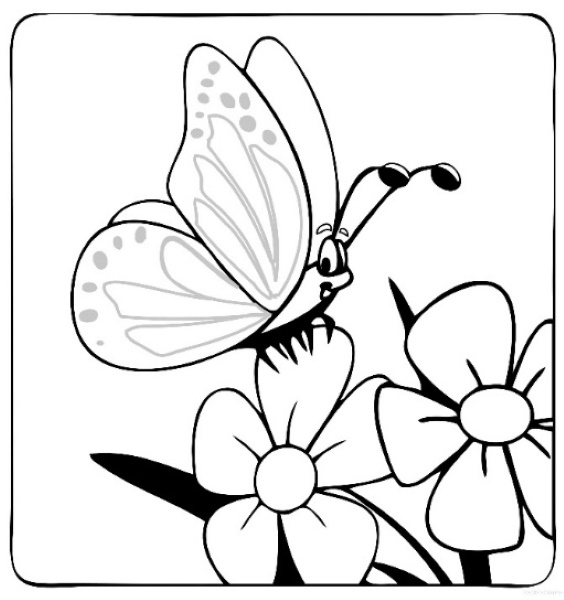
Butterfly on a flower
A butterfly on a flower is typical for children. When creating such a drawing, it is not necessary to draw the plant in detail, replacing it with a schematic outline.
| Butterfly outline drawing variant | A simple algorithm for its creation |
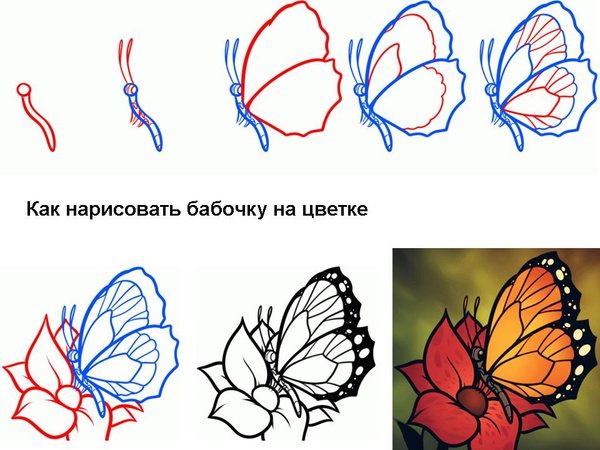 | 1. Determine the middle of the working plane, then draw a small circle (butterfly head) in the center. 2. From the lower border, draw 2 smoothly curved lines at a distance of 1 cm, then connect their lower points. 3. From the upper border of the circle, draw 2 straight lines (the insect’s antennae). 4. From the right side of the butterfly’s body, draw a semicircle to the right so that its extreme points are located approximately in the middle of the side edge. 5. Divide the inner part of the resulting figure diagonally into 2 halves (butterfly wings). 6. Detail the inner part of the wings by drawing a random relief, taking into account that the image on the wings should be mirrored. 7. To the left of the butterfly’s body, draw a schematic of a flower, using straight and curved lines located around a small circle (the center of the flower) to draw the outline of the plant. 8. If desired, color the picture using bright shades of paint or pencils. |
 | 1. In the lower right corner of the working plane, draw several flowers using the usual algorithm.
2. On one of the plant petals, on the left, draw a small oval, pointed at the edges. 3. On the right edge, draw 2 rounded triangles with black dots inside (eyes). 4. From the upper border of the eyes, draw 2 smoothly curved lines, at the ends of which draw small ovals (the insect’s antennae). 5. At the upper border of the body, draw deformed ovals closely, directed towards the upper left and lower left corners. 6. Fill the space inside the wings with random figures, located randomly. |
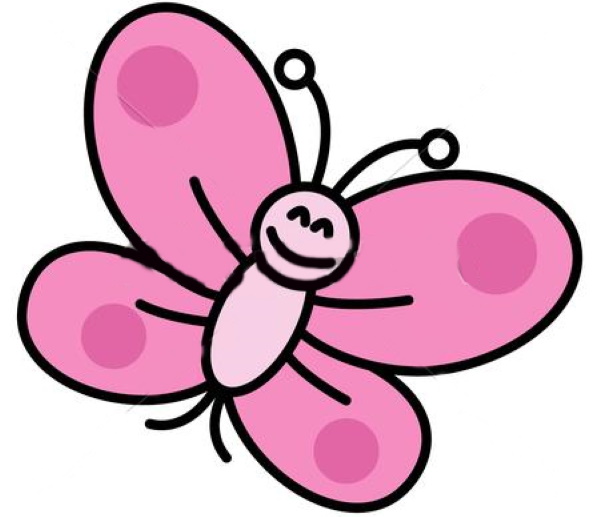
Cartoon butterfly
The easiest way to depict a cartoon butterfly is like this:
| Butterfly outline drawing variant | A simple algorithm for its creation |
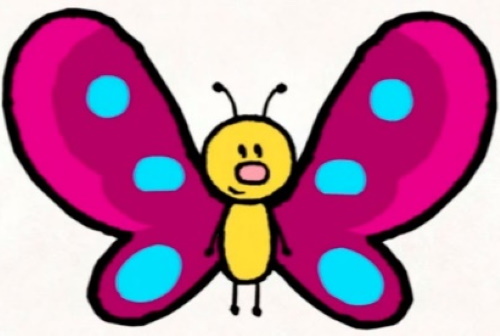 | 1. In the middle of the working plane, draw a small circle (the head of the butterfly). 2. Inside the circle, draw the eyes, nose and mouth of the cartoon character (2 dots, an oval and a semicircle curved downwards). 3. From the upper border of the head, draw 2 lines curved in opposite directions, at the ends of which draw small circles. 4. Draw a semicircle extending downwards at the bottom of the head (the body of the insect). 5. On both sides of the body, draw a diagonal line, directing them to the lower corners (arms). 6. Draw short straight legs at the bottom of the body. 7. To the right and left of the butterfly’s body, depict wings using 2 semicircles located close together and being a continuation of each other. 8. Detail the relief of the butterfly's wings. |
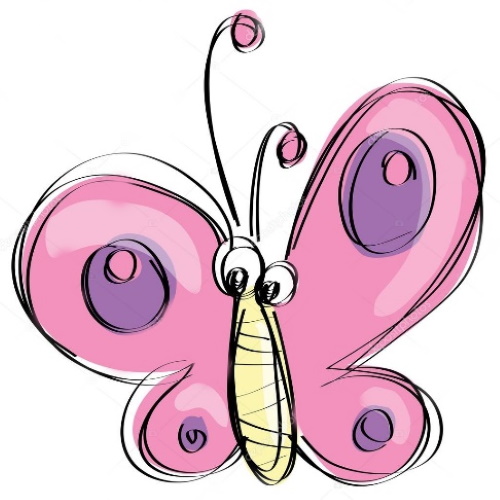 | 1. In the middle of the sheet of paper used, draw 2 circles, placing them close to each other (eyes). Inside the main circles, draw smaller black circles.
2. Draw an oval below the eyes, placing it vertically (the body of the butterfly). 3. Fill the inner part of the butterfly’s body with straight lines of random orientation. 4. Draw vertical lines above the eyes, the ends of which are twisted into spirals (butterfly whiskers). 5. To the right and left of the body of the insect, draw 2 semicircles of different sizes, directing the upper one to the upper corner, and the lower one to the lower one (wings). The wings to the right and left of the body of the butterfly should be depicted in mirror image. 6. Color the cartoon character. |
Colourful drawings for children are not only a way to reveal their creative potential, but also to get rid of nervous tension.
By helping a young artist create illustrations that include the inhabitants of the surrounding nature (for example, butterflies), parents not only broaden his horizons by answering questions that arise during the work process, but also help strengthen the psycho-emotional connection with their child.
Butterfly Drawing Video For Kids
How to draw a butterfly step by step: