Today, hand-made items are becoming increasingly popular. Many techniques for making souvenirs and decorations have only recently become known. Making paintings from various fabrics and scraps has its own history, rooted in ancient times.
General information
In different countries of the world, with the development of weaving craft, people tried to use every piece and scrap of fabric, the production of which required a lot of effort and labor, to good use. This is how patchwork sewing appeared.
Items made from sewn scraps of various materials were discovered during excavations in Egypt. Scientists dated an ornament made from pieces of leather found there to 980 BC.
In England, patchwork garments appeared in 1712. In 1620, settlers from other countries brought quilts to America, which were sewn from scraps of old clothes. This marked the beginning of the production of quilted products from scraps. This technique was called quilt, which literally translates as quilting.
Later, applique from pieces of fabric appeared. The English began to use their crazy technique, which allowed them to make works from expensive fabrics and materials, using embroidery to connect the parts.
The products were decorated with fringe, tassels, lace and ribbons. However, the English technique did not take root in the world for long. In many countries of the world, craftsmen preferred traditional methods of patchwork sewing.
In the 70s of the last century, interest in this handmade was revived in the USA. Entire clubs of interest began to appear, where quilt was practiced. Kits intended for this type of handicraft with all the necessary attributes appeared in stores. Some couturiers used the patchwork technique in their fashionable clothing models.
In Russia, as early as the 16th century, a collection of rules, advice and instructions called “Domostroy” provided detailed instructions on how to cut and sew dresses from scraps, how to select scraps for cutting, how to sort and store them.
Patchwork reached its peak of development and application in Russia by the end of the 19th century, when chintz began to be imported into the country from abroad. Before that time, this technique was used mainly for sewing quilts from old worn items and was only of a practical nature.
At the beginning of the 20th century, techniques of three-dimensional patchwork sewing appeared in Rus'. At the same time, this type of applied art became one of those that was supported at the state level as decorative and applied art.
In the 90s, interest in it increased with renewed vigor. Patchwork sewing ceased to be just a hobby and interest. It became an independent genre in applied art. Since 1997, various festivals and exhibitions of works by real masters of patchwork sewing have been regularly held in Russia.
Materials and tools for work
Do-it-yourself fabric paintings can become a worthy decoration of any interior. Making them is not as difficult as it may seem at first glance. But you will have to put in effort and work. In addition, you will need desire, patience, imagination, as well as materials and tools that are in every home.
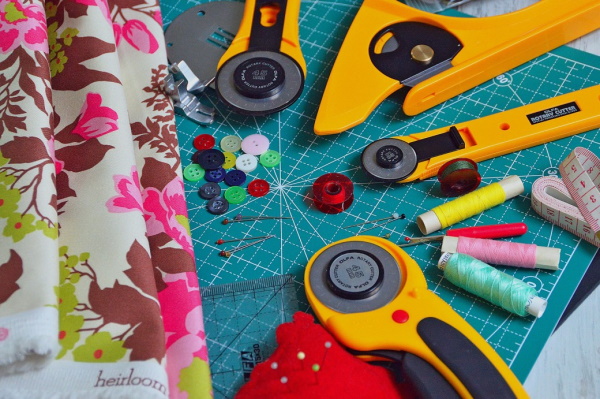
To perform work in different techniques, different tools and materials may be required - the main ones are:
- fabrics; they can be artificial and natural: linen, wool, viscose and synthetic; in addition, they can be plain dyed or with a printed pattern of various types: floral, geometric, abstract or thematic;
- sewing machine or needles with threads of different colors;
- silicone mat for handicrafts;
- rulers of different lengths and configurations, protractor, compass;
- squared paper or graph paper (they can be used to make markings and create product diagrams);
- scissors and fabric cutters;
- pins for preliminary fastening of parts;
- iron (it is used to smooth out the seams of the connected parts of the work);
- materials for finishing and final design of the work; these can be ribbons and braid, fringe and lace, beads and buttons.
In addition, for work, depending on the technique and the master’s idea, you may need:
- picture frames;
- polystyrene foam;
- plywood or cardboard;
- paper;
- glue (PVA);
- stapler;
- small nails.
It should be said that today in craft stores you can buy ready-made kits for creating paintings using the patchwork technique.
Modern trends
You can make fabric paintings with your own hands using various techniques.
Patchwork has been known to many for a long time. However, along with the old styles and techniques of this type of handicraft and original art, new modern trends have emerged that are very interesting and accessible for independent creativity.
The names of these trends are most often associated with the methods of joining pieces of fabric, applying it to the base or the shape of the pieces of material themselves.
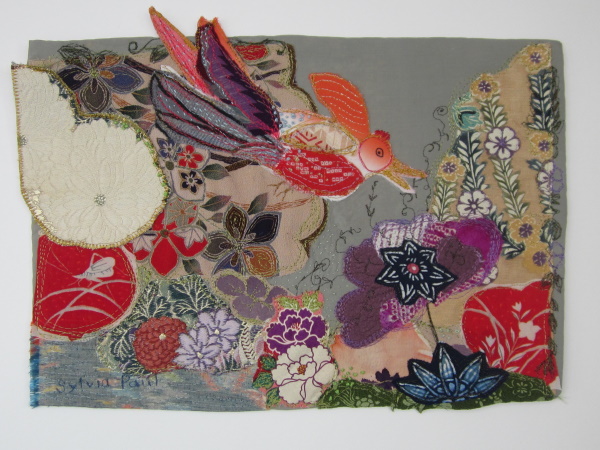
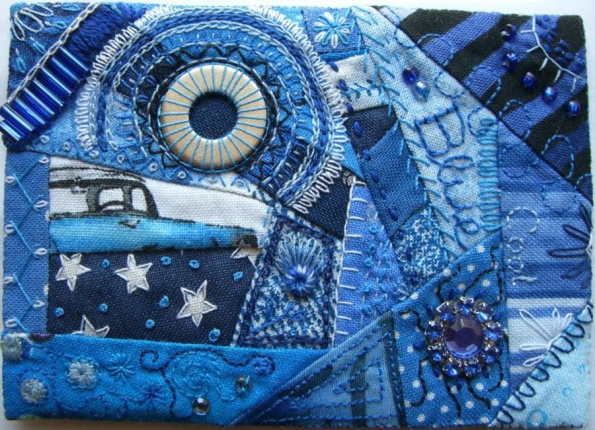
Crazy
Despite its centuries-old history, this style is still popular today. It is characterized by: freedom in choosing colors and applying pieces of fabric and seams, as well as a complete absence of geometric canons.
Crazy patchwork is used mainly for making blankets, pillows and carpets. The style is very easy to perform, even a novice master can handle it.
English
Another of the most accessible styles to perform is English. It uses fabric scraps of geometric shapes. Previously, these were only squares, which were arranged in a strictly checkerboard pattern when sewn together.
Today, triangles and diamonds are used in this direction, as well as various colors of these figures.
Quilt
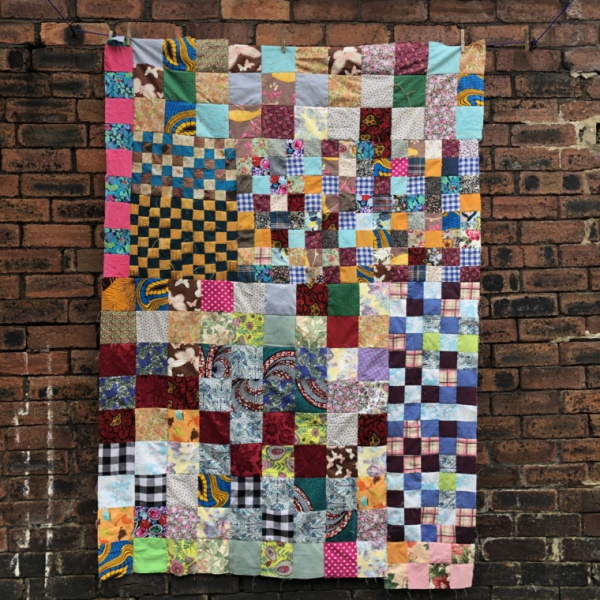
This type of patchwork, like in the old days, involves a "quilt" style, where the top layer of the piece is sewn together from pieces of fabric of different colors, shapes and sizes.
The 2nd thick layer and the 3rd lining layer are subsequently quilted together with the top decorative layer.
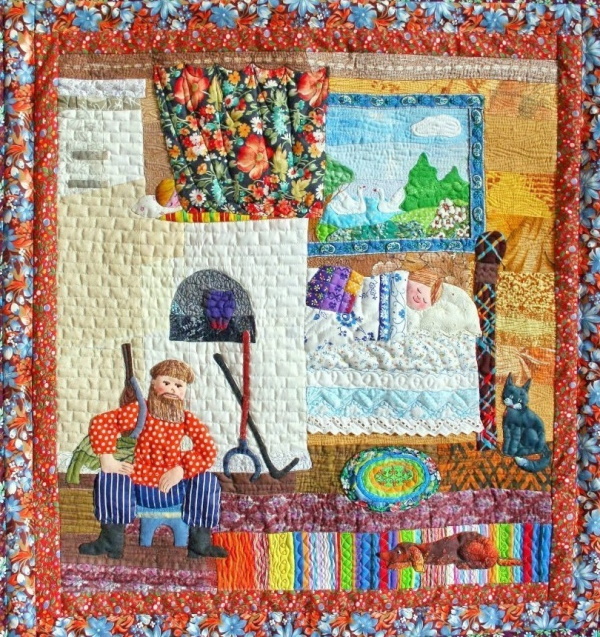
Japanese
The Japanese patchwork style also has a centuries-old history of existence. The technique is considered one of the most difficult and requires perseverance and a certain skill in work.
To perform it, you need to select fabrics and shapes, from which various figures of animals, people, plants and buildings are obtained by sewing. Today, there are several directions in Japanese patchwork.
Among them:
- "Poyagi";
- "Yosegi";
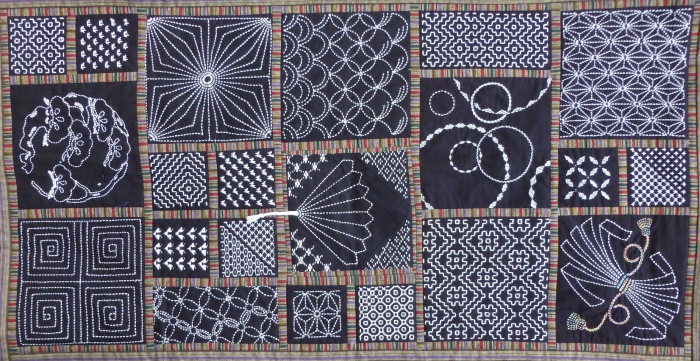
- "Sashiko";
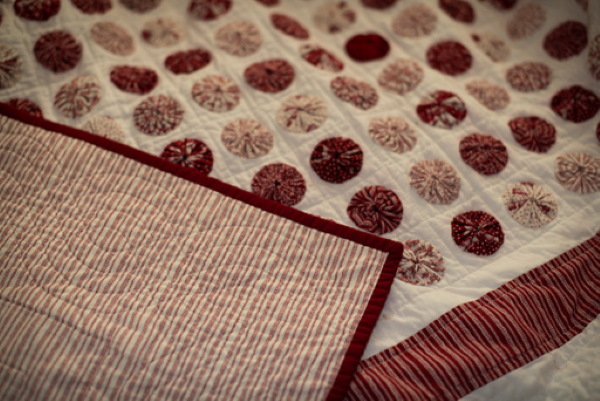
- "Yo-yo";
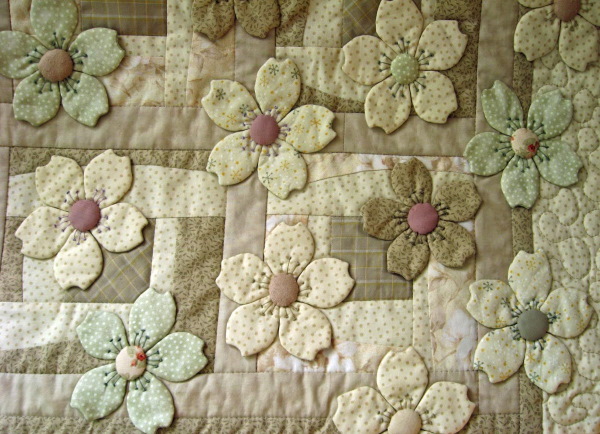
- applications;
- "Kinusaiga" (patchwork without a needle).
A distinctive feature of Japanese patchwork is the use of only manual labor without the use of a sewing machine. That is why patchwork items from the Land of the Rising Sun always have a fairly high price.
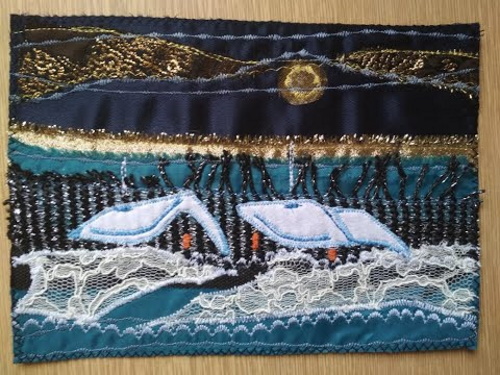
"Boro"
This technique is a variation of the Japanese style. All work is done by hand. The fabric scraps can be of different textures and colors.
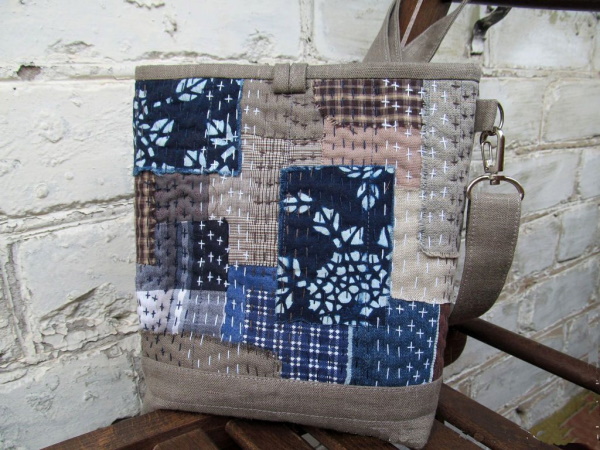
They are not simply sewn together at the edges. They are stitched on top of each other with overlapping stitches over the flaps. The result is an unusual and semi-volumetric picture.
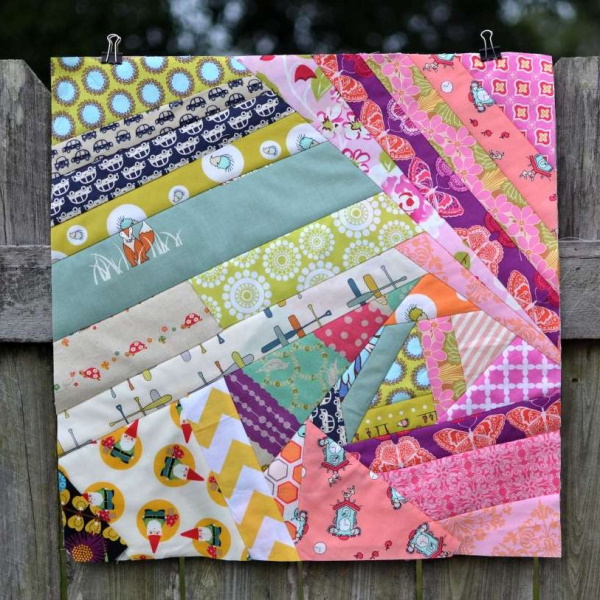
"Watercolor"
This style of patchwork is very popular among needlewomen and is considered one of the simplest and most beautiful.
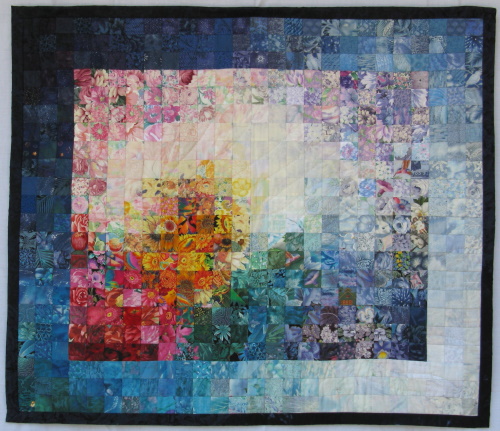
In the process of stitching together patches of different shades, while following the color combination scheme, beautiful gradient paintings are obtained.
"Bargello"
A very interesting direction, where by sewing together patches of different colors in a certain direction, a beautiful transition from color to color is obtained with the illusion of movement.
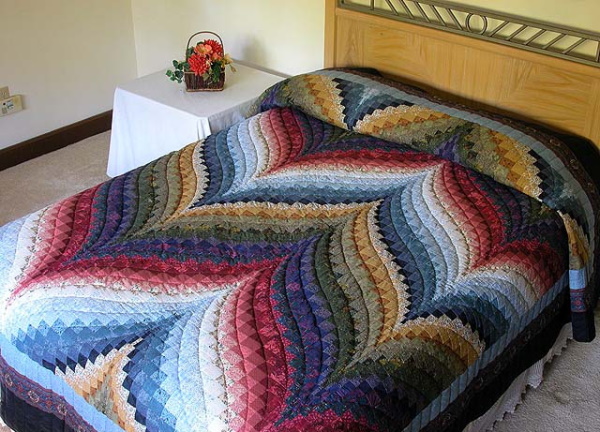
This is not a very simple technique, but the result is very beautiful.
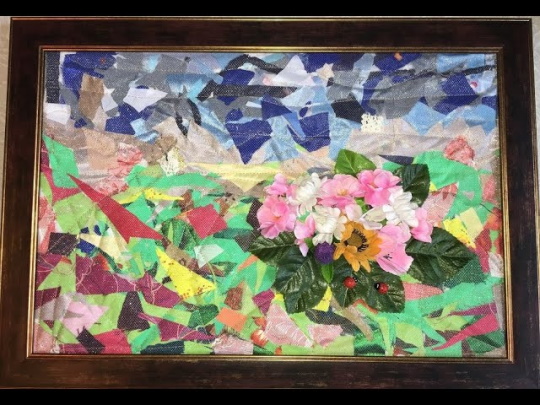
"Pizza"
This is a fairly simple version of the patchwork technique, which does not require a pattern or strict geometry. Here, patches of the desired color are laid out on a piece of fabric in a chaotic order along the contour of the selected pattern.
Organza or tulle is placed on top. The work is ironed and pinned, then stitched on by machine.
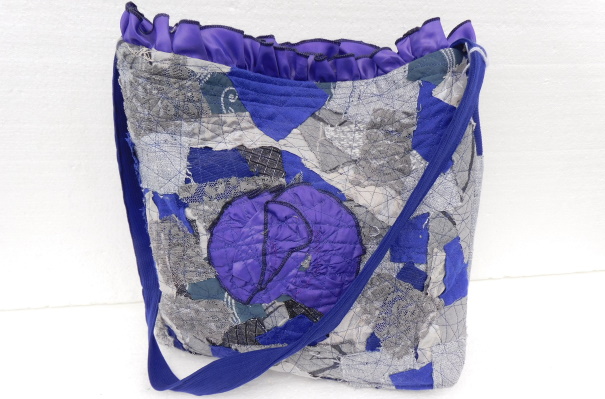
"Lyapochikha"
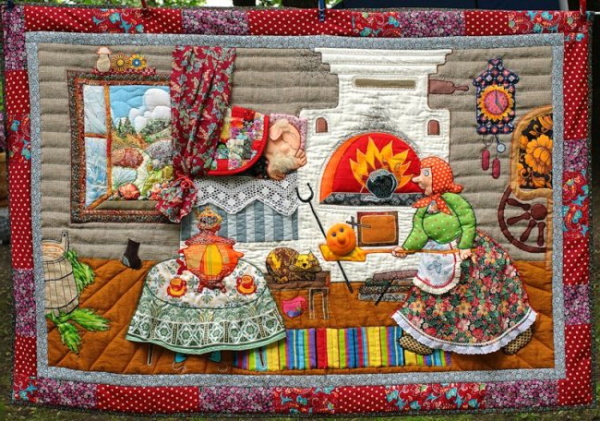
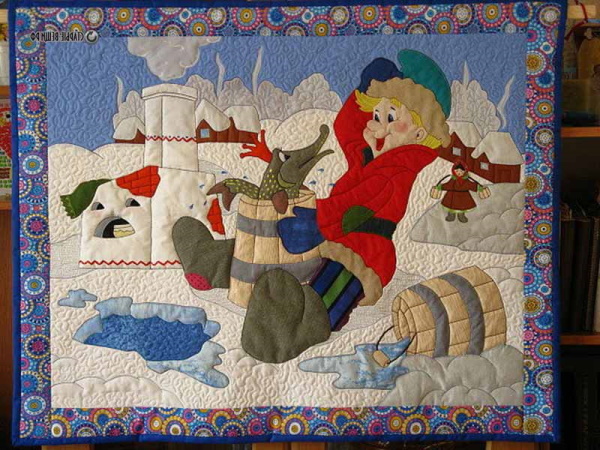
This is an old trend in patchwork sewing, the name of which is translated as "a piece of rag". This technique produces excellent three-dimensional pictures.
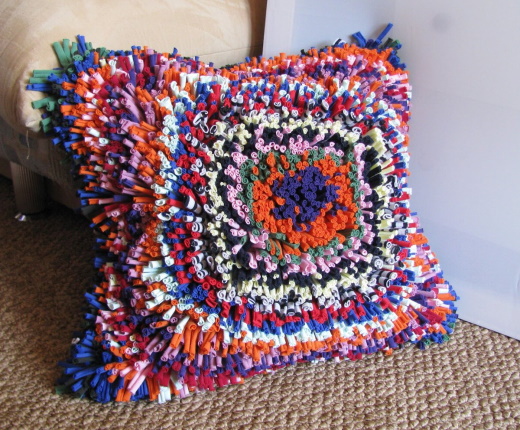
In this case, scraps of fur, pieces of yarn or fabric are used to create them. They are sewn on top of some kind of fabric base.
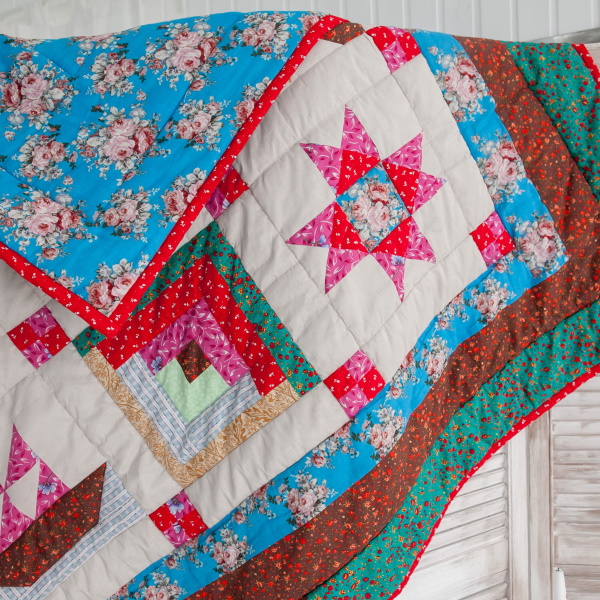
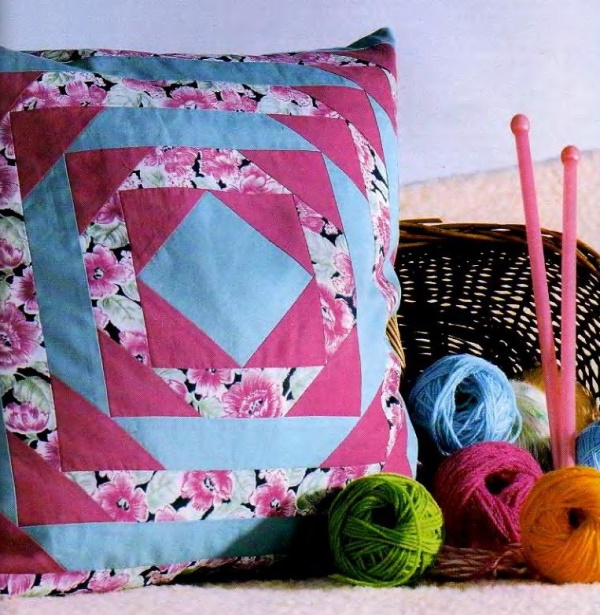
Traditional
In this technique, the remaining pieces of fabric are sewn in a circle to the central piece of fabric of the chosen figure on the base according to the chosen pattern. There are several types in this direction.
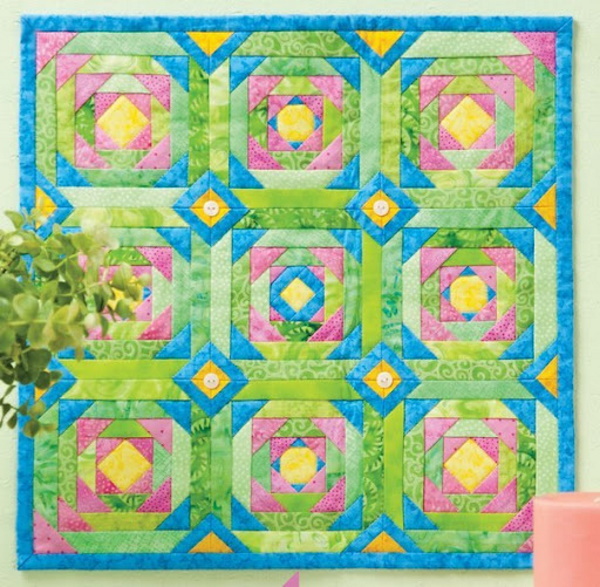
Among them:
- "Russian square";
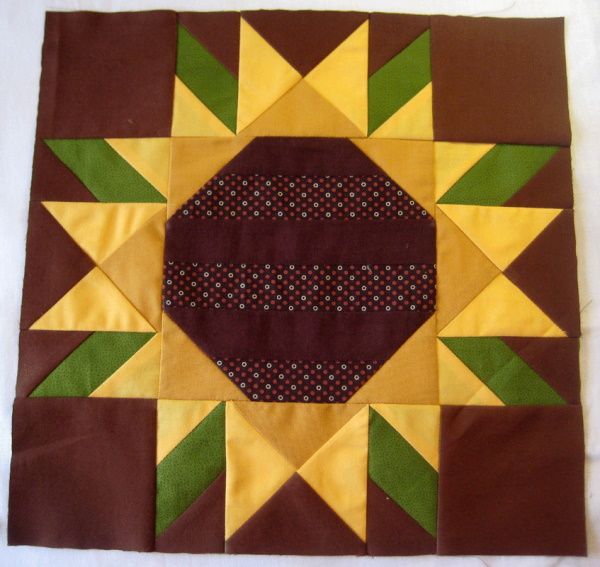
- "Sunflower";
- "Multicolored spiral";
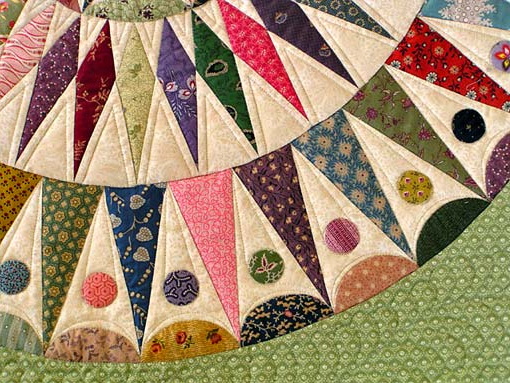
- "Pineapple";
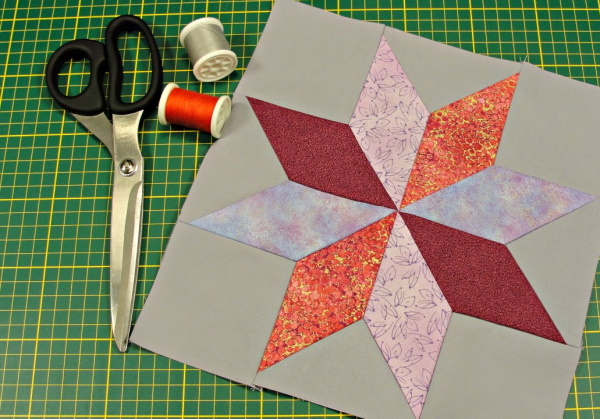
- "Star".
All subtypes use fabric scraps of different geometric shapes, which are sewn together in a specific order.
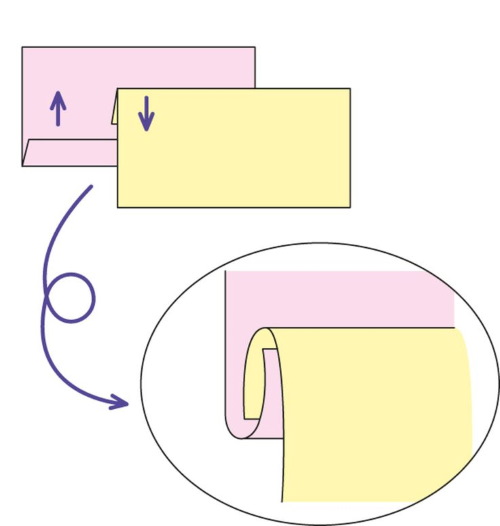
"Chessboard"
This is a popular and not very difficult to perform direction in patchwork sewing. Here, squares are used for stitching in the required quantity and color, which are determined in advance. They are stitched alternately into strips, which are subsequently joined into one piece.
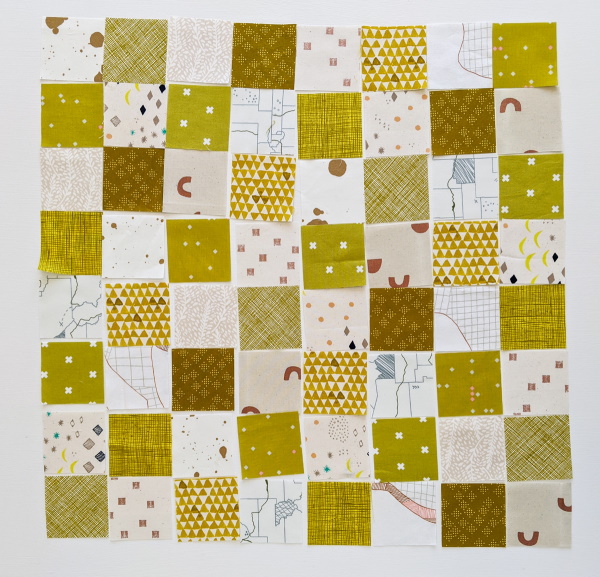
When working, it is important to clearly preserve the joints of each figure.This technique is used to create blankets, bedspreads, decorative pillows and pillowcases, as well as frames for patchwork paintings.
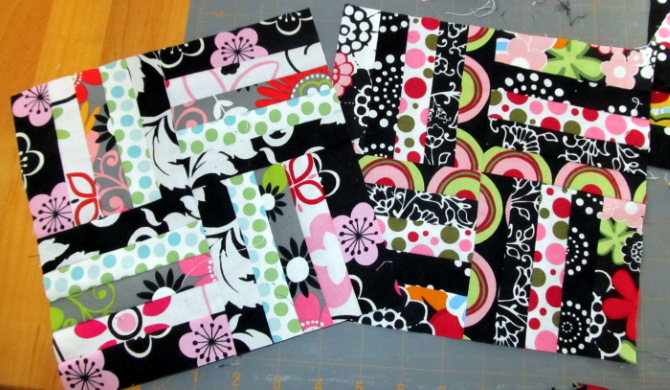
"Corner"
This patchwork sewing direction resembles the Japanese paper art of origami. In this case, squares of the same size are cut out of fabric of different colors. Each of them is folded several times into triangles.
The finished figures are placed one on top of the other, pinned together beforehand, and then stitched. As a result, you can get a beautiful three-dimensional patterned panel, napkin or rug.

The easiest to perform, well-known and popular directions:
- squares;
- triangles;
- stripes;
- honeycombs.
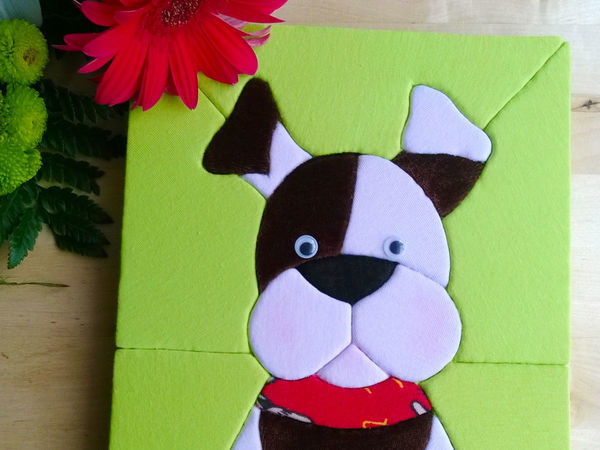
Their names speak of the shape of the patches used in the work. Today, in addition to the method of sewing pieces of fabric, patchwork applique is used.
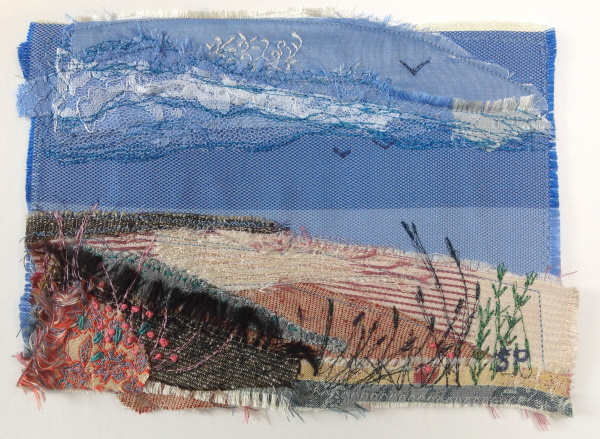
Patchwork picture from denim fabric in the technique "Pizza"
Pictures made from denim are very interesting. Anyone can easily create unusual products with their own hands. The "Pizza" technique is quite simple to perform and is suitable for beginners.
To work you will need:
- a piece of fabric 30×30 cm (cotton, linen, matting) as a base;
- interlining or cobweb to match the base size;
- organza or tulle to match the base size;
- a picture with any image (it can be flowers, animals, children – as desired);
- small scraps (patches) of denim fabric of different colors;
- small scraps of brightly colored fabric;
- pins;
- scissors;
- sewing machine;
- picture frame or passe-partout.
Work order:
- Place interlining on the base fabric and place the picture on top of it.
- Place pieces of denim fabric in a random order around the image.
- Place brightly colored patches on top of the denim layer in some places.
- Place a piece of organza or tulle on top of the resulting picture.
- Iron with a hot iron.
- Secure the work with pins.
- Stitch the picture on the machine diagonally, from corner to corner, with a step of 1 cm.
- Trim all sides with scissors.
- Place the painting in a frame or mat.
The painting made from denim scraps is ready.
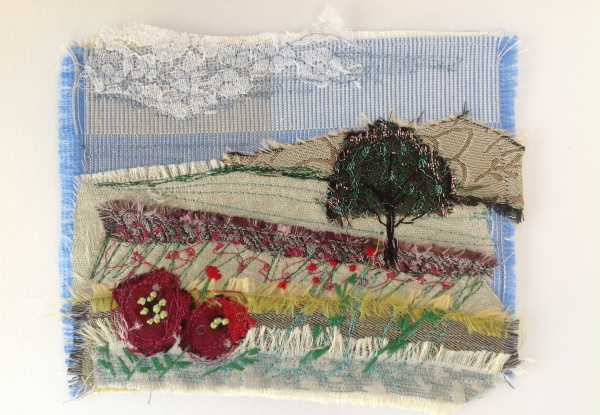
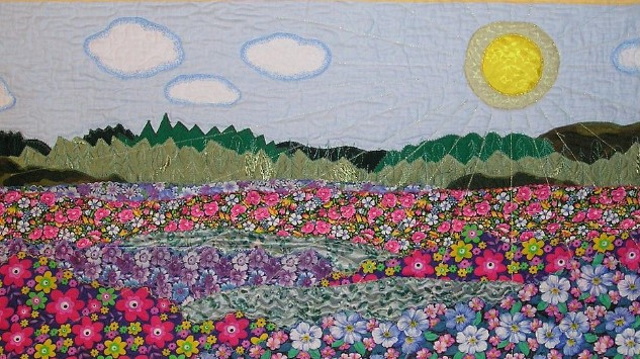
Patchwork painting "Sunny Summer"
To work you will need:
- image of a summer landscape (from the Internet, a book or a postcard);
- white paper for sketching a painting;
- white cotton fabric for the base;
- interlining (cobweb);
- fabrics with floral and other bright plant elements;
- pencil;
- scissors;
- iron;
- frame or passe-partout.

Work order:
- On a piece of paper, draw a sketch of the future painting, using the selected ready-made images for clarity.
- Cut out green fragments for the hills, grass and tree crowns, blue ones for the sky, and flowers for the flower meadows from colored pieces of fabric.
- Place the prepared patches on a white base: sky, mountains, trees, bushes, flowers on a clearing. When choosing a place to place the fragments, you should consider the play of color, the scale of distant objects and the law of perspective.
- Secure the pieces with adhesive webbing, placing it under each piece and ironing.
- Stitch everything onto the base, sewing each piece on the machine with a zigzag stitch.
- Trim the edges of the painting to the desired size.
- Place the painting in a frame or mat.
Quilting
If you add a few more stages to the previous work, you will get a picture in the quilt style. To do this, just add 2 layers under the decorative front image.
| No.layers | Layer composition |
| 1 | The resulting decorative painting is made in the patchwork style. |
| 2 | Synthetic padding, batting or holofiber for volume. |
| 3 | It will act as the back side of the painting. |
All 3 layers are connected with pins or basting, and then machine stitched along the contours of the figures. The result is a three-dimensional and very expressive picture.
Japanese version
Do-it-yourself Japanese-style fabric paintings are very diverse in their execution techniques. "Kinusaiga" (patchwork without a needle) has become very popular all over the world. It is similar to patchwork, but the fabric scraps are not sewn together in the work.
In ancient Japan, they treated everything with care, and old clothes were not thrown away. Worn kimonos were torn into shreds and used to create paintings. In the past, only silk was used. Nowadays, different fabrics and leather are used in "kinusaiga".
To work you will need:
- foam sheet;
- craft mat;
- selected design or stencil;
- pencil;
- stationery knife;
- pieces of fabric;
- scissors;
- glass (you can use a regular nail file).


Work order:
- Transfer the design or stencil onto a sheet of foam.
- Cut all the details of the image on the foam with a knife to a depth of no more than 5 mm.
- Cut out the details for the image from pieces of fabric, taking into account allowances (up to 5 mm).
- Place each piece in a specific place, using the prepared image as a guide, and tucking the remaining allowances into the slots on the foam surface (you can pre-treat the slots with glue stick for stronger fixation).
- If you make cuts along the perimeter of the outline of the painting, you can make a frame out of fabric. You will get a frame.
Do-it-yourself fabric paintings in this technique are very popular. They can be of any complexity and number of details. The volume and beauty of the completed work depend on the density and texture of the fabric.

Some tips and recommendations for working in the Kinusaiga technique:
- To add more volume, filler should be placed under thin fabrics. Cotton pads or synthetic padding can be used for this purpose.
- Instead of polystyrene foam, you can use penoplex or foam rubber insulation glued to plywood or board as a base for the painting.
- Volume should be given only to the figures located in the foreground of the painting. In this case, it will acquire a 3D effect.
- The picture, the places of cuts and joints on the image can be decorated with cords, ribbons and other elements.
- Natural ingredients can be used as an adhesive for sealing the slits in the base: egg white, starch paste or gelatin dissolved in water.
- To give the picture three-dimensionality, additional elements should be used that are superimposed and attached to the finished image: leaves and twigs - on plants, folds of ribbons - on clothes, buds - on flowers and others (depending on the plot).
In order for a work done by hand to look harmonious in the interior of the house and not stand out from the overall ensemble, you should correctly select the colors of the fabric used in the work, choose the shape of the painting and find a worthy place for it.
It should be said that fabric paintings can be a worthy gift for friends and family, as they are not only interesting and beautiful. They are unique.
Homemade interior decoration items are always a worthy decoration for your home. Pictures made of fabric in various traditional and modern techniques look very harmonious. Everyone can choose the option that suits them and start creating, using their imagination and desire to create.
Video about creating paintings
Pictures from fabric, scraps of fabric: