At the age of 3-4 years, a child is already actively exploring the world, begins to analyze and remember information well, can compare objects, their shape, size and color. Drawing lessons for kids at this age are of great importance for the development of memory, attention, motor skills and speech.
Features of development of children aged 3–4 years.
The development of a child during the early preschool age period is accompanied by active socialization; it is at this time that most children go to kindergarten.
The flow of information from the outside world increases, imagination develops, and the following begin to appear among thought processes:
- generalization;
- comparison;
- classification;
- selection of essential properties (abstraction).
Memory at this age is aimed at bright, emotional images, therefore at 3-4 years old the child does not have the goal of memorizing any information, it happens involuntarily.
The main channels of perception of the surrounding world are:
- hearing;
- vision;
- sense of smell;
- touch.
Vision is dominant, attention is focused mainly on size, shape and color. The brighter and more colorful the object of study, the more it will be remembered.
Drawing lessons for children aged 3-4 are useful, first of all, because they help to connect the information received by the child from outside into a single whole; he begins to construct visual images on paper.
Very often, the child divides color characteristics into liked and disliked, so the paper will display the preference, and not the real image of the object. The development of fine motor skills contributes to the correct formation of speech.
Independence, perseverance, accuracy – all these qualities are also acquired and formed in the process of visual activity.
The advantage of drawing lessons for the development of children aged 3-4 is also that it stimulates imagination and thinking, and this has a positive effect on the development of intelligence. It is in such creativity that creativity is manifested, and the search for associative connections between the object and its image occurs.
In the process, the young artist speaks or comments on his actions, which affects the formation of speech; he analyzes and observes the object, describes it through a drawing, this is useful for perception.
Basics of drawing for a child 3-4 years old.
At the age of 3-4 years, the child already has basic skills of visual activity, can hold a brush, pencil or felt-tip pen. The participation and help of parents is of great importance for the further full development of the ability to draw, they should organize the learning process at home.
How to interest a child
After 3 years, children already master the skills of painting entire figures, outlining lines or contours, correcting and finishing the image, they begin to be interested in drawing details, for example, fish scales, webbing on paws, fins, beaks.
The most convenient tools for creativity during this period are brushes and watercolors or gouache, and finger paints can also be used.
In order to stimulate a child’s interest in learning to draw at home, you can:
- provide the opportunity to try felt-tip pens, pencils, wax or watercolor crayons, paints in order to identify preferences.
- Show different drawing techniques and pressure on the chosen tool, different sizes, shapes, colors and textures of paper.
- Allow the child to use his imagination and even play pranks, mix different colors, and get his fingers dirty.
- Come up with a story or character that you will then depict on paper, using special coloring books.
- Try to depict some real object, for example a toy, or draw a portrait of someone in your family.
- Approval from an adult, as well as joint drawing, have a positive effect on a young artist; this develops greater interest in the activity.
Many children love to draw and the main task of parents is to support this endeavor, pay special attention to the quality of materials for creativity, organize the workplace and provide assistance. As an experiment, you can arrange a home exhibition with the most successful examples.
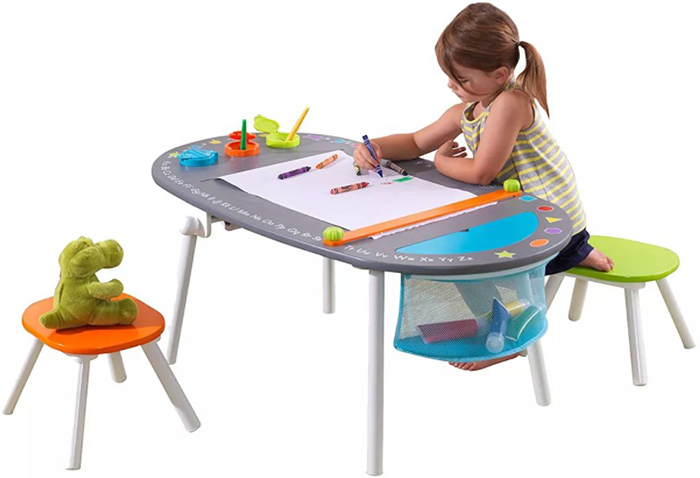
Organization of the work process
Drawing lessons for children aged 3-4 at home begin, first of all, with the correct organization of the workplace. The chair and table should be the right size and comfortable, and it is also necessary to provide good lighting for the work area.
To keep the table surface clean, you can use oilcloth, and to protect the child from stains, you can use an apron; it is better to keep the workplace clean right away.
The selection of tools and materials should be approached responsibly, since the use of high-quality paints, pencils, paper provides not only an excellent result, but also facilitates the work process itself. When working with watercolors or gouache, it is necessary to wash the brush often, for this purpose there are non-spill cups, they prevent moisture from getting on the drawing.
The palette will come in handy when experimenting with mixing colors, and when choosing brushes, preference should be given to soft and round ones. This rule applies to pencils and crayons, they should have a soft lead and fit comfortably in the hand.
The most suitable time for classes is daytime, duration no more than 25 minutes. If the child has difficulty holding a brush or pencil, you can support his hand, helping to apply strokes.
It is best to start learning with simple operations, for example:
- performing shading;
- drawing various lines (straight, wavy, zigzag);
- drawing simple shapes, for example – a square, a triangle, a circle;
- complicate and add details gradually;
Finger painting is a very simple, interesting technique, it is ideal for getting acquainted with paints, mastering shapes and lines, and also resembles a fun, exciting game. After mastering the easy technique, you should move on to a more complex one, namely, from finger painting to brush painting, from wax crayons to pencils.
The best drawing techniques for children 3 - 4 years old
Having completed the preparation of the workspace and selection of tools, you can move on to mastering various methods of drawing. They may depend on the chosen topic of the lesson, materials or the required result (study of figures, lines).
Hatching
The main task is to apply straight, wavy, dotted and other types of lines along the entire perimeter of the drawing, without going beyond its boundaries. The strokes can be of different sizes, short or long, one or several colors.
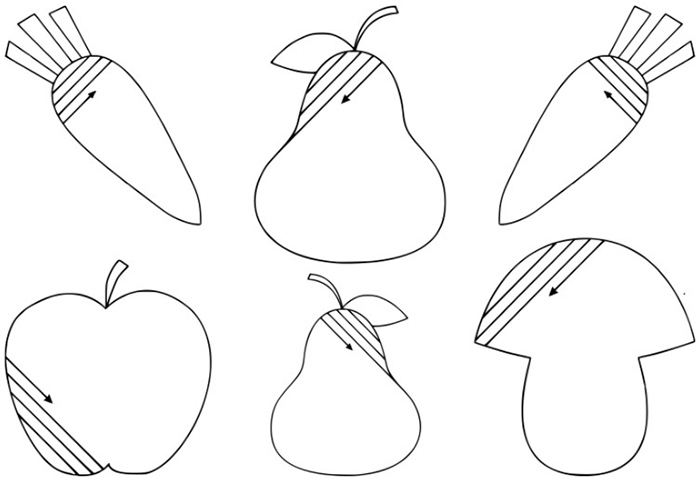
With the help of this technique, not only the color of the object is conveyed, but also its texture or volume; it is more convenient to do it with a pencil or felt-tip pen.
Lines
Like the previous technique, this method involves drawing lines of various shapes, in this case the line can become part of the drawing, for example, blue lines depict the sky, blue ones - waves or ripples on the surface of a reservoir.
With the help of lines, a background is created around the main object in the composition or the horizon is marked. This technique helps in the first stages of mastering the drawing, then the training can be complicated, moving from straight lines to zigzags, waves, spirals.
Dots
Drawing with dots for children aged 3-4 is very exciting; as part of the lesson, you can use a short-haired brush, thick-tip markers, a cotton swab or a special sponge brush.
The dots imitate sand, rain or snow, clouds, flowers or leaves on the tree crown, a textured background is created or the entire figure is filled with one color. Gouache is well suited for this technique, the brush must be dry.
Seals and stamps
You can make an imprint on paper using special children's seals and stamps, or using materials at hand, The following are perfect for these purposes:
- halves of fruits and vegetables (apple, tomato);
- tree leaves;
- petals and inflorescences;
- plasticine or hardening mass for modeling;
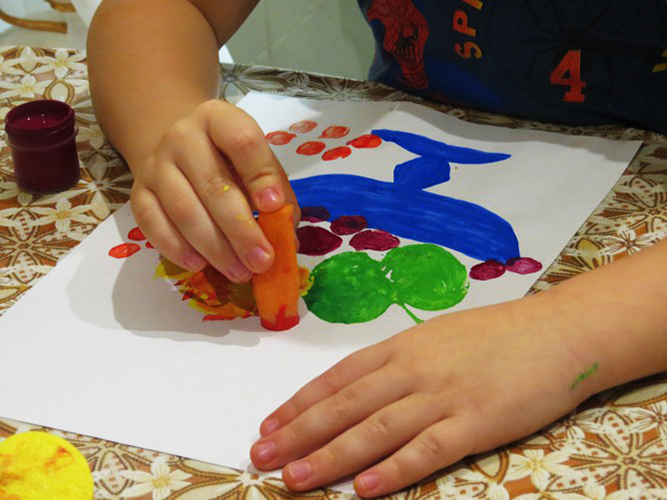
A light design is applied to the prepared potato or carrot halves, for example, a fish or a heart can be drawn schematically and cut along the contour. The cuts of half an apple, pear or radish are immediately suitable for use.
A stamp can easily be made from plasticine if you press a pattern onto a piece; any textured caps and bottles are well suited for this technique. Figures for stamps and seals can be cut out of foam plastic.
Splashes and blots
To create splash paintings, brushes of various sizes and shapes, toothbrushes, watercolors, and gouache are suitable. You can start by simply splashing drops of all colors onto a clean sheet of paper, watching how the background changes.
To obtain more complex designs, various templates and stencils are used, placing several stencils on a sheet of paper one after another and splashing new layers of paint on each one. Splashing imitates snow, stars or rain on paper, giving an original accent to a design already made in another technique.
Drawing blots is very exciting and does not require any special skills; a young artist only needs to drop paint on paper and use a little imagination to bring the character to life.
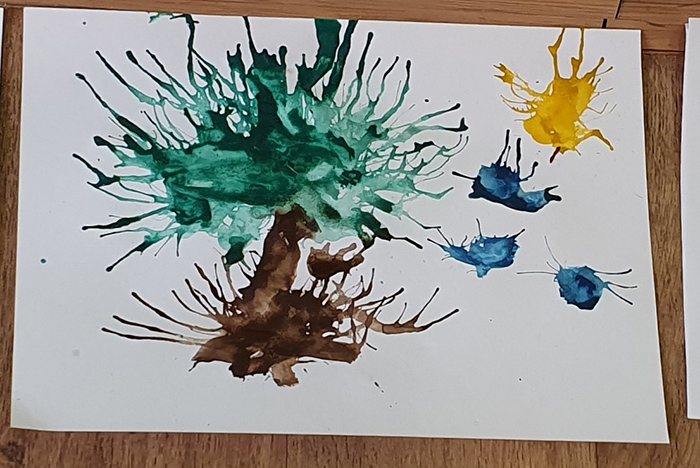
A blot can be turned into a fairy-tale character, a real jellyfish or a spider, the child comes up with a new image, looking at the paint spot on the paper. If you blow on the blot from a tube, even more interesting and unusual images are obtained.
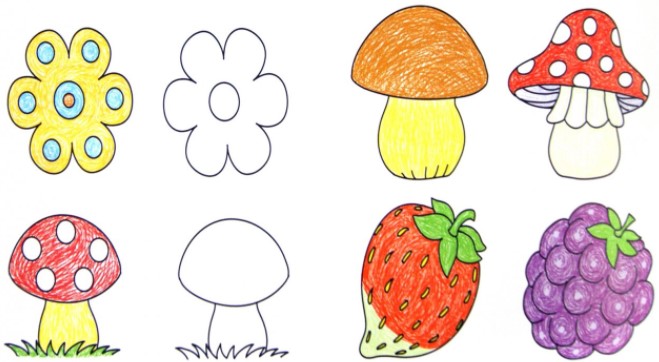
Coloring
Drawing lessons for children aged 3-4 using the coloring technique are very easy to perform, paints, pencils or felt-tip pens are suitable for the work. The main task is to apply color over the entire surface of the figure, without going beyond its boundaries, when coloring, the strokes are applied in one direction. It is very convenient to use ready-made coloring books for lessons.
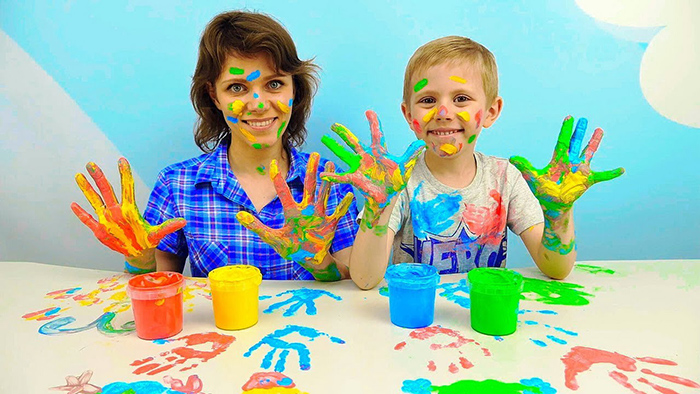
Fingerprint and handprint paintings
Drawing with palms and fingers is an unconventional technique, it is very simple and exciting for kids. This method allows the child to show imagination, and the activities take the form of a game or entertainment.
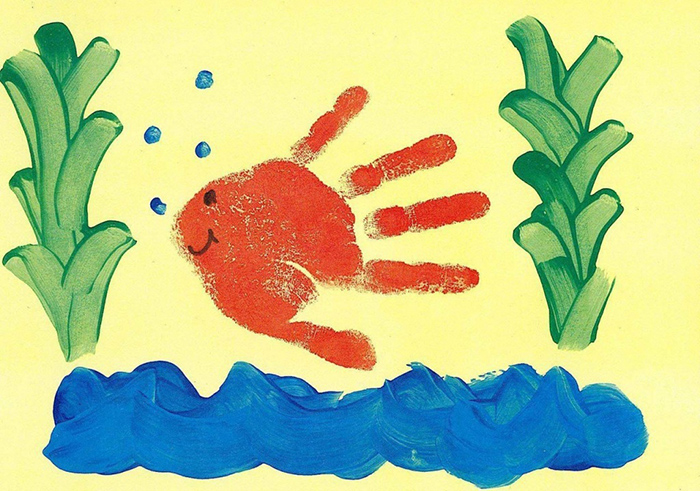
It is better to use special finger paints for drawing, applying them to the inner surface of the hand or dipping a finger. After applying, the colored palm print can be turned into an animal or a bird.
| Drawing technique | Materials | Benefits for development |
| Hatching | Pencils, markers, wax crayons, wax pencils, watercolor pencils | Learning to hold a pencil in your hand, preparing for writing. |
| Lines | Paints, all types of pencils, pens | Preparation for drawing geometric shapes, more complex objects, images of people, toys. |
| Dots | Watercolors, gouache, acrylic paints, pens with colored rods, brushes, cotton swabs, foam brush. | Training attention, perseverance, consistency, development of color perception. |
| Seals, stamps | Watercolor, gouache | Formation of perception of a holistic image, color perception, training of accuracy, figurative thinking. Acquaintance with various forms and textures. |
| Splashes, blots | Watercolor, gouache, brush, toothbrush | Developing imagination, training perseverance and accuracy, color perception, associative thinking. |
| Coloring | Pencils, felt-tip pens, gouache and watercolor paints, brush | Development of observation, imagination, accuracy, associations. |
| Fingerprints, fingerprints | Finger paints, thick gouache | Development of fine motor skills of fingers, tactile perception, imaginative thinking, familiarization with different textures of paints. |
Card file of knowledge on drawing in preschool educational institutions
There is a special card file containing a selection of drawing lessons for children aged 3-4. Each lesson contains a detailed description of the process with examples and photographs. Guided by the methods presented in the card file, children master various drawing techniques, such as finger painting, the poke method, and drawing with palms.
In addition to the educational part, each card includes a warm-up for relaxation; all activities are presented in a game form so that the child does not get bored.
The lessons clearly describe certain techniques, the goals of mastering them, the benefits, the list of necessary materials, and the course of the lesson. For convenience, all information is structured, the lessons are divided by month with corresponding topics and introductions.
Thus, using the card index, you can create a lesson plan for a long period or make an individual selection depending on the child’s abilities.
Ideas for drawing with pencils, markers
Working with pencils and felt-tip pens is somewhat more difficult than with paints, so you should pay attention to the lead and rods of the tools you use. The lead of a pencil should be soft and wide, and the rod of a felt-tip pen should be of increased volume.
Here are just a few ideas:
- Fish. To work you will need multi-colored felt-tip pens; first you need to draw a silhouette of a fish, then fasten several felt-tip pens with an eraser and make patterns on the silhouette with them. You can apply straight or wavy lines, any geometric shapes, decorate the bottom of the reservoir and algae in the drawing, connecting several felt-tip pens of the same color of different shades. Using a soft brush moistened in water, you can blur the colored lines a little, and for decorating the fish itself, it is better to take warm shades of no more than 3 pieces. Fish can be drawn with wax crayons, and the background can be decorated with watercolors over the drawing.
- Stencils and frottage (grattage). These techniques are very easy to master, with the help of ready-made stencils the child learns to paint figures, you can use ready-made templates or cut them out yourself from thick cardboard. For a drawing using the frottage technique, you need to select a flat object with a relief surface, for example, a coin, then:
- place a sheet of clean paper on the object;
- shade the drawing on the surface of the paper using a soft pencil or pencil dust;
- remove the relief from under the sheet and get a finished drawing.
Lego pieces, lace, and tree leaves can be used as relief.
- Drawing a story or fairy tale. At the very beginning, you need to come up with a story or tell your child a fairy tale, and then depict one of the characters on paper.
Painting ideas with paints
Beginning artists find it easier to master working with paint because there are more opportunities for experimentation, You can paint with your fingers, mix colors, not focus on details, or simply paint over the images.
- Volumetric paint. To make such a drawing, you need to combine shaving foam, PVA glue and colored paint in a bowl, then you can start drawing, for example, an ice cream cone. Then you need to make a cone out of cardboard, attach it to a sheet of paper and apply ice cream balls on top with colored foam.
- Salt and paint. Using glue, a simple drawing is applied to the paper, fine salt is applied on top and after drying, the details are painted with watercolors or gouache.
Original drawings are made from colored soap foam, for this you need to add paint to a thick soap solution, beat the foam and apply it to paper, if you add stems and leaves to the foam caps, you get a beautiful lush bouquet.
Another idea is drawing with gouache and a disposable fork, you just need to dip the fork into gouache, and then make circles, squares, and other shapes with the imprints; this technique works well for making funny, fluffy animal faces.
Recommendations from psychologists and teachers
For children of preschool age, namely 3-4 years old, Drawing lessons are extremely beneficial in terms of developing self-expression and self-awareness, in particular they help to:
- emotional development;
- development of color perception, spatial thinking;
- stimulation and development of fine motor skills, memory;
- early writing;
- the manifestation of creative abilities and imagination;
- relieving fears and emotional stress;
- free expression of thoughts;
- familiarization with various painting materials and tools;
- balancing the emotional state.
The connection between drawing and thinking and speech is very close, for example, the German teacher Adolf Diesterweg believed: "The one who draws receives more in an hour than the one who only contemplates for nine." A child can express many more images in a drawing than describe them verbally. Drawing can be called the language of the child's inner world.
There is an interesting technique, which consists of the following: the child is asked to draw any scribbles with his eyes closed, and then finish drawing the images with his eyes already open. In this way, the imagination is stimulated, creative potential is revealed, and freedom of self-expression appears.
Many teachers and psychologists, Friedrich Froebel, Jan Komensky, or Vasily Sukhomlinsky, Simon Soloveychik, recognized the benefits of early drawing lessons. At the same time, parents should help and support the young artist, allow him to choose colors and images independently, and in no case criticize or impose their own opinion.
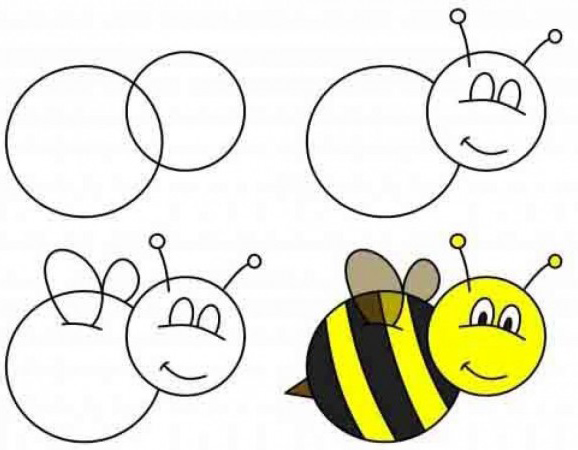
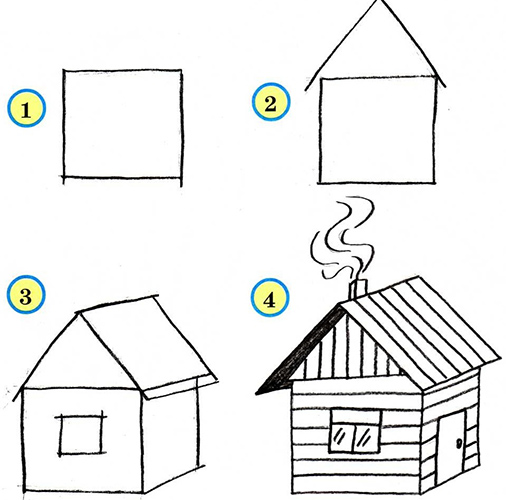
After mastering simple techniques, you should move on to drawing more complex objects step by step. So, from a square you get a house if you add windows, a roof, a pipe to it, from a circle you get a sun if you add rays to it.
For the best results, you need to use special pencils and paints, organize your workspace, and use various techniques suitable for children aged 3-4. Drawing lessons will always be welcome if the child receives support and approval from an adult.
Author: Udalova Anna Igorevna
Video about drawing
Ice cream drawing master class for children aged 3-4: