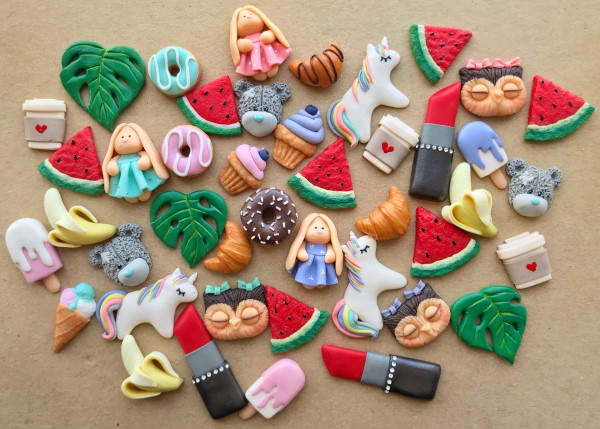
A few years ago, the fashion for polymer clay products. Not only toys and decorative items began to be made from it. Badges, decorations and other pleasant little things appeared.
The history of this flexible and easy-to-make material dates back to the distant 1930s. The birthplace of polymer clay is considered to be Germany, where it was developed, named "Fifi Mosaik" and first launched into production under the brand name "Fimo". A little later, similar material began to be produced in Argentina and Italy.
Polymer clay came to the USA from Germany in the 70s. Charming crafts made from the plastic mass and the material itself arrived in America in a package intended for one of the German emigrant families for the Christmas holidays.
Many people noticed the clay figurines and small objects that the house owner began making and giving to her neighbors. They were appreciated and interested in the material they were made of.
The head of the family turned out to be very enterprising. He opened the company Exent Imports, which began importing polymer clay "Fimo" from Germany to the USA. In addition, the owner of the company himself sold the imported goods and organized master classes on making crafts, where he gave recommendations on the use and processing of the material.
As German polymer clay grew in popularity in the US, other companies began importing it. In Russia, polymer clay began to be produced independently in the early 2000s.
The main advantages of polymer clay
Polymer clay is a flexible material that can be molded and shaped into various shapes and can harden on its own or by baking at high temperatures.
The mass in its initial state is very similar to plasticine. But its main and essential difference is the ability to harden and solidify. This makes it similar to pottery clay. Polymer clay differs from the latter in its aesthetic qualities, simplicity and ease of use in work.
In addition, there are several other important aspects that characterize the advantages of polymer clay.
- Ease of use. Not only a person without experience can work with the material, but also a small child with basic modeling skills.
- Possibility of working with plastic mass in normal conditions that do not require special premises.
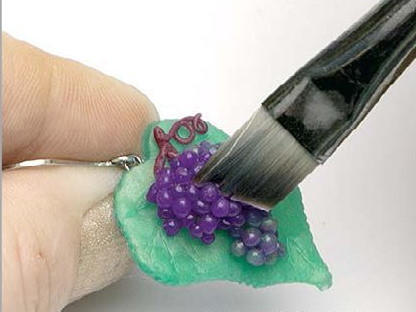
- A wide range of material possibilities. Its pliability allows you to imitate any texture and structure of manufactured products, create any shape, improvise with the size and combination of parts.
- Variety of colors. The plastic mass can be very bright shades. In addition, the content of mica in some of its types allows the production of polymer clay of pearlescent and metallic colors. It can also be translucent.
- Lightness and durability. Products made from modern plastic mass are lightweight. They do not get wet in water, do not fade in the sun and do not break when dropped.
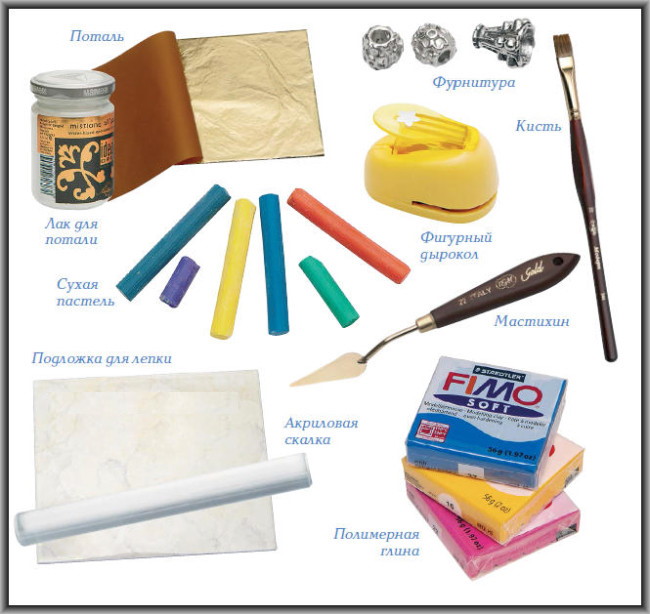
Tools and materials
Polymer clay badges are one of the simplest options for crafts made from this plastic material. However, to complete the work, you will need materials that are necessary for creating forms of any complexity.
Among them:
- Work surface. It should be flat and smooth, without texture. It can be a sheet of paper, tracing paper, glass or ceramic tile, silicone or glass cutting board.
- Polymer clay. It can be chosen in basic colors: white, yellow, red, blue and black. Other shades and colors can be obtained by mixing the basic ones. However, modern manufacturers produce sets of plastic mass, consisting of a variety of bright shades. This greatly facilitates the work, especially for beginner "sculptors".
- Roller (rolling pin) for rolling out polymer clay. This tool can be made of different materials. The main thing is its impeccable smoothness. You can use a special acrylic roller or a well-processed small wooden rolling pin, a bottle of hairspray or deodorant, a glass bottle or any other hard cylindrical object. Experienced craftsmen often use special rolling machines for paste (noodles). For beginners in working with polymer clay, this is not necessary.
- Cutting sharp tools and blades. You can use special straight and shaped knives, widely available on sale from polymer clay manufacturers. In addition, a stationery knife and a modeling stationery scalpel with a sharp thin cutting end, regular razor blades or spare blades for a stationery knife will do.
- Stacks and tools for modeling. You can use special tools, as well as improvised materials: an awl, sharp furniture nails with figured heads, toothpicks, knitting needles, handles from art brushes of different diameters.
- Items for creating texture. You can use special plates, or you can resort to the help of improvised materials that have a ribbed surface (large lace, textured wallpaper, buttons, stamps, sharp objects, toothbrush bristles, crumpled rough paper or foil).
- Liquid plastic. This product is necessary for gluing parts. You can use glue (universal or Moment glue).
- Molded cutters. MYou can use special metal stencils for cutting clay plates, or you can use materials at hand (caps from bottles and jars, cookie cutters, refills from cosmetic eye shadows).
- Silicone forms (molds) for creating different surfaces on a sheet of clay (very good for making jewelry, doll faces, badges and brooches).
- Fittings. To make badges, these can be regular pins of the required size or brooch clasps (their lock is more secure when fastening).
- Wipes (regular and wet). They are necessary for hands, work area and tools.
- Latex gloves. They will help to make the product more accurate, prints. For beginners, this is a necessary attribute in working with polymer clay.
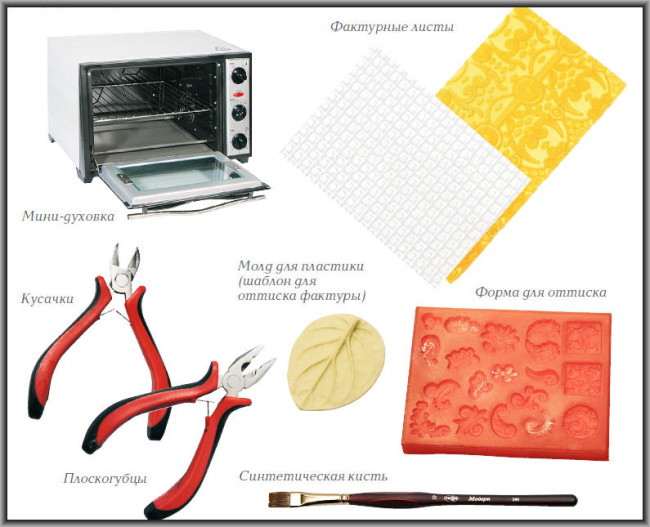
- Oven (regular kitchen oven). This attribute is necessary if the work involves polymer clay that requires baking. The heating temperature should not be higher or lower than 100-130 degrees (these parameters are usually indicated by the manufacturer on the packaging with the plastic material).
Preparing the workplace
Badges or other crafts from polymer plastic clay can be made in any place convenient for the production process. The main thing is to properly prepare the workplace.
Important points:
- Good lighting. This factor is necessary when performing any work, including sculpting.
- Convenient location. The place should not be in a limited space, cramped for any movements.
- Cleanliness. Polymer clay is capable of collecting any specks and dust from the work surface. This is unacceptable when working with the material.
- Having the right working surface. It should be flat and smooth, without roughness, dents, chips and breaks (depending on the chosen surface material). All defects will be imprinted on the plastic material.
A properly prepared workplace is one of the absolute factors contributing to a successful creative process.
Sculpting techniques
Experienced polymer clay modelers use many techniques of varying degrees of complexity in their work. Beginner sculptors are better off using those that are most common and accessible.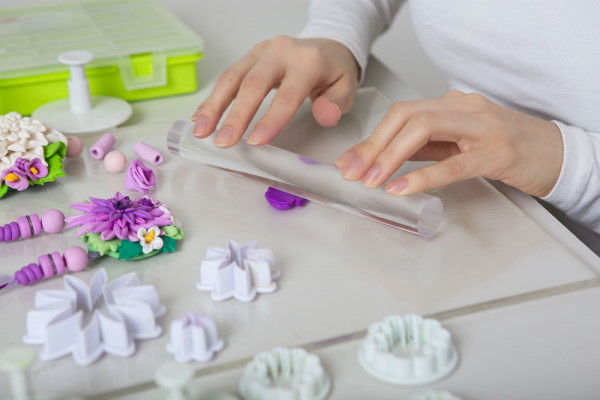
| Type of equipment | Features of the technique | Where it is used | |
| 1. | Watercolor | Clay of several colors is used for the work. Multicolored plates of the working material are placed on top of each other, rolled out until soft "watercolor" transitions from color to color are formed. The resulting part is torn into smaller parts. Then all of them are alternately placed on the prepared surface of the product. | Manufacturing:
|
| 2. | Salt | Salt or sugar is used as an additional material for work. The prepared parts are lowered into a container with salt and rolled in it. Then they are baked according to the instructions attached to the clay, and then immersed in water until the salt dissolves. After this, the parts are dried and varnished. The resulting surface resembles pumice. | Manufacturing:
|
| 3. | Millefiori (caning) | Multi-colored pieces of clay are placed on a thin layer of the working mass. Everything is rolled into a roll, which is then unrolled and cut into rolls. Intricate designs are obtained on the cuts. | Manufacturing:
|
| 4. | Kaleidoscope | The technique is similar to millefiori. Instead of a cylindrical shape rolled from clay, it uses squares, rectangles and other geometric shapes. As a result, the cuts produce a mosaic similar to the figures in a child's kaleidoscope. | Manufacturing:
|
Gluing parts together
Polymer clay badges can be easy to make. However, this work will also require fastening the parts (the clasp and the main form).
When using baked clay, you can use the method of applying a fastener to the product. In this case, a piece of plastic mass is placed on top of it. It is pressed onto the base, and then the product is sent to the oven for baking. After cooling, the material will be securely attached to the product.
In other cases, glue can be used. In this case, it is necessary to degrease the surfaces to be glued beforehand. The glue is applied to the parts, which are pressed against each other for some time. After this, the work is left for the glue to dry completely.
Baking
For baking polymer clay products, household ovens are used. In this case, the equipment must have a temperature regulator. 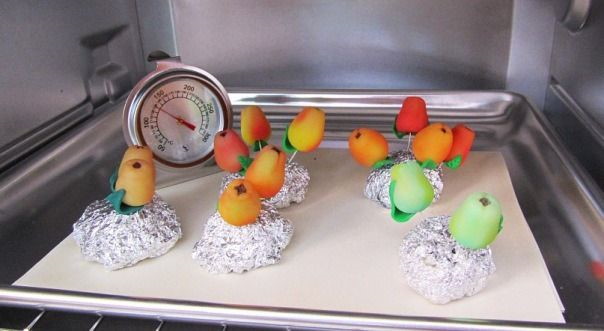
On the packaging of plastic material, manufacturers indicate the time and temperature required for baking.
The strength of the product depends on the time used in the process.
For a base for items that are going into the oven, you can use:
- ceramic tiles;
- glass board;
- silicone mat;
- baking paper.
When baking polymer clay products, remember that very high temperatures can cause the craft to burn.
After using the oven to work with plastic mass, it is necessary to wash it thoroughly after baking.
Varnishing
Polymer clay badges and other items will look more beautiful if you varnish them after finishing all the work. This will give them shine and a more elegant look.
For this purpose, special varnishes for polymer clay are usually used. Varnish for wooden products can also perform this role.
Before varnishing the work, it must be completely degreased. The glue can be applied with a brush, distributing it evenly over the surface.
Polymer clay badges
Polymer clay crafts made with your own hands can become a cute surprise, decorative elements for your home, as well as items for your own collections of badges, toys or jewelry.
Several master classes will help beginning sculptors master simple skills of modeling from plastic mass.
Fox
To work you will need:
- polymer baked clay of white, black and orange colors;
- a sheet of squared paper to create a template sketch;
- simple pencil;
- scissors;
- smooth glass or ceramic tiles;
- model scalpel;
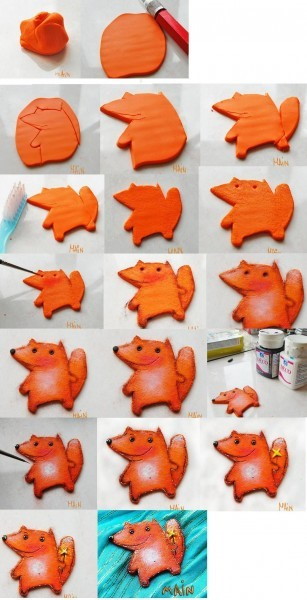
- porous sponge with large, hard cells;
- acrylic roller for rolling out clay;
- a small diameter cutter or a bottle cap;
- a file or fine-mesh sandpaper for sanding the edges of the baked workpiece;
- acrylic white paint;
- pin or brooch clasp;
- Moment glue.
Work order:
- Draw a fox's head on a square with a side of 3.2 cm on a sheet of paper in a grid.
- Cut the template along the contour with scissors.
- Knead and then roll out a small piece of white clay. Place it on the glass.
- Apply the template and cut out the figure along its outline with a scalpel.
- Round off the edges with your fingers and, taking a sponge, “go over” the entire shape. This will give the surface a wool texture.
- Roll out a piece of orange clay into a thin layer.
- Using a cutter, cut out semicircles on one side.
- Place the resulting piece on the top of the fox's head shape and press it well along the contour. You now have a white muzzle with a red forehead and ears.
- Trim off excess clay along the outline. Smooth the edges with a sponge and fingers.
- Using the sharp end of a scalpel, cut triangles on the surface of the ears without cutting through the clay. Remove the orange pieces of clay. There should be a white surface underneath.
- Roll a thin sausage out of black clay and cut off 3 small pieces (eyes and nose).
- Make indentations for the eyes, insert black balls into them. Attach the nose.
- Use acrylic paint to apply white highlights to the eyes.
- Place the glass figurine in the oven and bake for 20 minutes at the temperature indicated on the clay packaging.
- After the form has cooled, clean its edges with sandpaper or a file.
- Apply glue to the back side and attach the clasp.
- Place a piece of clay on top to hide the base of the clasp. Apply a little liquid plastic to it, and place a piece of thinly rolled clay on it.
- Bake for another 20 minutes.
- The product can be varnished.
The "Fox" icon is ready.
Funny little animals
Polymer clay badges can be made even easier by using ready-made pictures of various animals and objects.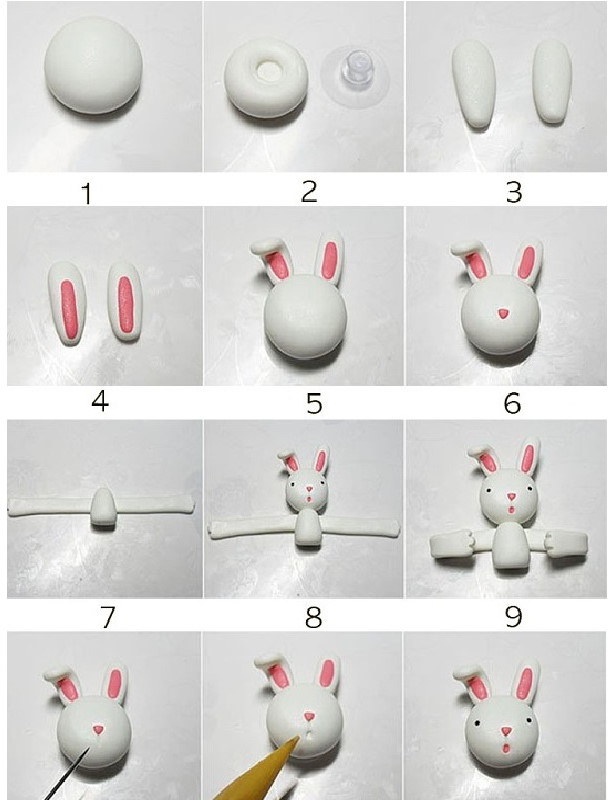
To work you will need:
- clay white color;
- pictures with images of animals (heads);
- glass for work;
- glue stick;
- rolling pin;
- stationery knife,
- stacks;
- clear varnish;
- pins;
- glue gun.
Work order:
- Cut out the animal faces you like from the prepared picture.
- Roll out a well-kneaded piece of clay into a layer no more than 3 mm thick.
- Place the cut out figures onto the rolled out clay.
- Cut off excess plastic mass along the contour with a knife.
- Bake the pieces in the oven for 20 minutes at the temperature indicated on the clay packaging.
- After cooling, glue the images that were used to cut out the shapes to the shapes.
- Cover all the blanks with transparent varnish in 2 layers, on both sides of each.
- Hot glue pins to the back of each shape. The pin should remain vertical to the base.
Interesting and easy to make badges are ready.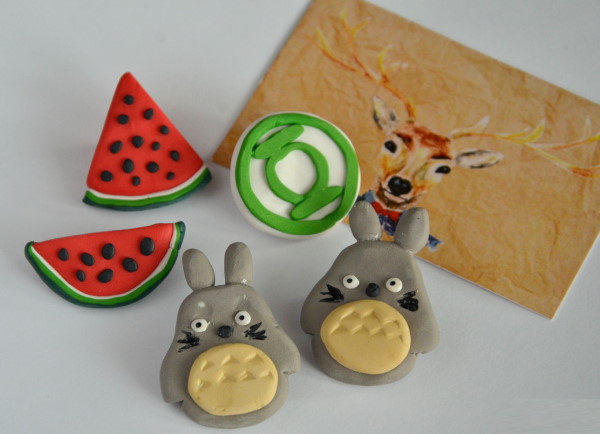
Polymer clay products are very popular. With imagination and great desire, you can make not only interesting badges, but also more complex beautiful jewelry, decorative items and toys that can please their owner for many years.
Video about polymer clay badges
DIY New Year's badges: