The Cowardly Hare is a popular fairy tale character and a well-known beastDrawing this animal is an easy task, even for children. The head, long ears and carrot will help you recognize it in any sketch.
However, once the primitive level has been completed, students can be encouraged to improve their drawing skills, and the animal in question is the best model for this, as it allows them to try different techniques.
Master class - drawing a hare with a simple pencil
Tools and materials:
- Drawing paper (not glossy).
- Simple pencils of varying degrees of hardness (TM, MM).
- Soft white elastic bands (medium and thin edge).
- Cotton pad.
- Photo of a hare or rabbit.
At the beginning of the lesson, you can remember several interesting facts about the life of hares, which will help in drawing. For example, a hare has long ears, the tips of which remain dark all year round.
The life of a hare depends entirely on running, so it has strong legs with long, wide paws. Such a constitution allows it not to sink into the snow. If a hare notices danger, it sits down and freezes in place to check whether it has been detected and whether it is worth running away. It is in this pose that the hare is most often photographed and depicted in paintings.
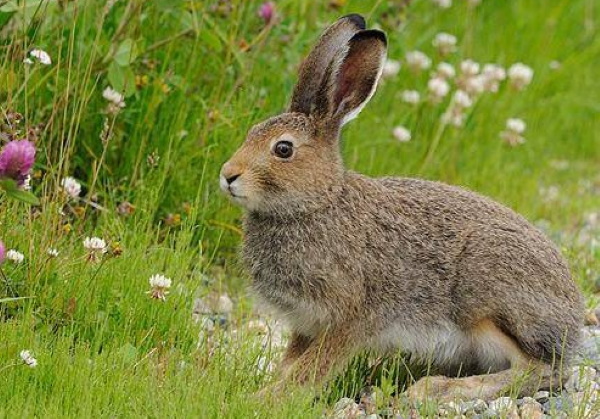
Next, you should look at photos of hares in different poses, and choose the clearest image as a sample for drawing. Since the drawing will be done with a simple pencil, it is better to look at a black and white sample.
The drawing process is structured according to the following plan:
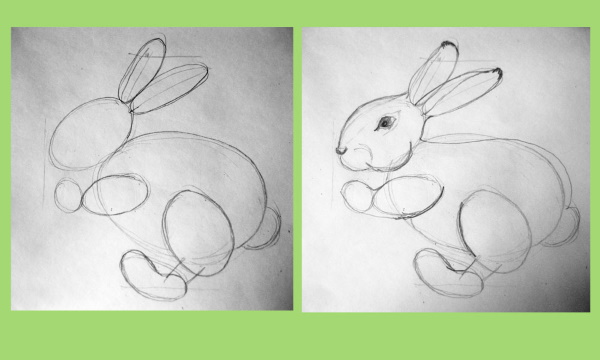
- First, look at the photo and mentally or on a sheet of paper if the photo is printed, fit the animal's body parts into geometric shapes.
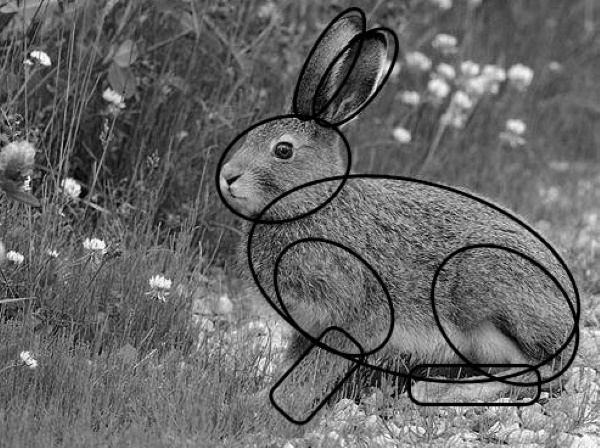
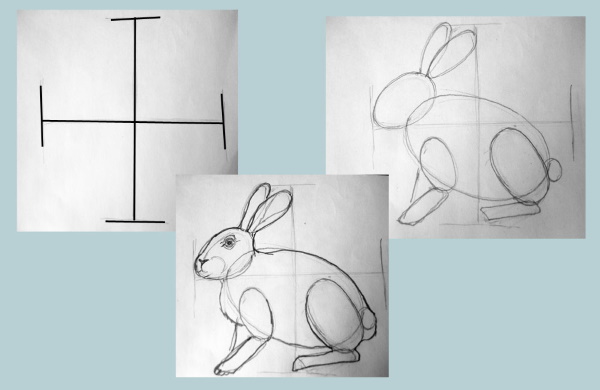
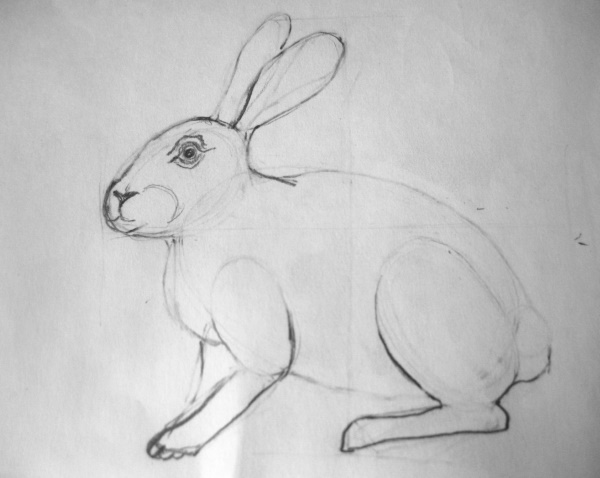
- Next, barely noticeable strokes mark the location of the hare on the sheet. The sitting hare, together with the ears, fits into a square. For convenience, you can divide the image in half vertically and horizontally, determining the middle. This results in 4 squares.
- At the next stage, using the photo as a reference, depict the head, body, thighs (upper parts of the legs) of the hare using ovals, the thin parts of the legs and paws can be outlined with rectangles or lines. At this point, it is not the similarity that is important, but the arrangement of the parts relative to each other and the proportions.
- Next, use a medium-thickness pencil to draw the outline. Pay special attention to the curve of the muzzle, back, and hips, as these lines do not completely match the ovals. You also need to outline the hare's dark almond-shaped eye and mouth.
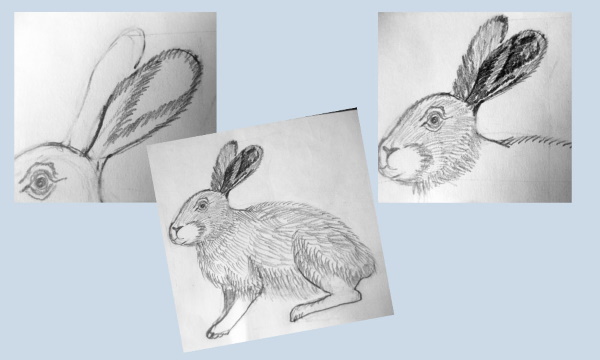
Hare drawing for children step by step. - At the next stage, using a thin eraser, erase all the auxiliary lines, and make the main lines light, almost invisible. This measure is especially relevant in areas with fluffy fur - on the belly, in the auricle, on the cheeks, on the withers, on the back. Clear lines remain only on the lower part of the paws, on the nose and in the area of the bend of the hip. The hare almost disappears from the sheet.
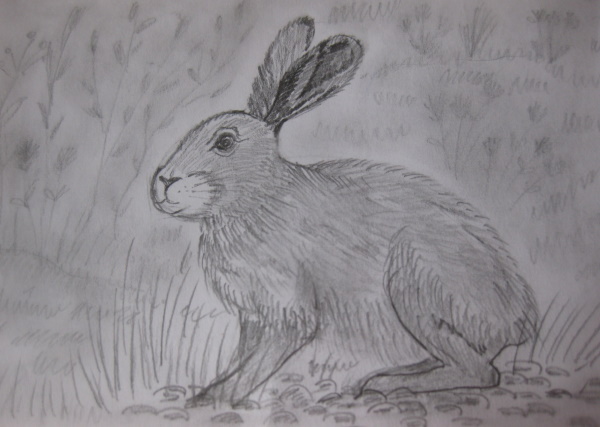
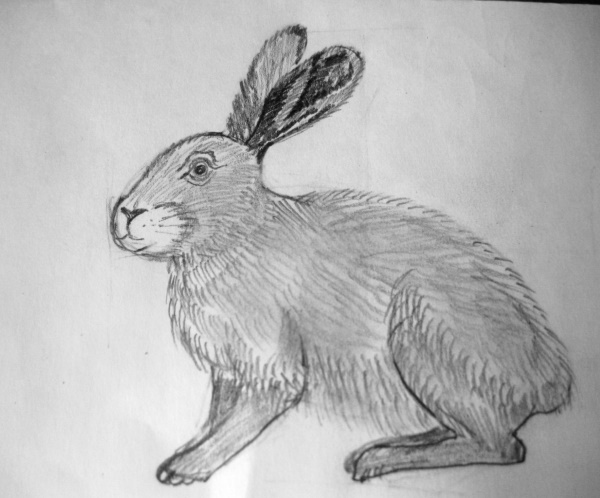
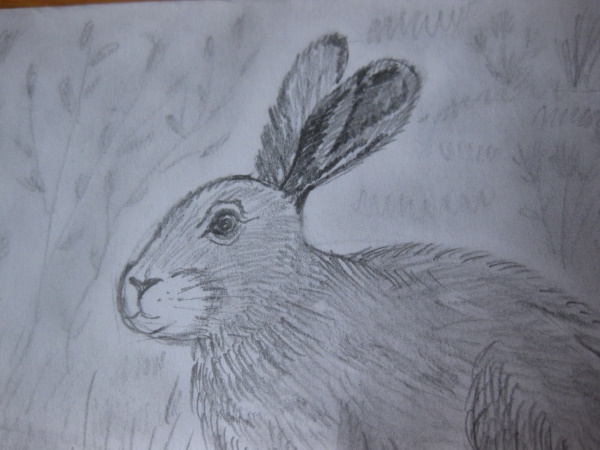
- Next, work is done with a soft, simple pencil. The sample should always be in front of your eyes, it helps determine the direction of the shading. The silhouette of the hare is covered with fur - these are light, frequent strokes of 3-5 mm. In places of darkening - in the auricle, on the bends, on the hip line, the pressure during shading increases. In the area of the withers, on the muzzle, on the cheeks, ears, back - the shading is neat and clear, and the whole body can be covered with more sweeping strokes, and then rub this area a little with a cotton pad so that the hare seems fluffier. If the shading needs to be made lighter or removed altogether, for example, on the belly, you can rub the lines with a thin eraser.
- The background on which the hare is hiding can be borrowed from a sample photograph. For example, stones and grass in the foreground, flowers and bushes in the background.
- The elements that are under the hare's paws are drawn clearly and brightly.
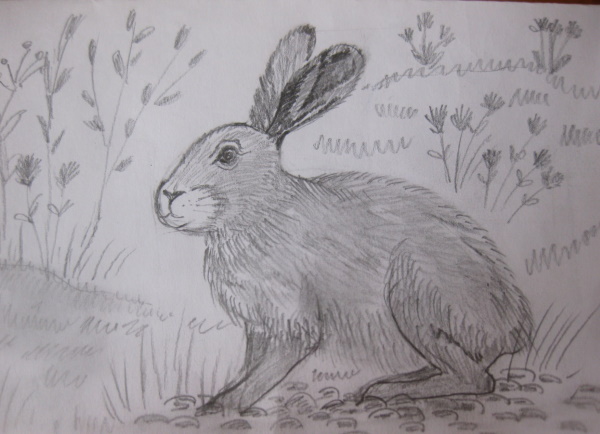
- In the background, you can schematically depict branches, balls of clover and dandelions, and then almost completely rub all the plants behind the bunny with a cotton pad, as if performing a defocus.
Hare - a drawing for children that allows them to practice drawing an animal with a pencil.
Using this algorithm, you can create a realistic graphic image of almost any animal.
Master class - drawing a bunny with paints using a poke
Materials and tools:
- Drawing paper (not glossy).
- Gouache paints, white and black colors are required.
- Thin brush.
- Foam rubber pokes - 3 pcs. (15 mm, 20 mm, 30 mm).
- A simple pencil of medium hardness (TM).
- Eraser.
- Palette.
- A book with illustrations by Evgeny Charushin or another animal artist.
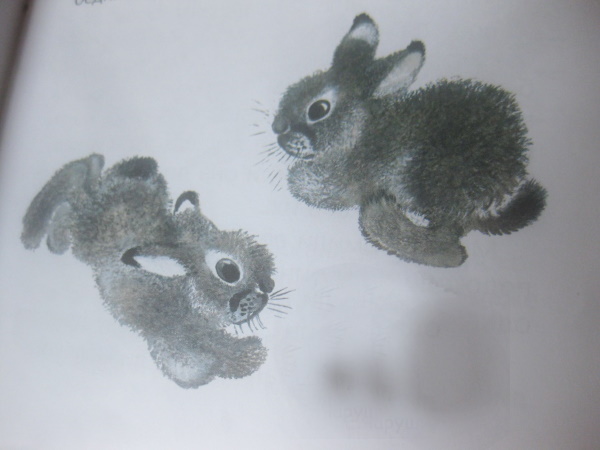
At the beginning of the lesson, you can read the children the story "About the little hares" by Evgeny Charushin and look at the illustrations. In addition, it is worth discussing how the little hares appear in the illustrations ("soft, fluffy"), how you can achieve this effect with paints (using a poke, a dry brush).
This is the best time to show the poke and dry brush in action, quickly covering the silhouette of any animal with fur.
Then the drawing proceeds according to the following plan:
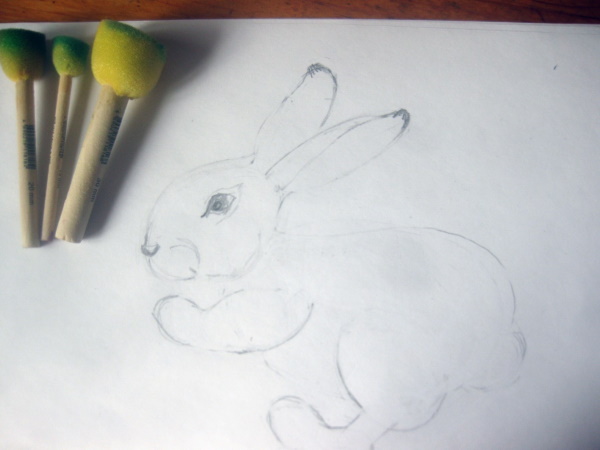
- First of all, determine the location of the bunny on the sheet and its size using light strokes with a simple pencil. The bunny fits roughly into a square. The large square can be divided into 4 small ones with two intersecting lines to make it easier to track the proportions.
- Next, without pressing the pencil, depict the main parts of the hare's body using geometric shapes and lines. Basically, everything is drawn with ovals. The head and ears occupy the upper left square diagonally.
- Then some elements of the body are drawn with a pencil. The convex muzzle, the curve of the neck are outlined, the paws are drawn, the almond-shaped eyes and nose are outlined.
- At the next stage, all auxiliary lines are erased, and the main lines are made very pale, almost invisible - especially in places where the fur is very fluffy - on the back, chest. If the eraser left crumbs, they must be carefully shaken off so that they do not spoil the picture when coloring.
- Next, prepare the paints and the pokes. Foam pokes can be bought in a store or made by yourself using a wooden stick and foam rubber screwed on top and cut to a certain size. Before work, the pokes and brush must be completely dry.
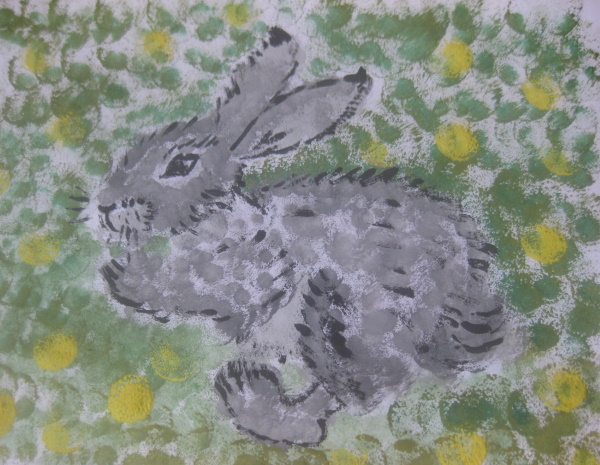
- First, make the background. Grass can be made as a background with a dry brush or a poke and flowers. Mix green and yellow gouache on the palette and fill the entire background with poke of this shade, closer to the hare it is better to work with a 20 mm poke, and on the sides of the picture you can use a larger poke - 30 mm.
- For flowers (dandelions), thick yellow paint is spread on the palette. When the green background is completely dry, several yellow dabs are made on it.
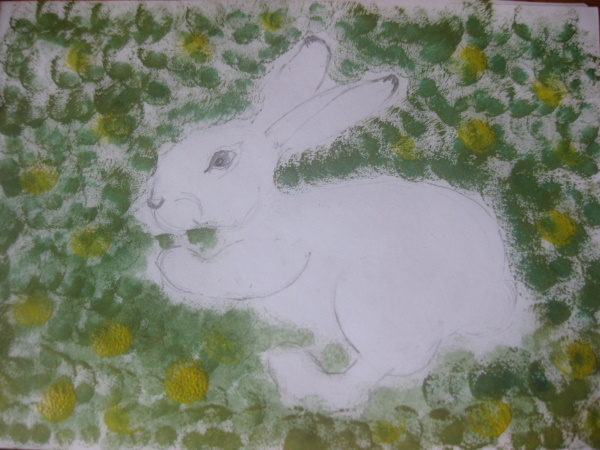
- Next, on a white plastic palette, you need to mix the paints of the desired shades. For the bunny, you need 2 shades of gray - light gray (white with a little black added), and dark gray. The paint should be quite thick, almost without water.
- When all the materials are ready, start drawing the fur. Press the poke into the paint from all sides, then make a couple of poke marks on the sample. If there is not a solid trace left, then start working on the main sheet. While there is a lot of paint on the poke mark, go over the darkest parts of the hare's body with frequent poke marks - the hip line, ears, nose, neck. Start working with a dark gray color, using a 15 mm poke mark. The hare's sides, front, tail, central part of the thigh and belly can be done with a 20 mm poke mark in a light gray shade, or a 15 mm poke mark, but then it needs to be carefully washed and dried with a cloth.

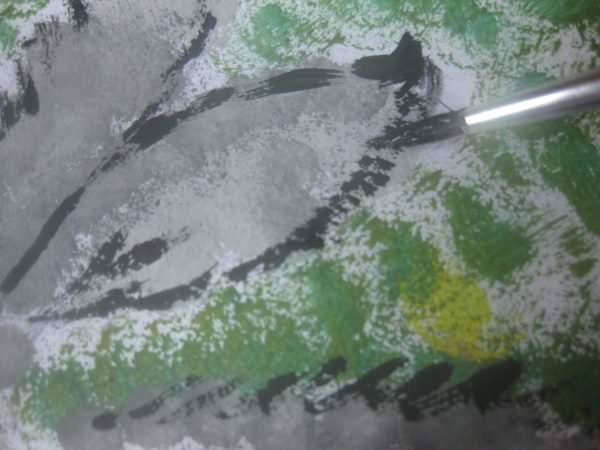
- Next, using a thin brush, draw the eye, nose, and mustache in black, and with a dry brush, make scattered strokes in some places, emphasizing the structure of the fur.
A hare (a drawing for children or a work by an adult novice artist) is not the only animal that can be drawn with a poke. Using the technique of this master class, you can draw different animals - a fluffy kitten, a puppy, a chicken, a bear cub.
Master class - drawing a running hare with pencils and a black felt-tip pen
Materials and tools:
- Drawing paper (not glossy).
- Colored pencils.
- A thin black felt-tip pen, marker or liner.
- Cotton pad.
- Illustrations or photos of a running hare.
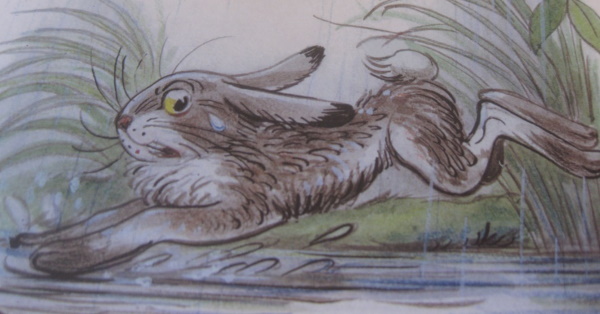
The hare is a very active creature. There are many photographs and drawings by animal artists where you can see a hare running and jumping. However, for your first drawing experience, you can use the image from the fairy tale performed by Vladimir Grigorievich Suteev.
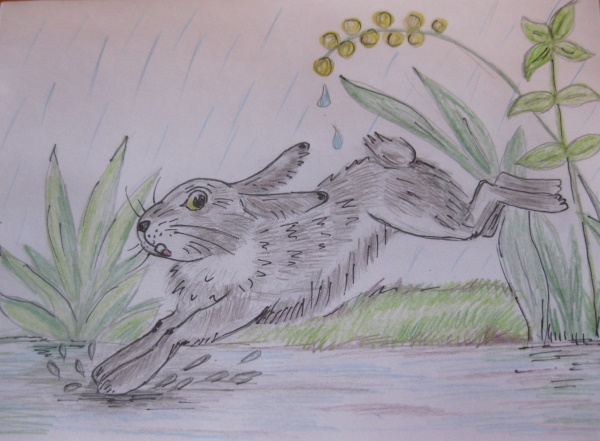
His hare from the fairy tales "Under the Mushroom", "Apple", "Magic Wand" is, although a fairy tale, close to a real animal. All proportions are perfectly observed. At the same time, the lines are very clear, which helps children to correctly capture the movement.
Drawing takes place in several stages:
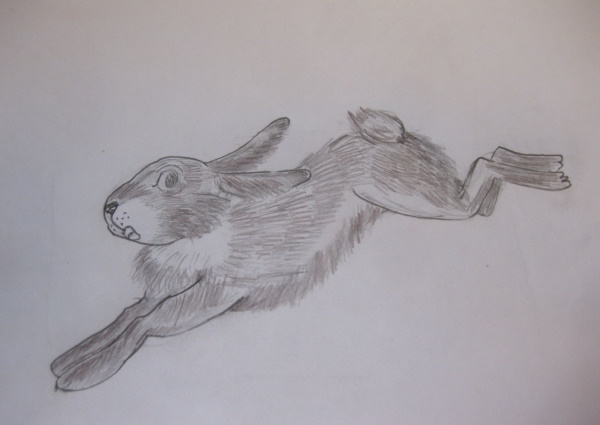
- Using thin pencil strokes or lines, mark the location of the hare on the sheet. The animal in motion fits roughly into a rectangle.
- Next, geometric figures (ovals) and lines are used to designate the parts of the hare's body. The main part of the image is stretched diagonally, where the tip of the front paws is the lowest point, and the tail is the highest. The ears are approximately in the middle of the drawing.
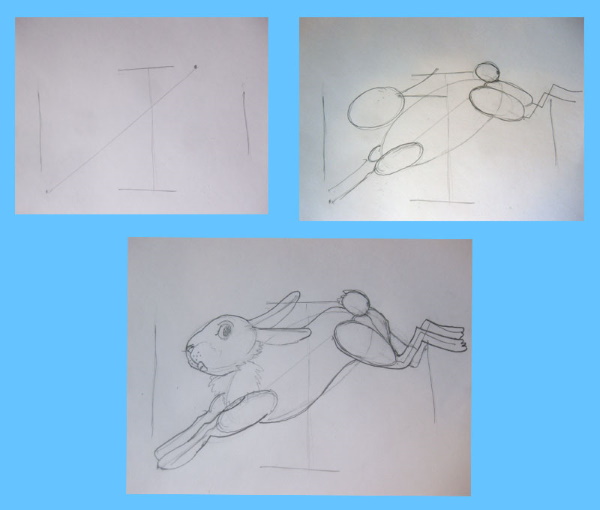
- At the next stage, drawing is carried out using the sample as a reference, special attention should be paid to the curve of the muzzle, paws and back.
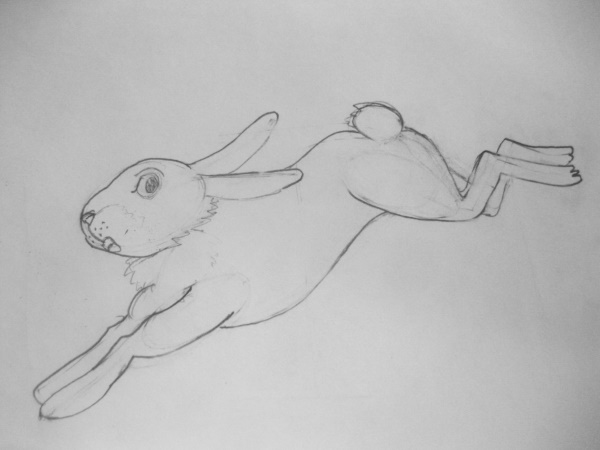
- Next, erase all secondary lines, and erase parts of the body with fluffy fur (withers, shoulders, cheeks, tail) with an eraser so that the lines are almost invisible.
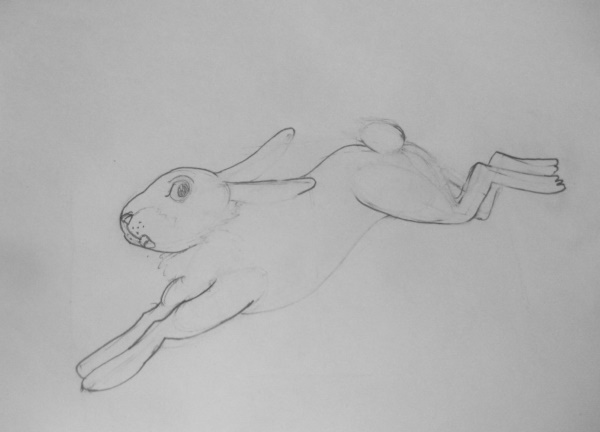
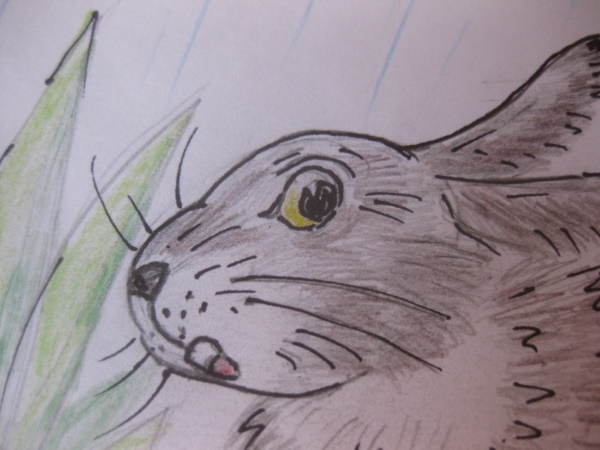
- Then start shading with a pencil. The principle of work can be demonstrated on the ear. On the edge of the ear, do frequent shading with a soft simple pencil, and make a darkening at the very tip.

- A little brown and some black strokes are added over the grey, the smooth part of the ear is simply painted over with a simple pencil without pressing. White fragments remain on the bib and belly.

- At the next stage, a marker or liner is used to mark the outline on the muzzle and legs, and only individual strokes are made in the area of fluffy fur. The marker or felt-tip pen is also used to outline the nose, eye and whiskers.
- If you draw a hare running away from a fox in the rain from the fairy tale "Under the Mushroom", then the background can be plants and the ground covered with puddles. Use a pencil to mark the horizon line, 2-3 plants.
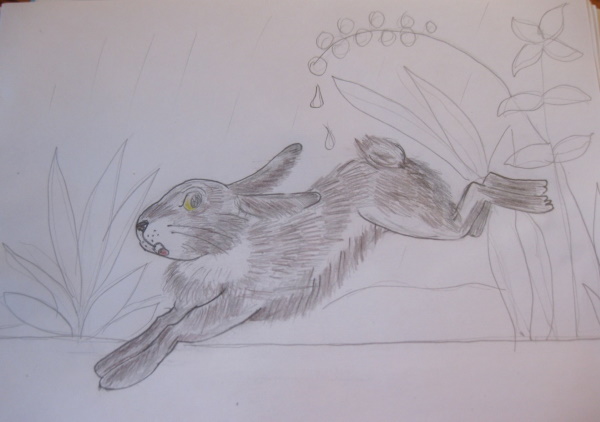
- Next, take 2 shades of green and 2 shades of blue. Tint the plants in some places with green pencils and add strokes with a liner. Paint the puddle and splashes blue, but be sure to add a little gray and green in those places where there should be a reflection.
The techniques described in the master class allow you to quickly create a lively drawing and feel like an artist-illustrator.
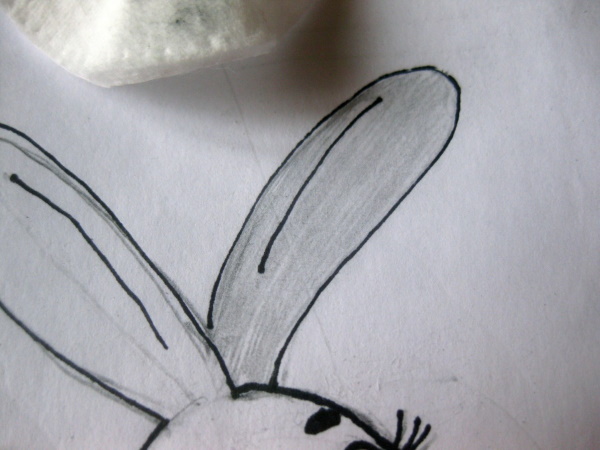
Master class - drawing a hare from the cartoon "Well, just you wait!" with felt-tip pens and pencils
Tools and materials:
- Drawing paper (not glossy).
- Simple pencil.
- Colored pencils and markers.
- A thin black marker or liner.
- Cotton pad.
- Sketching paper.
The hare is the hero of many cartoons, so drawing the long-eared animal is a great chance for children to feel like cartoonists. Before drawing, you can watch your favorite episode of the cartoon "Well, Just You Wait!" and make several still frames in which you can examine the hare in detail.
It is better to structure the drawing process according to the following algorithm:
- First, you need to choose in what pose the hare will be drawn, from what fragment of the cartoon. You can take the head of the hare from one still frame or based on standard images, and change the pose. Before drawing on the main sheet, it is best to try different options on a draft (schematically).
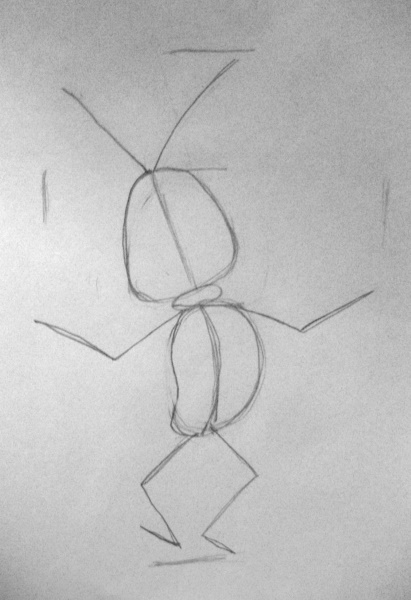
- Then, use a pencil to mark the location of the hare's figure. It will fit into a rectangle, where one third will be occupied by the head with ears, and the other two thirds by the body and legs.
- The next step is to simply indicate the body parts. The head resembles a pear (a trapezoid with rounded corners), the body is an oval, the ears are elongated ovals, the legs and arms can be depicted with lines. If the hare is supposed to walk the way he does arm in arm with the wolf on the deck of a cruise liner, then one leg will be bent more strongly, and the line of the foot will join the shin at an acute angle.
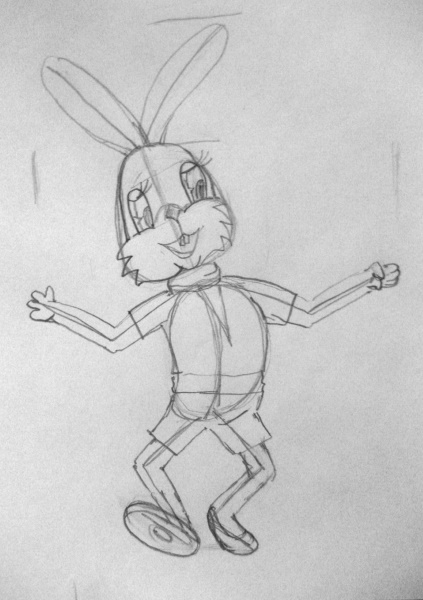
- Next you need to draw the curves of the body - the muzzle, paws, clothes.
- At the next stage, draw the details - eyes, nose, smile. To do this, it is better to hold a large image of a hare from a cartoon in front of you, since the similarity is determined by the little things - for example, the shape of the eyes and nose. Particular attention should be paid to how to correctly fold the hare's paw into a fist; children can practice squeezing something in their hand and look at their fingers.
- After drawing, all significant lines are outlined with a black marker or felt-tip pen, and after a couple of minutes, all auxiliary lines are erased.
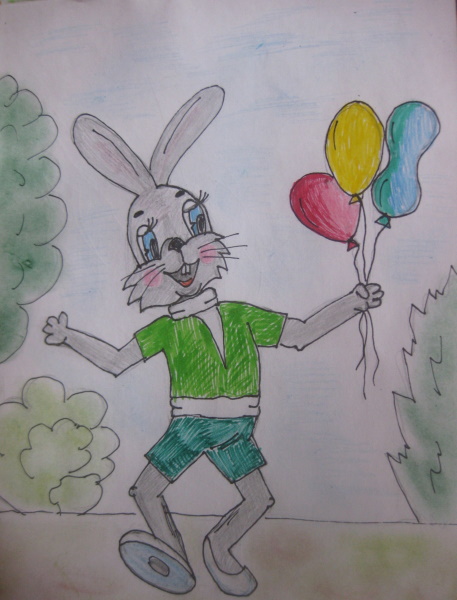
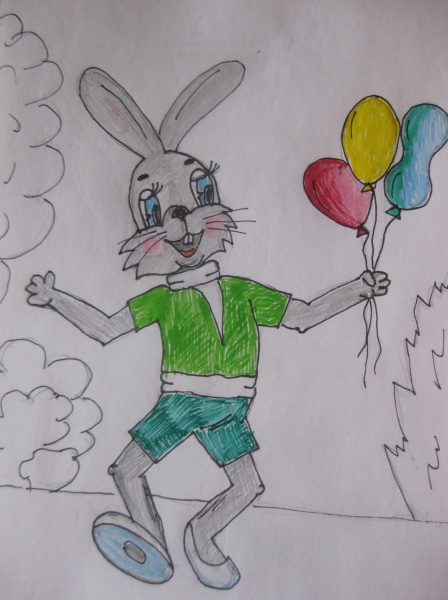
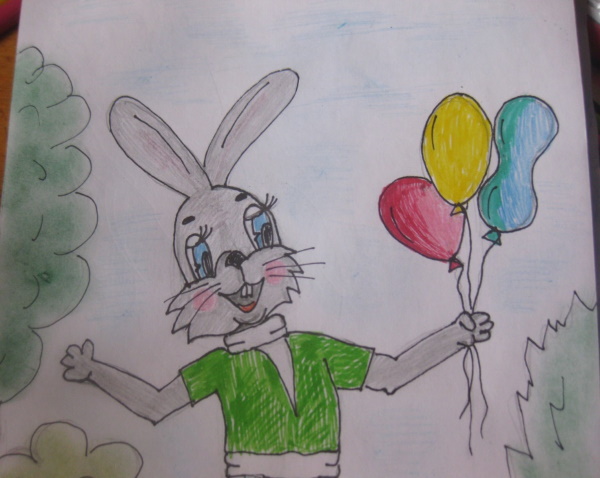
- When coloring, you need to take into account that the Hare from the cartoon always has the same shade of fur - gray-pink, and the same clothes - dark green shorts, a white turtleneck with a light green polo shirt.
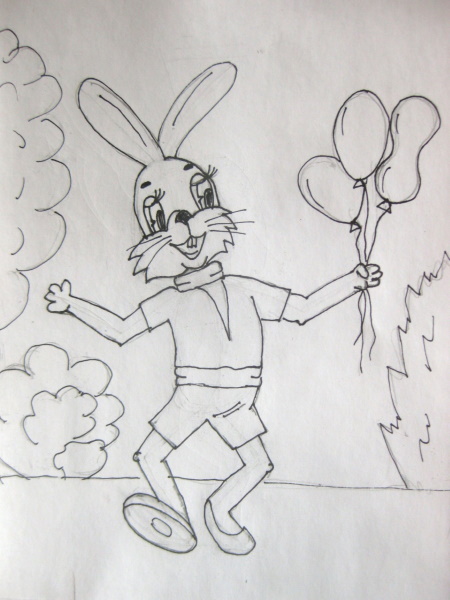
- You can color the Hare using both felt-tip pens and pencils.
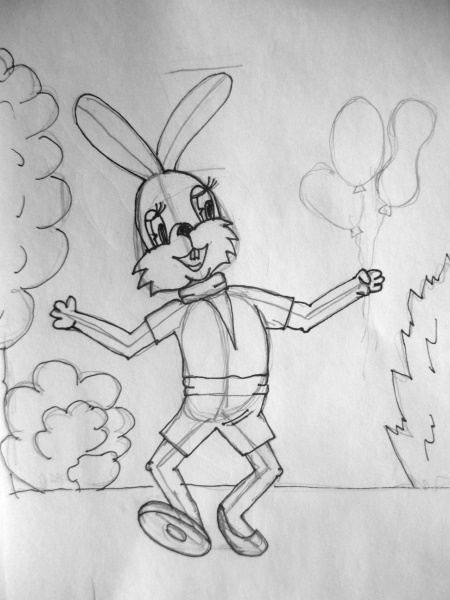
- The hare can be surrounded by any decorations. For example, place it in a park, on the beach or at a stadium. The hare can hold balls, flowers or a tennis racket in his hands. The principle remains the same - background objects are applied schematically so that the main character is not lost.
- Since children do not like to color large areas, you can scrape the colored pencils with a knife (this is an adult's task) and use the resulting powder to tone the background using a cotton pad.
- In the final work, the background is decorated with separate lines with a black marker - a zigzag of grass, tree bark, in some places the outline of leaves. There is no need to outline everything.
Ready.
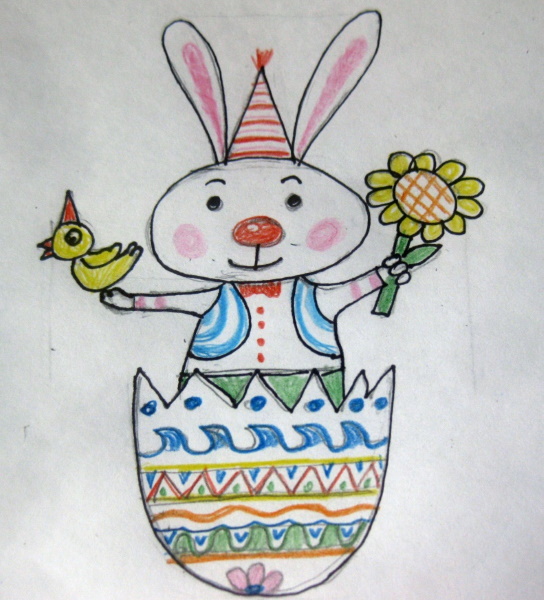
Master class - drawing an Easter bunny with a pencil
Materials and tools:
- Drawing paper (not glossy).
- Colored pencils.
- Simple pencil.
- Blue or light blue colored paper (double-sided).
- Scissors.
A hare is a drawing for children that can be timed to coincide with the holiday. Before drawing, it is worth telling that for Catholics - for example, in such European countries as Germany, Great Britain, Italy - the symbol of Easter is a rabbit (or hare), bringing multi-colored eggs. It is depicted on postcards and Easter attributes.
You can draw a funny rabbit for a postcard using this plan:
- First of all, you need to mark the sheet with a simple pencil. The image of the hare can be divided into 3 equal parts - ears, head, egg from which it looks out.
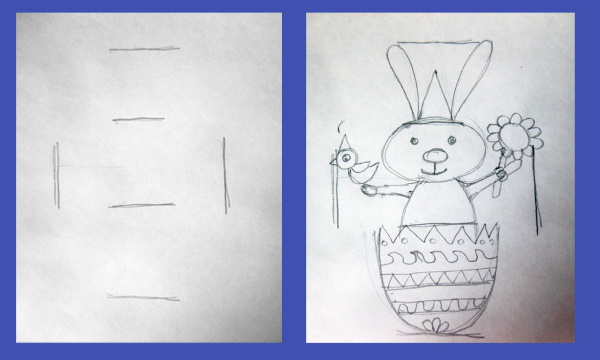
- Next, use a simple pencil to outline the image itself using geometric shapes and lines - half an oval (egg), ovals (for the head and body), lines (for the ears and paws).
- After this, you should draw the details with a simple pencil.
- Next, it is best to outline the main lines with a marker or liner, and only then erase all additional and unsuccessful strokes.
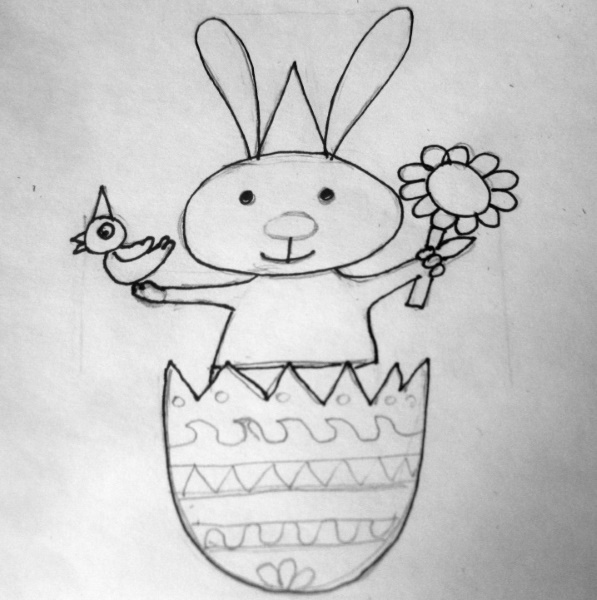
- Then the egg is decorated with a bright pattern, and the rabbit is painted in a calm range, using 2-3 primary colors.
- After finishing coloring the rabbit, you can cut it out (not necessarily along the outline) and glue it onto a blue or any other bright (preferably dark) background.
Master class – drawing a hare in love with a carrot
Tools and materials:
- Any paper for drawing.
- Felt-tip pens or markers (black and red).
- Simple pencil.
- Eraser.
Hare - a drawing for children and adults of any age, especially if it is a humorous character. The principle of drawing "cubic" animals is very simple. The basis is a square or rectangle with paws, to which you can attach the ears of a hare, cat, bear, dog, mouse.
The secret is in changing the expression of the face, so before drawing, you can repeat the main emotions (joy, anger, surprise, sadness) with children and how they are reflected on the face. The main thing is to show this clearly and leave simple smileys with emotions in front of the children's eyes. Then the children will be able to not just repeat the drawing of an adult, but to invent something of their own.
With the little ones, you can make up a fairy tale about a hare who found a sweet carrot and for a long time could not find a place to eat it, then a wolf would scare him away, then a bear would interfere, but then he met a beautiful rabbit and decided to give her the most precious thing.
You should draw according to the following algorithm:
- First, draw 2 rectangles, using lines to mark the position of the paws and ears.
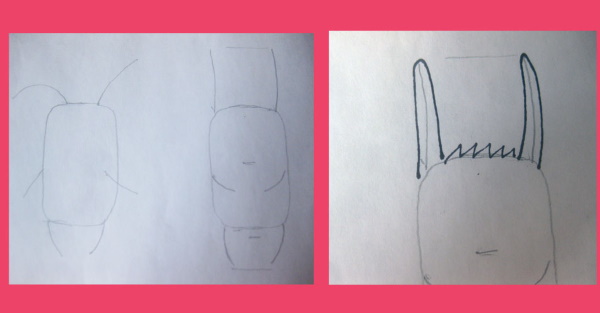
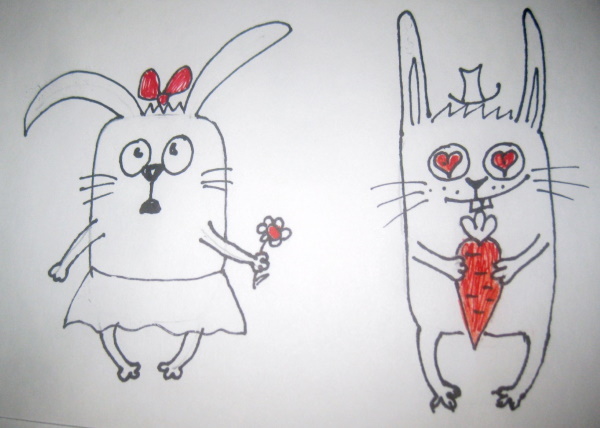
- Then draw the details of the image. You can draw the details with a pencil or with a black marker. In this case, you need to take into account that the paws of the gentleman bunny should be on top of the carrot, and the skirt of the female bunny also comes to the foreground.
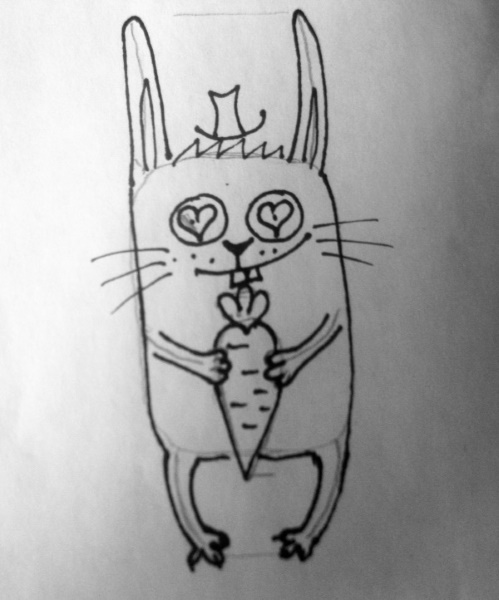
- Next, some details (hearts, carrots, bow) are painted red and a commemorative inscription is made, if necessary.
The funny hare and hare from this master class are a drawing that can decorate a postcard or a personal diary. Such funny images are not only for children, they can be used to make a confession or compose an emotional personal letter.
Video on how to draw a hare
How to draw a hare, simple algorithm:
Bunny is an interesting drawing for children.
Hello, to all readers of the site) This is my article, I hope that it helped everyone who read it) I tried very hard)