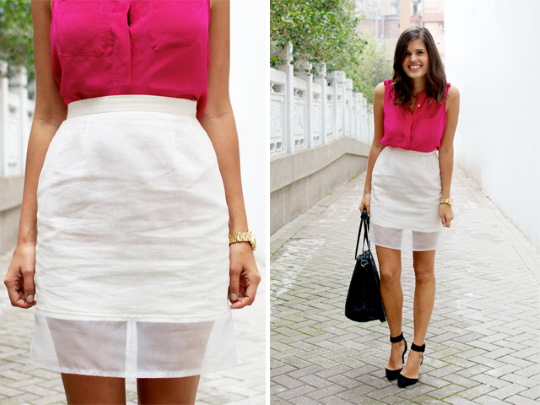
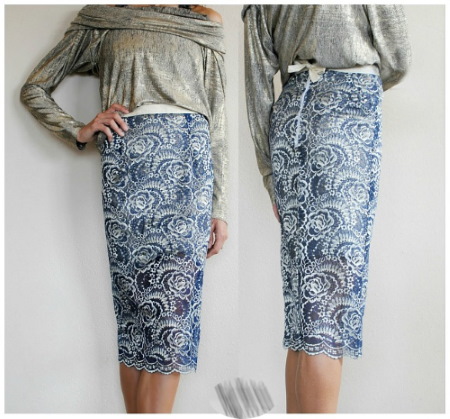
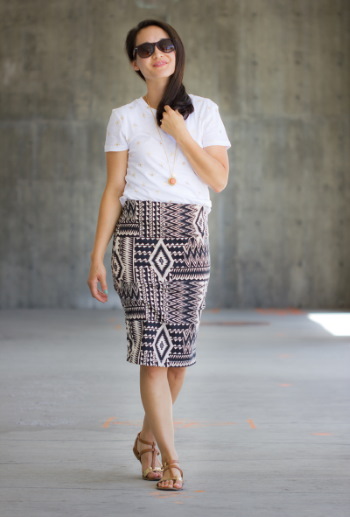
The pencil skirt is considered one of the universal items in a woman's wardrobe. It suits all body types because it has several different variations. To sew such a skirt with your own hands, you need to familiarize yourself with the rules for constructing a basic pattern, as well as learn how to correctly take measurements, calculate material consumption and what fabric to choose.
What fabric is suitable for sewing a pencil skirt
A pencil skirt should highlight all the advantages of women's hips and hide problem areas. Therefore, the choice of material for sewing such a thing depends on the type of figure, style and time of year in which you plan to wear the skirt.

It is important that the fabric holds its shape well and is elastic, then the skirt will not restrict movement. On items made from coarser materials, it is necessary to make a slit at the back or vents. Experienced seamstresses advise beginners to avoid loose and too thin fabrics.
These materials are not suitable for sewing this model, as they wrinkle a lot, quickly lose their shape and become unusable. If a snag accidentally forms on a chiffon or georgette product, then it will no longer be possible to hide this minor defect. You will have to completely remake the skirt.
The pencil model can be winter or summer. For wearing in the cold season, you should buy a dense material that retains heat well and lets in little air. For summer skirts, on the contrary, you need light and wind-blown fabrics.
The table below lists the materials suitable for different seasons:
| Time of year | Fabric name |
| Summer | Linen, silk, cotton, knitwear |
| Autumn | Denim, eco-leather, suiting fabric |
| Winter | Tweed, velvet, corduroy |
| Spring | Coton, satin, gabardine |
Depending on the style and purpose of the skirt, you need to choose the right fabric color. The classic pencil skirt is suitable for everyday office looks. Most often, companies introduce a certain dress code, so the color of the skirt should be monochromatic and not too bright.
Colorful patterns and large designs are suitable for summer and spring models. Skirts with yokes can be plain or with a small print. For festive options, an eye-catching, bright color, such as orange, is suitable.
How much fabric do you need? Calculation rules
A pencil skirt is considered one of the simplest models, so it is easy to sew it yourself. When buying material, it is important for beginner seamstresses to remember that you need to take fabric with a margin. But how to calculate the correct amount so that the margin is small and save money?
First, you need to take measurements. For example, the fabric calculation will be made with average values, all that remains is to substitute your numbers.
Parameters:
- half hip circumference – 50 cm;
- allowance for free fit in the hip area – 1 cm;
- seam allowances on the sides – 3 cm (1.5 cm on each side);
- seam allowance at the back – 1.5 cm.
The standard canvas is 1.5 m wide. If you fold it in half, you get 0.75 m. You need to subtract the rest from this value. Calculation: 75-50-1-3-1.5 = 19.5 cm. For this size, 1 length of material is enough. If the calculation result is negative, then you need to take 2 lengths of the product.
To find out the canvas consumption, the following values are needed:
- length of finished product – 60 cm;
- seam allowance at the waist – 1 cm;
- belt width – 6 cm;
- allowances for sewing the belt to the skirt - 1.2 cm on each side (2.4 cm);
- seam allowance at the bottom – 4 cm;
- allowance for fabric shrinkage – 15 cm.
Everything needs to be added up. Calculation: 60+1+6+2.4+4+15=88.4 cm. For convenience, the result should be rounded to 90 cm.
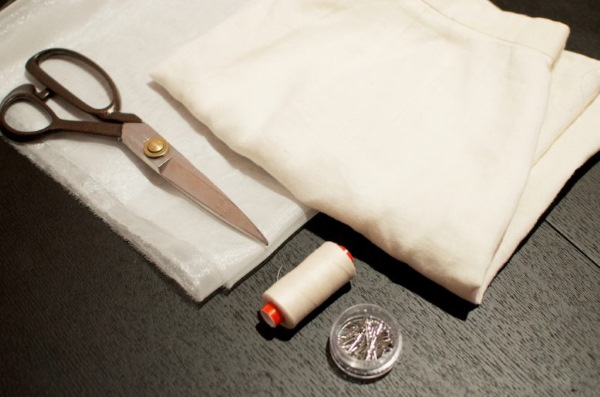
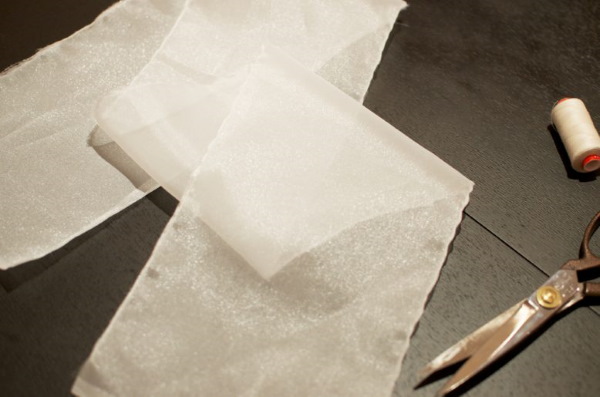
What you need to cut and sew a skirt
In addition to the fabric, you will need additional tools:
- sharply sharpened scissors;
- threads that match the texture and color of the material;
- chalk or a piece of soap for marking;
- a large plastic template or a long ruler for cutting;
- measuring tape;
- tailor's pins;
- sewing machine.
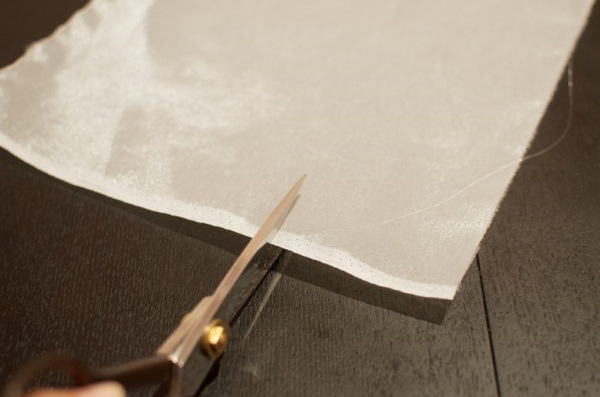
Professionals recommend that beginning seamstresses make a pattern on paper and then transfer it to fabric. This will make it easier to correct minor errors and flaws.
How to take measurements correctly
A pencil skirt (you can sew this model yourself in 40 minutes) should be comfortable to wear, so it is important to take measurements correctly. You can take measurements yourself, but beginners should ask another person for help, it will be more convenient.
First, you need to decide on the length of the product. Classic models slightly cover the knees. The tape is applied to the waistline. To accurately mark it, you should tie an elastic band 2 cm above the nape. Do not pull the elastic band too tightly or loosen it. It should fit snugly, but so that it is comfortable to move and bend.
The measuring tape is lowered to the knees and the resulting length is written down, for example, 60 cm. If you already have a skirt of the appropriate length in your wardrobe, you can measure it by placing the tape from the middle of the waist to the bottom edge of the hem.
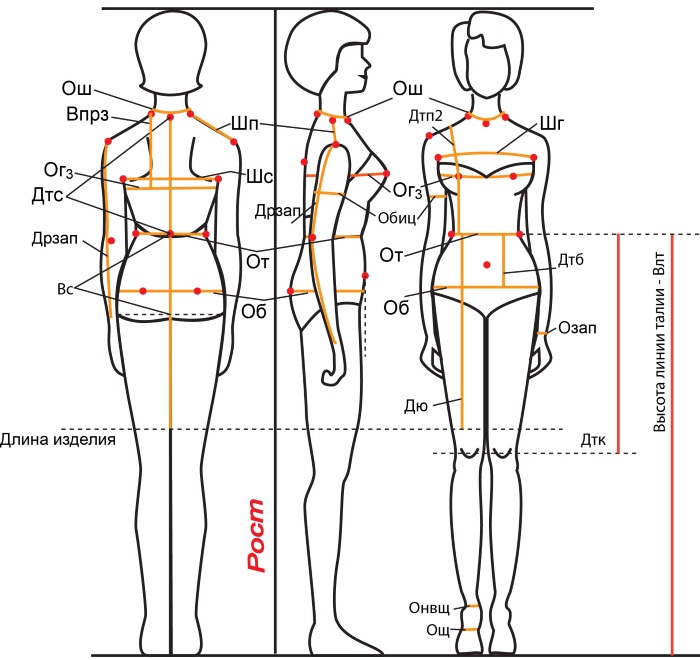
Now you need to wrap the measuring line around the waist, where the elastic is located and write down the obtained value. The last measurement is the hip line. The tape is laid along the most protruding points on the buttocks.
If a girl has a protruding belly, then you need to measure its lower part and write down the values separately. When constructing a pattern, you will need to make an allowance in this area so that the skirt fits well.
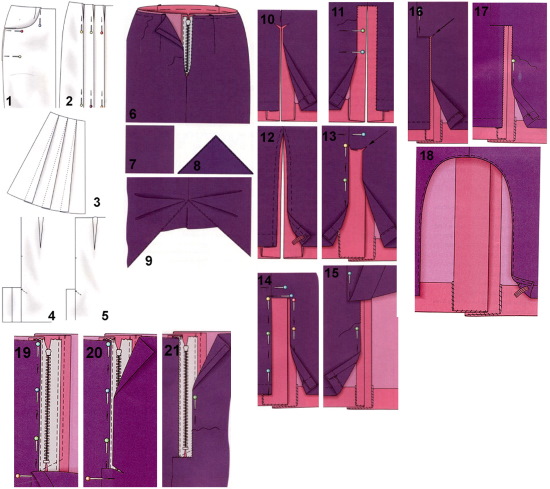
Step-by-step instructions for making a pencil skirt pattern for beginners
A pencil skirt, which is easy to sew with your own hands, should fit well to the body, so it is important to construct the pattern correctly. For the drawing, you will need a ruler, pencil and scissors to cut out the resulting shape and transfer the markings to the fabric.

This model is based on the basic pattern of a straight skirt. The main feature is the narrowing towards the bottom. The intensity of narrowing is determined individually, depending on the body type. Girls with curvy ankles and hips should make the bottom of the skirt a little wider than those with slender figures.
In order for the sewn skirt to look elegant and emphasize the roundness of the hips and the beauty of the legs, it is necessary to make several darts. With their help, the product masks minor flaws well.
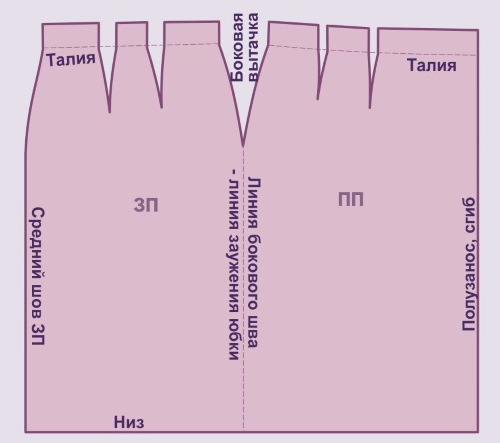
Sideline
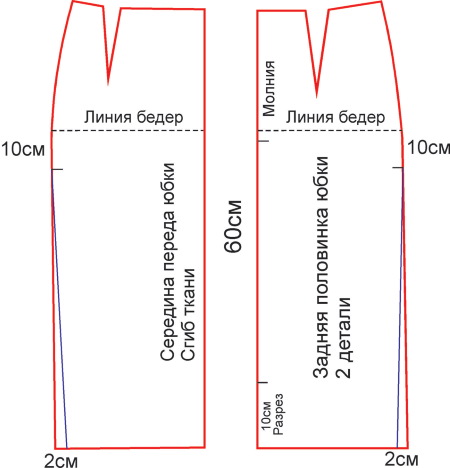
First, you need to draw a rectangle, the width of which will be equal to the half-girth of the hips with an increase of 2 cm. The length of the rectangle is equal to the length of the finished product. The resulting figure should be divided into 2 parts. One of them should be narrower than the other by 2 cm. The narrow part is the back of the skirt, and the wide part is the front. The drawn line is called the side seam line.
Hip line
To mark this line, you need to:
- Mark the top and bottom on the drawing.
- From the top, you need to step down 18 cm. This value is considered standard and fits all sizes. In rare cases, you will need to set aside not 18 cm, but 23 cm. To make an individual calculation, you need to measure 1/2 the length of the back to the waist.
- At the bottom you need to put a dot and draw a horizontal line.
This line shows where the highest points of the hips are located.
Calculating the size of darts
There are also standards for darts that change only in some cases:
- To mark the darts along the side seam, you need to set aside 3 - 3.5 cm from this line in both directions and mark with dots. Then draw a semicircular line, not reaching the hip line by 3-4 cm.
- To design the front darts, you will need to step back from the center of the front to the side seam about 12 cm and put a point. It will be located in the center of the front dart, the width of which is 3 cm, and the depth is 10 cm. All that remains is to draw a triangle according to the specified values.
- The back darts are determined in a similar way. From the middle of the back panel, you need to step back 10 cm towards the side seam and put a point indicating the middle of the dart. Its solution is 5 cm, and the depth is 13 cm.
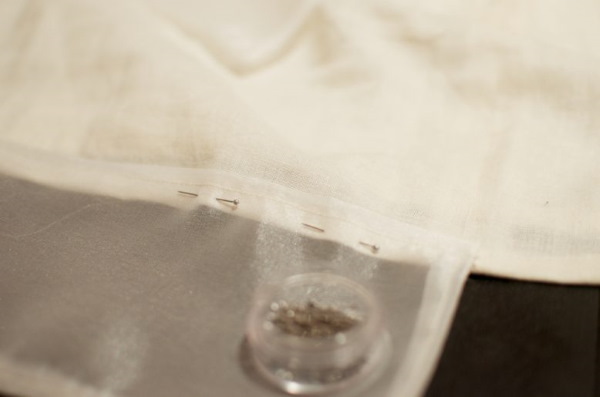
To select the size of the darts individually, you need to transfer the pattern to the fabric, cut out and stitch the side seams (not all the way to the top). Then, using pins, mark a convenient location for the darts, their depth, and solution.
Belt pattern
The standard width of the belt is 3.5 cm. When unfolded, the width of the belt will be 7 cm. You need to draw a rectangle with a height of 7 cm and a length equal to the waist size.
The length should be increased by 6 cm for the fastener, and 1 cm for a loose fit. To make the belt more rigid, interlining should be glued to the back of the fabric. You can add several belt loops.
Step-by-step instructions for sewing different variations of a pencil skirt with your own hands
A pencil skirt (you can sew it yourself in several versions) varies in style. Depending on the specific model, the fabric consumption increases or decreases. If a material with a colored print was chosen for work, it is important to make sure that the pattern along the seams matches. To do this, you should buy fabric with a reserve of 1 meter.
High waisted
This model will require a slight modification to the basic pattern:
- Raise the waist line by 6 cm and mark this area with point A1.
- Point A will need to be moved 1 cm to the right.
- Draw a smooth line between points A2, A and B1.

Before sewing all the parts together, you need to try on the product and see if it fits well on your buttocks. If there is not enough volume, you will have to make several folds at the bottom.
With one seam
A one-seam skirt is much easier to sew and construct a pattern.
Experienced seamstresses recommend that beginners take this model as their first work:
- In this case, the pattern will not be 1/4, but 1/2, which means that you don’t need to fold the material in half.
- The fabric is turned face down and the pattern is traced twice, positioning them so that the side line of both parts is common.
- The resulting workpiece is cut out.
The notch that is formed on the side is a side dart. At the top, you need to place the zipper.
With a yoke
The yokes differ from each other in shape. They can be simple or figured.
If you plan to make a pencil skirt with this element, then:
- The pattern is first duplicated on paper.
- Draw the necessary elements and folds.
- They cut the material into pieces.
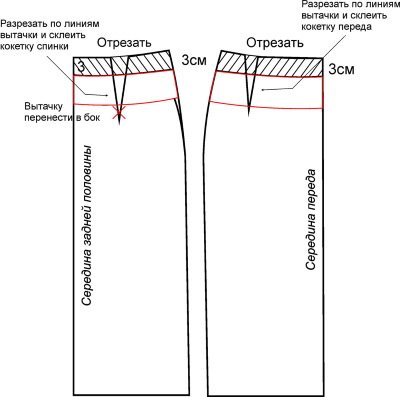
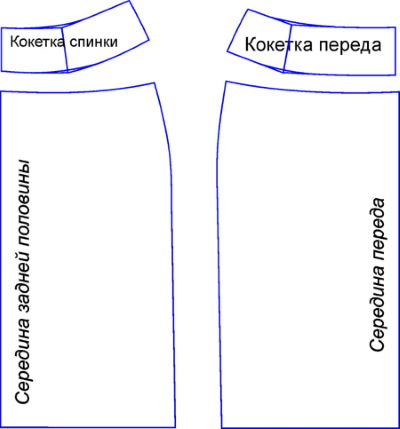
When cutting the pattern, remember that the darts should be closed. If you plan to add a yoke to a high-waisted model, then you do not need to make turns at the waist. It is enough to reinforce the fabric with interlining on the back side.
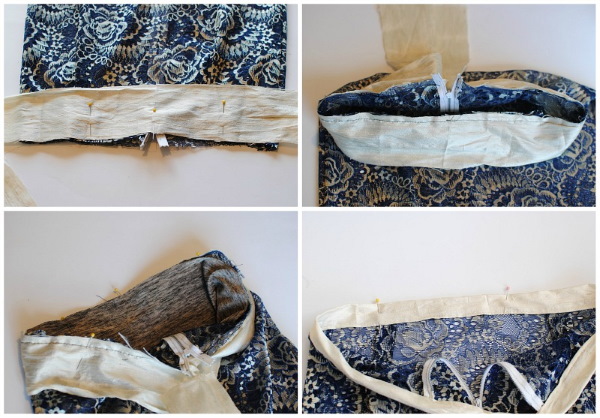
With lining
The lining helps to thicken the thin fabric and also prevents the material from becoming electrified. The skirt will not stick to your legs or rise while you walk. This element is sewn from thin fabric, using the basic pattern as a guide. The lining should be slightly shorter than the main skirt.
How to sew the lining correctly:
- The pieces are sewn together along the seam in the middle.
- The lining is applied to the skirt, with the wrong sides facing each other.
- Carefully stitch the lining to the fabric along the main seams.
If you plan to make a slit at the back, then you need to make additions on the main skirt on the sides of the solutions of 1.5 cm. The lining is placed strictly along the lines of the slit, and the edges of the skirt are ironed and stitched. The lining fabric ends up inside the seam.
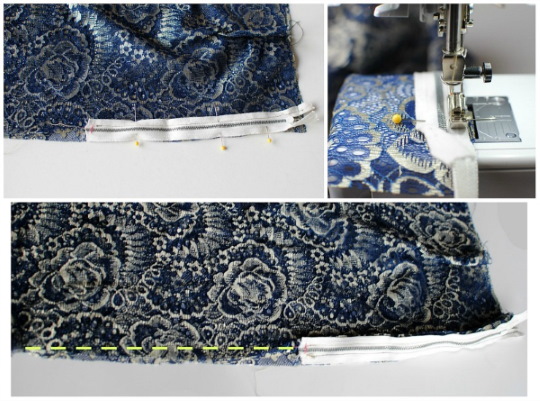
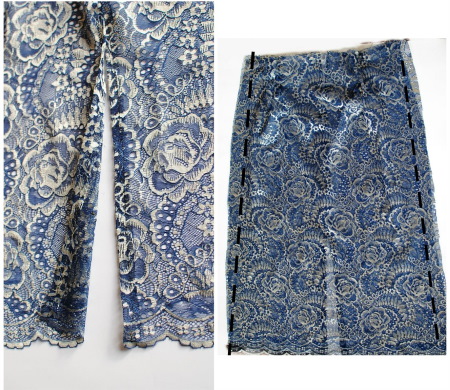
With smell
One of the simplest models. You will need to cut out a triangle, the width of which is 1.5 m, and the length is equal to the length of the finished product.
Step by step:
- The bottom and sides need to be processed.
- Wrap the material around your waist so that the top corner is on the right side and the second corner is on the left side. Pin the edges.
- Determine the location for the fastener and make a cut.
- Separately cut out a rectangle (at an angle) with a length equal to the waist circumference and a width of 3 cm. Sew the piece to the skirt, turning the elements with the right side inward.
- Fold the second edge of the belt and stitch. Turn the belt to the wrong side of the skirt and fix it.
This model will have a slit in the front, which will slightly reveal one knee.
Knitted skirt with elastic
This summer model, without darts, in a sporty style:
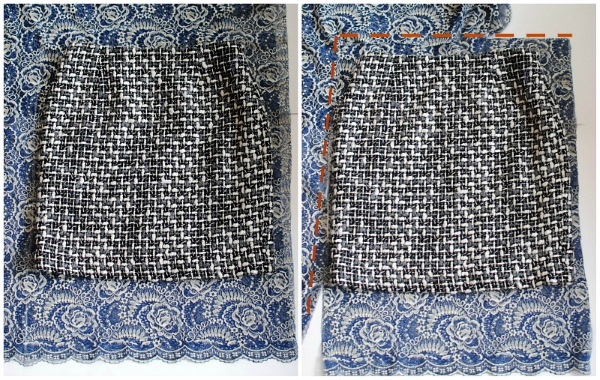
- Draw a rectangle on the fabric, the width of which is equal to the waist circumference with an allowance of 3 cm for the seam. The height of the figure is the length of the skirt with an allowance for the hem.
- The rectangle is folded in half, with the halves of the fabric facing each other, and stitched.
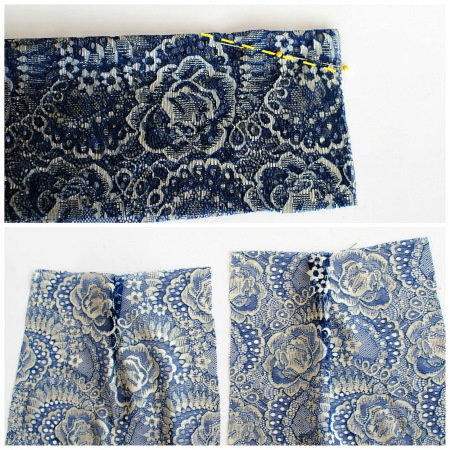
- All that remains is to cut out a belt 7 cm wide, fold it in half, and sew it to the skirt, leaving a drawstring for a wide elastic band.
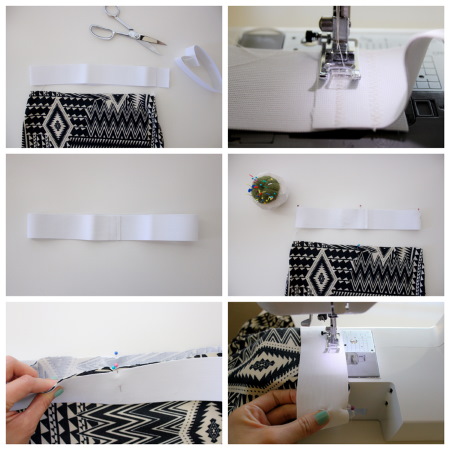
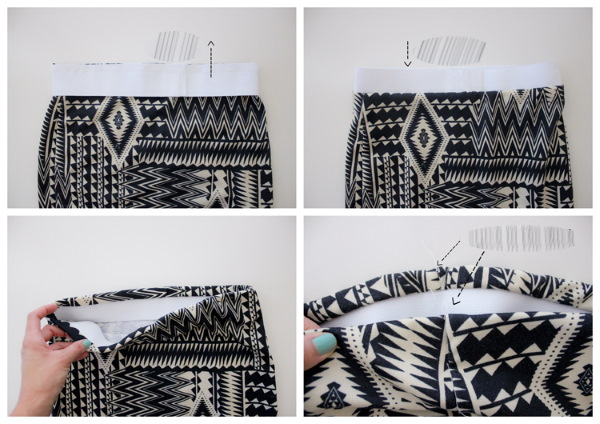
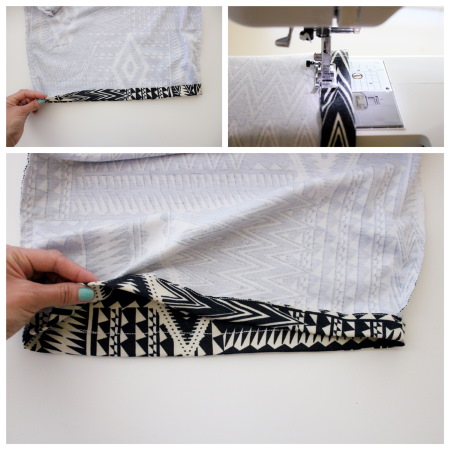
Carefully insert the elastic into the hole, sew its ends together, and then close the drawstring with a blind stitch.
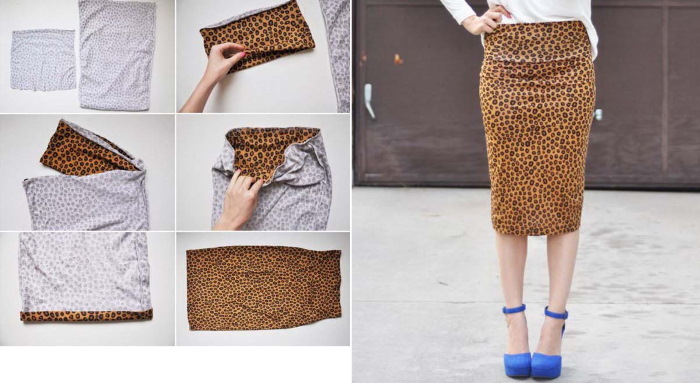
How to sew a skirt without a pattern
The fastest and easiest option for sewing a pencil skirt, of all the above. This style, like a skirt with an elastic band, can be attributed to the sporty style. This model will not look as elegant as more complex options, but is suitable for a summer look.
Step by step:
- You will need elastic fabric of the same width and length as the size of the skirt.
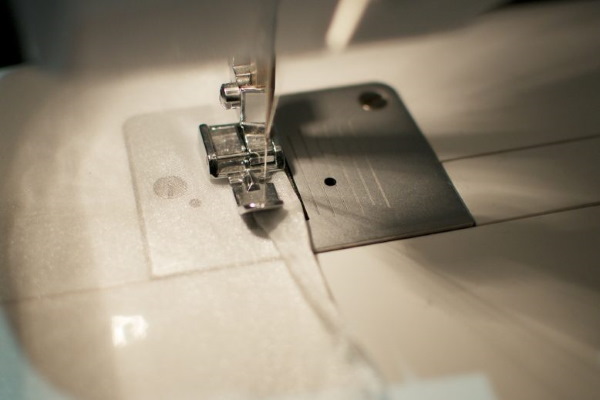
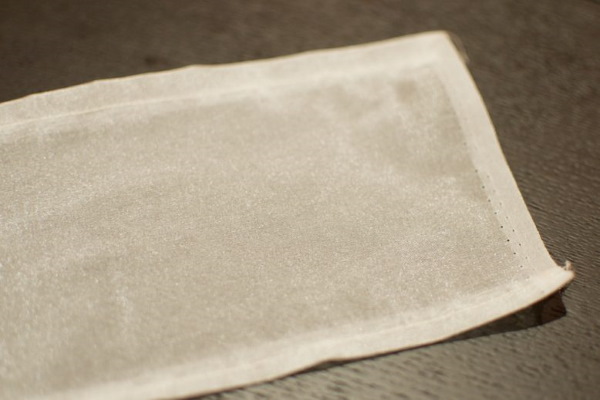
- You need to cut out 2 identical pieces from it and sew them together, making a wrap.
- The edges must be processed using an overlock machine.
It is better to use a button and a loop as a fastener rather than a zipper.
It is easy to sew a pencil skirt with your own hands. The main thing is to take the right measurements and buy the right material.
By following step-by-step instructions and recommendations from experienced seamstresses, you can easily and quickly update your wardrobe by sewing several skirts of different styles and colors.
Video about sewing a pencil skirt
DIY pencil skirt without a pattern: