The easiest way to draw a camel is from the side, using simple geometric shapes and lines. To make the drawing look like a real image of the animal, you need to take into account the main elements of its figure - a large body, a long wide neck and legs, massive at the body.
For children it is recommended to choose soft colored pencils, which are marked "2M", since the usual ones draw palely and require significant effort when coloring large areas of the drawing.
You can also buy watercolor pencils, which are made from a special watercolor composition. They are more expensive than regular ones.
Their difference is that they are shaded with water like regular watercolor paint. But they can also be used for painting in the regular, "dry" technique, and they look much brighter on paper.
Simple pencil drawing
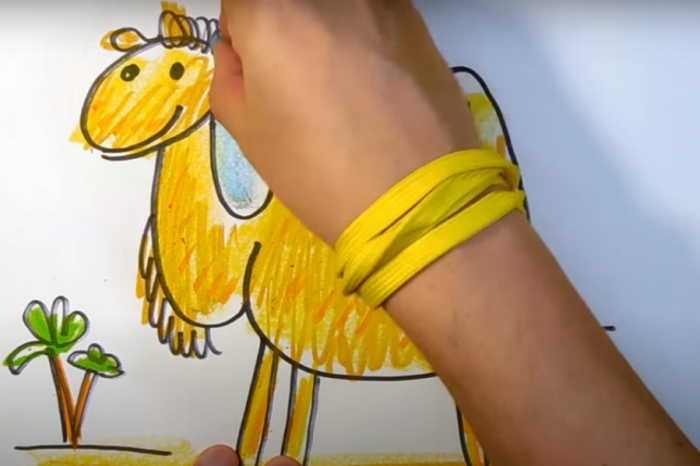
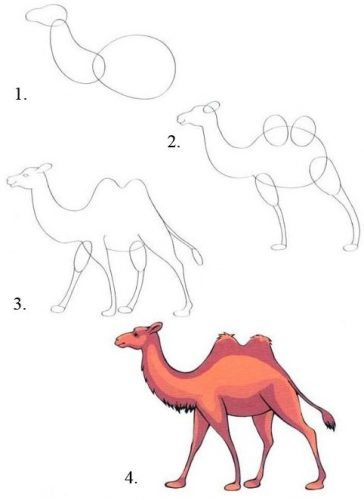
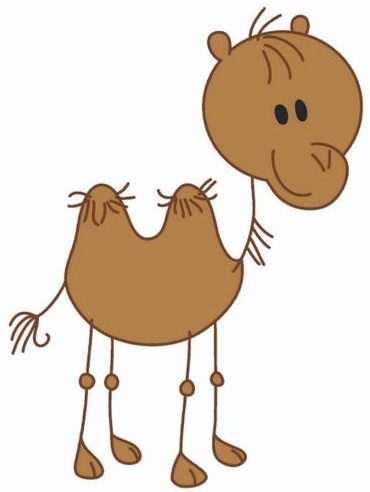
A camel (a drawing for children aged 3-7 in a simple technique is done without a preliminary sketch) can be drawn using several elements. Individual elements may need to be practiced on a separate sheet of paper or with the help of an adult (for example, the lower part of the neck). For work, you need black, brown, yellow and orange pencils.
The detailed step by step process of drawing a camel is as follows:
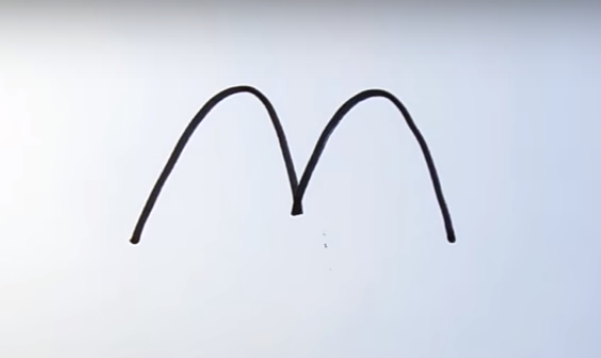
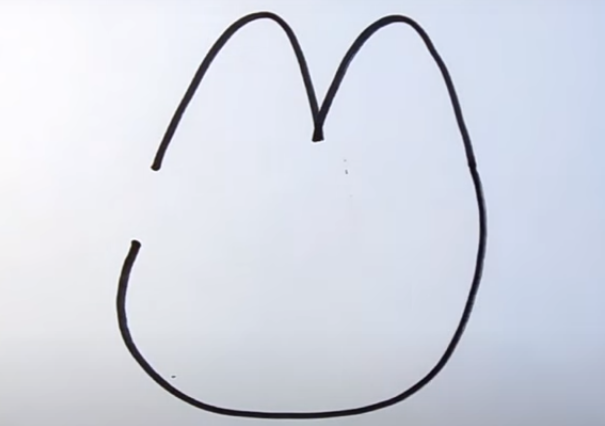
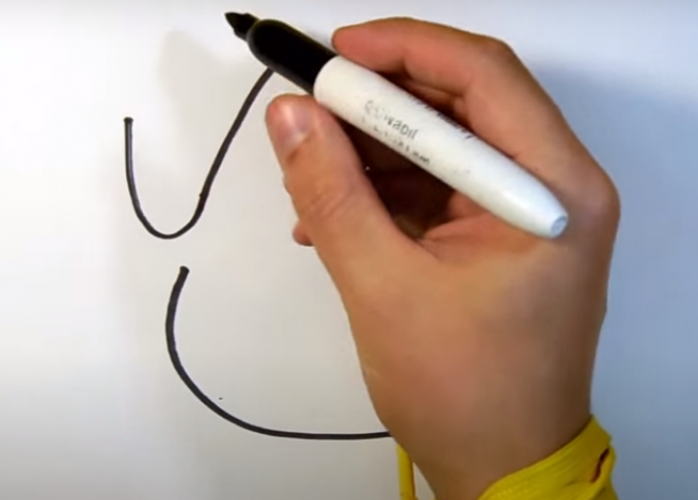
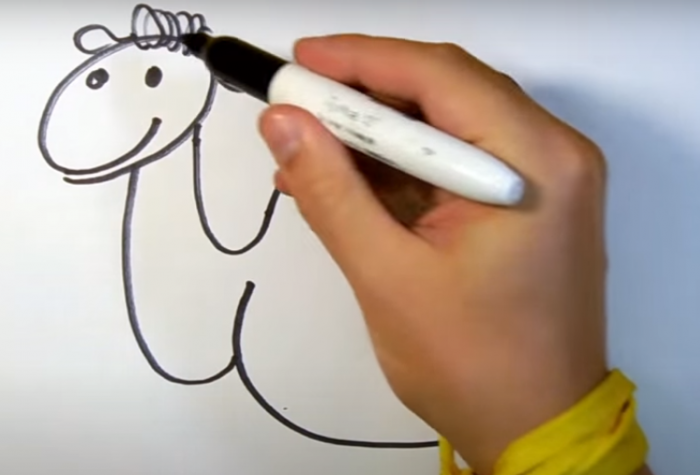
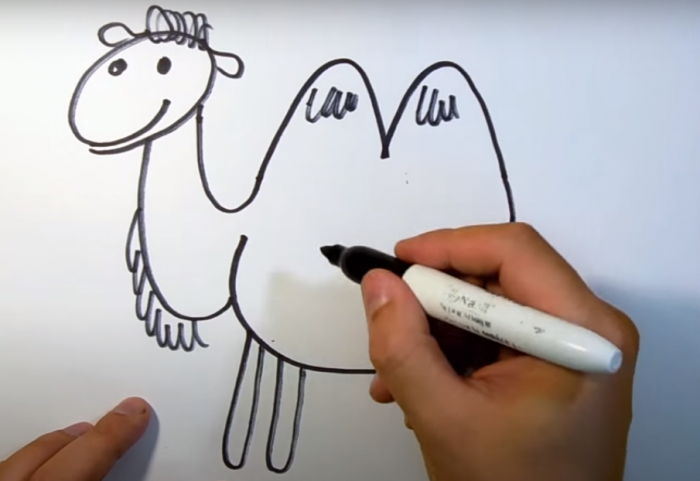
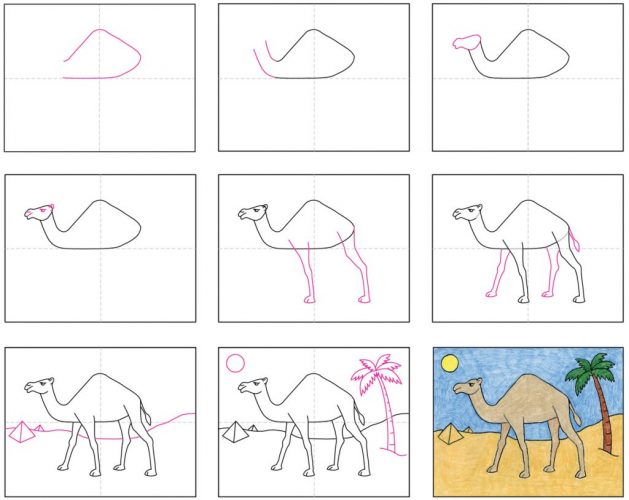
- First, you need to draw 2 wavy lines that will represent the animal's humps. It is not necessary to make them perfectly even, since the image is not done in a realistic form, but in the form of stylization, when the curvature and unevenness give the drawing its unique individuality.
- Next, draw the animal's belly in the form of a large semicircle, leaving a gap on the left to attach the neck.
- After this, you should draw the curve of the neck in the form of a steep arc downwards.
- Then draw the head by drawing a medium-sized oval to the left and above the neck. Now the recognizable outline of the animal is beginning to appear.
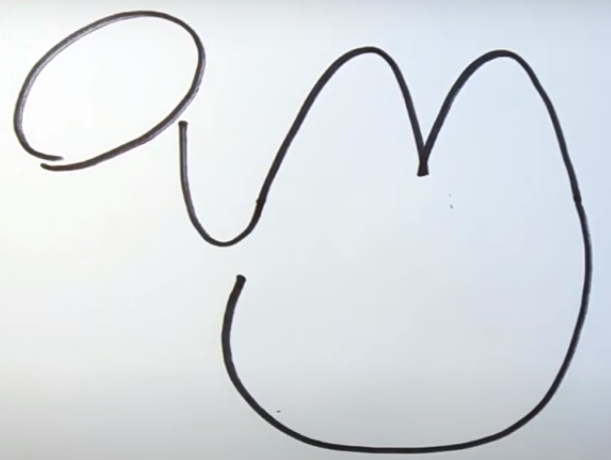
- Next, you need to draw the lower part of the neck, also in the form of a steep arc. The camel's neck should be wide, so you should not draw the lines too close to each other.
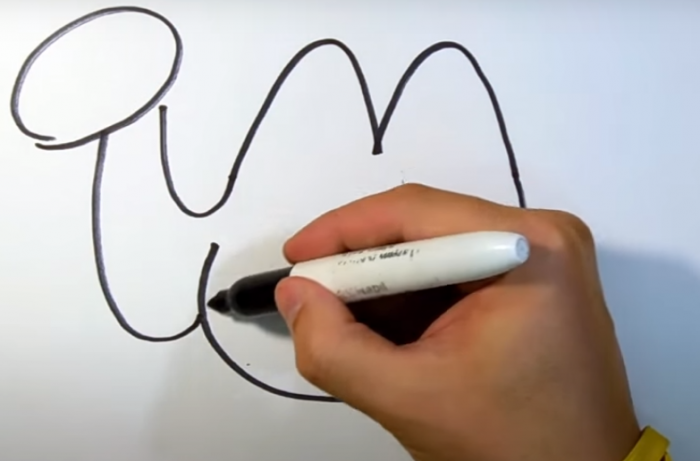
- Now you can draw the details of the camel's face - a smiling mouth in the form of an arc and eyes in the form of circles or ovals.
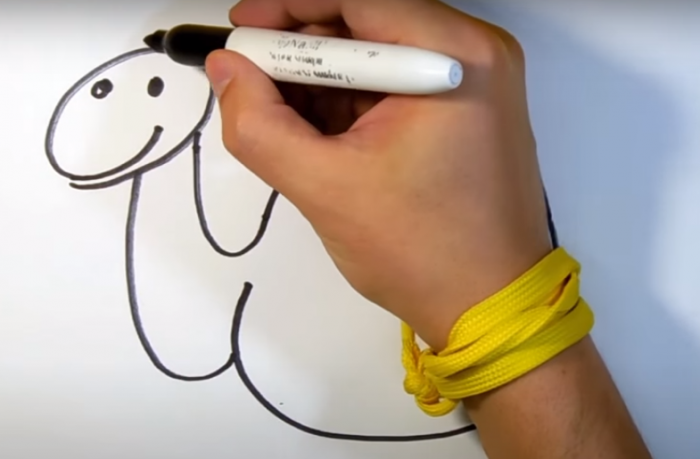
- The animal's ears can be drawn in a simplified way - in the form of small loops on the sides of the head.
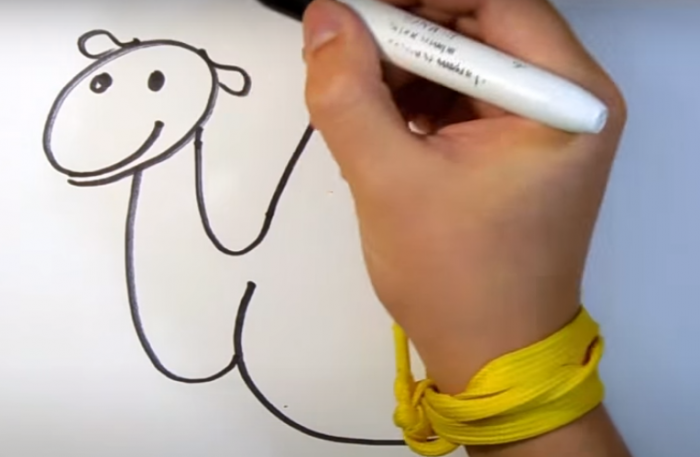
- Draw curly hair on the top of the head.
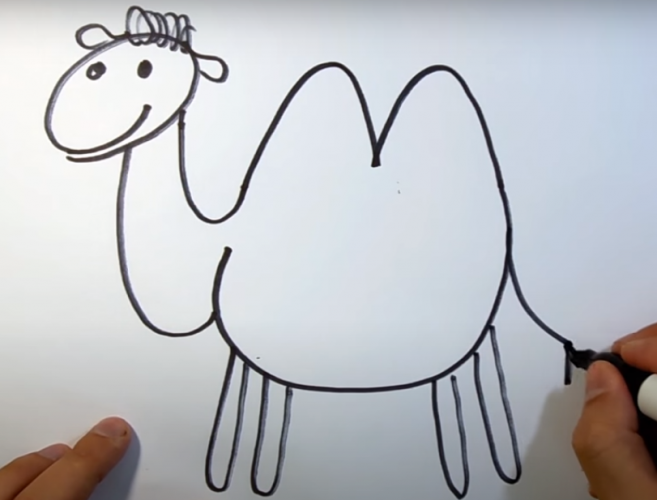
- The camel's legs can also be drawn in a simplified way - in the form of stripes, two in the front part of the body and two in the back.
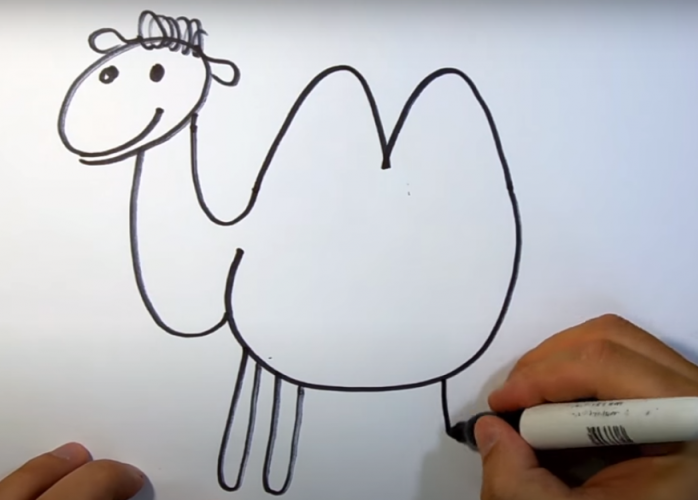
- At the back you need to draw a tail in the form of a line with a tassel at the end.
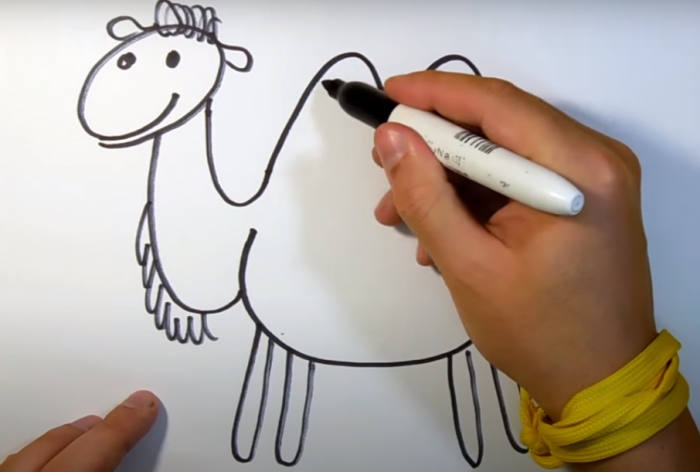
- Now comes the most interesting stage – adding details to the drawing. At the bottom of the neck and on the humps, you need to draw wavy hair. On the neck, it will hang down, and on the humps, it will be directed inward (although you can draw it upward). If desired, add other elements, for example, a bow on the tail, a bridle on the muzzle, or “throw” a colored carpet on the camel’s humps for the rider.
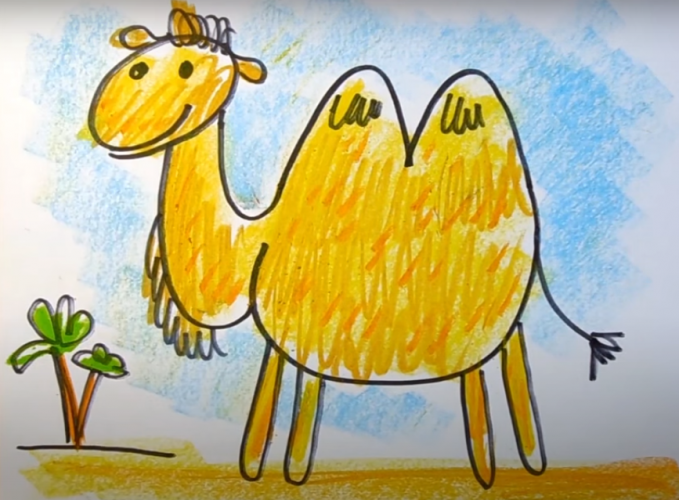
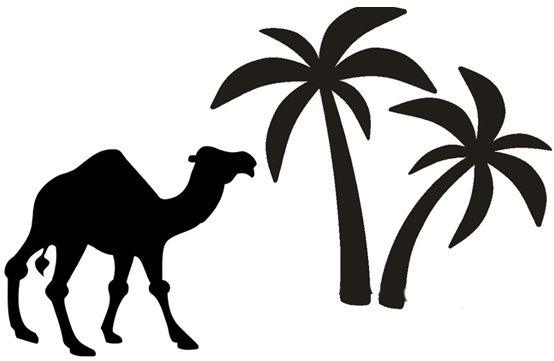
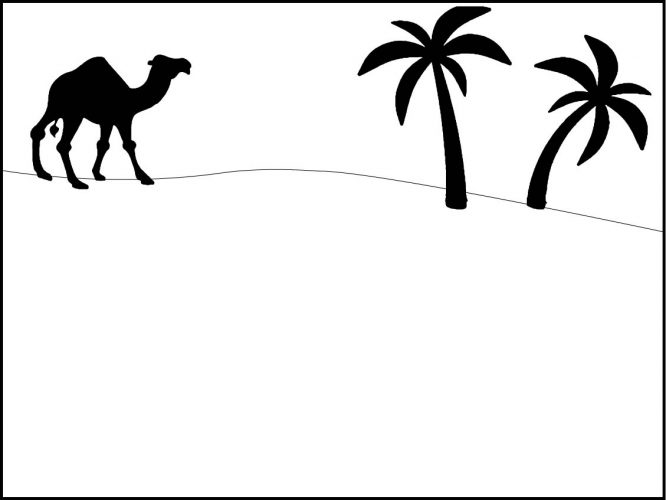
- If desired, you can add small palm trees to the bottom of the drawing, which are also drawn in a simplified manner - in the form of a rectangular trunk and leaves similar to flower petals, but only on one side - from above. Then draw a horizontal line under the palm trees, indicating the level of the ground on which they grow.
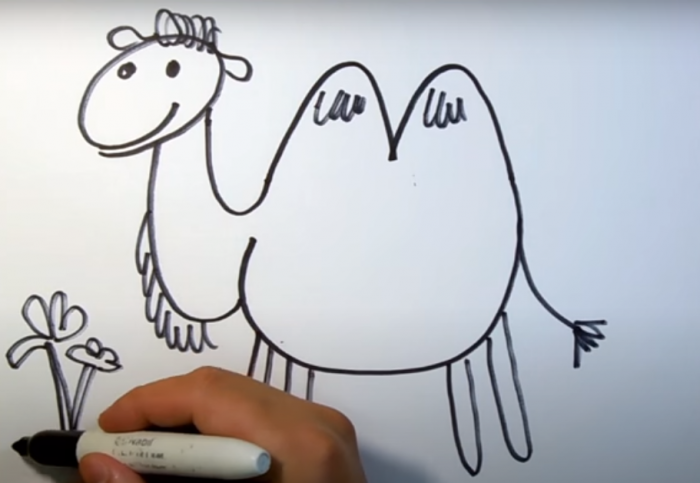
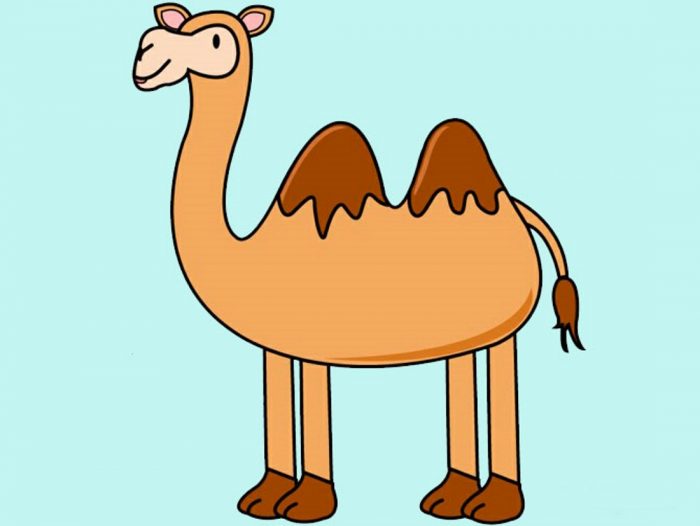
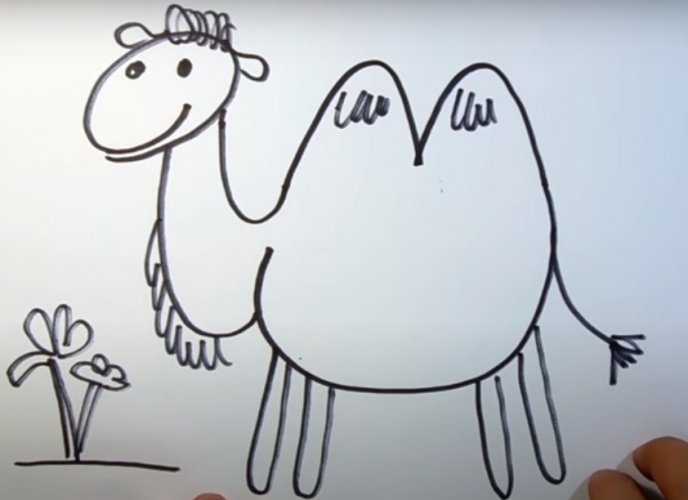
- As a result, you will get a contour drawing like this:
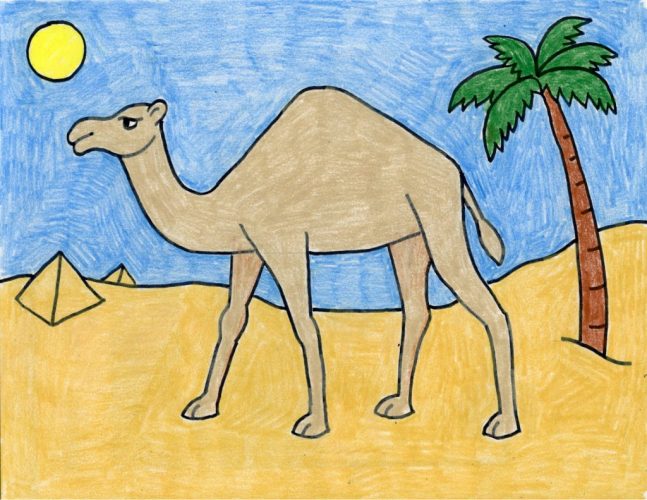
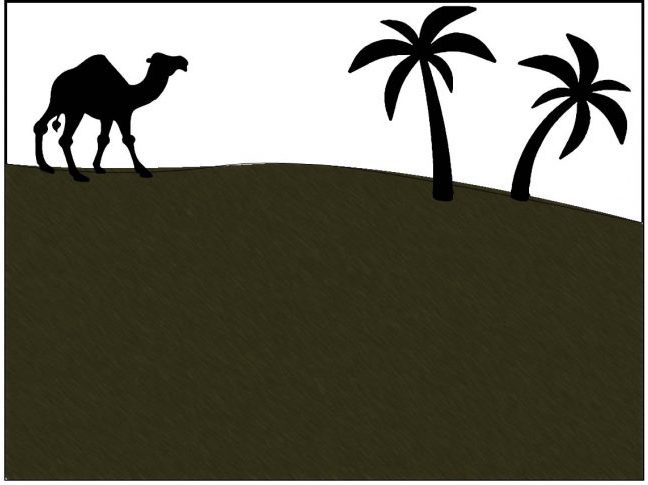
- Next, it needs to be colored. Since the camel is associated with the desert, it is better to use yellow and brown pencils. First, you need to color the sand under the animal and its figure with a yellow pencil. Then, in the part where the fur was drawn, add brown. You can color with linear strokes, a zigzag, or circular movements. It is easiest for small children to do this in the last way. To give the animal a “woolly” texture, you can add short strokes with an orange pencil. In this case, it is best to direct them in one direction.
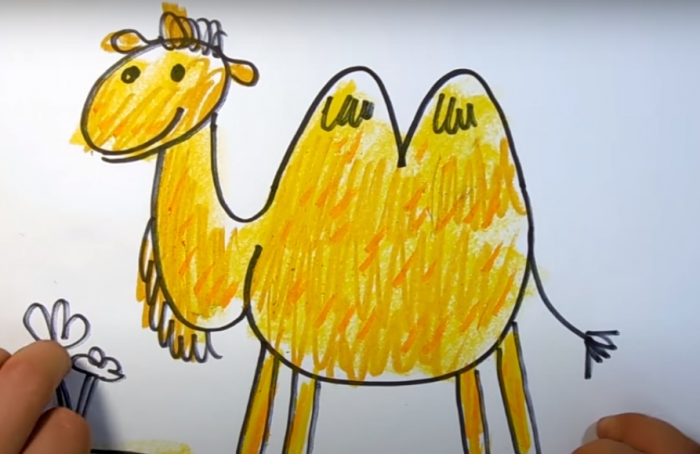
- The trunks of the palm trees should be colored orange or brown, and the leaves - with a green pencil. After that, you can color the sky blue, or leave the background white.
This is what the finished drawing looks like:
The camel (a drawing for younger children can be done with wax crayons, which allow you to immediately get bright and wide lines) looks beautiful on a painted background. If watercolor pencils were used in the drawing, they can be washed out with a brush and water.
Another popular method is to blend pencil dust, which is obtained by sharpening the tip of a pencil with a knife or sandpaper. However, for safety reasons, this should be done by an adult so that the child does not get hurt. The dust is rubbed with fingertips or a piece of paper that can be rolled into a tube in the shape of a pencil.
One-humped camel
In the previous example, a simplified method of drawing a one-humped camel was already considered. In this drawing, the animal's figure will be worked out in more detail and will become more realistic. This method is suitable for school-age children. Just as in the previous case, you first need to draw the outline of the animal, and then color it.
For the outline, you need to use a simple graphite pencil, which can be erased with an eraser in the necessary places and for quick correction of lines.
The step-by-step drawing process is carried out according to the following scheme:
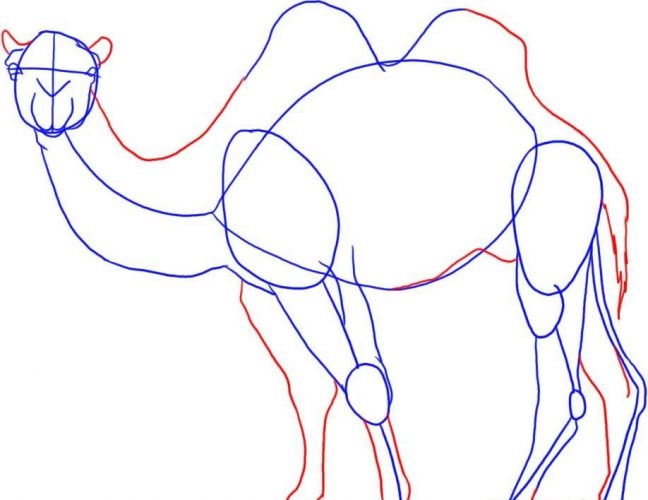
- Since the central part of the composition will be occupied by a camel, for its correct placement it is recommended to first draw lines that divide the sheet of paper in half - horizontally and vertically. The belly of the animal must be drawn exactly along the horizontal line. The upper part of the body should be given the shape of a triangle. The body of the animal should look massive, so you should draw a fairly large figure. Camels are large animals.
- Then, on the left, you should draw a curved neck, the outline of which is made in the same way as described above.
- The third step is to draw the head. Since it has a rather complex shape, to simplify the work you can first draw an oval that tapers towards the end of the camel's muzzle, and then finish the elongated jaws, raised nose and convex lips.
- After that, using simple lines, as shown in the picture, add the details of the muzzle - a nostril, an eye, an ear and a mouth. To make the ear look more "voluminous", you can draw a small arc inside.
- Now you need to draw the first pair of legs of the animal. Since the camel will be depicted in motion, they need to be moved back. It is also necessary to take into account the anatomy of the animal - the front legs bend inward at the knees, and the back legs - outward. These bends are simplified and drawn in the middle of the leg length.
- The second pair of legs should be shorter than the first, as they "go" into the background, that is, are located further from the viewer. They should be set at an angle forward. The tail is also depicted as a tassel.
- Then you need to draw the horizon line. In this case, it goes approximately in the middle of the camel's legs. Here it is necessary to take into account that the lower the horizon line, the shorter the height of the observer who looks at the drawing seems. That is, if you draw it very low, the viewer's eyes will be practically at ground level.
- The pyramids in the distance are drawn as two triangles with a common side.
- Next, you need to draw a curved trunk of a palm tree, which is also located behind the camel, so the ground level will be higher than the animal. The leaves of the palm tree can be depicted as arcs, with jagged edges drawn on the underside. On the trunk of the palm tree, from its base, lines are drawn that gradually shorten. They also give a sense of perspective, as if the trunk of the tree goes high up. On the left side of the drawing, the sun is placed in the form of a circle.
- Before coloring, you need to erase the extra lines that were made with a simple pencil and outline the contours with black. To prevent the shading from going over the contours, when approaching them, color parallel to the lines.
The camel in this drawing for children is painted in one tone. Volume of the animal's figure can be given by using a darker color on its belly, neck and legs. You can also draw a shadow falling from the legs at an angle from the sun and add other details - clouds, wool, a camel driver. A clear example of shadow overlay is shown in the following drawing.
Bactrian camel
In this example, the camel's body is drawn in a different way - it is divided into several large elements, which are then connected with an outline and additional elements are gradually added. Therefore, the drawing style is more reminiscent of academic. Here you will also need a simple graphite pencil and an eraser.
A more realistic image can be drawn from a photograph of the animal. The peculiarity of this drawing is that due to additional shadows the animal becomes "voluminous".
The camel (a drawing for children in pencil is presented below) is performed in this case in the following sequence:
- The animal's body is depicted as a large oval, the neck as a curved oval, and the head as an oval flattened from the side of the muzzle. To better understand the proportions of a camel and their relative position, you can use the following drawing:
- Now you need to draw 2 humps, an ear, massive upper parts of the legs and feet. All these elements are made in the form of ovals of different sizes, as shown in the picture. Straight sections of the legs can be depicted in a simplified way, in the form of curved arcs.
- At the next stage, you need to draw the second pair of legs, the tail and outline the contours with a pencil, simultaneously working on the details and making smooth curves of the animal's body. Erase unnecessary lines with an eraser.
- The camel is painted layer by layer, starting with a lighter pencil. The lower areas that need to be shaded need to be painted with a darker color. To get a smoother transition of shades from the lightest to the darkest, a third, intermediate tone is used. Instead of brown pencils, you can take yellow and orange. The fur on the neck and tail tuft is drawn with a black pencil or pen.
Using this method, you can draw any type of animal, the body and limbs of which are divided into simple geometric figures, observing the general proportions and arrangement of elements.
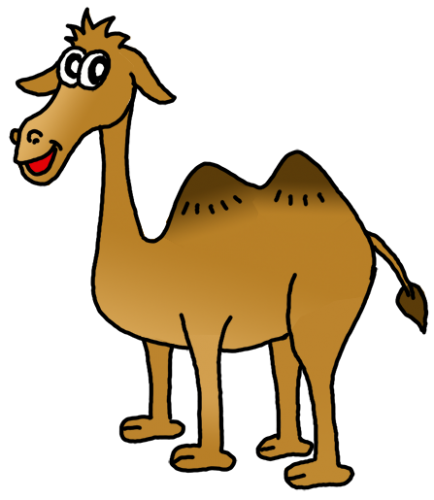
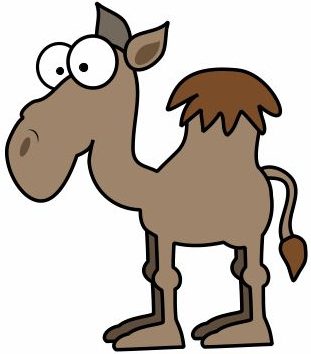
Cartoonish
When drawing a cartoon camel, you don't have to be too precise in proportion. It's enough for the animal to be recognizable. In this example, the drawing starts with the eyes, not the body outline, since the most important thing is the cheerful, cartoonish character of the character.
The step-by-step method for drawing such a camel consists of following the following recommendations:
- First, you need to draw close-set oval eyes, color the pupils in them with a black pencil, leaving small white spots that depict highlights.
- The second stage involves drawing zigzag hair and hanging ears. To make it easier to draw curved lines, the ears can be made in the form of circles or triangles.
- Next, you should draw the outline of the muzzle and add a smiling mouth.
- The animal's neck is depicted as longer, and its lower part transitions into a massive body.
- After this, draw the animal's front straight leg with a small thickening at the top.
- The second foreleg in the background should be shorter than the foreleg. It is worth noting that real camels do not have hooves. They have two claws protruding from their soles, which help them walk on soft, hot sand. In this drawing, the animal's feet are depicted exactly like this.
- Now you need to draw two humps, and show the fur on them very conditionally - in the form of short straight strokes. At the same time, draw the back leg, which should be thicker than the front one.
- Then add the last leg and finish drawing the belly at the bottom.
- At the next stage, draw a tail with a tassel.
- You can color a cartoon animal not only in traditional yellow-brown colors, but also in brighter and more unusual ones.
If the curves of complex contours do not work the first time, then this drawing can be used for copying.
A camel (a drawing for children can also be done in a stylized form) is obtained using the same principles, taking into account the features of the animal's body structure, which have already been described above.
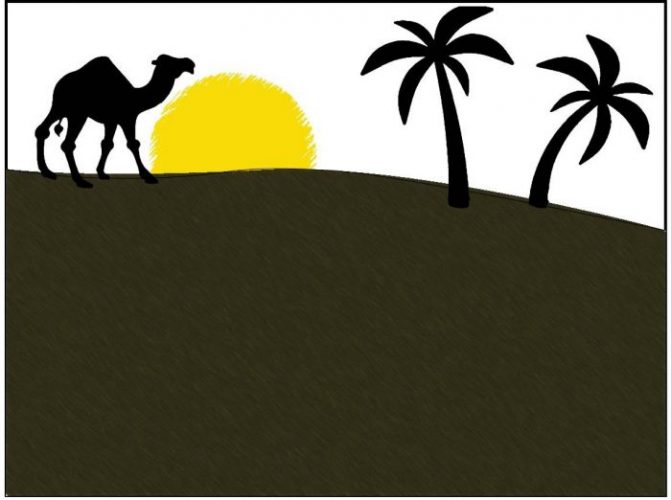
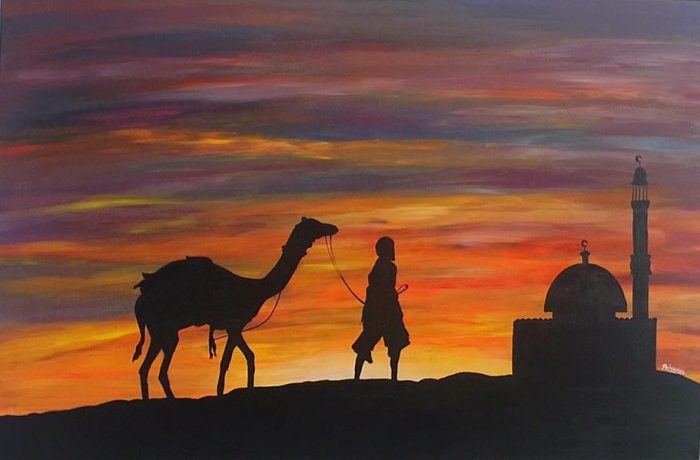
Camel with palm trees
This drawing is made using a different technique – using stencils. Despite such a simple option, the drawing turns out very picturesque. As a stencil of an animal and palm trees, you can use printouts from the Internet, which are cut out of paper or cardboard along the contour. It is better to choose stencils with simple contours and wide elements, as they are easier to cut out and paint.
You can take the stencils below. Depending on the size of the paper on which the drawing will be made, they are reduced or enlarged by stretching the edges of the image.
The drawing is done as follows:
- First, you need to draw a horizon line, apply stencils and outline them with a black pencil.
- After that, you should paint the palm trees and the camel black (or dark brown). This color is chosen because the animals will be placed against the backdrop of the setting sun, when all objects appear darker.
- Now you need to paint the sand in the foreground black or dark brown. If it is difficult to do this with pencils, you can paint it with watercolors or gouache.
- After that, you need to draw a semicircle on the horizon, which symbolizes the sun, and color it yellow. The edges of the circle do not have to be shaded exactly. "Torn" edges will look more stylish and interesting.
- Then you should paint the sky in the colors of the sunset. In this example, a minimum of colors are used, but the drawing will be brighter and more saturated if you take several pencils for coloring - yellow, red and orange, in different shades. If you apply colors in layers (paint first with one color, and then with another), you can get interesting shades and color transitions.
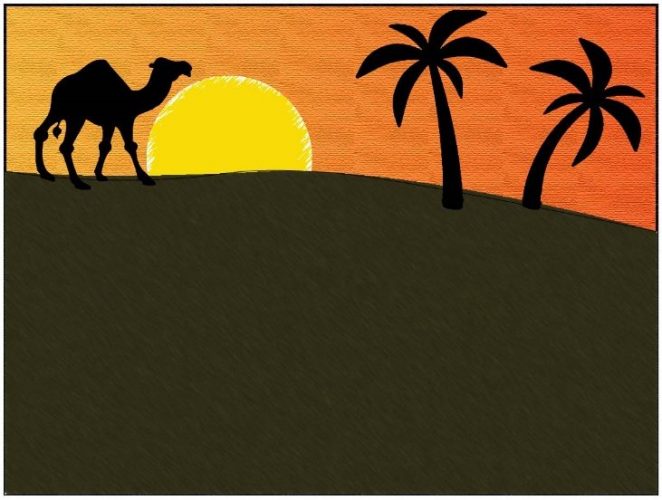
This drawing can also be done in a mixed technique - cut out the figures of a camel and a palm tree from paper and glue them onto an album sheet. Examples of drawings in this interesting and simple technique are given below.
The camel images in this article can be used for simple pencil drawings for kids. Since its body has a rather complex shape, it is recommended to draw the animal in a stylized form at the first stage, these examples are given above.
If it is difficult for a child to draw a large image with a pencil, then it can be combined with other techniques – drawing with watercolors, crayons and gouache.
Video about drawing
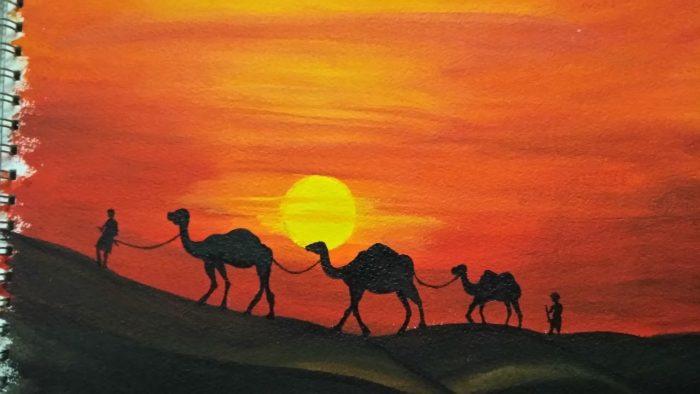
Master class on drawing a camel caravan: