Traffic light drawing - plot, which can be used for children of all ages. For toddlers, it is a bright object that is easy to draw and color, while learning basic colors. For older preschoolers, drawing a traffic light allows them to review the rules of behavior on the road, while learning to draw simple three-dimensional objects.
Schoolchildren can already fit a traffic light into a street image, creating a real picture. Even for older schoolchildren, this is an attractive motif, since a traffic light is an integral part of city life, it looks spectacular in the pop art style, as graffiti, and allows you to experiment with projection and color.
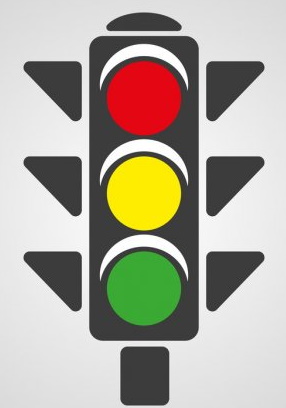
Traffic light diagram for drawing
Materials and tools for drawing
Before you start drawing a traffic light, you need to choose the right tools and materials.
Depending on the drawing technique, you may need the following creative set:
- Simple pencils.
- Colored pencils.
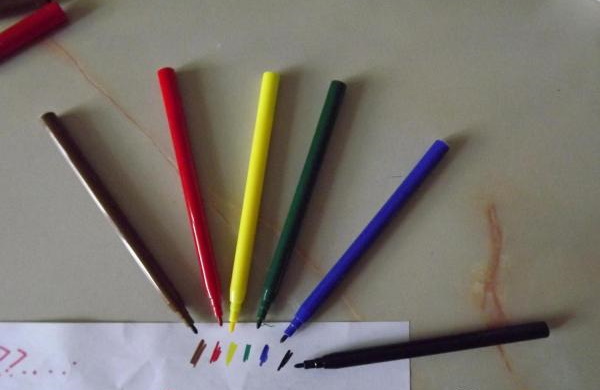
- Colored felt-tip pens or markers.
- Watercolor paints or gouache.
- Oil pastels or wax crayons.
- A thin black felt-tip pen, marker or liner.
- Brushes of different sizes.
- Erasers.
- Palette.
Two types of simple pencils are suitable for drawing a traffic light - hard and soft (it is designated "TM" or "HB"), and for tinting elements you can also have a soft pencil designated "M" or "B" in your arsenal. Children are not recommended to use hard pencils marked "2T" or "2h", as they leave a very light mark and can tear the paper if pressed hard.
In addition, a hard pencil is harder to erase, and the child often needs to correct the drawing. In addition to the pencil, you need to have a good sharpener, preferably with a storage container, and a small white eraser.
A traffic light drawing for preschoolers requires careful selection of coloring tools. Colored pencils should also be soft enough, this will speed up and facilitate the toning process. Preschoolers find it more convenient to use pencils with edges, rather than round ones, they are easier to fix in the hand.
It is best for a beginner artist to choose not professional, but "honey" watercolor. It is brighter and easier to lay on a sheet of paper. It is necessary to draw the attention of children to the fact that in addition to a small amount of honey, the paint contains pigment and other substances, in addition, honey is often replaced with glycerin or potato starch, so the paints do not need to be tasted.
To draw a traffic light, basic colors of watercolor and gouache are enough; the missing colors can be obtained by mixing.
However, it is necessary that the gouache set contains white color. For ease of working with paints, you will need a white plastic palette and a spill-proof glass.
You can color and outline not only with pencils, paints and felt-tip pens, wax crayons and oil pastels are also good for this purpose. Pastels give a richer color and are easier to draw with, but they stain your hands more and can be smeared with a careless movement.
In almost any technique, the image of a traffic light requires clear contours – they can be made with a regular black felt-tip pen, marker or liner. There are only two requirements for the felt-tip pen – suitable thickness and quality (it should not leak).
Also, for younger students, it is better to use washable markers. A more professional outline can be made using a liner (also known as a liner or thin marker), the thickness of the marker depends on the purpose of use, the most common stroke diameter is 0.6 mm.
It is important to remember that the liner is a permanent marker, and waterproof ink will be more difficult to wash off from clothing, so children should use it under adult supervision.
To make the traffic light image beautiful and more convenient to draw, it is important to choose the right paper:
| Paper density | Paper texture | Type of drawing |
| Printing paper 70-80 g/m2 | Smooth, not glossy | You can draw with a pencil, felt-tip pen and crayons, but the drawing is not very high quality, since you have to press on the felt-tip pens and crayons, and the felt-tip pen shows through the sheet and spreads |
| Drawing and sketching paper 120–180 gsm (standard landscape paper) | Slightly porous, ribbed | You can draw with pencils, markers, crayons, pastels and paints, but if you add a lot of water, the paper will go wavy. |
| Watercolor paper 170–850 g/m2 | Smooth but not glossy, or textured (grainy) | Ideal for working with paints |
Master class: oil pastels and watercolors for kids
Materials and tools:
- Thick drawing paper (not glossy).
- Oil pastels or wax crayons.
- Watercolor paints.
- Simple pencil (TM).
- Cardboard of any color.
- Plastic lid (diameter 3.5 cm).
- Brush (thick flat).
Progress of work:
Drawing a traffic light for children is a topic that not only teaches how to draw, but also introduces the rules of life in the city. At the beginning of the lesson, children need to be told about the meaning of traffic light signals and discuss the difference between a traffic light for cars and a pedestrian one.
You can also ask children if traffic lights ever take a break (they don't). It should be emphasized that if a traffic light breaks down - goes out or starts flashing yellow non-stop - an accident can happen on the road, since drivers don't know how to behave. Traffic lights are especially important at night. This is the kind of night traffic light you will need to draw at the post; it will be a traffic light for cars.
The work is based on the following algorithm:
- First, use a pencil to mark the location of the traffic light - with lines or strokes. If it is difficult for the child to do this by hand, then you can draw a line with a ruler.
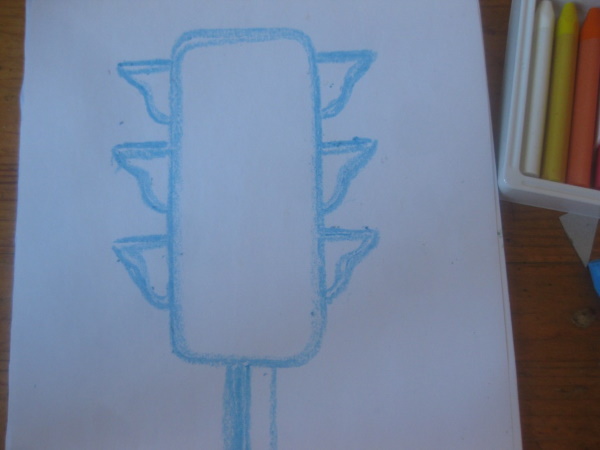
- An adult prepares a rectangular template for the traffic light in advance (width - about 6 cm, height - 15 cm). You also need to prepare a template for the visors - a simple triangle or with one curved side. Younger students can do without templates, they can draw a rectangular traffic light body and visors with a pencil.
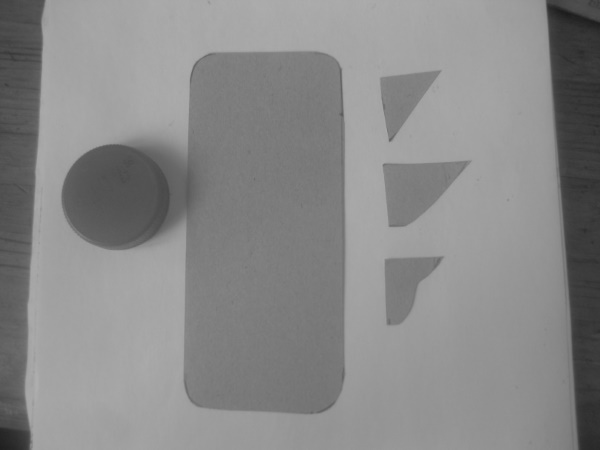
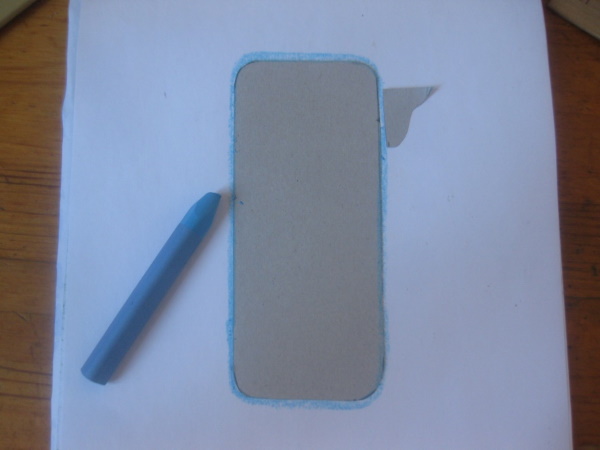
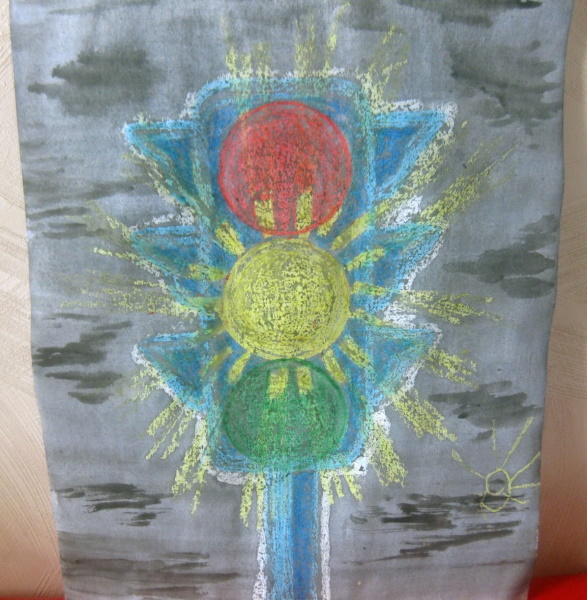
- Children trace the traffic light body template, and then three visors on each side. The tracing can be done immediately with pastel or wax crayon, it will be even easier than tracing with a pencil at first. It is important that the line is thick enough, if this did not work out when tracing the template, you need to outline each edge again. For the tracing, you need to choose blue or a light shade of blue or lilac. The traffic light stand is drawn in the same color.
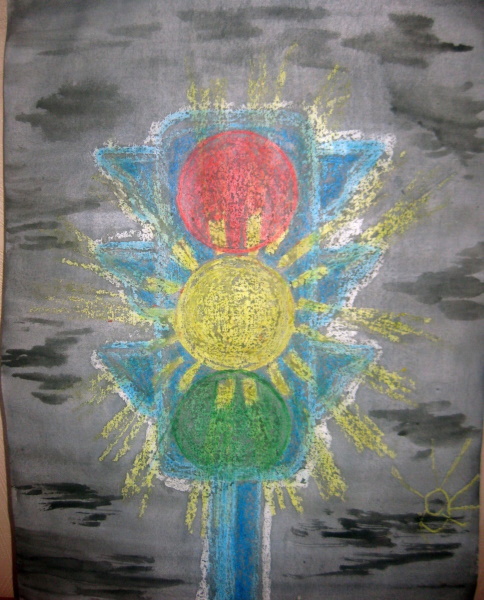
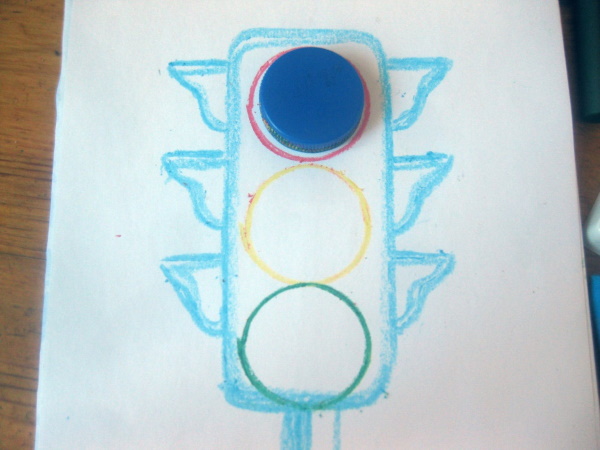
- Next, draw the traffic lights with red, yellow and green pastels; a plastic cap of a suitable diameter can be used as a template. When the outlines are ready, you need to paint the circles with pastels, using circular motions. The child chooses which signal will be on. From it, draw rays with pastels.
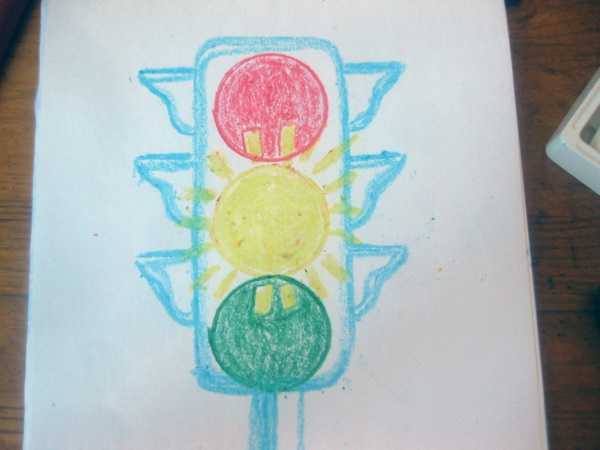
- Then paint the traffic light with blue or grey pastel.
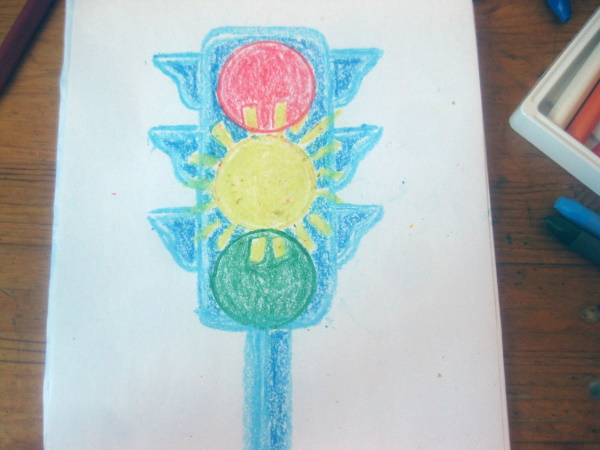
- To make the drawing stand out more against the dark background, the outline of the traffic light can be additionally outlined with white pastel.
- Next, try a black, dark blue or purple shade of watercolor on the palette. Mix the paint with a sufficient amount of water and paint the entire sheet. In this case, the image of the traffic light shows through the paint.
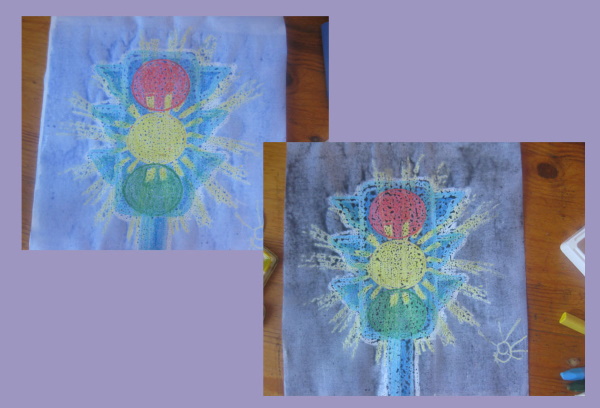
- While the image is not completely dry, you can use a dry brush to remove some of the paint from the traffic lights if the color does not show through clearly.
Children really like to draw in this technique, as they perceive the appearance of the image on a dark background as something wonderful. Using pastels or wax crayons, you can create a street of an evening city, illuminated by lights and traffic signals.
Master class: fun with felt-tip pens and pencils
Materials and tools:
- Drawing paper.
- Simple pencil (TM).
- Eraser.
- A thin black marker, felt-tip pen or liner.
Progress of work:
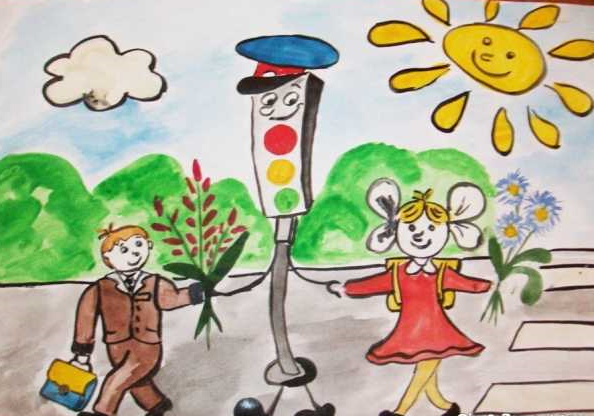
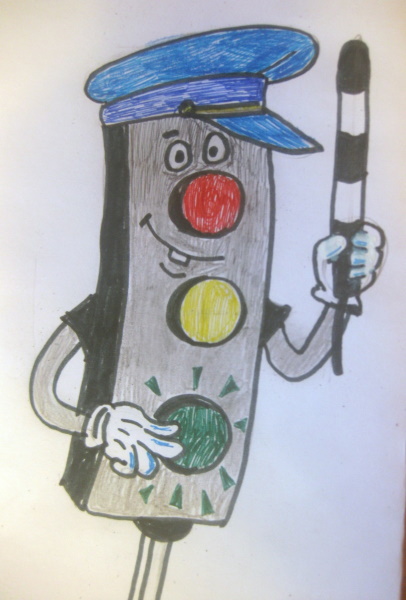
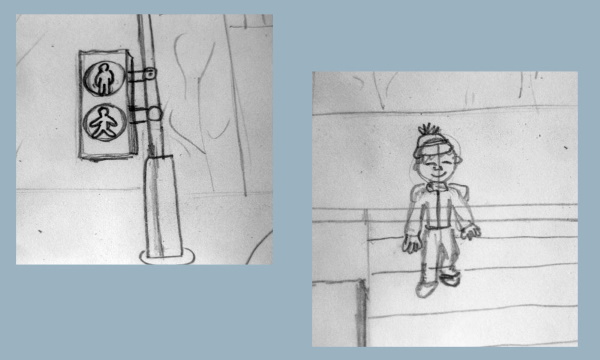
Before drawing, children need to be shown photos of real and cartoon traffic lights. Figure out what the similarities and differences are. Note that the funny traffic lights have a red signal light instead of a nose.
You can ask children if they know the difference between a traffic light for pedestrians and cars, which is what the funny traffic light (striped baton) is holding. It will also be interesting to discuss who needs the baton (the traffic controller who is at the intersection when the traffic light breaks down).
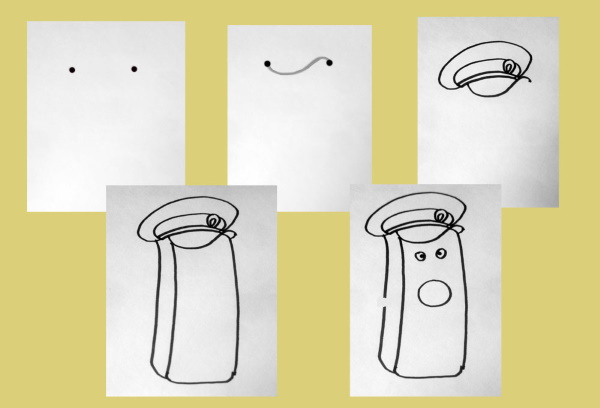
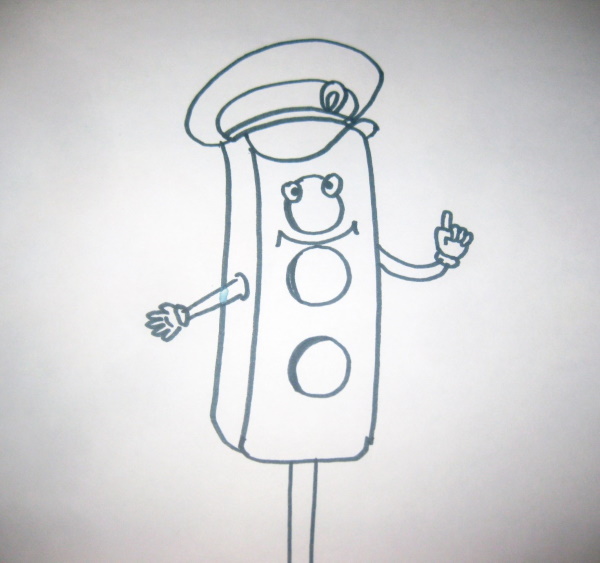
The image of a traffic light can be created according to this plan:
- At the first stage, the dimensions of the image and the location of the traffic light on the sheet are marked with pencil strokes.
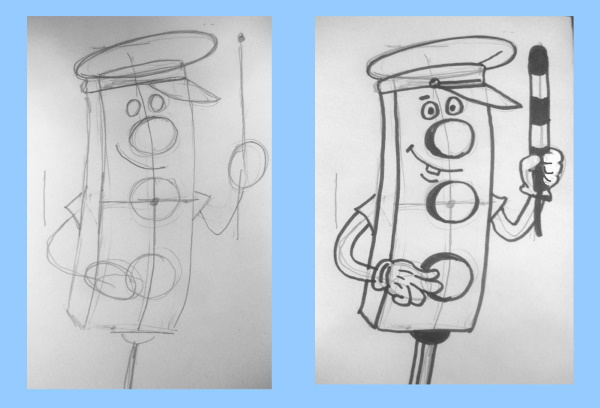
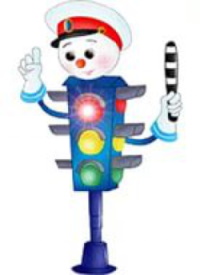
- Next, use a pencil to sketch out the main details. The traffic light body is a rectangle with slightly curved sides, as if the traffic light is sticking out its chest. The police cap is an oval and a rectangle. The bent arms are marked with lines. Ovals are used instead of gloved hands. A line is drawn in the center of the body, which helps to place the signal lights. The circles can be drawn by hand or using a template.
- At the next stage, the main lines are outlined with a black felt-tip pen or marker and the details are drawn. The hardest thing for children is to draw a hand clutching a baton. To make the process easier, you can look at your own fist with an object clutched. Then the secondary lines are erased. Older children and adults can draw directly with a marker without a pencil sketch, in this case you need to start with the details that are on top of the rest. You need to draw in the following order - a cap with a visor, the front wall of the traffic light body, signals and parts of the face, hands and gloves, side wall and baton. If there are any mistakes, they can be corrected with correction fluid.
- Next, the traffic light can be colored with pencils and markers. A simple pencil will do for the traffic light body; to make the color appear uniform, you can rub it with a cotton pad.
The traffic light drawing for children presented in the master class is suitable for drawing with both toddlers and older children. Younger preschoolers can color the image prepared by adults, and younger schoolchildren can draw such a traffic light from scratch.
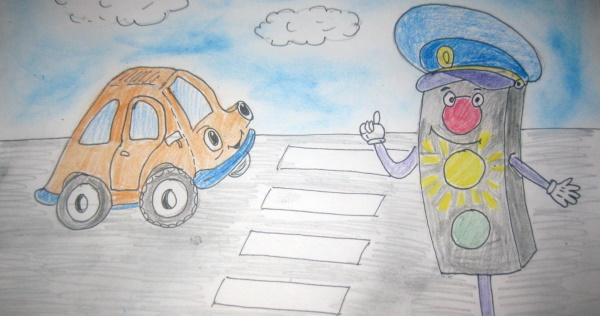
Master class: cartoon and cars with pencils
Materials and tools:
- Drawing paper.
- Simple pencil (TM).
- Colored pencils.
- A thin black marker, felt-tip pen or liner.
Progress of work:
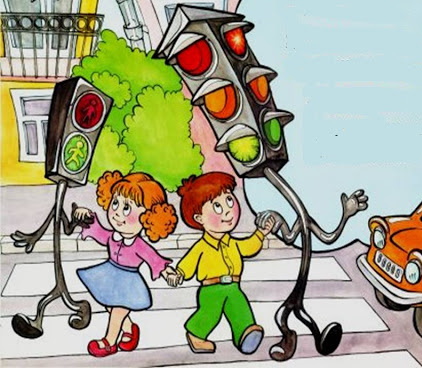
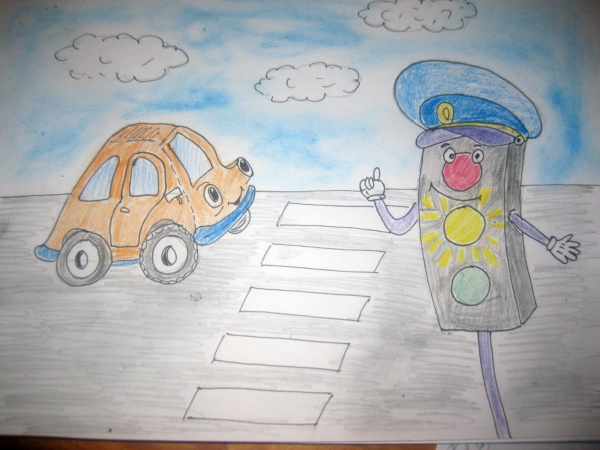
Before starting the work, it is worth remembering the main traffic light signals. It is also necessary to consider traffic lights for cars (with three signal lights) and for pedestrians (with two lights). Then you can tell the children that the traffic light seems to talk to cars and people in its own language, which everyone understands. You can say that the traffic light also works in the road patrol service.
Further drawing is built according to the following plan:
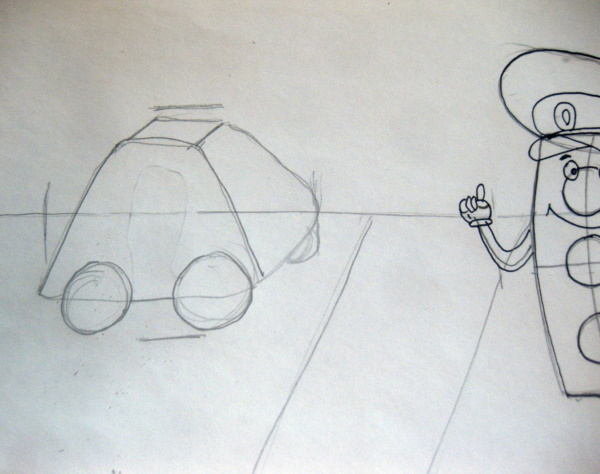
- Using a simple pencil, draw a horizon line and a path for a pedestrian crossing. Use strokes to mark the location of the traffic light and the car.
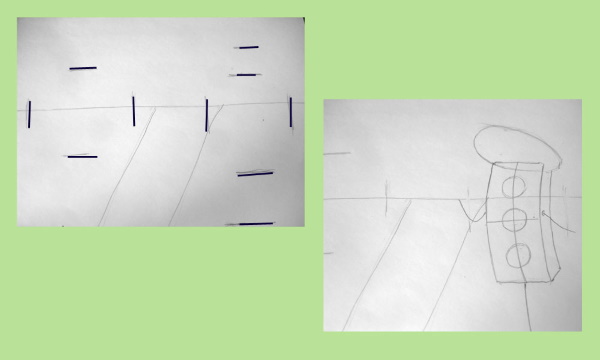
- Next, use a pencil to schematically mark the main details of the characters in the picture. A rectangle is for the traffic light body, an oval is for the cap, and curved arms and a stand are marked with lines. The basis of the machine is a trapezoid with rounded edges.
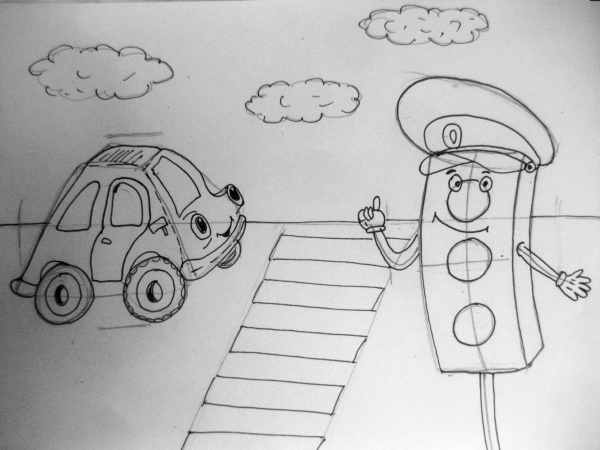
- At the next stage, the details of the image are drawn with a pencil. They start with the wave of the peak of the cap. Then they make the bend of the traffic light body and the back wall. Then they draw the signal lights. You can use a template for them. After that, they finish drawing the eyes, mouth, and gloved hands.

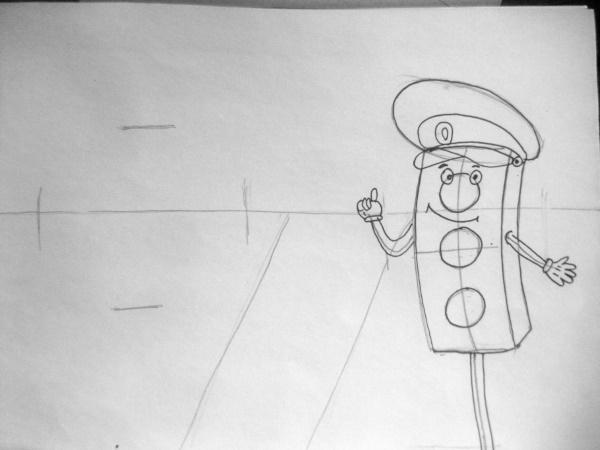
- At the next stage, all the lines are outlined with a black marker, and after a couple of minutes, the secondary lines are carefully erased. An adult or a child with drawing experience can draw a traffic light with a felt-tip pen right away. Then you need to start drawing with those details that overlap all the others. For a traffic light, this is the peak of the cap. Also, the eyes are above the red signal.
- A cartoon traffic light, made with a black marker or printed on a printer, can also be used as a coloring book for kids.
- Next, the same steps are performed with the machine.
- When the characters are ready, the horizon line and zebra stripes are outlined with a marker. You can also draw additional details - houses, clouds, trees, a pedestrian crossing sign. Erase all secondary lines.
- At the next stage, the traffic light and the car are colored with pencils.
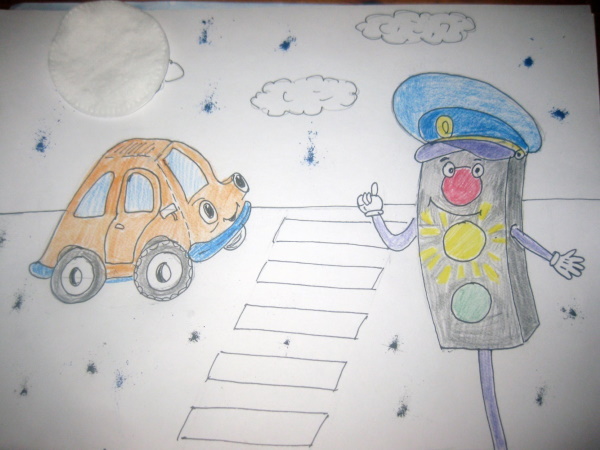
- To color the background, you can use the rubbing technique. An adult should scrape the graphite off the pencil with a knife or razor beforehand. As a result, you get a powder of the desired color.
- Children use a cotton pad to color the sky and the road. You can also color the road with a simple pencil using large strokes and then rub it with a cotton pad.
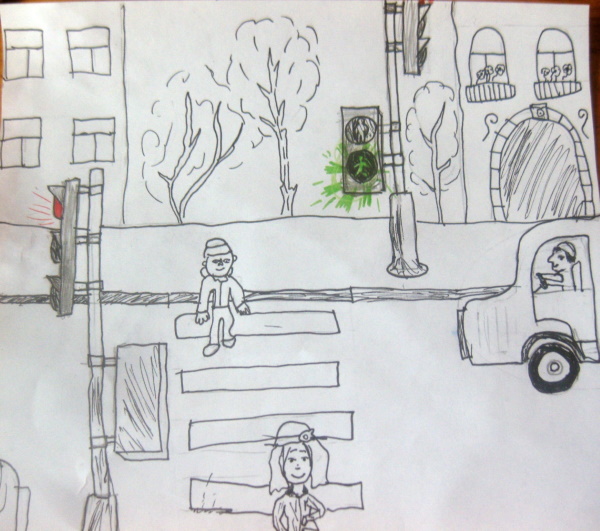
Graphic representation of a street with traffic lights
Materials and tools:
- Drawing paper.
- Simple pencils (MM and TM).
- Eraser.
- Colored pencils (optional).
- Black felt-tip pen, marker or liner.
- Photos of traffic lights.
Progress of work:
The traffic light drawing is also of interest to school-age children, as bright signal lights are the dominant feature of any intersection and busy road. Before drawing, you can ask children to remember the pedestrian crossing that is closest to the house, how it is equipped (traffic lights, zebra crossing, special signs).
You can quickly draw it on a whiteboard with a marker or on a sheet of paper schematically. Then it is worth analyzing what happens on the road when traffic lights give different signals (for example, a traffic light for cars gives a red signal, at the same time a pedestrian traffic light shows a walking green man, cars are standing, pedestrians are crossing the street). You can also find errors in ready-made images of intersections.
Children will have to depict a real street according to this plan:
- First, draw a horizon line with a simple pencil - this is the curb of the sidewalk. Then, mark the pedestrian crossing area with two lines. Next, use lines to show where the traffic lights and people will be located and what size they will be. It is necessary to take into account that on the other side of the street, objects will be slightly smaller, since they are located further away. The location and size of cars can be marked with ovals.
- After this, traffic lights, figures and cars are drawn with a simple pencil. It is important to draw the children's attention to the fact that traffic lights are located in a certain way.
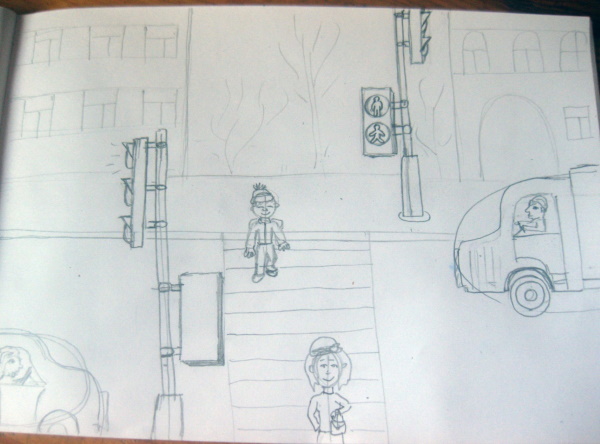
- To make the picture realistic, the pedestrian traffic light in the background faces the road, with people visible on it, while the traffic light in the foreground only has its back wall visible. Traffic lights for cars face the flow of traffic.
- After this, the main lines are outlined with an even marker or liner, and the secondary ones are erased or tinted with a simple pencil. The drawing can be left black and white or only the traffic lights can be colored.
Master class with watercolor paints
Tools and materials:
- Drawing paper (not glossy, thick).
- Simple pencil (TM).
- Eraser.
- Watercolor of primary colors.
- White gouache or white wax crayon (optional).
- Brushes (thin and medium thickness).
- Palette.
Progress of work:
Drawing a traffic light for children is always not only creativity, but also knowledge about life in the city. At the beginning of the lesson, you need to review the purpose of the traffic light, consider the difference between a traffic light for transport and pedestrians, pay attention to the different ways of attaching traffic lights. Children will have to draw a suspended traffic light, but if desired, it can also be depicted on a stand.
Before drawing, it is advisable to consider different projection options using any small parallelepiped (for example, a box, a box or a Lego cube). In a specific example, children will see that when looking from the side, two walls of the traffic light are visible, if we look from below, the bottom will be visible. When drawing, you can copy the sample or experiment with projections, this may be interesting for children over 7-8 years old.
A traffic light drawing for children is suitable for both getting acquainted with watercolors and practicing skills. The complexity of the painting depends on the level of the students (for beginners, you can not emphasize the halftones).
The drawing is built according to the following plan:
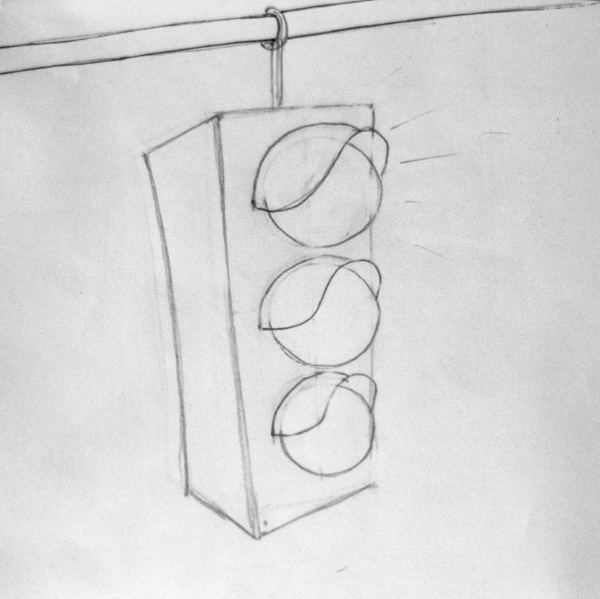
- At the first stage, the dimensions and location of the traffic light are outlined with a simple pencil, the wire and the trapezoid of the body are depicted. It is necessary to draw the children's attention to the fact that the traffic light is intentionally made wider at the top than at the base, drawing attention to the burning red signal. This is an artistic concept. You can not violate the projection rules and draw a more realistic traffic light, taking the original view from below or from the side.

- Next, draw the details with a pencil. Draw the side edge at an angle. Then depict the signal lights. In accordance with the design of the drawing, the lights line up from the largest to the smallest one after another with a slight shift to the right edge, as if they are being looked at from above. It is difficult for children to track the change in size correctly, so it is better to make three templates or select three round caps of different diameters.
- Next, a visor consisting of a wave and a semicircle is made over each signal.
- Then erase the auxiliary lines and carefully remove all the crumbs from the rubber band.
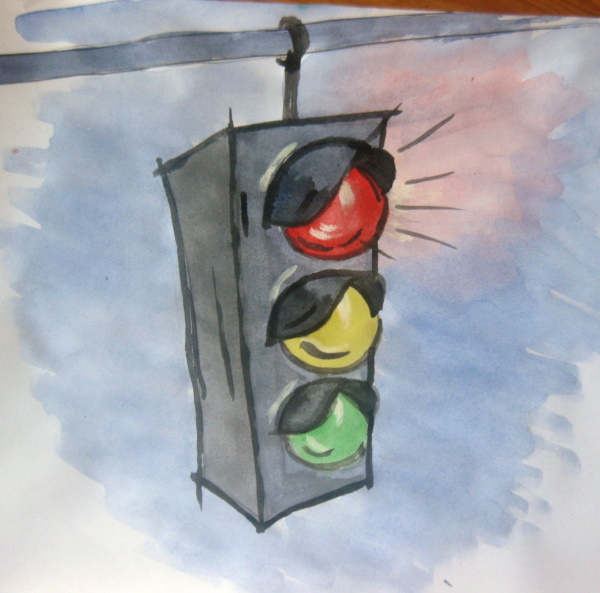
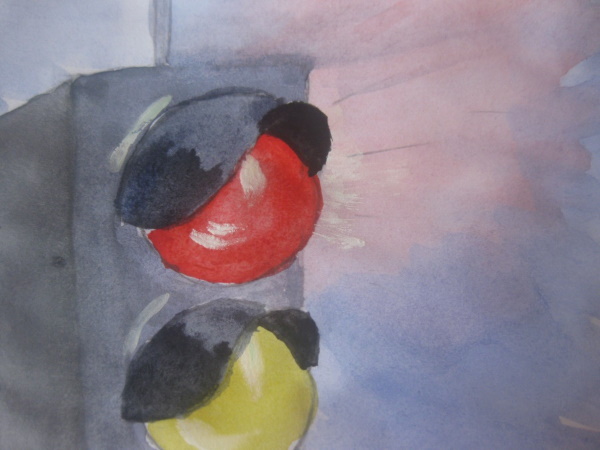
- At the next stage, paint of any blue shade is placed on the palette and a sufficient amount of water is added. The color should not be very bright. Next, with light strokes of a wide brush, paint the background around the traffic light, without touching the area around the red signal. The strokes are made in the direction from the silhouette of the traffic light. Then take a little red paint, dilute it heavily with water and tint the area around the red signal, imitating a glow. A damp brush can be used to correct the smooth transition at the junction of the two colors.
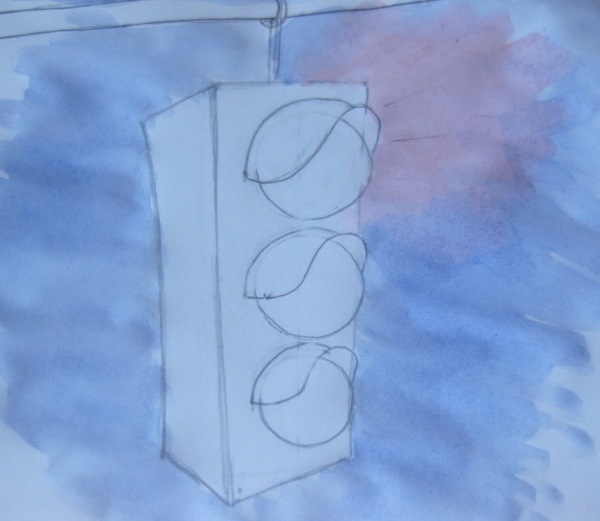
- Next, you need to wait 3-5 minutes for the background to dry. At this point, you need to mix the colors for the traffic light body. Put the background color on the palette and add a little black paint to it. Use a medium-thick brush to tint the front edge of the traffic light, without touching the signal lights.

- Then add more black paint to the background color and paint the side edge and peaks. The top of the peak should be lighter. To emphasize this, you can go over this area with a wet, dry brush several times. The inside of the peak can be painted black.
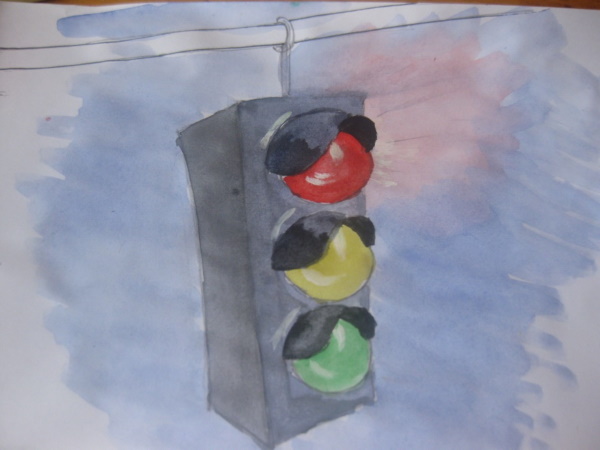
- When the background has dried a little, start painting the signal lights. They should have light highlights in two places. This effect can be achieved in several ways: The classic approach for watercolor is to simply leave the highlights unpainted, which is quite a difficult task for children. You can also draw a damp brush over the painted circle several times, but this technique allows you to make the color less bright, but it does not work well when applied pointwise. Another option, which is easiest for children, is to apply highlights with white gouache on top. You can also draw highlights in advance with white wax crayon or pastel and paint over them with watercolor, the crayon will show through the paint.
- When the image dries a little, the main lines are outlined with strokes of black paint. To do this, take watercolor on a thin brush. Do not add a lot of water. The lines can overlap each other. Clarity is not required, since black paint imitates pencil strokes.
A watercolor drawing of a traffic light can be an ideal option for children to practice various brush techniques and paint mixing.
Video on how to draw a traffic light
How to draw a traffic light easily: