Rose is one of the most popular and beautiful flowers, which is a source of inspiration for artists of different eras. Drawing this flower with pencils can be a fascinating creative process and a way to develop artistic skills.
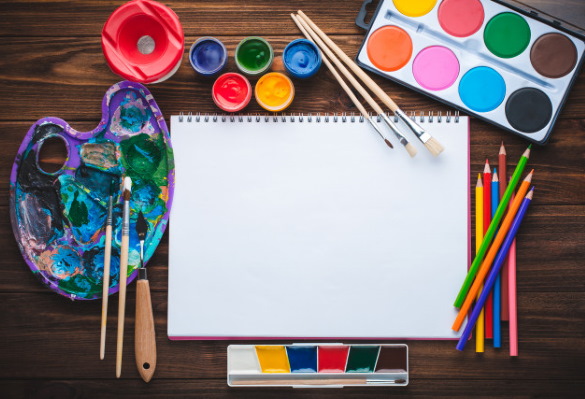
Necessary materials and tools
Depending on the material and drawing technique, each of the tools listed in the table provides the artist with unique opportunities to realize his creative idea.
| Name of material or tools | Brief description |
| Paper | It is important to choose paper that matches the techniques used: toned paper is suitable for drawing with charcoal, and smooth paper is suitable for working with a graphite pencil. Thick paper allows you to convey the volume of the drawing, but absorbs graphite more softly, which can affect the expressiveness of the lines. |
| Pencils | You can use different types depending on the desired line intensity and expressiveness of the drawing. Graphite pencils (HB, 2B, 4B) give darker lines and also allow you to easily correct mistakes. Charcoal and sanguine create a more saturated and contrasting drawing. |
| Pattern separator (knot) | It is used to create soft transitions between shades and allows you to adjust both the intensity of the stroke and the brightness of the drawing as a whole. |
| Eraser | It is necessary for erasing lines and correcting mistakes in the drawing. For convenience, you can use soft erasers, but it is also worth buying harder ones for more precise corrections. |
| Knotted eraser | It will help to remove unwanted elements of the drawing and leave soft, smooth transitions. It can also be used to apply lighter tones. |
| Sharpener | Helps maintain the correct shape of pencils and the sharpness of their lead, which is an important condition for creating clear and expressive lines. It is recommended to choose a sharpener with a reliable mechanism and the ability to adjust the degree of sharpening of the lead. |
| Stencils and rulers | Stencils allow you to quickly and easily create repeating design elements such as patterns, lines and shapes, and then use them in a composition to give it rhythm and structure. Rulers are standard tools used for measuring, marking, and constructing. They are useful for drawing geometric shapes and figures, as well as determining the proportions and scales of compositional elements. They enable artists to create more complex and structured compositions. |
Master classes
The main emphasis when depicting a rose is on consistency and silhouette drawing, which unites the basic elements of the composition into a single harmonious image.
The result may differ from the instructions given, depending on the tools, techniques and individual skills of the artist. It is important to maintain accuracy and attention to detail so that the drawing looks finished and professional.
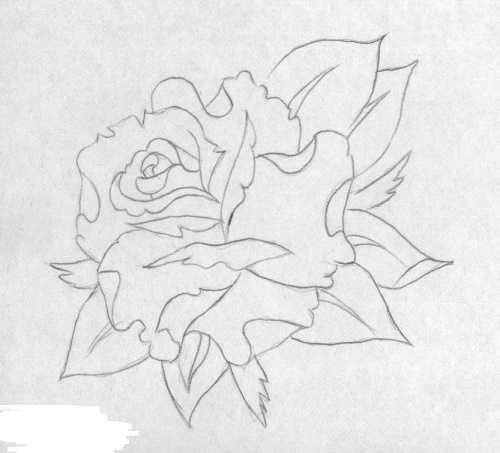
Volumetric bud
The rose, the design of which can be unique, according to the steps below, maintains a balance between realism and stylization:
- Start by drawing the outline of the rose with a hard pencil on a sheet of paper. Maintain proportions and symmetry, giving it a natural look.
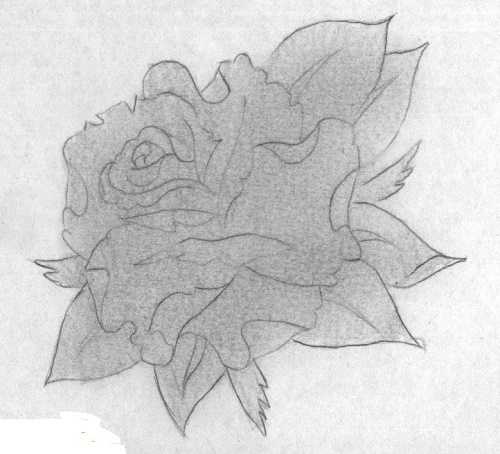
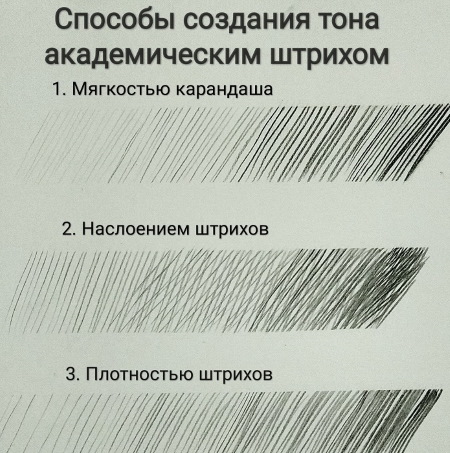
- Using a soft pencil, shade the drawing to create volume and shadow. Apply shadows gradually, using short strokes, leaving gaps between them. This will create the effect of depth. Strive for the rose to acquire a uniform dark shade.
- Continue shading until the rose reaches the desired darkness. Use an eraser to highlight the contours and gradually complete the drawing.
- To give the rose volume, darken each petal, decreasing the intensity of the strokes towards the edge of the outline. The shadows should be the densest at the center of the bud, since the petals are pressed against each other there and almost no light reaches there.
- The outer side of the petals should be the lightest. Use a soft pencil, adjusting the pressure and intensity, to create a darker and more saturated shadow on the petals.
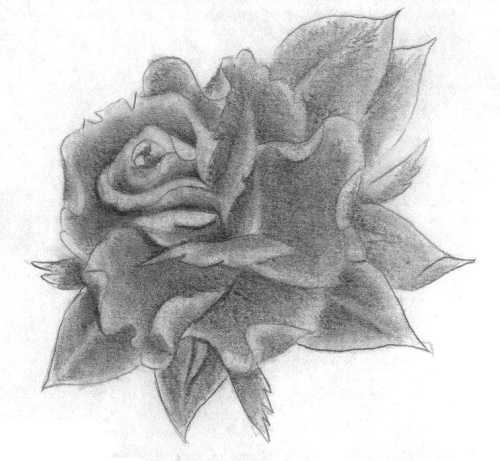
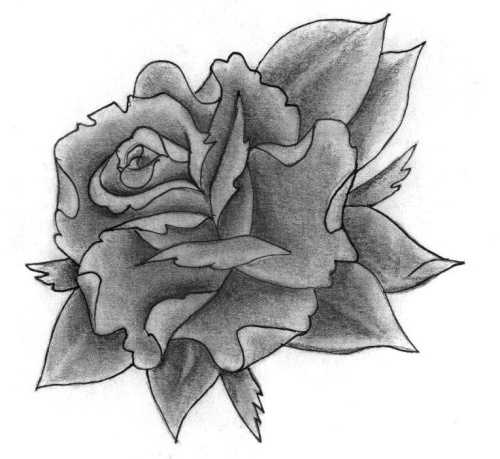
- To smooth out the lines of the drawing and give it smoother transitions, shade the shadows with a piece of paper.
- For greater expressiveness, draw the contours again.
- Blend the shadows at the base of the rose and at each petal. This will help emphasize the volume of the flower and make the image more realistic.
Adviсe:
- If the rose in the center of the sheet seems too small, you can place the image asymmetrically. For example, move it to the right. Or draw 2 identical flowers on the right and left at a small distance from each other. This will help to avoid distortion of the drawing during further work.
- Tonal gradation in shading allows you to create a realistic 3-dimensional view of the rose. With each new layer, there is less light, and the flower acquires a more saturated color and volume.

- Before you start shading, make sure that all the contour lines are clearly visible. If they are too light, this may interfere with further work.
- If you draw with a pencil over existing lines, the paper may not be evenly saturated with pigment.
- It is better to first outline the general shape of the petals and bud, enhancing the shadows and contrast.
- Avoid making the shadows too dark on the tips of the petals, so that they don’t merge into a single line without volume.
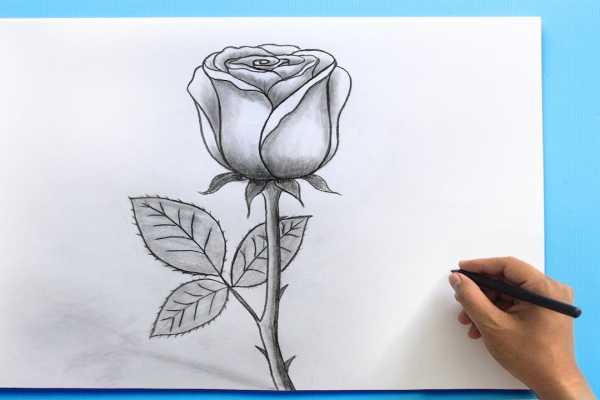
With a long stem
The rose (its design must be critically assessed after each stage) is a flower, each element of which must look natural and harmonious:
- Outline the stem. Determine the length of the stem and its thickness. Add a base for the future flower. It is important to outline the stem so that it looks clear and harmoniously combines with the bud and petals.
- Design the leaves and bud. Draw them from the basic outlines, then add details. Design the bud at the top of the stem. The leaves should match the bud in size and shape, look convincing and naturalistic.
Their shape can be oval or elliptical with a pointed tip. For the petals of the bud, use a circle shape. Draw the leaves as if they were embracing the stem. This will help achieve a harmonious composition.
- Mark large petals taking into account the circumference of the bud. The mass of petals should be concentrated at the base. Work in detail the elongated tips of the petals and the outer edges, which will set the volume.
Draw petals of different lengths and widths to achieve a natural drawing. For large petals, general arc lines with small bends at the base and tip of the petal are suitable.
It is better to outline the resulting contours with a pencil of a darker shade, you can also add shadows and volume to give volume. Several large last petals on the bud should be drawn overlapping. They should touch each other and form a beautiful rounded shape.
- Add the last petals between the large ones - smaller ones. You can make a different number of petals, but usually there are from 5 to 8 of them. Mark the dark red areas in the depth of the bud on the back side of the petals. This will create an internal shadow.
Sharpen the tips of the petals, connect the touching edges evenly. The small petals in the middle of the bud should be more rounded and thin.
- Add a few small strokes on the stem to indicate the thorns. They should emphasize the realism of your rose.
- Draw small scallops on the edges of each leaf to give a textured effect.
- Shade the stem of the flower, add volume and shadows. Use a light pencil to create shadows along the stem. Gradually increase the intensity of the shading, making it thicker and darker.
- Using a soft pencil, add shadows to the outer edges of the leaves. This will help create the illusion of volume and add depth to the drawing.
- Using a soft brush, blend all the sharp pencil lines to make the drawing smoother and more realistic.
- Using a darker pencil or blending the shadows, darken the bud area. This will create a contrast between the bright color of the petal and the darker central part.
- Use the eraser to add shadows and emphasize volume in certain areas, such as the hollows of the bud or the shaded areas of the stem and leaves.
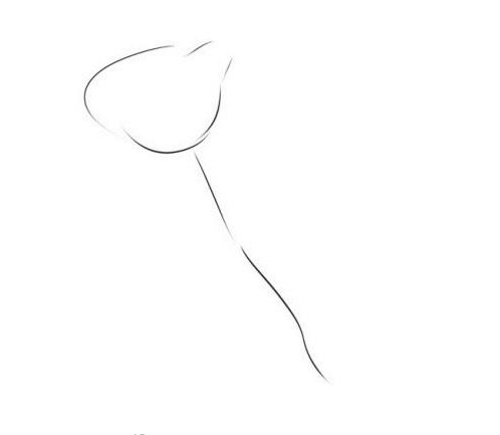
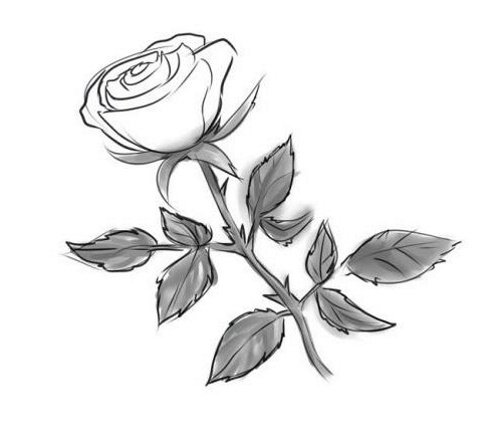
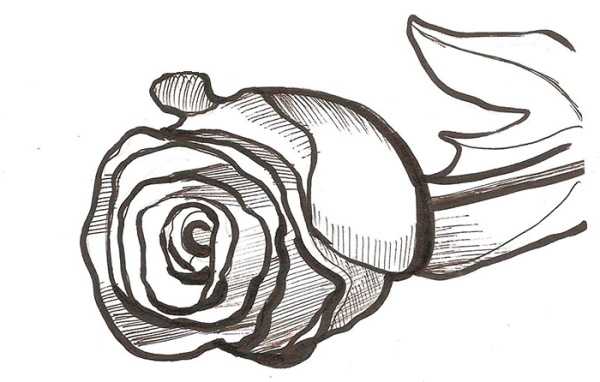
Lying on her side
A rose (you can draw it using the presented master class) is a flower whose image can be adapted to your own preferences and capabilities:
- Draw an oval with thin pencil lines from the center to the edges. This will help make it symmetrical. The oval line should be smooth.
You can use a ruler to create an even oval. It is important to determine its size correctly: it should be proportional to the future stem.
- Draw a stem line from the bud to the left. Use a thin pencil for a thin line, so that it will be easier to remove later. A ruler can be used for drawing. Connect the end of the stem with the oval line - this will give the drawing volume.
You can add small curves or bumps on the stem for realism. Keep the lines smooth to create a harmonious image.
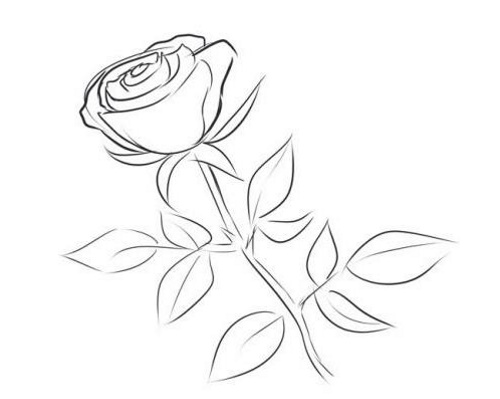
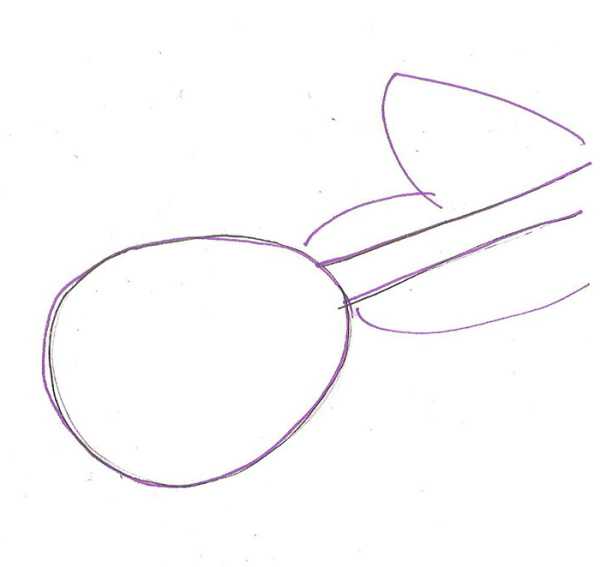
- Approximately in the center of the oval, draw a spiral of several turns. These turns will represent the future rose petals. They can start from different sides, be of different sizes and shapes.
Use a soft pencil to make light markings. Trace the spiral lines twice for more emphasis.
- Based on the markings, make the rose petals more distinct and defined. From the spiral lines, draw small lines to the sides, which will set the shape of the petals and help to mark the transition between them, making the drawing three-dimensional.
Use lines of different thickness, creating relief. This technique is used to add depth and volume. On the petals, you can use gradations of line thickness: the closer to the center of the petal, the thinner. Make one petal sharp, and the one next to it more rounded.
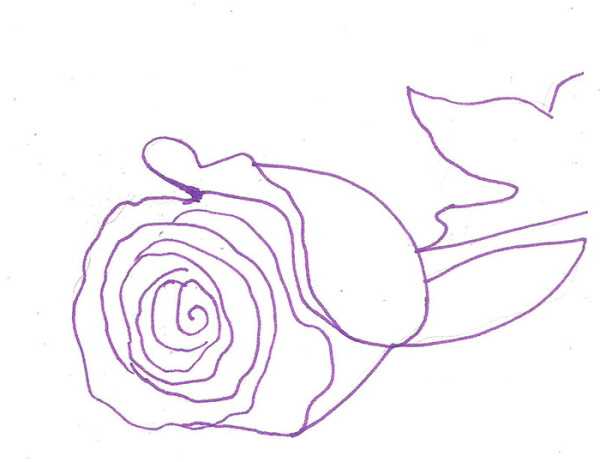
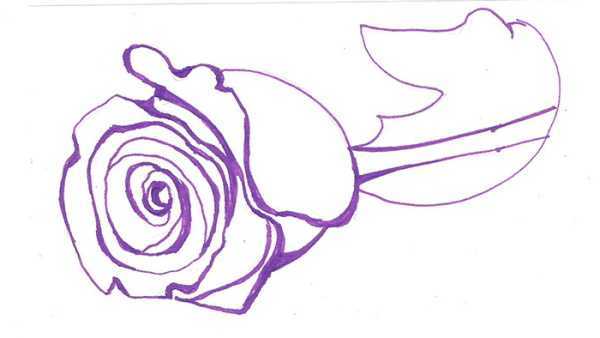
- Focus on the overall shape and structure of the rose, emphasizing it with thicker lines. Highlight the outline of the flower, making it more visible and distinct. Form details such as the structure and shape of the petals and core.
By thickening the lines, you can give the rose contrast and expressiveness.
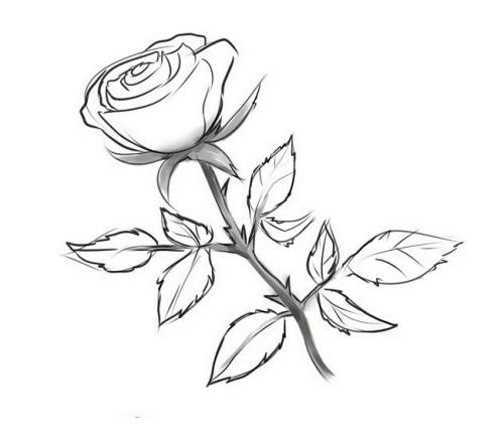
- Since the flower is located on the plane of the leaf, add a shadow from the stem down and from the petals back. This will give a sense of volume and depth. You can add shadows on the petals to emphasize their relief.
Apply shadows easily and gradually, adjusting their saturation in different areas of the drawing.
Adviсe:
- Do not make the lines too straight or of the same thickness.
- To convey volume and shape, use strokes of varying intensity. For example, press harder on the pencil where you need to mark the lower part of the bud and make a shadow from it.
And less when drawing the upper part, to create a smooth transition from one element to another.
- The finished bud should look slightly uneven in outline. This will preserve the liveliness and dynamism of the drawing.
- The edges of the stem are finished with curved lines resembling waves. This way you can achieve realism in the drawing and soften the angles.
Bouquet
A rose (drawing it in pencil requires attention and accuracy) can be depicted in a bouquet:
- Determine the composition of the bouquet. Outline large rose petals and some leaves. This will help create a base for further details. Use soft pencils to easily adjust the markings as needed.
- Outline the outlines of the petals and cores of the roses. Determine the placement of the buds and stems. This will give an understanding of the volume and position of each detail. Maintain proportions to create a realistic image of roses.
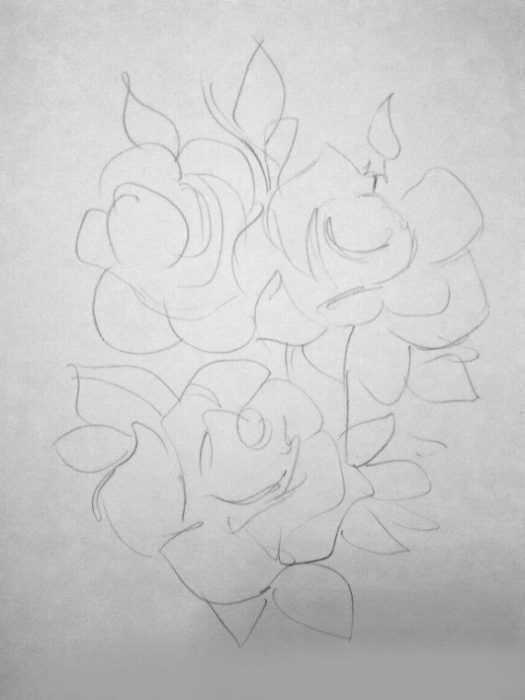
Make sure all sections and parts are consistent with each other.
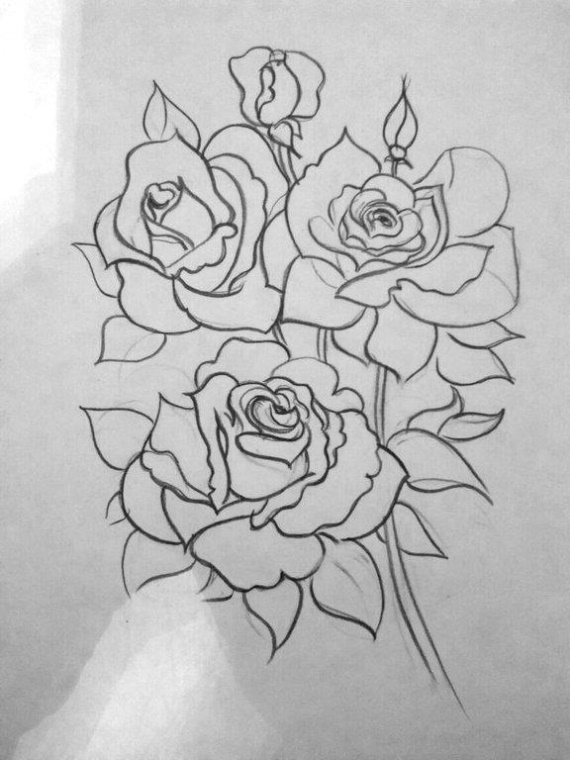
- Outline all petals, leaves, stems and buds with thick lines. This will give the drawing clarity and completeness. Use different line thicknesses to convey volume and texture.
- Applicative shadows will help to highlight the volume and realism of the bouquet. The space between the roses can be shaded with cross-hatchings reminiscent of a grid. This creates the texture of the background. The strokes should be directed towards the main background, forming a smooth transition.
- Darken the shadow areas under the petals. Use cross hatching. Do not overuse the shadow, so as not to lose the contrast and expressiveness of the drawing. Make strokes in different directions for the dynamism of the image.
Halftones in the form of horizontal crosshatching can be used to balance the lighting.
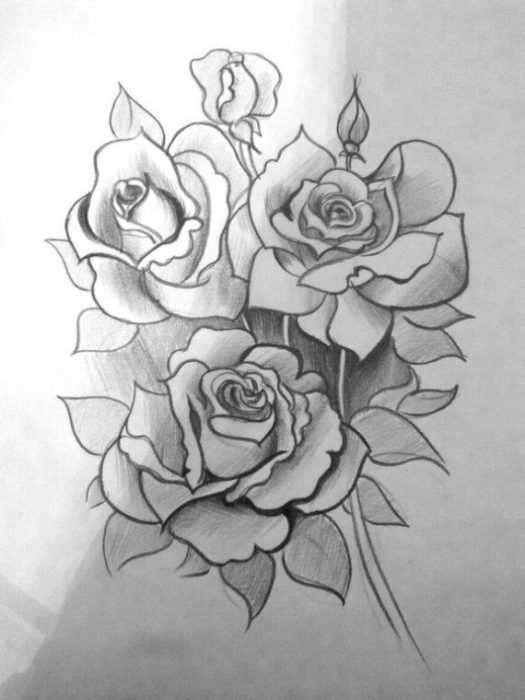
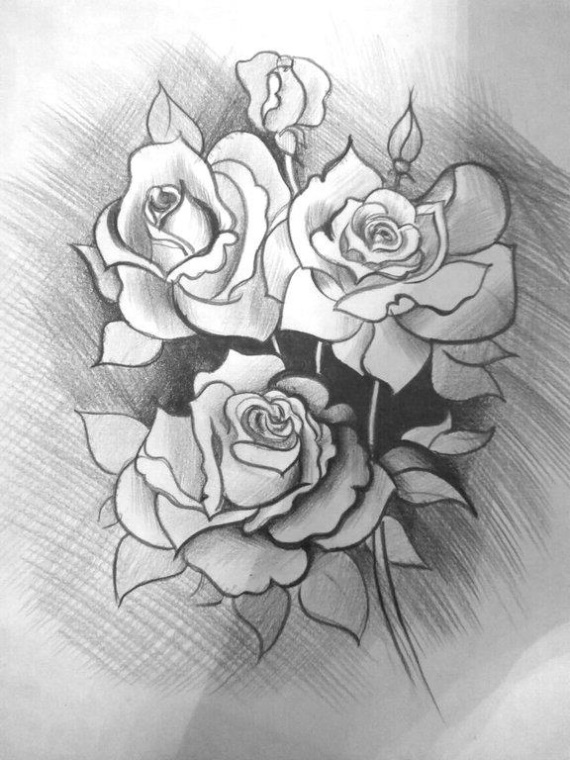
- Draw small details, such as the edges of petals or veins on leaves. Clarity of contours distinguishes professional drawing.
- Refine the shadows, filling in the areas between 2 shadows, and detail the transitions between light and dark areas, emphasizing volume and shape.
From the movie "Beauty and the Beast"
The steps presented will help you draw a rose from the famous film, and the final image depends on your creative approach:
- Outline the location of the main elements of the composition: an oval for the future rosebud and stem. Make a sketch easily, barely touching the paper with a pencil. Draw carefully, without leaving traces of pressure.
- Add petals to the oval of the bud. Draw them as straight lines from the edge to the center of the rose. Go to smooth, rounded lines - they make the rose more natural. It is important that the petals form a symmetrical composition.
- Draw a detailed stem of the rose. The stem should be strong, smooth and straight. Pay special attention to choosing the correct angle and thickness of the stem in relation to the bud. It is necessary to achieve the effect of volume, outlining the shadows and light on the stem.
- Draw some wilting leaves around the base of the rose stem. Leave them a little blurry and fuzzy to give the impression of decay and wilting.
- Add small thorns on the stem and bud, typical of roses. The thorns should be thin and prickly. Arrange them unevenly, making the composition realistic.
- Place several petals under the base of the stem, creating the effect of fallen petals. Form them without observing a clear shape, making the fallen petals more detailed and realistic.
- Create the appearance of a fallen petal - it flies along the stem of a rose. The petal should be colorful and bright, with a highlighted outline.
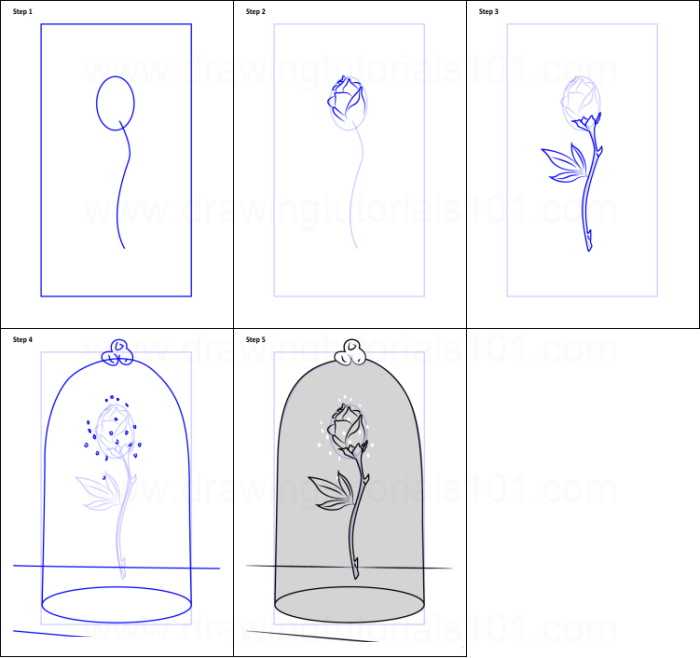
- Draw a transparent glass flask with a rose in it. The flask and the rose should be in harmony with each other, creating an elegant composition. The rose is in the center of the container and does not touch its bottom. The petals should lie on the bottom of the flask.
Tips for Beginners
When drawing a rose, it is important to detail each petal to achieve a realistic drawing. You can use different art materials, depending on your own preferences and goals.
There are a number of recommendations for this:
| Stage or direction | What is recommended to do? |
| Composition and proportions | · Decide on the size and proportions of the flower within the composition. · Keep in mind that roses usually have long stems with thorns and several large petals. |
| Background and detailing | · Outline the contours of the rose and start working with the details.
· You need to add shadows along the contours of the petals, outlining their shape. · Use auxiliary lines to refine the shape and size of the petals. |
| Petals and their shape | · Pay special attention to the shape of each rose petal. It can vary depending on its position in the bud.
· The petals should be oriented in different directions, creating a three-dimensional effect. |
| Light and shadow and volume | · To add volume, use chiaroscuro. The shadows can be soft and smooth, while the light should be strong and bright. This technique will help make the rose more realistic. |
| Leaves and stem | · The stem should be in harmony with the bud.
· Draw the leaves in the same way as the petal structure. |
| The final touches | · Once the main details of the rose are worked out, add finishing touches such as highlights on the petals or more precise details on the flower itself. This will help create a sense of completion. |
| Balance and harmony | · Make sure that the image of the rose fits harmoniously into the overall canvas.
· All elements of the composition must complement each other, creating a complete work. |
An artist can experiment with different styles and techniques to create a unique and expressive rose drawing. Proportions can be studied to make the flowers look natural and realistic.
It is important to experiment with different types of materials and apply different methods. Individuality is expressed in the details.
Video about drawing
Rose - drawing: