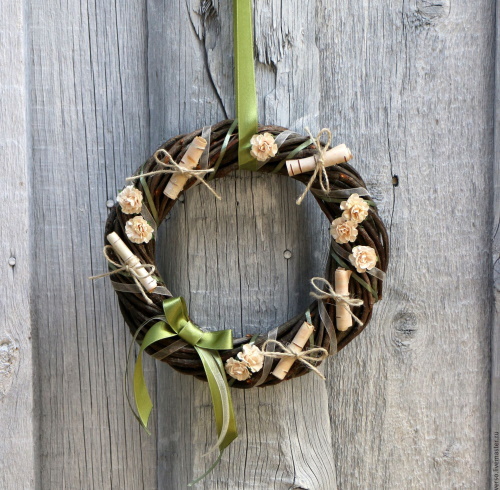
Wreaths woven from different branches, you can decorate your home in anticipation of the winter and autumn holidays. It is not difficult to create such decoration with your own hands. Before you start making, you need to learn how to work with different materials correctly, as well as read several step-by-step instructions.
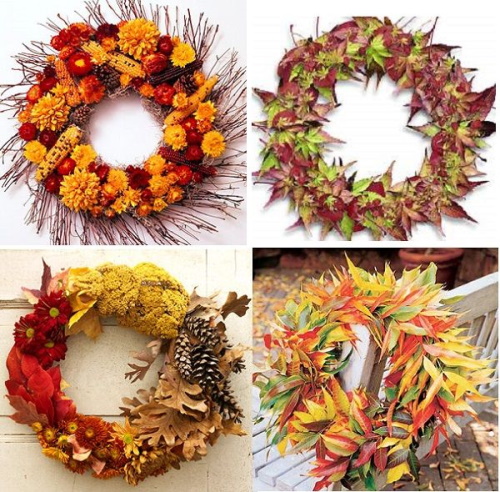
Autumn wreath
A homemade autumn wreath can decorate the front door or window. Sometimes it is placed in the center of the dining table, with several small candles placed inside. Their warmth makes the natural materials emit a pleasant forest aroma, which adds charm to the festive table.
What tools and materials will be needed:
- a piece of red polymer clay;
- clear acrylic varnish;
- black acrylic paint;
- transparent glue;
- thin brushes for painting;
- toothpicks;
- a coil of thin copper wire;
- green floral wire;
- sisal;
- baking foil;
- acorns;
- large yellowed leaves;
- willow branches.
Algorithm of actions:
- Roll several small balls from polymer clay to imitate rowan berries.
- Use a toothpick to squeeze out a “star” on each berry.
- Roll a small oval out of foil. Stick toothpicks with berries strung on them into it. Dry the blanks in the oven at 50 degrees for an hour.
- Take the berries out and let them cool. Using a thin brush, paint the squeezed out "stars" black.
- Place a drop of transparent glue into the recesses left by the toothpicks and secure pieces of green floral wire, about 6 cm long, inside.
- Then you need to twist the wire, forming berry clusters. There can be from 4 to 7 berries in 1 bunch.
- Cover each berry with varnish using brushes.
- Wash the leaves, dry them and cover them with acrylic varnish.
- Sometimes acorns fall to the ground, losing their caps. They can be collected separately and then attached with glue. All acorns should be varnished.
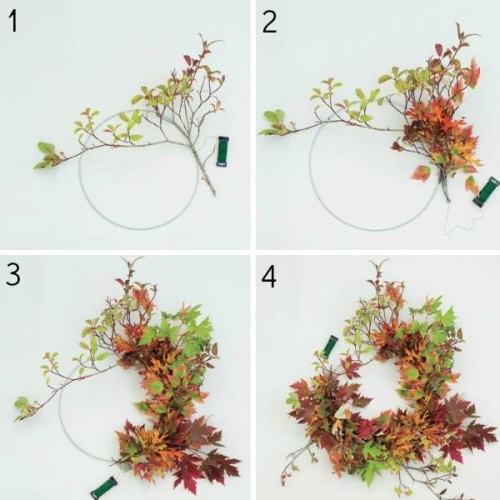
- Before weaving, you should make breaks on the branches every 3 cm, without damaging the bark. This step will help make the branches softer and more pliable.
- The weaving is done in a circle. The ends of the first branches need to be held with your fingers. You can fix them with wire. First, a circle is formed from the thickest branches, then thinner ones are placed on top of them.
- The berry clusters need to be woven in a circle, at a small distance from each other.
- The acorns are attached to the branches using clear glue.
- By analogy, several leaves need to be secured.
The number of decorative elements depends on the taste and wishes of the master.
Finally, the wreath is decorated with sisal. Now you can use it to decorate any room.
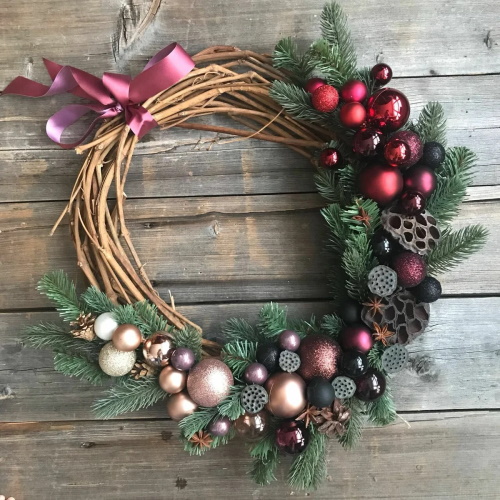
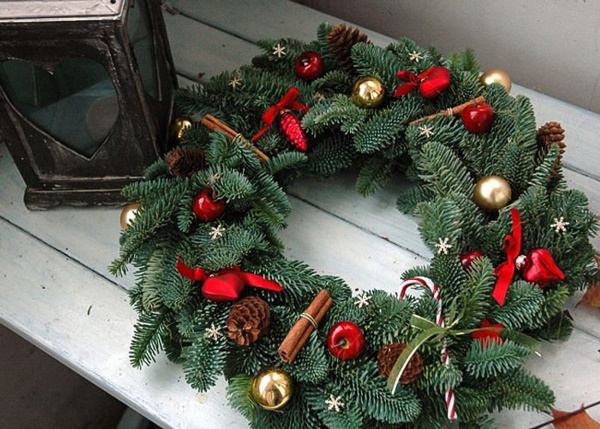
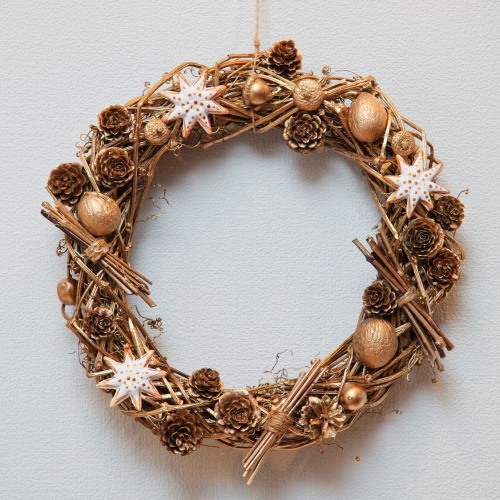
New Year's wreath
This wreath can create a cozy and festive atmosphere. It not only looks good, but also smells good.


Necessary materials and tools:
- thick cardboard;
- newsprint;
- scotch;
- florist wire;
- 10-15 medium sized pine branches;
- small Christmas tree balls;
- pine cones;
- cinnamon sticks;
- strong brown rope;
- red beads;
- red and white satin ribbons;
- glue gun;
- stationery knife;
- scissors;
- pruning shears.
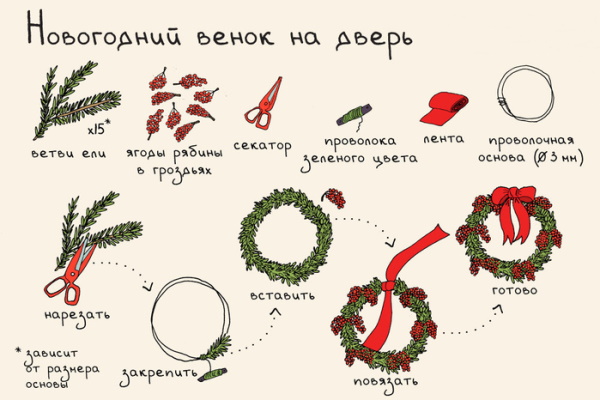
Algorithm of actions:
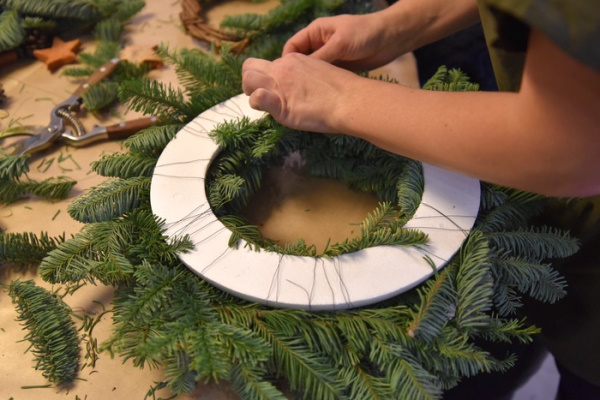
- Draw a circle 26 cm in diameter on cardboard.
- Inside this circle, draw another one, the diameter of which should be about 15 cm.
- Cut out the "donut" with scissors or a box cutter. The workpiece may be slightly uneven. All burrs and crooked cuts will be covered with pine branches.
- The circle should be made three-dimensional. To do this, the paper should be crumpled and tightly taped to the cardboard on both sides.
- Use pruning shears to cut the pine branches into small pieces.
- Connect the branches together with wire, placing them in a circle. To ensure the size matches, periodically apply the workpiece to the branches. The pine needles should be facing up.
- Fix the branches on the paper “donut”, pulling them tightly together with wire.
- Secure the decor with hot glue. First, glue the large balls, then the smaller decorations. This makes it easier to create a harmonious composition.
- The cinnamon sticks need to be wrapped with twine in the middle to hold them securely. Since pine branches are very loose, you will need a lot of glue.
Decorate the finished wreath with aerosol snow or sprinkle with gilded paint.
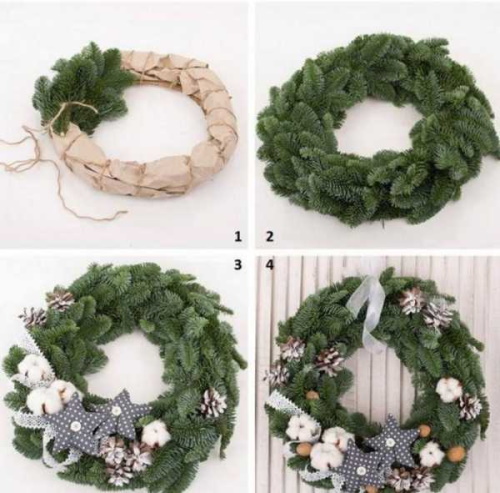
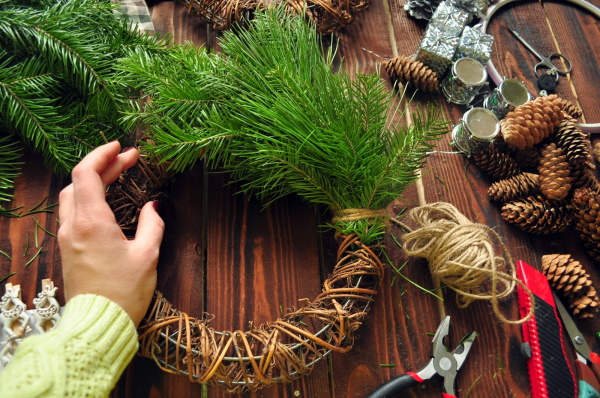
Christmas wreath
Ready-made Christmas wreaths are similar to New Year's ones, but the algorithm of actions and the set of materials are slightly different.
What you will need for work:
- straw wreath blank;
- Christmas tree balls;
- artificial rowan berry clusters;
- red satin ribbon;
- pine cones of different sizes;
- thin spruce branches;
- thick pine branches;
- scissors;
- florist wire;
- red and gold decorative flowers.

Algorithm of actions:
- The base can be bought or made by yourself. Wrap dry grass in cling film and secure with tape.
- Assemble the base from pine branches, placing them with the needles facing up. Attach them to the blank, tightening them tightly with floral wire.
- Fill all the gaps with spruce branches. They can be fixed with wire or hot glue.
- If the branches are very protruding, you can wrap them with wire again.
- Tie a fluffy bow from red ribbon. Singe the edges with a lighter and fix the bow with glue at the top of the wreath.
- Secure the pine cones.
- Flowers for decoration should be alternated. For example: 1 red, 1 white, red again. Berry clusters should be fixed between the flowers.
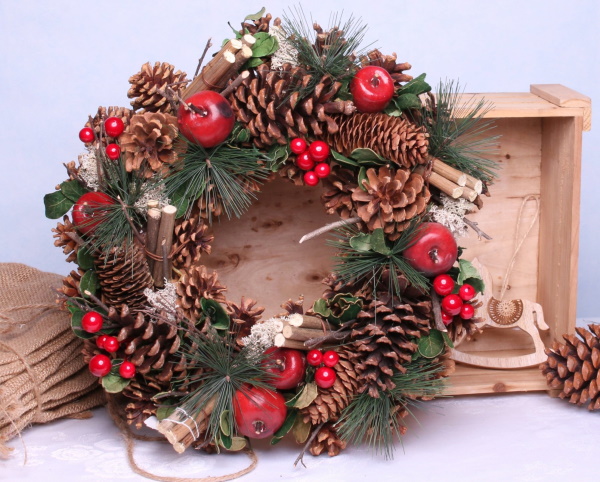

The Christmas wreath is ready. The decor can be supplemented with paper angel figures.
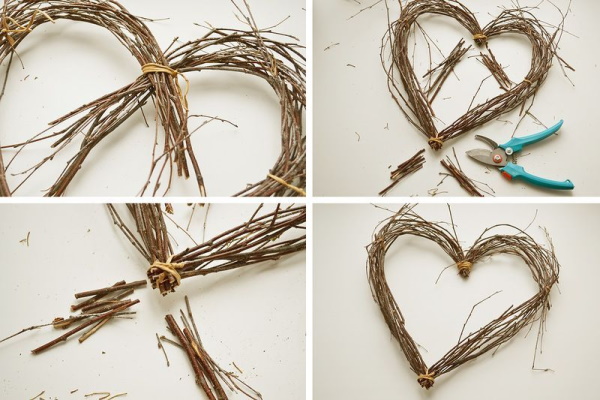
From birch
A wreath of birch branches (you can weave it yourself in 120 minutes) will turn out smooth and beautiful. It can be decorated with Christmas toys, dry leaves or berries. In this master class, the author creates a blank without decorations, because a birch wreath looks great in a minimalist interior.
To work you will need:
- thin birch branches;
- plywood or a wooden board that will completely fit the wreath;
- compass;
- hammer;
- small nails (preferably without heads);
- pruning shears;
- twine;
- thin copper wire.

Algorithm of actions:
- Draw a circle 30 cm in diameter on the board.
- Drive nails along the marked line, at equal distances from each other. They should hold firmly in the wood and not fall out. The number of nails should be odd.
- Remove all knots and small shoots from the branches. Divide lush branches into thinner parts.
- Now the branches need to be woven together. They are placed in a "snake" pattern between the nails. That is, 1 branch needs to be placed behind the nail, then in front of the nail, and so on until the end. Where the branch ends, you need to attach the next one and continue weaving. Weaving continues until the branches reach the nail heads.
- Cut the twine into 10 cm long pieces and tie the wreath so that it does not fall apart when removed from the nails.
- Carefully remove the wreath from the nails. If the nails do not have heads, this task becomes much easier.
- The ropes need to be cut and removed.
- For reliable fixation, tie the wreath with thin wire. It will be invisible among the branches and will not allow the workpiece to unravel.
- If there are any protruding branches left, they should be carefully cut off with pruning shears.
The birch base can last more than 5 years. Each season, the decorations can be changed and the wreath can be made for different holidays.
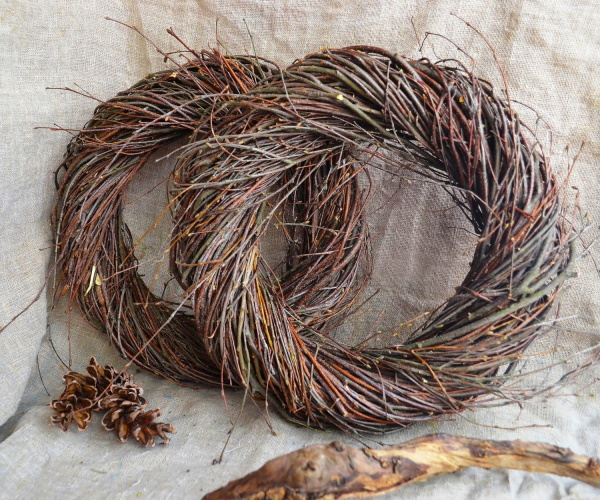
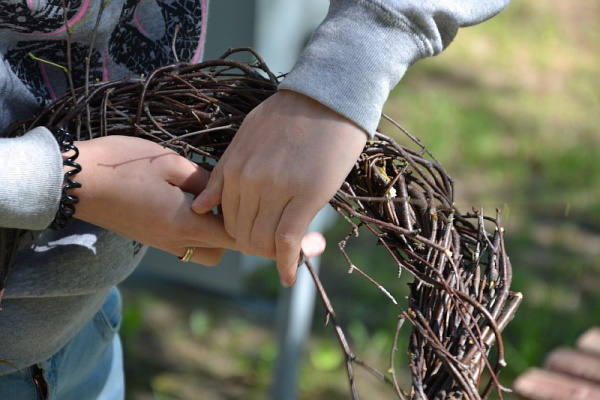
From willow
A willow wreath can be woven with your own hands only from pre-prepared branches. It is advisable to use fresh material, then the willow will be flexible and the weaving process will be faster and easier. Dry, brittle branches must be poured with boiling water and left in the water for 40 minutes. Then take them out, dry them with a towel and make breaks along the entire length.
Algorithm of actions:
- Take the 2 thickest and longest branches, fold them into a circle. Twist the ends around each other so that they hold tightly.
- The next branch should be a little thinner. It should also be wrapped around the workpiece.
- Repeat this procedure until the thickness of the wreath reaches 8 cm.
- The branches need to be twisted clockwise and counterclockwise. Small protruding branches should be hidden inside the weaving or carefully cut off with pruning shears.
- The material must be distributed evenly so that the wreath is smooth.
- Tighten the finished workpiece with twine or thin wire so that the product does not fall apart. The wire can be wrapped in a circle, or cut into 13 cm strips and tightened in several places. Twist the ends of the wire on 1 side, which will be the back side.
- Cut off excess ends of rope or wire. Sharp wire edges can cause injury, so they should be hidden under branches.
The finished product can be decorated with acorns, pine cones, ribbons and Christmas decorations.
From grapes
A wreath of branches (you can weave a product of any size with your own hands) of grapes is made using fresh branches. They do not need to be pre-soaked, because the grapevine is thin and very flexible.

Algorithm of actions:
- Bend 1 long branch to form a circle with a diameter of 30 cm.
- Tie the thin end around the thick base.
- Weave all the remaining branches around the blank, connecting the thin and thick ends. The thickness of the wreath should be about 8 cm.
- At first, the wreath may turn out crooked, but this is normal. To make the shape more even, you need to lay more branches.
- Tuck protruding branches under the wreath. No need to trim knots.
The finished product can be decorated with artificial snow. Craft shops sell special sprays. Glue pine cones, varnished leaves and acorns on top.
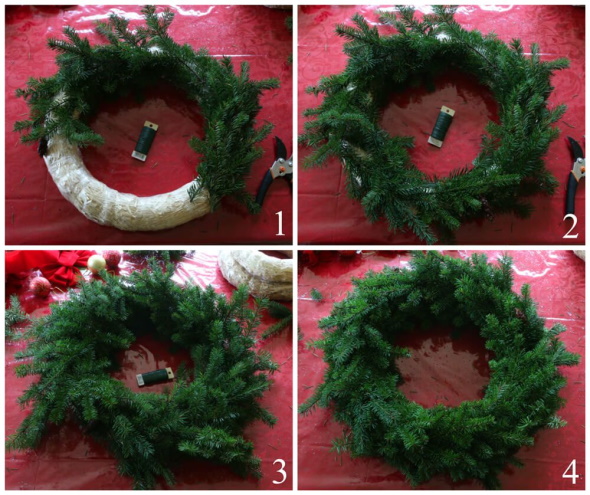
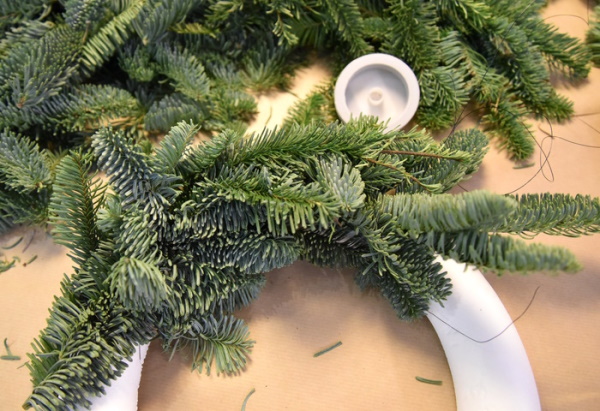
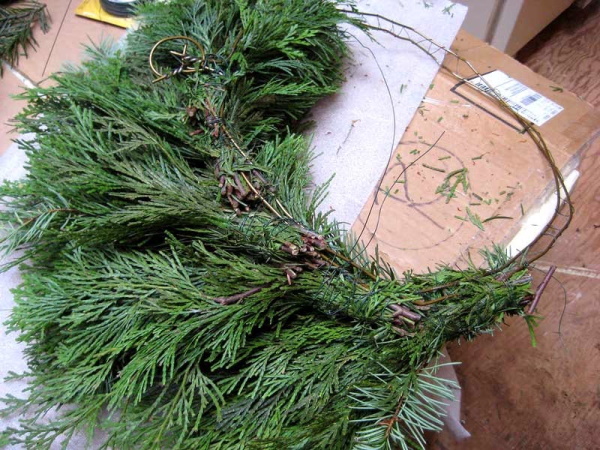
From the Christmas tree
A wreath of branches (you can weave it yourself by repeating the step-by-step instructions for a New Year's wreath) of spruce should be woven from prepared material. Experienced craftsmen collect raw materials a week before manufacturing.
If you plan to make a lot of wreaths, you can purchase a felling permit and officially cut down a whole spruce tree up to 2.5 m high.
What you will need for work:
- spruce branches;
- twine;
- pine cones;
- beads, ribbons and New Year's toys for decoration;
- pruning shears;
- scissors;
- gloves;
- transparent plastic ties.
To avoid staining your clothes or car seats with resin when transporting branches from the forest, you will need several rolls of cling film. You need to wrap the branches tightly, folding them into 1 large bundle. This technique will help reduce the volume of the branches, making them much more convenient to transport.
Algorithm of actions:
- Using a stationery knife, open the package and pull out the branches. It is better to do this in the bathroom so that the needles and resin do not stain the floor in the apartment.
- Leave the branches in the bathroom for 3 hours so that all frozen snow and ice completely melts.
- Wear gloves to protect your hands from being pricked by spruce needles.
- Select long and fluffy branches to make a wreath.
- Bend the branches into a semicircle and lay them out, layering them on top of each other. They need to be secured with twine so that the wreath holds its shape. You can use cardboard or embroidery hoops for the frame.
- When the product takes a beautiful, even shape, the branches can be additionally secured with plastic clamps. Cut off the ends of the clamps so that the joints remain invisible.
- Trim off protruding branches.
- Use hot glue to place decorations on the wreath.
Natural spruce branches fall off quickly. Regular spraying with cold water from a spray bottle will help keep them fresh. Craftsmen do not recommend using such wreaths to decorate doors. Frequent movements will cause the needles to fall off even more, and as a result, the wreath will last no more than a week.
From rose hips
A wreath of branches (you can weave it yourself from fresh or dry branches) of rose hips is considered a universal decoration. It can be hung on doors and windows in the fall or on the eve of the New Year. The branches should be prepared in advance. Usually, craftsmen collect them together with ripe berries and pre-dry the material in the sun.
To work you will need:
- thick cardboard;
- compass;
- scissors;
- pruning shears;
- acrylic varnish in a spray can;
- a skein of brown yarn;
- twine.
Algorithm of actions:
- Use a compass to draw a circle 30 cm in diameter on cardboard. Inside this circle, make another one, its diameter should be about 15 cm.
- Cut out the blank.
- Wrap the "donut" with brown yarn. The threads will completely hide the cardboard base of the wreath and also make the surface non-slip, so the rose hips will hold on tighter.
- Then the branches with berries are placed on top of the workpiece one by one. The thick ends are connected to the thin ones, intertwining them with each other in a “snake”.
- The branches are placed on top of each other until the thickness of the wreath is about 10 cm.
- Then you need to tightly wrap the branches with twine. It can be wound in a circle or cut into pieces 20 cm long and tighten the branches. In this case, the knots should be only on the back side.
- Cut off the excess ends of the string.
- Use pruning shears to remove all protruding branches that disrupt the composition.
To prevent the berries from wrinkling, they need to be covered with acrylic varnish from a spray can.
From juniper
Juniper branches are soft and do not hold their shape well. Experienced craftsmen recommend weaving wreaths by combining juniper with branches of other coniferous trees. The table shows an example of assembling a wreath from 4 types of branches.
| View of branches | Description |
| Pine branches | They hold their shape well and fall off less. They can be laid on the wreath frame as the first layer. |
| Spruce branches | Thin and strong, they are usually used as an intermediate layer to add volume to the product. |
| Juniper branches | Soft and light, they add volume and a beautiful light green tone to the wreath. |
| Thuja branches | Like juniper, soft and flexible. Depending on the type of wood, they can have a yellowish, light green or blue tint. They are laid on the product as the last decorative layer. |
Tools and materials that will be needed for the work:
- wreath frame made of thick wire;
- florist wire;
- white and silver spray paint;
- cones;
- red satin ribbon;
- hot glue.


Algorithm of actions:
- Prepare the frame of the product. You can buy it in craft stores or make it yourself. Since the structure will be heavy, thick cardboard may not withstand the load and break. Therefore, it is better to use a wooden or metal base.
- Form bunches from the branches. They can be made from branches of 1 type or combine branches of different plants. The main thing is that all the bunches are fluffy and voluminous. You can combine from 3 to 7 branches into 1 bunch.
- Tie all the bunches with green florist wire. The wire should be twisted on all the bunches in one direction, so that when assembling the wreath it will be easier to place them.
- During the process of forming the bundles, they need to be periodically laid out on the base and the appearance of the future product assessed. It is important that the workpiece is completely hidden from view.
- When there are enough bunches of branches, they need to be fixed to the base. First, each part is fixed separately, then the wreath is wrapped with wire twice. This way, the product will be even.
- Protruding branches are removed with pruning shears.
- The fluffy wreath is ready, now it needs to be decorated.
- Cones of different sizes and shapes, need to be painted with white and silver paint. Thread the wire through each cone, wrap it and secure it to the base of the wreath. First, you need to fix the large cones, then the small ones.
- Tie a bow from red ribbon and secure it to the top of the wreath using hot glue.
Finally, you can spray the wreath with silver paint. The spray can should be held at a distance of 30 cm from the product. 2-3 presses are enough for the paint to lie like dust. It will imitate snowflakes.

Making a wreath of branches with your own hands is not difficult. In addition to external beauty, the decor, assembled from natural materials, exudes a pleasant forest aroma, which has a beneficial effect on the mood and well-being of people in the house.
Video about wreaths made of branches
How to weave wreaths from branches: