Drawing an ear for children can be difficult because the organ consists of many details that are not always given enough attention to accurately convey in the image. This is an important element of the body, without which a person cannot hear., so when creating a portrait, it is important not to forget about the ears so that the drawing looks believable and complete.
Necessary tools
Drawing of an ear for children can be done using different tools:
| What you will need | For what |
| Paper | The density of the material depends on the chosen tool: for paints and markers, thicker sheets are chosen, while when working with pencils, thinner sheets can be chosen. |
| The pencil is soft | Used for light shading to create a drop shadow effect. |
| Pencil hard-soft or hard | Create a rough sketch and draw auxiliary lines. |
| Eraser | Remove unnecessary or unsuccessful details. |
| Ruler or compass | An auxiliary tool for creating straight or curved lines for sketching. |
| Liner | Trace the finished outline of the drawing. |
| Paints or colored pencils | Color the finished drawing. |
Simple drawing for kids
The ear (a drawing for children of this part of the body can be done in a simple manner) begins with an image of the base and gradually adds new details.
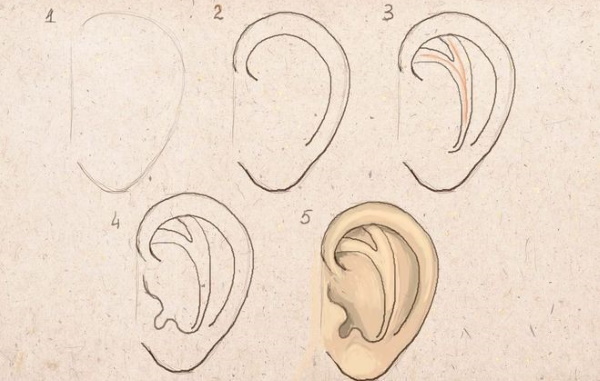
The method is suitable for beginners or preschool children, as it does not take much time and involves repeating simple shapes and proportions:
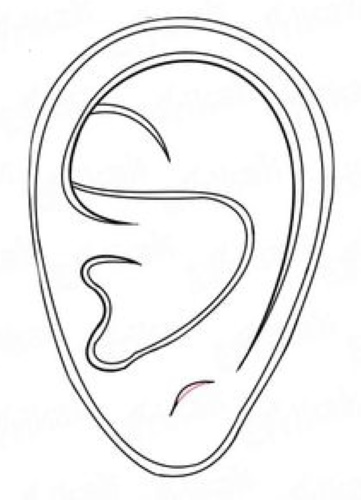
- Draw a vertical oval in the center of the sheet. Its left side is made straight, not round. This gives a schematic representation of the shape of the ear.
- Draw a curved line from the top and lead it to the center to the right. The arc follows the curve of the ear with a small indent inward.
- Proceed to the depiction of cartilage in the ear. From the beginning of the curved arc, draw an elongated check mark, repeating all the previous bends. This auxiliary line denotes the cartilage in the auricle. Outline this line on both sides and erase the base with an eraser.
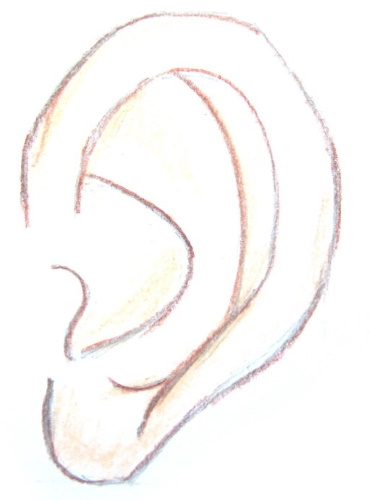
- Using a curved line at the bottom, draw the cartilage, repeating the line in the drawing below.
- Outline the contour with a liner or pen, erase the pencil sketch. Color the ear with paints or colored pencils. Add a darker color to the places where the shadow falls. Brown, gray and black colors are used for this.
Easy step by step method
This method, despite its simplicity, is more suitable for people who have drawing skills or for children aged 8-10. In the process, they try to reproduce the shape of the ear using geometric figures, and then draw small and curved asymmetrical details.
How to draw:
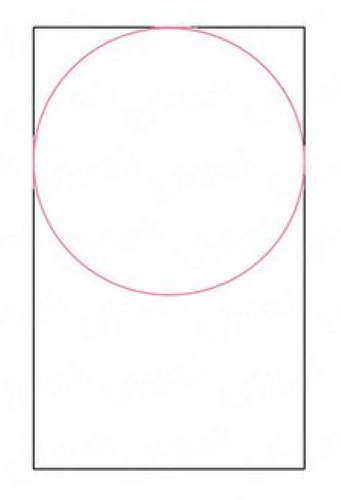
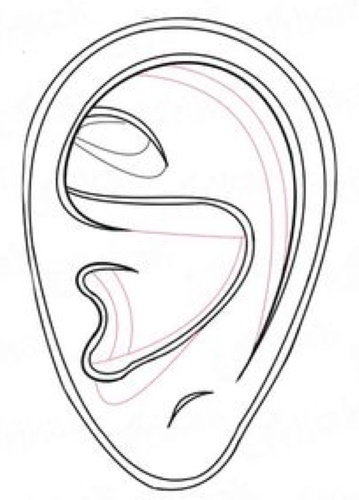
- Start with a rectangle as a base. All 4 edges are the boundaries of the ear itself, do not protrude beyond them during the drawing process. In the upper part, draw a circle, it should fit in half of the rectangle. To do this, you can use an auxiliary tool - a compass or outline a round figure.
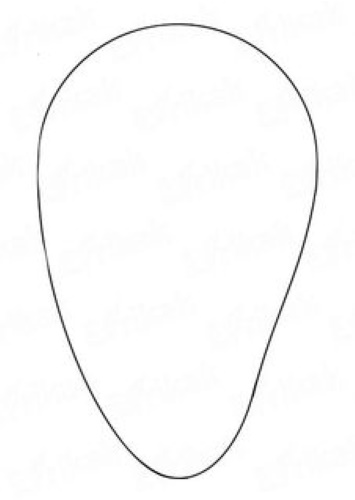
- An oval is drawn in the central lower part of the rectangle. It is superimposed on the circle and reaches its center. The oval does not touch the side parts of the rectangle. These 2 parts are connected along the sides of 1 common figure and all auxiliary lines are erased with an eraser. The image of the ear shape is obtained.
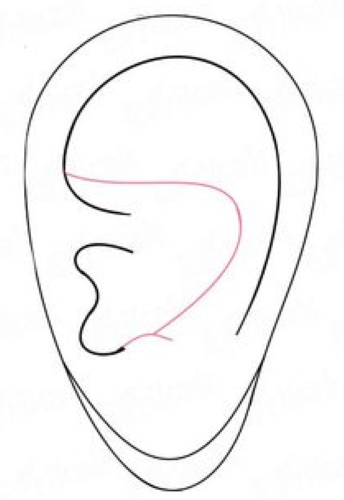
- They begin to draw the lines of the eye. In the upper part, they draw a curved semicircular line. On the left, this line sharply bends inward into the figure. In the central left part, they draw the cartilage of the tragus in the form of a wavy line. Above the earlobe, they draw a curved line with a small indent from the edge. From the beginning of the upper cartilaginous line to the wavy central line, they draw a curl with a bend to the right.
- Draw small curves in the upper and lower parts of the auricle. Erase the lower auxiliary line. All lines are re-drawn to give realism to the image.
- The outline is drawn with a liner or pen and the pencil sketch is erased.
- Using a pencil, draw curved lines to indicate where the shadow falls.
- Color the drawing in a convenient way - with pencils, markers or paints. The outline is made darker - black or dark brown.
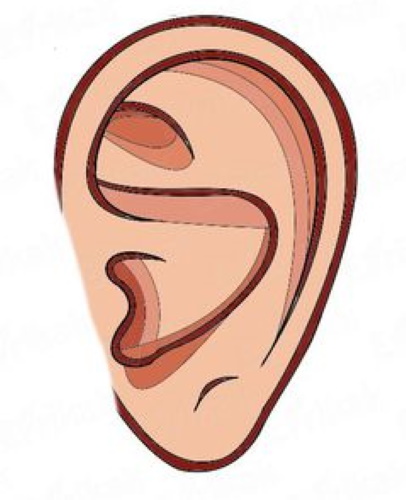
- The areas where the shadow falls are painted twice or with a color that is darker than the skin.
Drawing with a simple pencil
The ear (a drawing for children can be depicted with a simple pencil, focusing on the realism of the image and the places where light and shadow fall) is quite difficult to draw even in a cartoon style, since it has a complex pattern and curves. If you want to reproduce this part of the body in a realistic form, you should observe the proportions.
Artists advise to focus on the lower part of the eyebrow, which coincides with the upper edge of the ears. The ears are also 2 times higher than they are wide. When depicting the auricle, it is important not to miss the tragus, cartilage and ear canal, which can be darkened at the end of the drawing process.
How to draw:
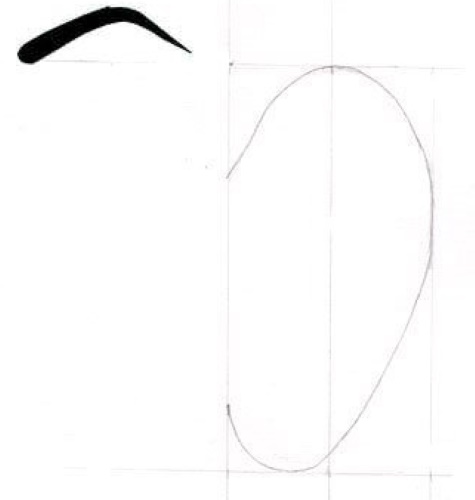
- Start by drawing a schematic grid on the sheet. Draw 3 vertical lines at equal distances from each other and 2 horizontal lines. The distance between the horizontal lines is equal to the length of the ear.
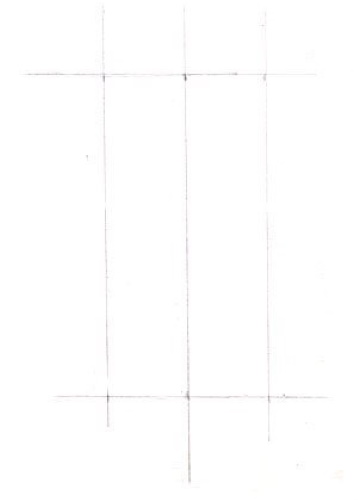
- In the upper left part, draw an eyebrow to orientate yourself on the size of the ear relative to the face. In the right part of the grid, draw the shape of the ear, repeating the curves in the cells.
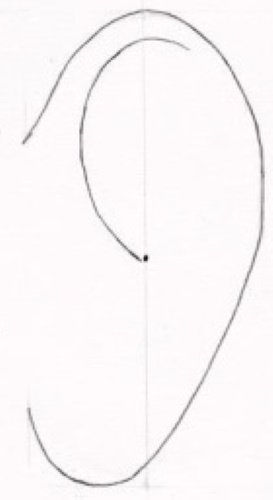
- Proceed to the depiction of cartilage. In the upper left part draw a line curved to the left.
- Draw an angular line at the bottom of the ear to show the tragus and a short bend from it.
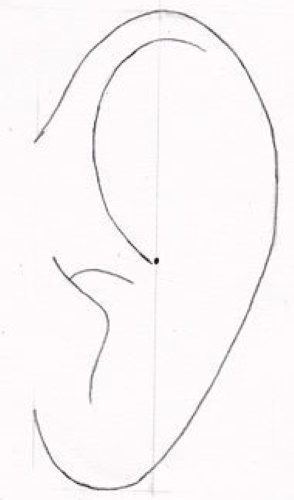
- In the lower right part of the ear, the cartilage is shown with a line that resembles a question mark in curve.
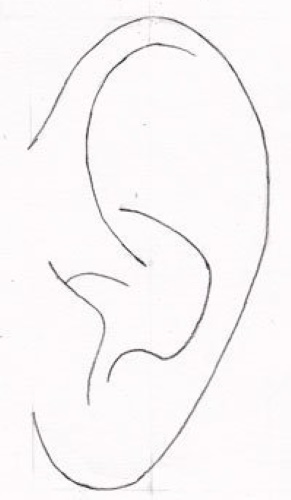
- Add small details to the drawing of the auricle. Repeat the curves as shown in the picture.
- Place the pencil flat on the paper and shade the areas on the upper and lower left side of the ear, showing where the shadow will fall.
- Shade the applied shadows. Continue shading, filling in the places where the penumbra hits – the upper part of the ear and the inner pattern of the cartilage. Go over the previous shading areas with a pencil again to darken them.
- Shade the hatching of the drawing. Color the ear completely. Lightly erase the places where light hits to create a glare effect.
- The outline of the ear is outlined with a hard pencil.
Drawing with colored pencils
The ear (a drawing for children can be depicted using auxiliary geometric figures) is colored with colored pencils or paints to make the drawing look more realistic. In this method, the parameters of 6 cm ear length and 4 cm width are used. These data are enough to depict a small ear. If desired, these indicators can be changed, following the proportion of 2:1, where the larger part is always the length of the ear.
How to draw:
- The sheet is placed vertically and a rectangle with the given parameters is outlined. If the ear will occupy only part of the drawing on the sheet, this area is placed in advance in the right place, using the right proportions.
- Draw a schematic of the ear's position inside the rectangle. The lines are angular, and are smoothed out in the following steps. A pencil and ruler are used in the process.
- A straight short line shows the beginning of the ear in the upper left part of the rectangle. An oblique straight line is drawn across the corner to the upper border. The same line is drawn across the upper right corner.
- Make a small indent down and draw a line cutting off the lower right corner. This corner should be larger than the previous ones.
- Step back to the left and draw a short straight line upwards, showing the end of the ear shape. The last line should go slightly to the right of the ear start line.
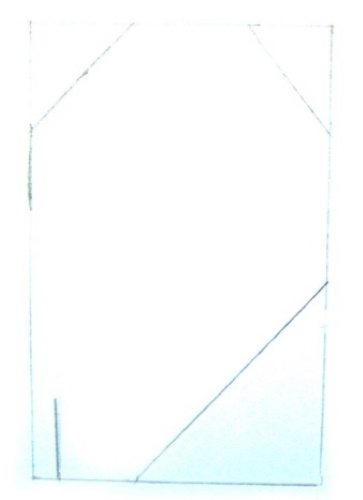
- Erase the auxiliary rectangle with an eraser.
- Add small details showing the cartilage lines inside the ear. A long arc, curved to the right, repeats the main curve of the ear. A curved short line shows the cauldron. From it, draw an arc to the beginning of the previous cartilage.
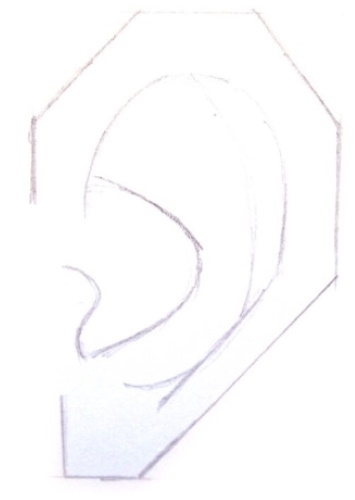
- Round off the main contour of the ear to give it a human and realistic silhouette. All lines inside the auricle are also made smoother. Erase the schematic sketch with an eraser.
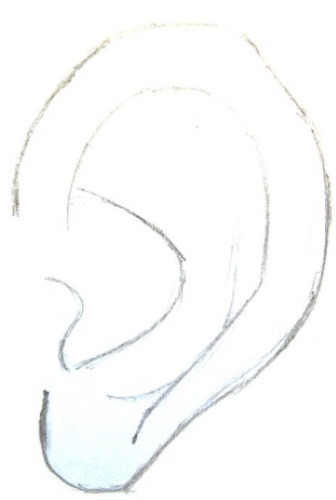
- Start coloring the drawing. Use a brown pencil to outline the ear and all the main lines. Use a beige pencil to do light shading in one direction over the entire ear area. Press harder and go over the shadow areas again.
- Use a brown pencil to shade the places where the shadows fall and the lines close to the main outline to give volume to the figure. Use black to make strokes in the darkest areas of the drawing and lightly outline the outline. Shade the drawing to make all the strokes softer.
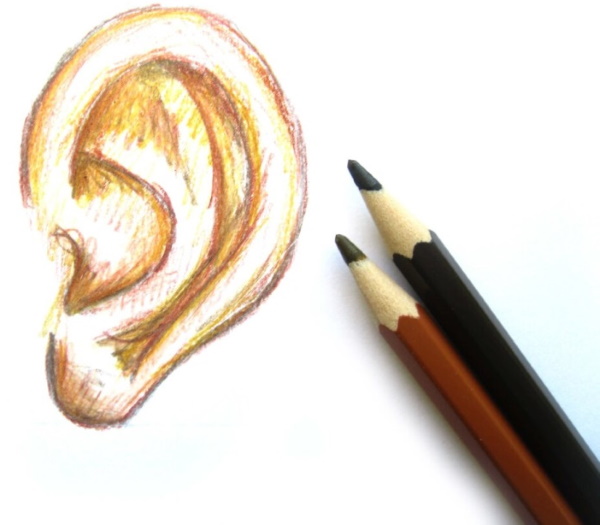
- Using light pressure, erase areas where light hits to create a glare effect.
Pencil sketch for those who have drawing skills
The ear (the drawing for children may differ depending on their drawing level) can be done in different ways. This lesson is more suitable for children aged 10-12 or for those who have drawing skills. The process uses uneven and asymmetrical lines, which can be difficult for beginners to repeat. The technique of applying light and shadow with a pencil is also used.
How to draw:
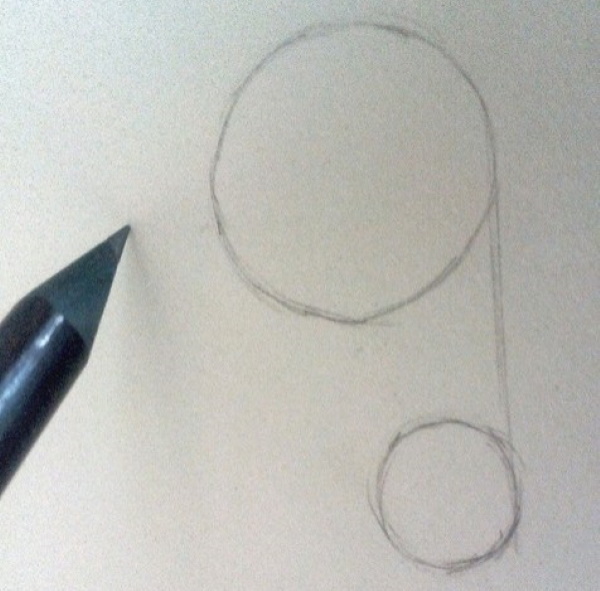
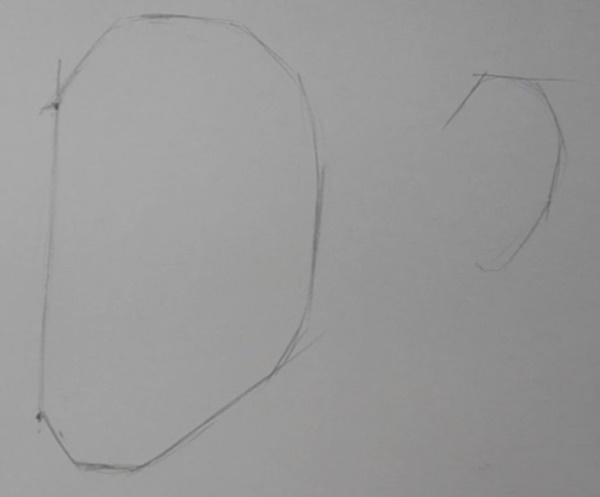
- The sheet is placed vertically and they begin to draw a schematic image of the ear silhouette. To do this, draw 2 circles of different shapes. At the top of the sheet, draw a larger circle. Below, with a small indent to the right, draw a smaller circle. The figures are connected with a straight line on the right side.
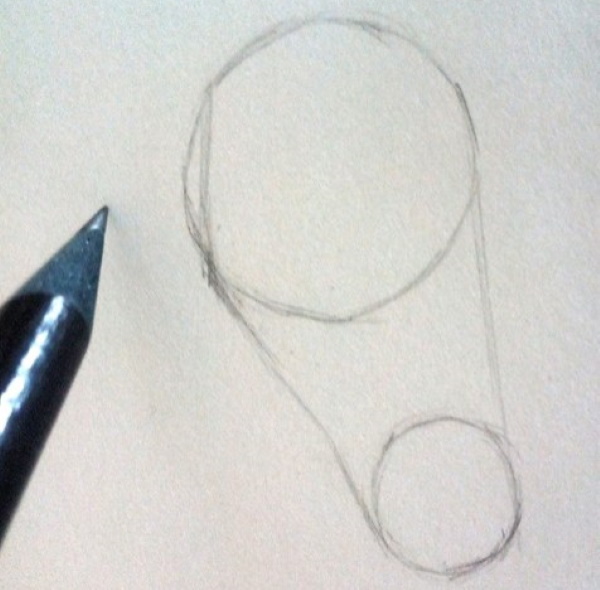
- The figures on the left side are connected in a similar way. The large circle is slightly cut with a straight vertical line.
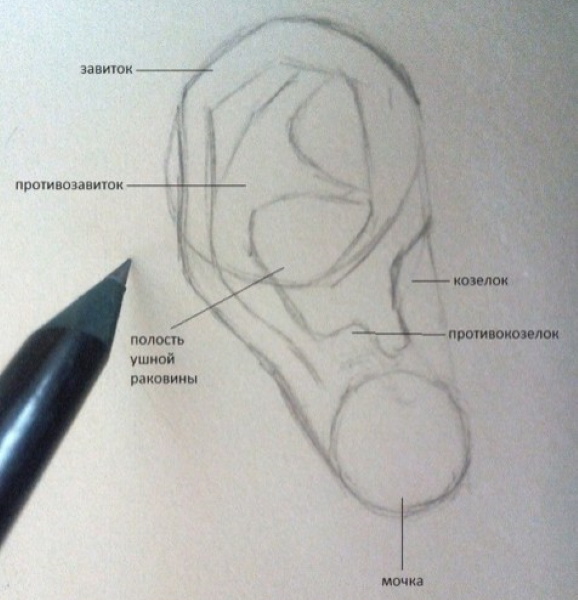
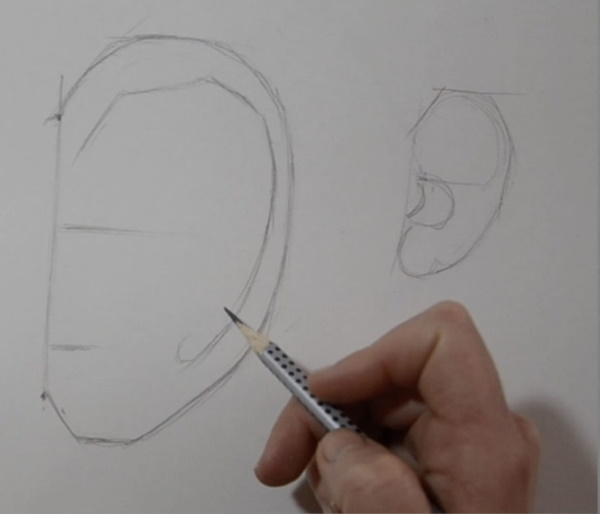
- They begin to draw the details of the inner part of the auricle. They begin by drawing the curl - this is a thick line along the upper edge of the ear. Its curve repeats the silhouette of the ear and starts from the middle of the auricle to the lobe.
- In the inner upper part, draw the antihelix. It starts from the helix, then bifurcates and leads to the upper part of the helix and down.
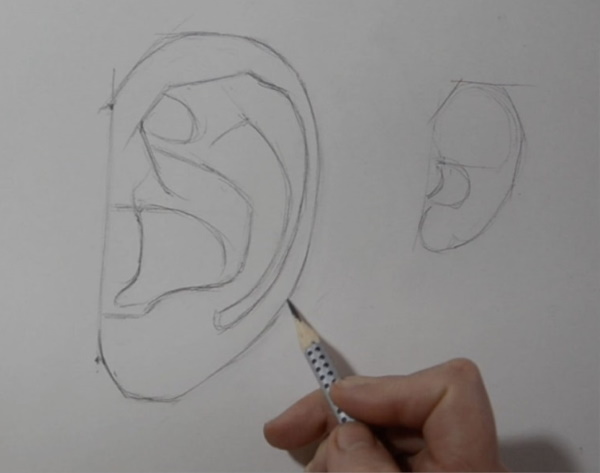
- In the central right part, draw a small tubercle – the tragus, and a little lower and to the left of it, the antitragus in the form of a tubercle.
- The lowest part of the ear, shaped like a small circle, is the earlobe.
- The space in the center of the auricle is its cavity.
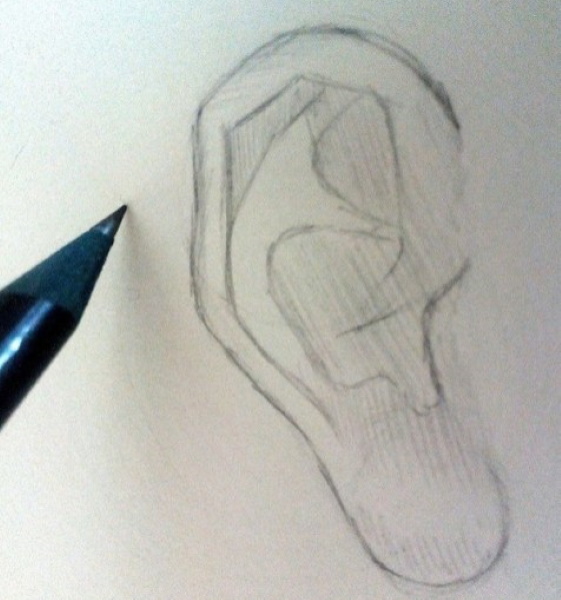
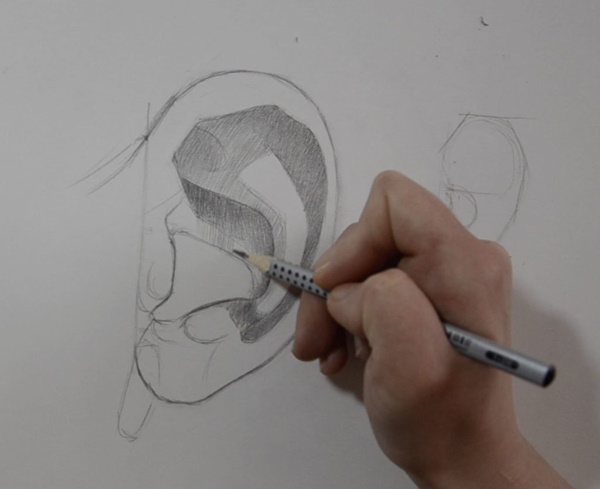
- Outline the contour and lines, erase the auxiliary parts. Proceed to shading the drawing. At this stage, do not draw the chiaroscuro, lightly shade the places where the shadow will fall.
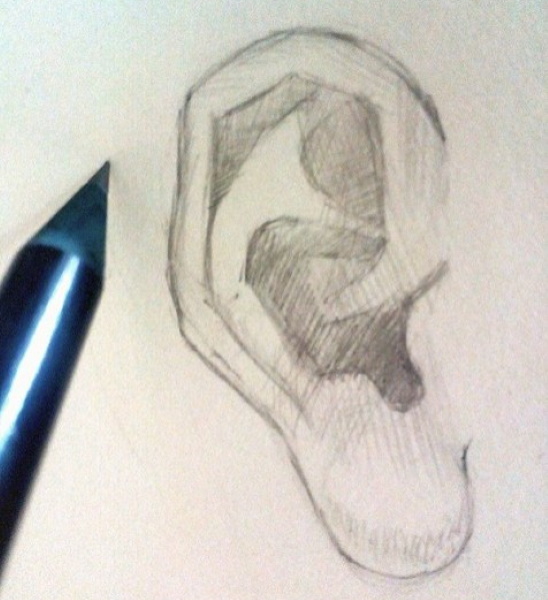
- Add opposite shading - apply frequent pencil lines in different directions. The places where the shadow hits are painted more intensively so that the shade turns out deeper. Light shading covers the places where the penumbra hits.
- To add realism to the drawing above the ear, the hair tucked behind the ear is drawn with long curved lines and strokes. The space behind the ear is shaded, adding realism to the image.
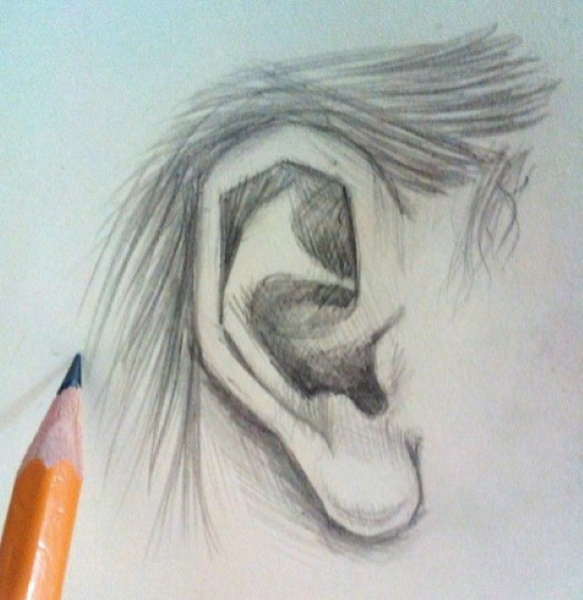
- Using a hard pencil, draw the main contours, accent areas and shadow areas.

- Shade the drawing.
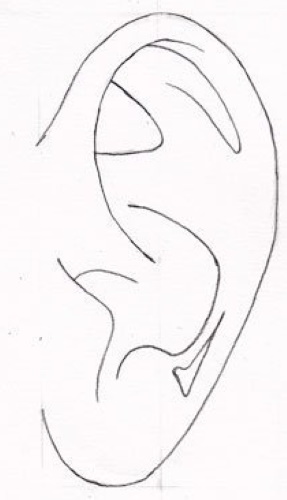
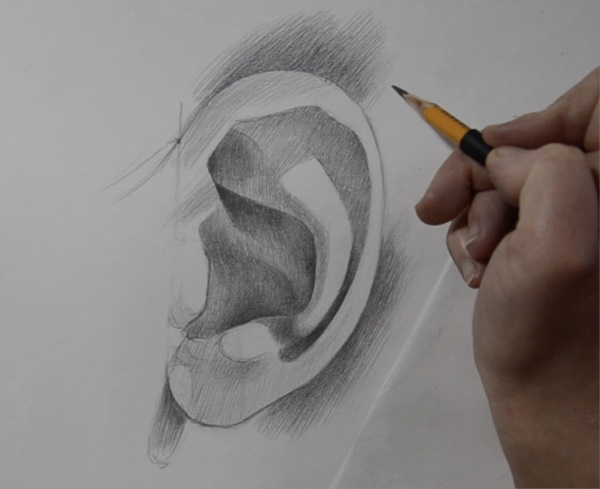
Realistic pencil sketch
The method is suitable for those who have drawing skills, since in the process the ears are drawn from life:
- Start with the image of a curved arc to the right - the silhouette of the ear. To correctly depict the tilt of the ear, draw 2 points, draw a straight line through them and from them draw the beginning and end of the ear figure. If it is difficult to repeat the ear figure the first time, try to build the main directions with straight lines and then round the overall silhouette.
- Visually, the ear is divided into 3 parts - the lobe, the tragus and the curl. Start with the curl - repeat the main curve of the ear with a small indent inward. Lead the tragus from the point where the ear begins to the beginning of the lobe.
- The earlobe is drawn more round and pointed downwards. The tragus is indicated by a tubercle above the earlobe.
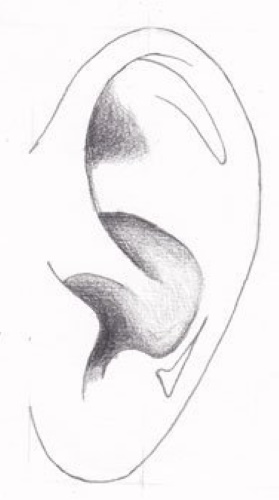
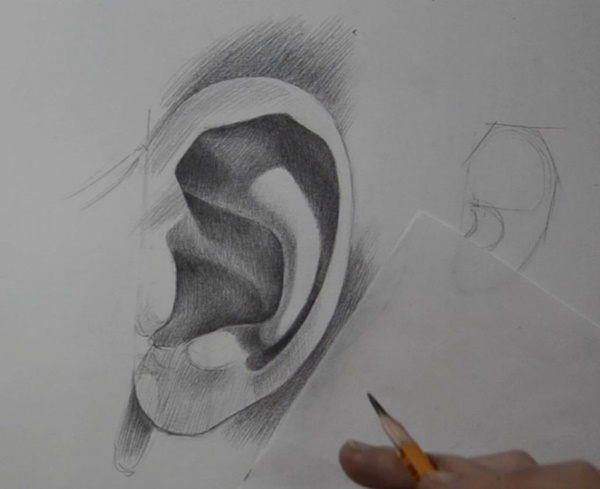
- Fill the auricle with small details. Repeat the lines as in the example drawing.
- To show the shape of the ear, use realistic shading to indicate light and shade. Shade with a simple pencil using light, short movements in one direction. Shade the inner part of the auricle from the helix to the tragus. Skip the protruding cartilage in the center. All cavities are at different distances from the light, so the intensity of the shading is different - repeat as in the example.
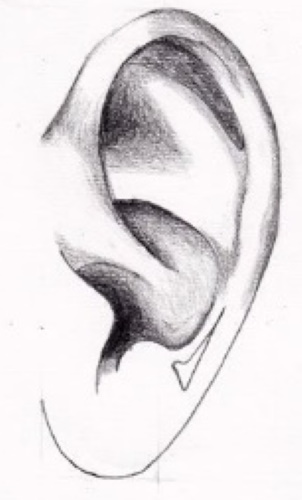
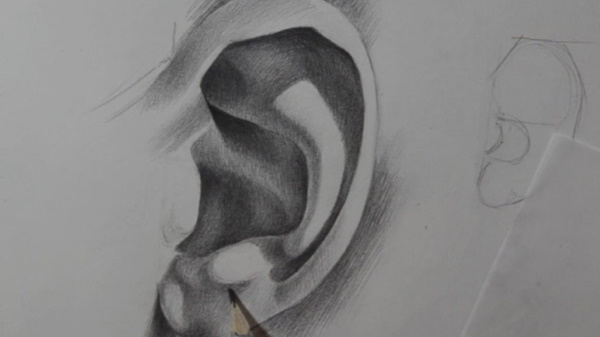
- Continue painting the surface of the drawing, trying not to focus on a certain area. Shadows are gradually thickened in all places. To give the drawing volume, the direction of the strokes is carried out according to the shape of the rounded areas.
- Determine where the darkest and lightest places are in the subject. All other places are compared relative to these places by tone intensity. In the example, the lightest place is the antihelix in the inner part of the auricle, the darkest is the area under the antihelix.
- Apply shading according to these observations. To make the tone lay more evenly, use shading in different directions, periodically shading it.
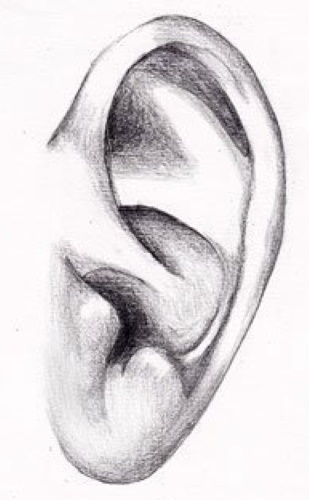
- Carefully work out the transition areas of the shadows with fine shading. Light areas are shaded weakly or an eraser is used to lighten the line. The entire ear area is covered in this way.
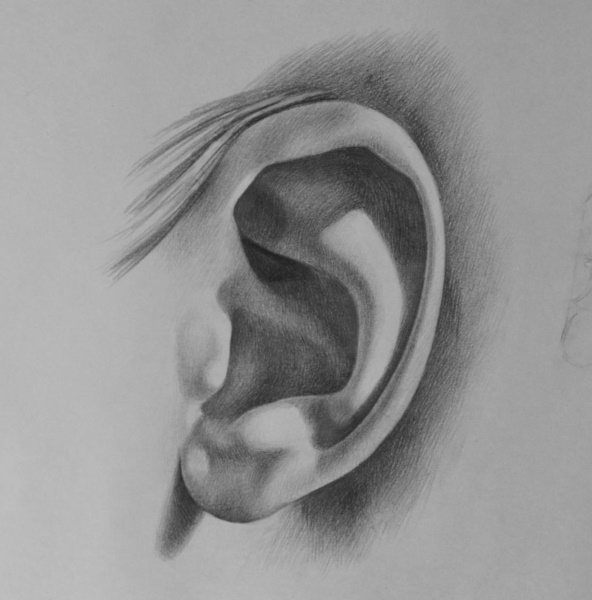
- At the end, add a hairline above the auricle to make the drawing look logical and more realistic. Use a hard pencil to go along the contour.
Useful tips
Drawing an ear for kids can take a little time if you follow a few simple rules:
- Before starting to draw, mark the place where the ears will be on the sheet in advance. If you plan to draw ears on a character, first sketch out its figure so that the finished sketch is in the center of the sheet. The papers are also placed horizontally or vertically.
- They start with a schematic image of the ear and its main features. Then they move on to a more precise outline. At the last stage, they color the drawing and shade the places where the shadow falls.
- The shadow in the drawing is shown by frequent and light shading with a soft pencil. This can be a simple pencil or a colored pencil of a shade darker than the skin tone. Another way to show the shadow is to use paints or colored pencils.
- The finished drawing is outlined with a liner or pen only when the sketch is finished. After that, all unnecessary details are erased with an eraser.
- For preschool children or those with a basic drawing level, it is recommended to use felt-tip pens, paints or colored pencils for drawing. In the process, do not try to create a realistic image and convey only the main features. Children who are not accustomed to the long process of drawing or the depiction of many complex lines can quickly get bored with the creative process.
- When drawing a portrait, the ears are placed in the space between the nose and the eyebrows. The position of the ears may change depending on the position of the head. If the head is raised, the ears are shifted and placed in the space between the tip of the nose and the level of the lips. If the head is lowered, the ears are shifted higher and are depicted between the middle of the nose and the middle of the forehead.
Video on how to draw an ear
How to draw ears easily: