Young and middle-aged children are not able to perceive a large amount of information at the same time. To draw a picture on a given topic, for example, "Tundra Landscapes", they will need visual aids and constant practice.
The child's theoretical knowledge on this topic will allow him to easily transfer his impressions and the provided prototype of the painting onto a piece of paper.
What you need to draw the tundra
Tundra (children of different ages can draw the picture) is a huge treeless and cold space in which many animals are forced to live. The word "tundra" has Finnish origins from the word "tunturi", which means "treeless plain" in Russian.
Despite the harsh climate and difficult living conditions, living in the tundra is more favorable for many animals than their life would be in the hot desert.
To correctly depict the nature of the tundra, you need to introduce children to the conditions in the region. Tell them how the region differs from other regions of the country. A preliminary acquaintance with the tundra will arouse children's initial interest in the northern region and facilitate the artistic process.
If a child has an idea of this region, he will be able to independently come up with sketches and display them on paper. The main and fundamental rule of drawing is practice.
The more attempts you make to draw a sketch of the tundra, the more high-quality and realistic the images will be. Gradually, you can begin to draw more complex and detailed pictures. Drawing a sketch of the tundra is not difficult if you have the necessary items for drawing.
It is easiest for children of primary school age to draw pictures with a pencil, in this case you will additionally need:
- eraser that does not leave marks on paper;
- cotton pad;
- black pencil;
- colored pencils;
- watercolor paints;
- A4 sheet of paper;
- pencil sharpener.
For older children, watercolor painting is suitable. A combined drawing will look good, with a combination of the texture of the pencil and the liquid consistency of the paints.
In this case, you can use a clear pencil line to mark the outline of the image or to indicate significant parts of the drawing; paints can be used to retouch the picture partially or completely.
Before painting, it is necessary to find demonstration material for the children, on which objects characteristic of this area will be visible. This thematic task will allow children to show their imagination and depict nature as they imagine it.
In middle school, children usually use several painting techniques, the main ones being:
| Linear | Linear technique is considered the simplest. When drawing in this way, straight or curved lines are used, which indicate the contours of an object or its individual parts. You need to start the drawing by drawing a horizontal line, which will serve as the horizon of the tundra. After that, you should draw the contours of trees, bushes, stones or animals. When using this technique, straight and curved lines, you can create detail in the drawing. |
| Spots and shading | This technique is based on the use of different forms of spots and strokes that create images. You should start with the main object of the picture, marking it with spots of different sizes. After that, use hatching to add details to the drawing: grass, stones and trees. This technique is used to create textures and shadows in the sketch. |
| Elements of volume | Using this technique, you can create the illusion of volume in a drawing. To do this, take a pencil and add light and dark shades to the sketch. You need to draw shadows falling from trees, bushes or animals, in this case the picture will convey depth and realism. |
Tundra (the drawing may differ in local color and plants typical for this area) is a picturesque region with amazing nature. In order to correctly convey the beauty of the region, you need to have the skill of working with color and form, to be able to correctly convey the surrounding natural beauty using a pencil or paints.
To draw a beautiful picture, you should follow these steps step by step:
| Start with a general outline | Draw the basic shape of the tundra using simple shapes: ovals and circles. |
| Add details | Draw low-growing vegetation, small bushes and trees. |
| Diversify the landscape | Add local features such as rocks and waterfalls. |
| Use different colored pencils or paints | The colors most often used to depict the tundra are blue, gray, or blue. To create your own unique style, you can additionally use other shades in the details. |
| Adding depth to a drawing | For the greatest realism in the drawing, you should add the effect of depth. To do this, you need to use shadows. You can draw objects in the background to create the illusion of immersion in space. |
| Emphasizing details | For harmony and completeness of the picture, you need to add details in the foreground. For this, you can use lines and texture, then the picture will be more expressive and interesting. |
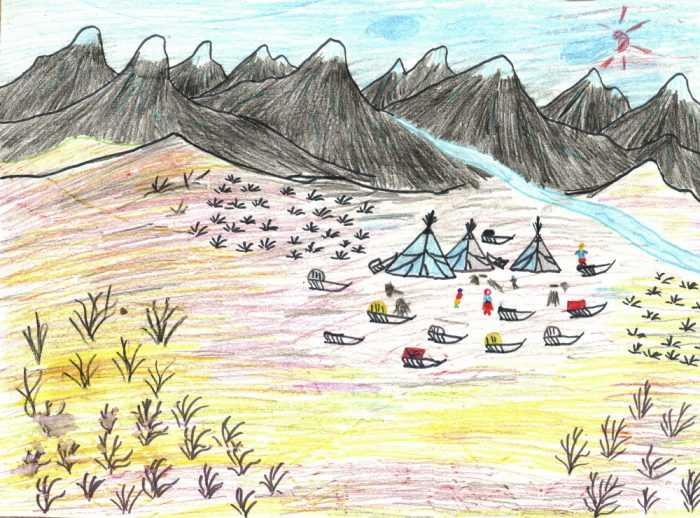
Examples of drawings on the topic of the surrounding world "How I imagine the tundra"
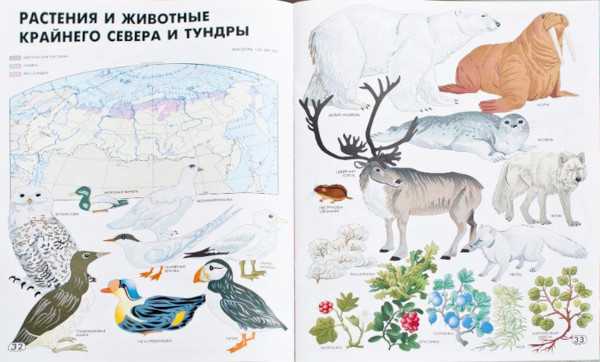
Tundra has a special type of ecosystem, the region has low-growing vegetation that can adapt to harsh freezing conditions and requires little nutrients in the soil.
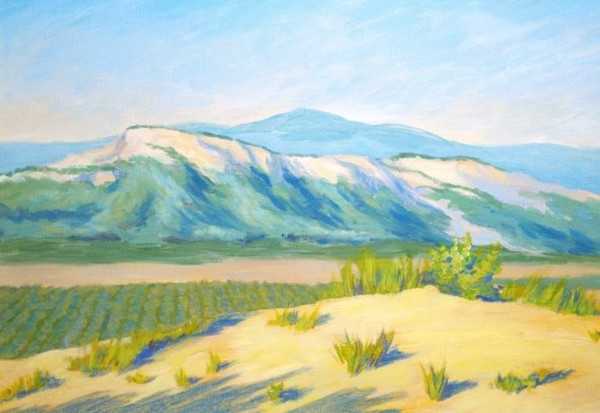
The main elements of the tundra are bright azure skies, snow-capped mountain peaks and picturesque flat landscapes. When painting, it is necessary to take into account that the tundra includes wide spaces, mountains, fields and small lakes.
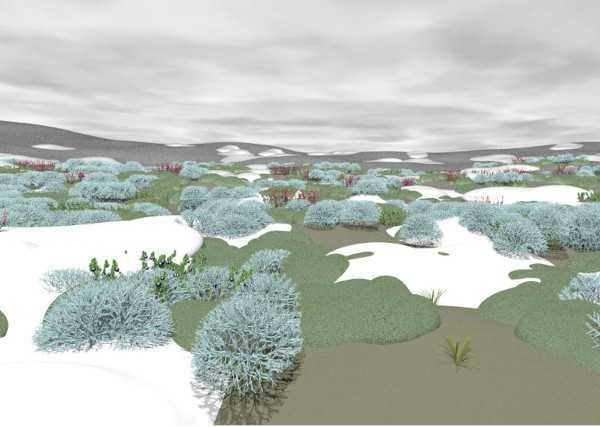
The most popular and most characteristic images of the area are those of deer, foxes, and polar bears, the main inhabitants of the northern region. Another striking representative of the tundra's animal world is the Arctic fox.
You can draw a picture of animals without adding complex details or a large number of characters. Or you can additionally draw the most common plants of the region - lichens and mosses.
Often, the northern lights are depicted in images of the tundra – a celestial phenomenon that can be shown on a sheet of paper by mixing a palette of paints.
Pencil drawing
To draw the simplest picture of the tundra with the image of the northern landscape, you need to follow the steps step by step:
- Draw the horizon on a piece of paper using a horizontal line. Leave enough space at the top for the sky and at the bottom for the ground.
- Using grey, blue and light blue pencils, draw the sky. Gradually add different shades and display shadows to give volume.
- Draw the ground. To do this, use green and brown pencils. For greater brightness, add vegetation and grass. For realism, add images of stones and bushes.
Using a simple pencil, you can depict a tundra landscape in black and white. To do this, after completing the basic step-by-step actions, you should mark the tundra plants in the lower part of the drawing, and draw the outlines of snow-capped mountain peaks in the upper part. To make the drawing realistic, you should draw in the shadows of the mountains, trees and small bushes.

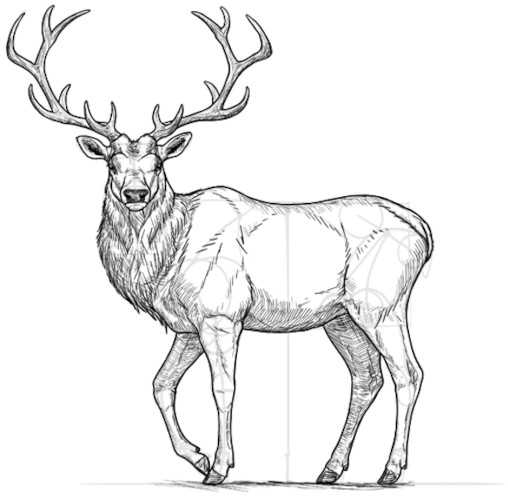
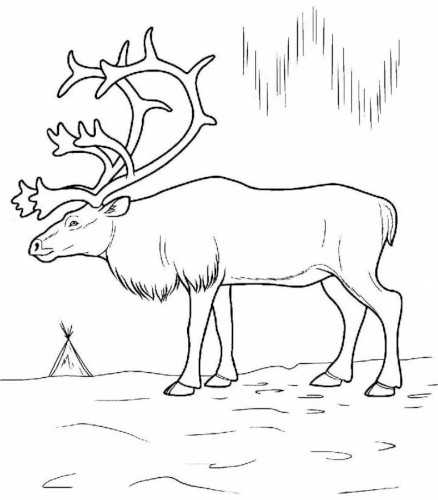
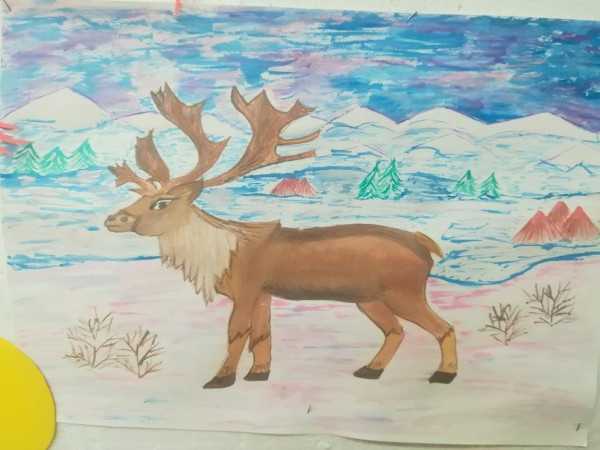
Tundra (the drawing can be very simple or complicated with small details) is distinguished by a certain climate and therefore animals that are not afraid of the cold live in it. For a more complex composition, the drawing should depict the most beautiful animal of the tundra - the deer.
The biggest problem when creating a complex painting is losing proportions on a sheet of paper. To avoid this, you need to draw a sketch of the animal's body before adding other details. To do this, you need to sketch the appearance of the animal with the possibility of further correction.
Step-by-step actions:
- To depict the animal's body, draw a rectangle on a sheet of paper.
- From the middle of the drawn rectangle, measure the desired distance for the ground. It should be slightly longer than the width of the future deer's body.
- Make a mark on the rectangle where the animal's limbs will begin.
- Make a light sketch of the animal's legs.
- To add realism to the animal's chest, add a circle to the lower left corner of the drawn rectangle.
- On the front part of the rectangle, on the left side, draw an oval; it will serve as a simplified form of the turned neck.
- Draw a neck from the circle in the lower left part of the rectangle.
- Draw the head at the top of the neck.
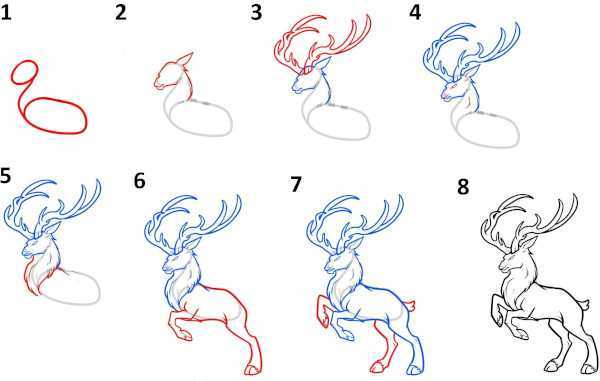
Detailed drawing of the animal's head:
- Divide the square head sketch into 3 parts.
- Draw 2 ovals on the sides of the square in the middle.
- Draw small circles inside the drawn ovals closer to the bottom sides.
- Draw the animal's nose, mouth and chin under the drawn ovals.
- From the oval of the animal's muzzle, draw 2 circles to create the basis for the ears.
- Connect the animal's head with the ears.
- Between the animal's ears, draw the starting points for the horns to branch out.
- Draw the animal's horns using curved lines.
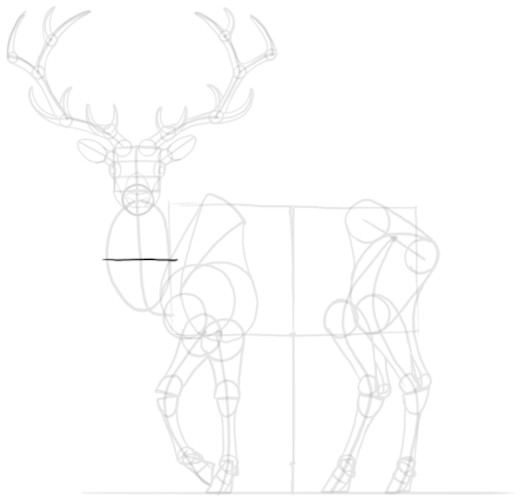
After a rough sketch, you should check the correctness of the animal's proportions, after which you need to start drawing it in detail:
- The animal's front legs are drawn in the shape of the number "6". The shoulder area and shoulder blade are included in the writing of the number.
- From the top point of the number, draw a shoulder blade that will rise slightly above the drawn rectangle, the future body of the animal.
- To draw the hind legs, use circles to mark the thighs and knees.
- Then outline the knee, hip joint and back of the thigh.
- After drawing and outlining the thigh part of the leg, mark the wrist, which is located approximately in the middle of the animal’s leg.
- At the bottom of the leg, near the ground, mark the location of the hooves, which will later be depicted as small rectangles of irregular shape.
- Draw the muscle mass of the animal's limbs; the details below the ankle should be thinner than the upper part of the legs.
- The animal's neck should be given a diamond shape.
- Connect the animal's neck with the body using a smooth line.
- Draw the body using smooth, curving lines.
- Add realism to the deer using shading, mark shadows and draw in the fur.
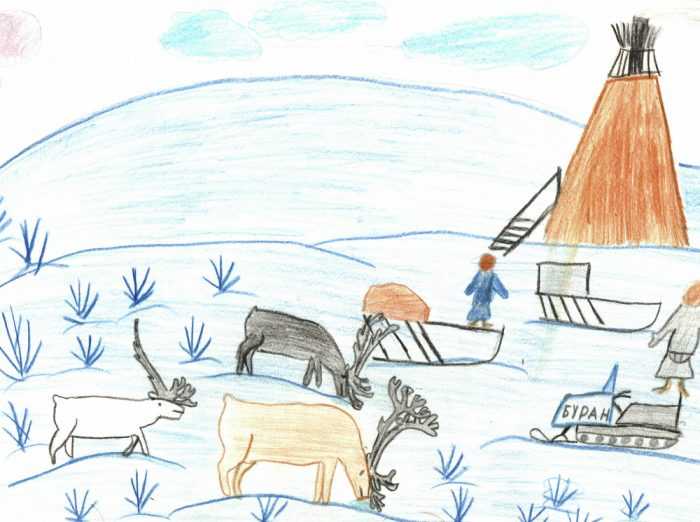
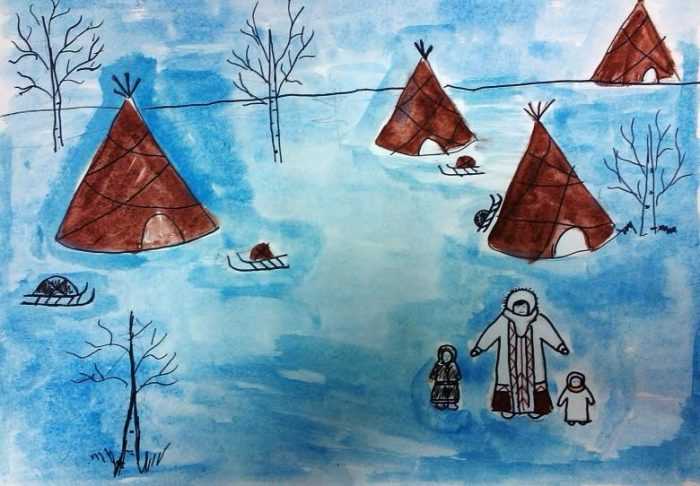
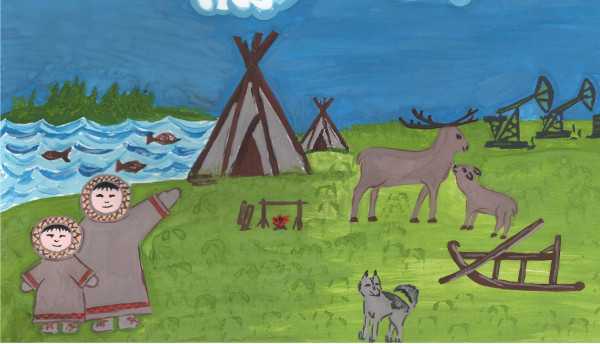
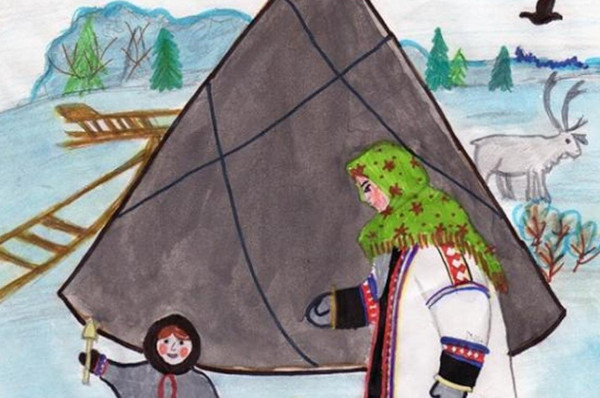
The tundra (the drawing can depict the life and everyday life of the local population) is sparsely populated, with no more than 300,000 people living in the northern region. In the background of the drawing, you can draw a hut of the local northern residents called a chum.
If desired, you can color the deer using colored pencils, making its fur slightly brown.
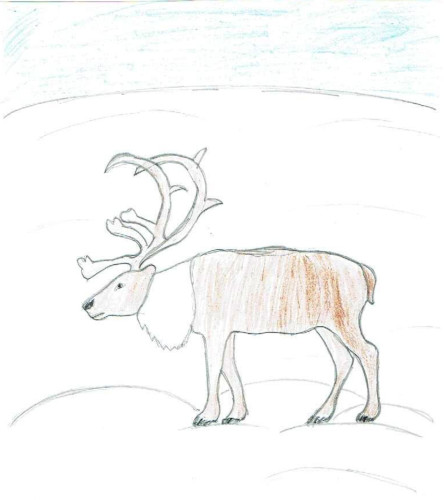
You can add snow-capped mountains, figures of people and their national sleds pulled by dogs or reindeer in the background.
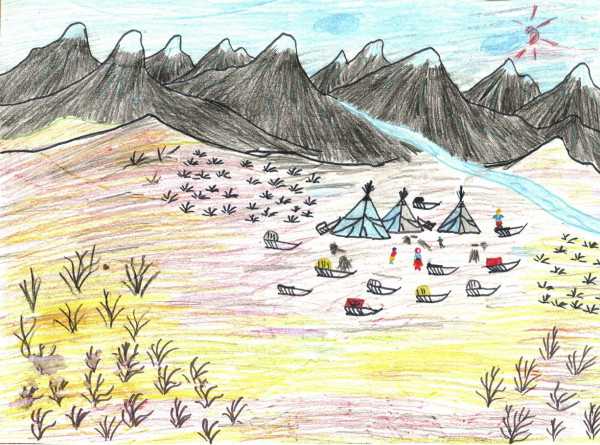

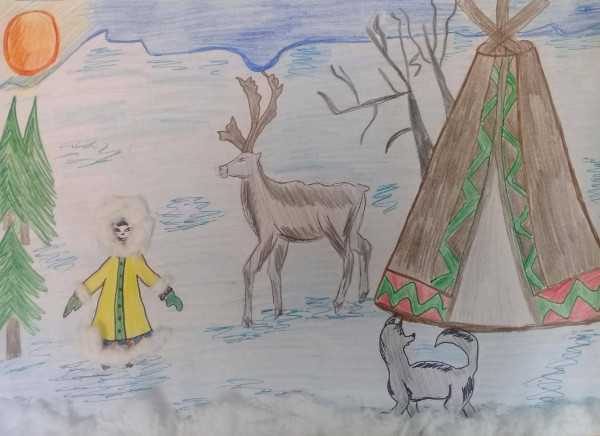
In the picture where the tundra is depicted, the person drawn next to the deer in the foreground should be depicted in national clothing: high boots, a fur hat and a reindeer fur coat.
Drawing with paints
To convey the beauty of the tundra and the incredible colors of the north at different times of the year, you can use watercolors when painting.
To do this you will need:
- pencils;
- paints;
- palette;
- watercolor paper;
- eraser;
- brushes.
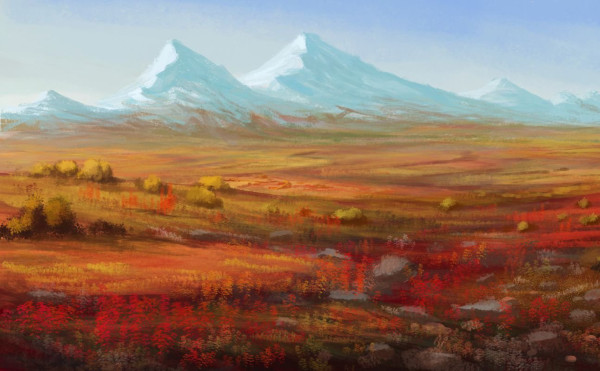
For a simple drawing by middle school students, regular honey watercolors, which are sold in stationery stores, are suitable. The landscape of the tundra varies greatly depending on the season, and the tundra is especially beautiful in autumn.
After studying the local landscape and choosing a sketch and scenario for the drawing, you can start working. First, you need to imagine the composition of the drawing in detail or select an image for copying. Conventionally, work on the painting can be divided into 2 stages: working with pencils and working with paints.
Step-by-step execution of the painting:
- a designation of the horizon line, with deliberate curves indicating mountainous terrain and hills;
- sketch of the shape of the reservoir;
- image of silhouettes of animals and people.
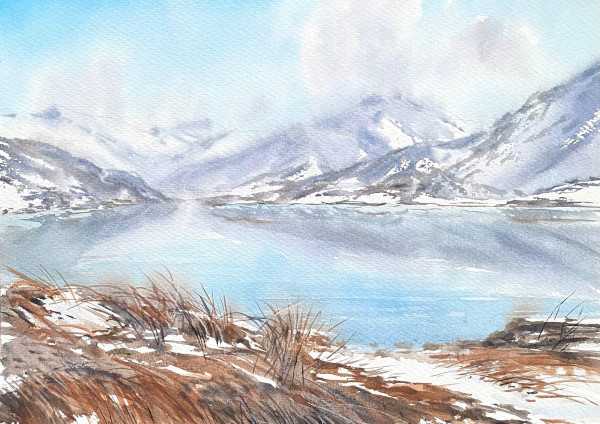
After working on the pencil sketch, you should move on to working with paints. To depict a winter landscape, it is necessary to take into account the subtleties of conveying the color range. In winter, the polar night comes to the tundra, the day is short during this period, so you should use muted, dull colors.
The sky should be painted with gray-blue paint, to get the right shade you need to use a palette. You need to paint the sky from top to bottom, as you approach the horizon the paint should be paler. The mountains can be left white or given a pale blue color.
Blue paint should be used when painting snowdrifts. Snow can be depicted in the drawing using cotton swabs. If there are animals in the drawing, they should be given color according to their characteristic features. People can be drawn in national clothes, using traditional northern motifs.
The snow should not be completely filled with paint, you can leave white space in some places. In case the painting has some mountains in the foreground and others in the background, the background further away should be lighter than the front.
Autumn in the tundra is a riot of colors. At this time of year, red, yellow, orange and green shades are present in nature. The brightness of nature can be conveyed especially beautifully using watercolors.
The main rules to follow when painting "tundra in autumn":
- In the picture, the sky should be lighter than the ground. It should be filled with blue paint, leaving white areas. They will represent clouds. When painting, you need to take the maximum amount of water with the brush, but avoid spreading. Excess water can be removed with a squeezed brush.
- After sketching the sky, start coloring the ground. To do this, mark the areas where wild rosemary and lichen bloom. Detailed drawing of polar autumn plants is not necessary.
- You can draw polar bushes, for this, use a thin brush with black paint to draw plants, and place dried leaves nearby.
When creating a painting, it is recommended to change the water as often as possible, especially if you have to use dark or bright colors often.
If desired, you can draw northern animals against the backdrop of the tundra landscape; deer are especially often drawn in paintings done with paints.
There is also the opportunity to draw local residents and their homes against the backdrop of beautiful picturesque mountains and lakes.
After successfully mastering and using paints or a pencil, while drawing a picture on the theme of "tundra", you can begin to use a more unusual material and make a craft using fabric or sand. This will give the opportunity to give a textured and volumetric effect to the finished creation.
Author: Olga Zhanskaya
Tundra Drawing Video
How to draw tundra with watercolors and pencil: