The trunk is the main part of the tree, for a realistic depiction of which it will be necessary to understand the principles and patterns of tree structure.
Being one of the important elements of the classical landscape, the trunk of the tree requires clear drawing of details, the presence of primary knowledge of geometric shapes and the skill of applying shadow accents. At the same time, the drawing itself is quite simple to perform and can be done not only by adults, but also by children who have carefully observed nature.
Materials used in the work
Tree trunk is a drawing created with a simple pencil, eraser and thick album sheet in a graphic style or is the basis of a classic landscape.
Materials needed for the drawing lesson:
| Simple pencils | For drawing, it is recommended to use a set of graphite pencils with leads of different softness: 2B, HB and 2B. In this case: · 2H pencil has a hard lead and is used for drawing outlines; · HB – with a medium tonality helps to make smooth transitions between the tones of the drawing; · 2B – soft pencils, used for outlining the contours of an image and applying shadows. |
| A4 sheets of watercolor paper | Having a higher density than office ones, they also have a ribbed surface, allowing you to easily apply and erase the contours of the image. They can also be replaced with album sheets for drawing. |
| Erasers | Experts recommend that a beginning artist purchase 2 erasers:
· A rubber or vinyl, plastic and flexible white eraser, produced by STABILO, Koh-I-Noor or Faber Castell, which removes traces of black graphite pencil well without damaging the paper. · A kneaded eraser made from easily creased, cleanable rubber, used for correcting and lightening charcoal and pastel drawings. |
| Stationery knife or sharpener | Used for neatly sharpening pencils. |
| A piece of fur or rag | Used to clean a drawing from eraser residue after removing pencil lines. |
| Colored pencils or watercolors | Material used for coloring the drawing and landscape image. The recommended number of colors in a set is 8 or more. |
Simple drawing of a tree trunk
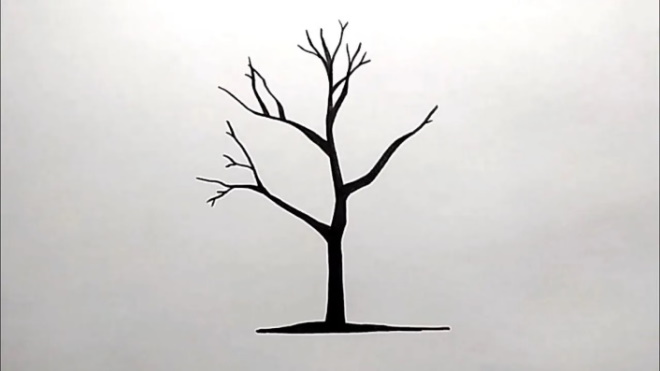
Tree trunk - a drawing in a simple execution, accessible to beginner artists, can have an oval, round or cone-shaped form, differing depending on the type of tree. Additionally, branches extending from the trunk and foliage (if desired) are depicted on it.
Besides this:
- At the bottom, the trunk is complemented by an above-ground rhizome, and at the top by a conical top.
- The lateral branches end on different sides with many small branches, depicted as straight, arched or wavy lines. Their size varies depending on their distance from the trunk (the further they are located, the shorter they should be).
- You should draw leaves of different shapes and sizes only on short branches.
 |  |
The drawing can be supplemented by a clear outline of the bark pattern, an image of a birdhouse on the branches, birds, or a hollow in the trunk.
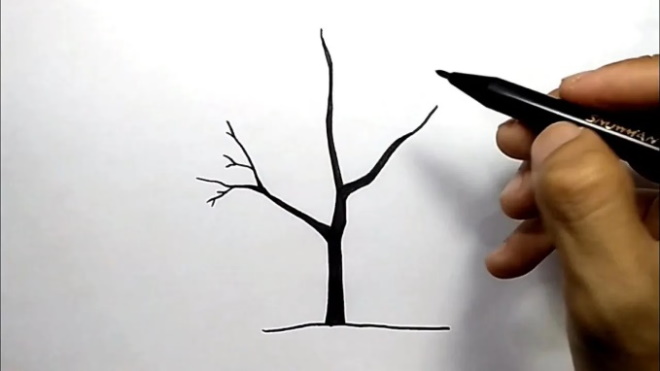
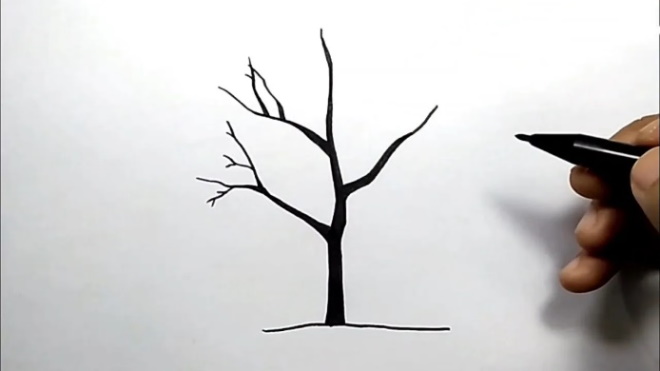
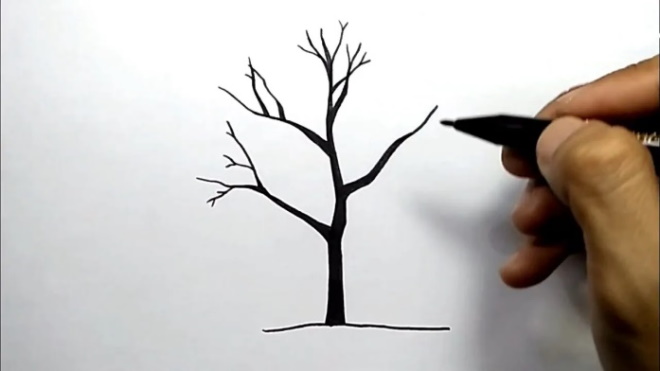
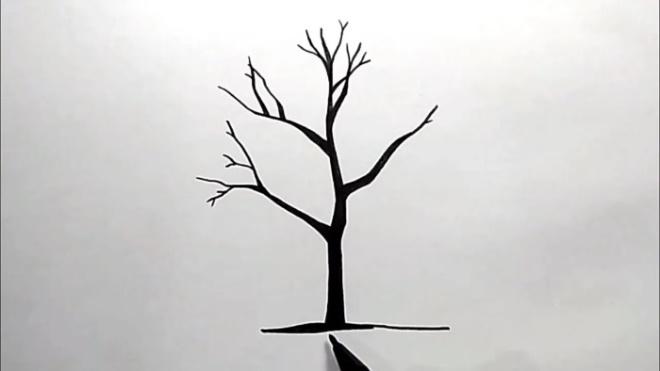
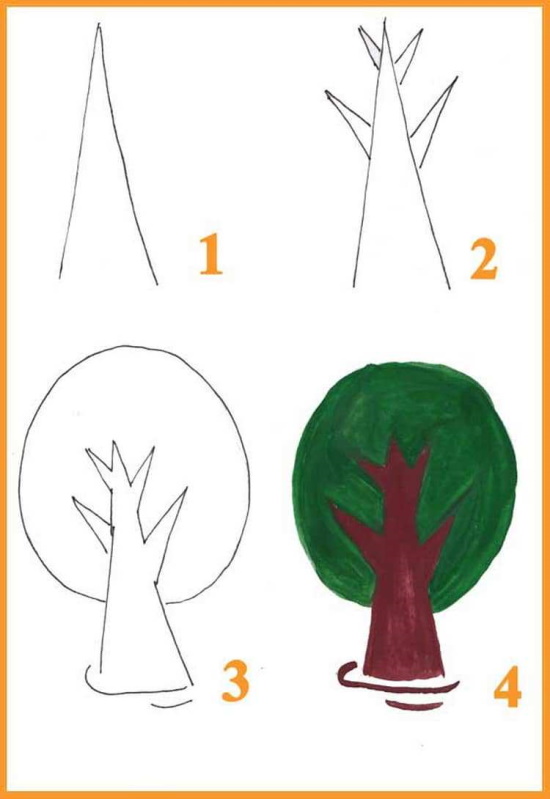
You need to draw the tree trunk using 4-5 curved lines of different sizes:
- First, a central point is established on the drawing, from which a vertical line of the central part of the trunk is drawn upward.
- Further from it, at different heights, stepping back a little from below, 2-3 oblique lines are drawn - branches.
- Subsequently, they gradually grow into smaller, branch-lines of varying lengths, directed slightly upward and periodically intersecting with each other.
- You can complete the drawing by rounding its upper part with foliage.
Option 2
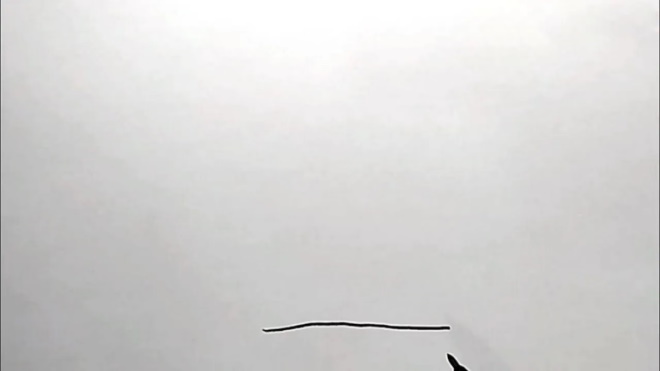
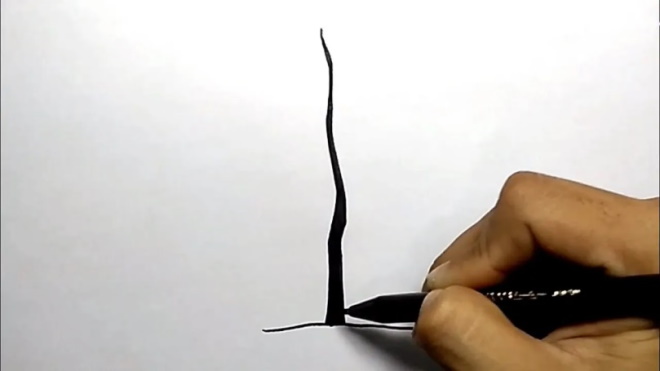
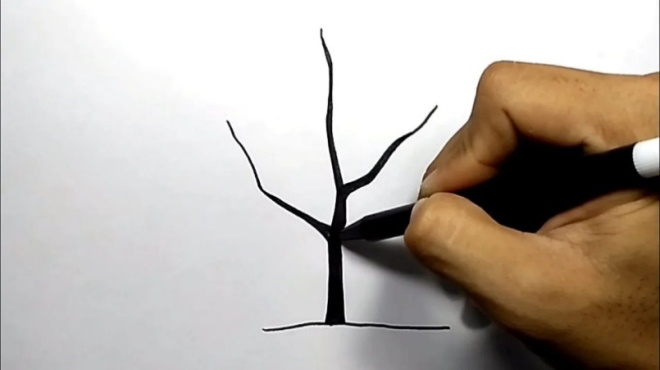
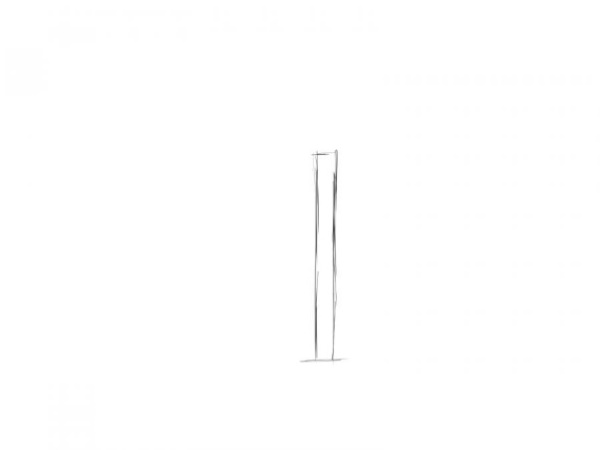
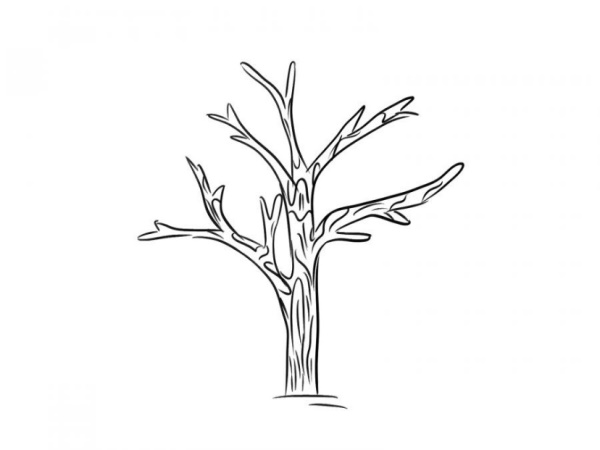
Tree trunk - a drawing without foliage can be easily drawn with a simple pencil, which will allow you to draw all parts of the tree as accurately as possible - its bark and branches. It begins with drawing a wavy line on a sheet of paper, depicting the ground level.
 |  |
 |  |
 |  |
 |  |
From its central part, you need to draw the outline of the cylindrical trunk, using winding, curved lines for this, which will make the image as realistic and asymmetrical as possible. The base of the trunk in the drawing should be much wider than its top.
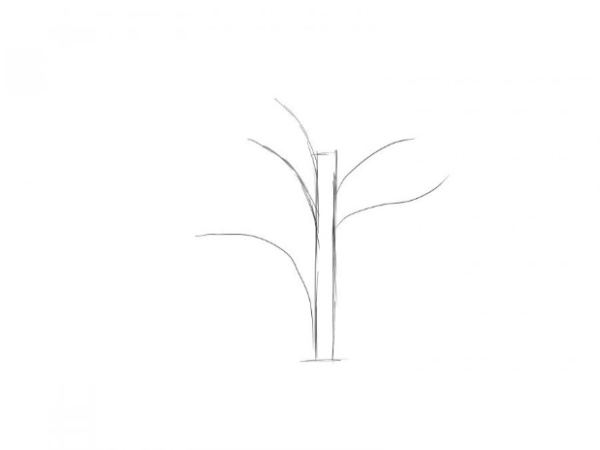
On both sides of the trunk you need to draw winding branches of different sizes and shapes.
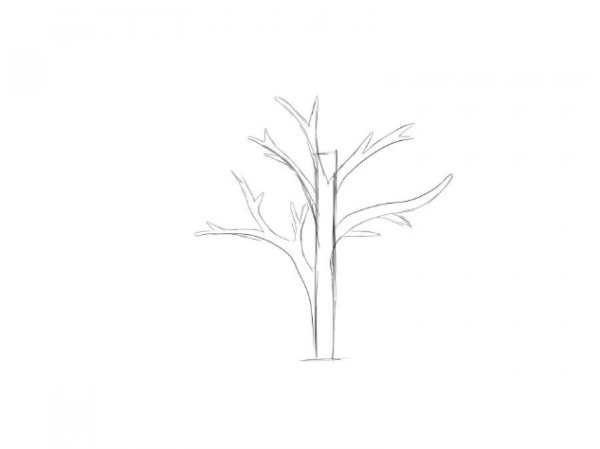
On each large branch, you need to draw smaller branches of different sizes and shapes. In the drawing, they should intersect with each other and have different lengths and thicknesses. The work is completed by drawing the area of land on which the tree stands.
Option 3
Tree trunk - a drawing that suggests working with various hermetic figures.
Thus, when depicting it, an elongated, vertically positioned rectangle can be used as its basis, from which arcuate lines should be drawn on each side to depict the branches.
 |  |
 |  |
 |  |
 |  |
The side lines need to be thickened with additional elements, thereby turning them into tree branches, and shorter, curvy lines need to be drawn to them to depict small branches.
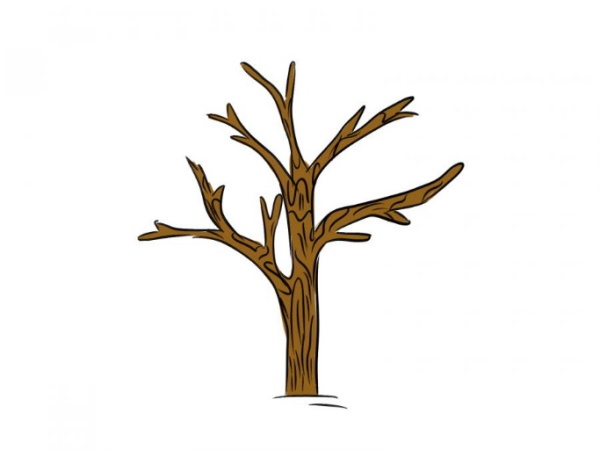
Using winding lines and strokes of different lengths, you need to create the texture of tree bark on the drawing, and then use an eraser to remove all auxiliary lines from the paper sheet and outline the resulting contour with a pencil with a soft lead.
Using a colored brown pencil, carefully paint the drawing without going beyond the edges. At the bottom, using a darker shade, you can draw the ground on which the tree stands, and then, using the same color, add a shadow to the drawing to give it visual volume.
Use a black pencil to enhance the shadow areas of the drawing using hatching, and then use a white gel pen or marker to add highlights and accent lines.
Option 4. Spruce trunk
The trunk of a fir tree can be drawn using a vertical line, 5-7 cm long, extending from a point located on a sheet of paper, depicting a plot of land with a growing tree.
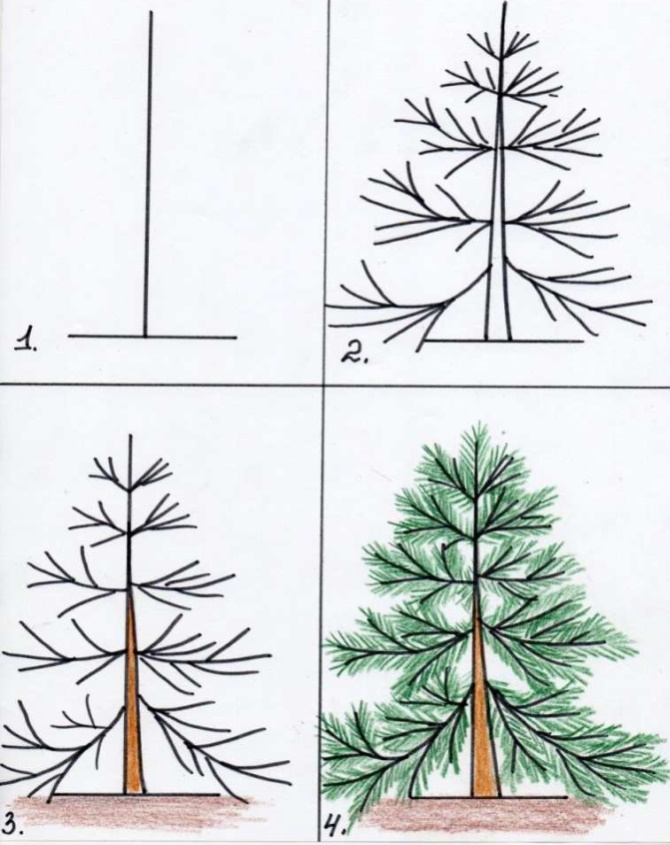
Next:
- By drawing another line down from the final top point of the vertical line, you need to draw the trunk, thickening it at the base so that the resulting figure depicts an acute-angled triangle.
- Stepping back 2-2.5 cm from the lower edge of the trunk, you should cross it with a 4-centimeter horizontal line so that you get an angle of 9°0С.
- Similar horizontal lines, perpendicular to the central vertical ones, need to be drawn higher, stepping back from the first one by 2-3 cm, and then another 1 cm, to create larger branches.
- From each horizontal line, in different directions, you need to draw several different length diagonal and vertical lines, thereby depicting short spruce branches.
- The resulting drawing can be outlined with a soft pencil, after removing all auxiliary strokes, and then color the triangle of the trunk with a brown pencil.
- Using a green pencil, apply short strokes to each branch; if desired, you can add needles to the spruce.
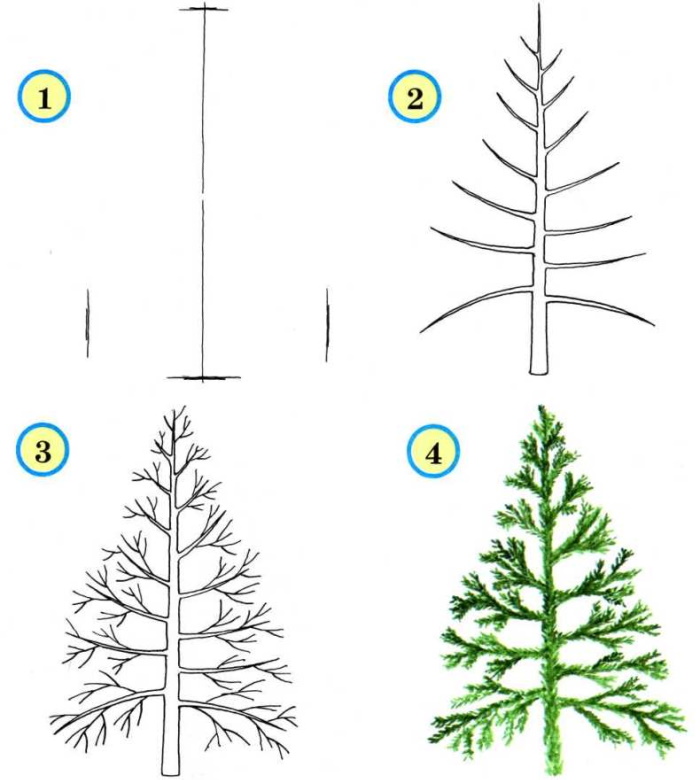
A more complex version of the spruce trunk requires drawing four dots on a sheet of paper - one at the bottom, top, right and left. The dots are marked with small pencil segments, and a straight vertical line is drawn from the bottom to the top in the center.
Next:
- On the central line, at a distance of 1-1.5 cm from each other, you need to draw dashes-segments, from which branches of different lengths should depart, depicted in the form of slightly elongated triangles. In this case, the two lower branches can be drawn in the form of a semicircle, using arched lines and lowering their tops down, and the remaining branches can be made straight and turned upward.
- On each branch, use short pieces of different lengths to depict additional branches. Some of them should be perpendicular to each other.
- Using an eraser, you need to remove all auxiliary lines and outline the outline of the trunk with a soft pencil.
- If desired, the finished drawing can be supplemented by adding strokes with a green pencil to depict needles.
Option 5. Birch trunk
The trunk of the birch tree has an uneven, curved shape.
And to depict it you need:
- On a sheet of paper, draw a winding horizontal line to represent the ground on which the tree is built, and from it, draw up first one slightly curved vertical arc, and then complement it with a second, connecting them at the top and creating a semblance of a slightly tilted triangle with a wider base at the bottom.
- Along the entire length of the trunk, apply short strokes, and then from them draw branches that become narrower as they lengthen. The largest, downward-hanging branches should be located at the base of the trunk and have an arched shape.
- The side branches are drawn using thin lines directed upwards. As with the larger branches, they should be larger at the bottom, gradually decreasing and shortening towards the top of the tree.
- On the trunk and branches, use dark spots and stripes to create a pattern typical of birch bark.
- Using an eraser, erase all auxiliary lines from the sheet and outline the outline of the birch trunk with a soft-tip pencil or marker.
- Using white and grey pencils, apply shadow to the tree bark, and below, using green pencil, draw the grass at the base of the birch.
Tree trunk image for poster
Tree trunk - a drawing for a school poster or project, with the image of a "family tree" can be done using a human palm as a basis.
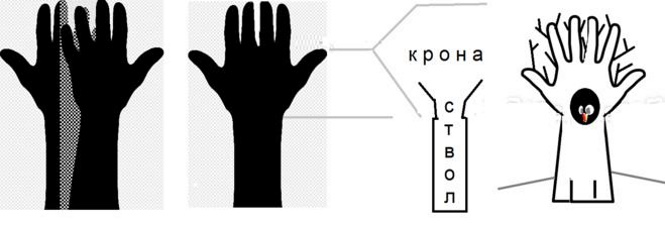
To do this:
- Place your palm with spread fingers on a sheet of paper and trace it along with your wrist with a pencil. In this case, the hand will serve as a model for the trunk itself, and the fingers will act as branches.
- Using straight lines, from each finger-the main branch, you need to draw the desired number of thin, additional branches crossing each other.
- The brush-trunk itself can be designed in the form of a rectangle.
Dead tree trunk
The drawing of the trunk of a dead, dried-up tree without bark and leaves begins with the application of several lines - a framework for the main drawing.
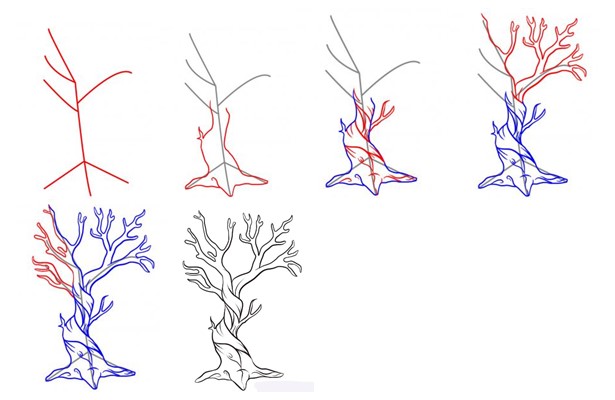
To do this you need:
- On a sheet of paper, draw a slightly inclined central vertical line, from which, stepping back 2 cm from the base of the drawing, you should draw 2 lines to the right and left down so that you get a triangle, and then randomly draw side lines in the upper part of the drawing - branches looking slightly upward.
- Using winding lines, connect all parts of the frame together so that a massive tree trunk with a wide rootstock and branches is formed.
- On the central branches, use a pencil to draw branches – shorter branches.
- Use an eraser to remove all additional strokes and outline the outline of the drawing with a soft pencil.
A simple version of a design for applique
The simplest option, recommended for creating templates for children's appliques, involves depicting a tree trunk as a triangle, widened towards the bottom.
The branches in this case also have the form of small triangles with a wide base, located randomly on the trunk, large at the bottom and small at its top.
This drawing is colored with a brown pencil in a single color, without creating color transitions. If desired, you can complement it with a spherical leafy crown, drawing apples on it or birds sitting on the branches.
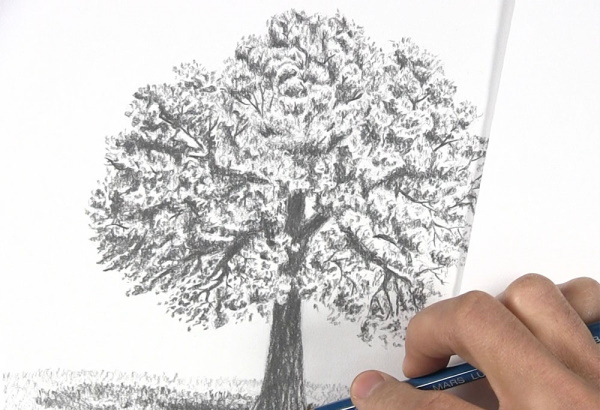
Professional tree trunk image
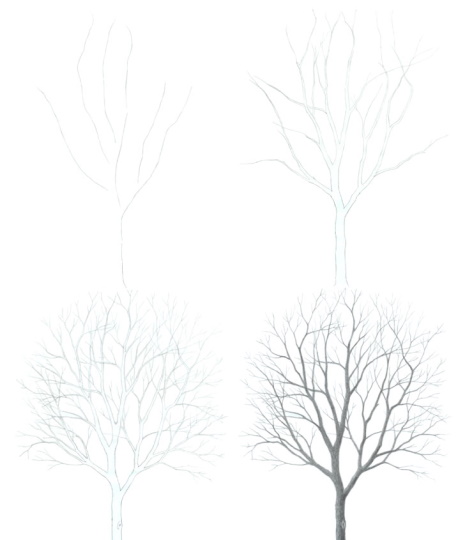
Tree trunk - a drawing made by professional artists, necessarily corresponds to the basic principles and patterns of tree structure.
The tree trunk is based on a cylindrical shape, and when depicting the bark, it is necessary to strictly monitor the preservation of its volume. It will also be unevenly illuminated, being darkened on one side.
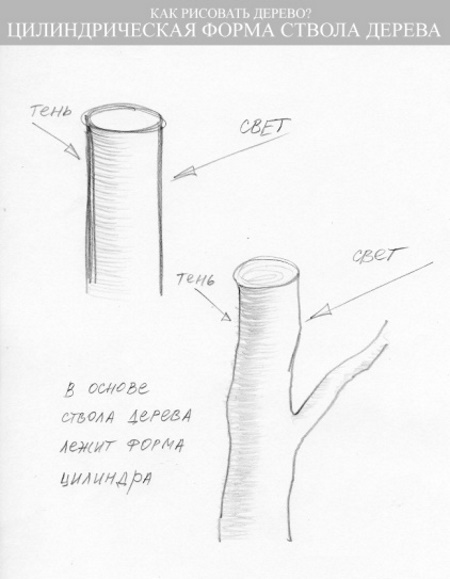 |  |
For this purpose, it is recommended to leave the light areas of the trunk in the middle and on the right, applying shadow shading on the left side.
A similar rule applies to the depiction of branches extending from the trunk, but since their small size will make the light transitions less noticeable, artists prefer to depict the branches in one color, only slightly emphasizing their edge with dark shading (or paint).
This technique creates a general impression of shadow, making the image visually more three-dimensional.
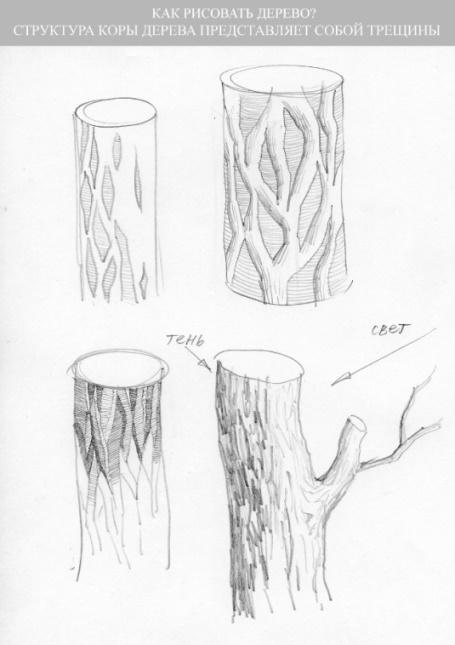
The structure of tree bark most often consists of many cracks located on the surface layer of the trunk. Cracked and roughened, they become rougher and thicker over the years, and each of the "bumps" acquires its own light and shadow sides.
Despite this, when studying trees, the human eye does not visually distinguish these details, perceiving the trunk as a single whole and making it possible during drawing not to focus attention on each “bump” of the bark, but to use uneven lines of varying thickness to depict it.
In this case, one area of the tree bark should be darker than the rest of the parts, including the middle of the tree.
The shape and curves of the trunk, as well as the direction of the branches, vary among different types of trees, and in order to complete the drawing as accurately as possible, it is necessary to take these features into account.
For example:
- the oak tree has gnarled and twisted branches;
- the pine tree has a straight trunk and branches of the same shape;
- The willow trunk branches into several sections with branches drooping downwards.
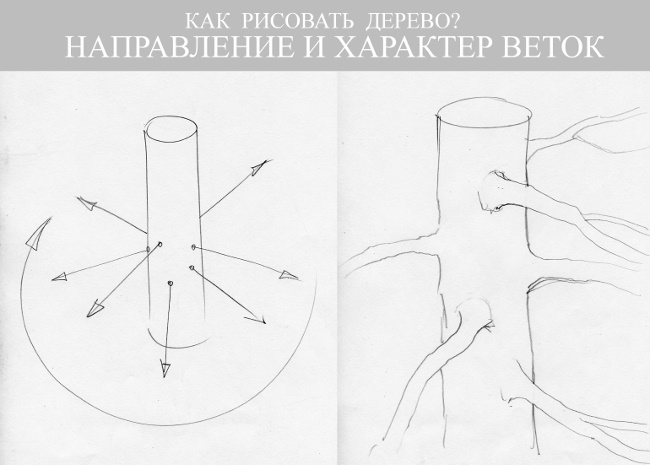
It is necessary to depict branches extending forward and backward from the trunk on all sides, as if surrounding the tree with them (and not just on the left and right).
At the same time, the central branch growing forward must necessarily block the trunk and other branches, as if dividing the drawing into several planes - first, second, third.
Based on this, you need to understand that the foreground branches located in the center should be depicted as larger and block out the smaller background branches.
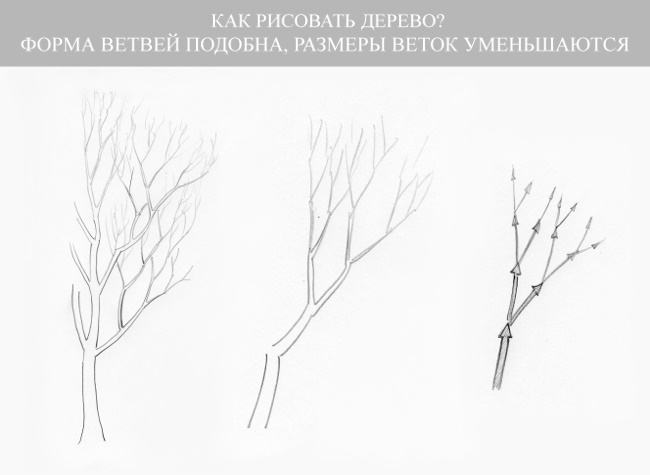
To depict tree branches, it is recommended to use the fractal principle, which allows you to draw them in different sizes - very small, medium and large, but identical in shape to each other.
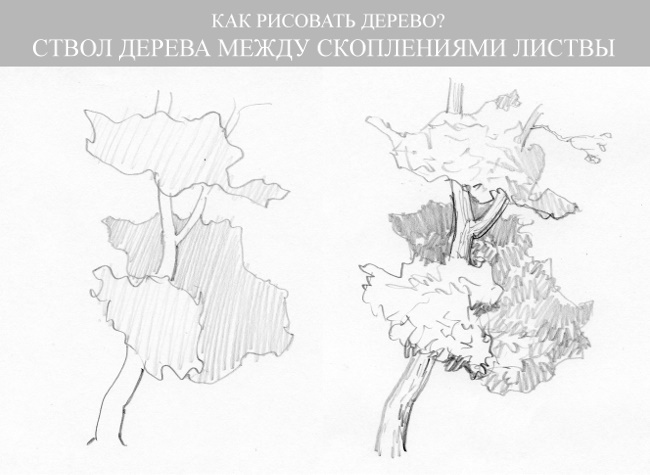
The tree trunk in the drawing, its branches, and also large branches necessarily pass through smaller branches and foliage, clearly appearing between them, then disappearing into the depths and becoming completely invisible. It is necessary to reflect this property in the drawing.
Also, the trunk should periodically show light and shadow from nearby leaves and branches, depicted using darker spots on the cylindrical base of the trunk.
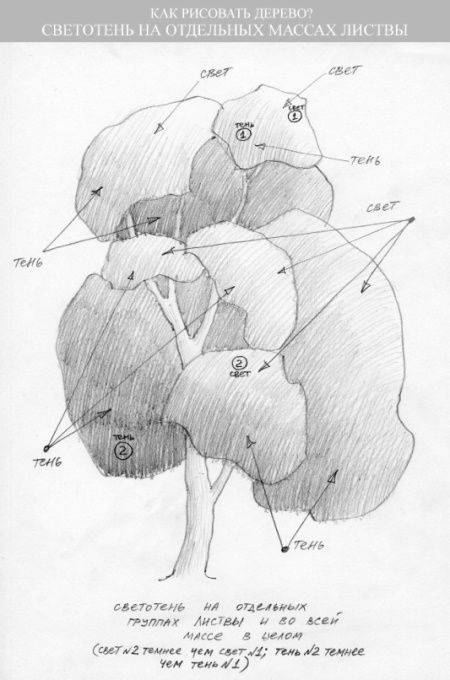
The tree trunk drawing can be supplemented with foliage, placing the crown on the branches, grouping them by size and shape. The groups will also differ in the type of lighting.
So:
- the lightest point will be located at the top of the tree crown;
- the darkest point is at the bottom, near the trunk.
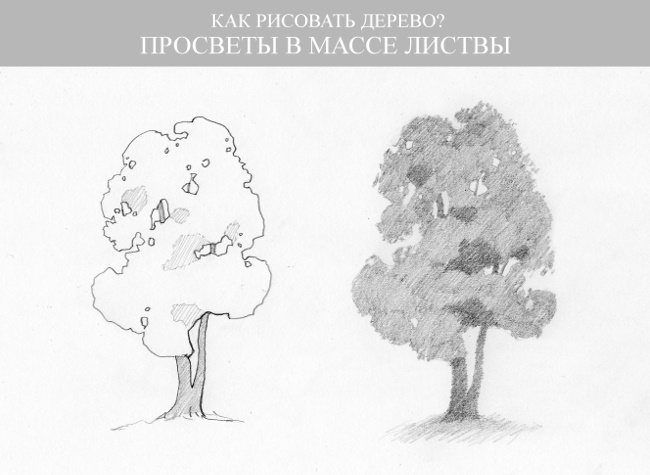
The protruding group of foliage in the foreground will also be lighter than in the lateral parts and in the background of the drawing. The crown is also not depicted as monolithic, since the tree trunk with voluminous branches should clearly shine through it.
The trunk is the main central part of the tree, depicted using various geometric figures.
Depending on the artist's professionalism and the method of execution, the drawing may have a schematic appearance, suitable for coloring or children's applique, or be done in accordance with the structural features of the trees, which is required when creating a landscape.
Video about drawing
Tree trunk: