A tank is a complex military device that can look different. Drawing such military equipment requires a child to be meticulous, elaborative, and pay attention to small details in order to give the image authenticity and accuracy.
Necessary materials and tools
There are many tools and materials for artistic work. Knowing their features and characteristics will allow the artist to create high-quality and harmonious works.
| Name of tools and materials | Brief description |
| Pencils | Allow artists to create works in various styles and techniques. When choosing pencils, you should pay attention to the hardness of the lead. There are 9 degrees of hardness, from the hardest (9H) to the softest (9B). The softer the pencil, the more intense the paint. |
| Paper | Its density must be sufficient to withstand repeated erasing with an eraser. |
| Erasers | This is a tool that is used to remove pencil marks from paper. For example, soft erasers are used for delicate erasing (for detailed drawings), and harder ones are used for larger areas. |
| Klyachki | A tool for affecting the surface of paper. They are made of pigments, chalk and binders, which makes them similar to erasers. However, erasers collect graphite through mechanical action and dissolve it through chemical action thanks to the binders. |
| Stencils | They are used to create repeating elements of an image. They make it easy to get identical shapes and perfectly correct lines. Using stencils helps the artist save time spent on drawing and focus on other aspects of the work. |
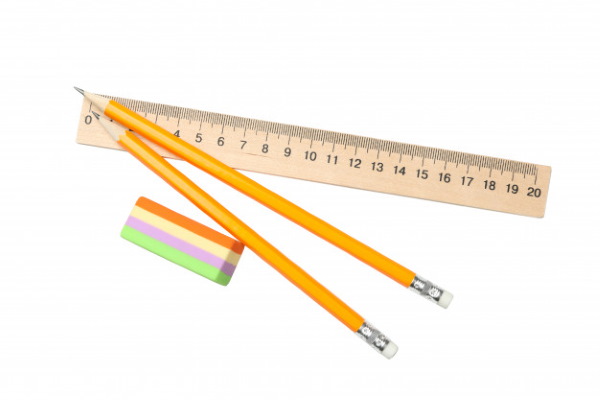
| Rulers, compasses | Used to measure distances accurately and create straight or parallel lines. This can be useful when drawing objects such as cars. |
| Sharpeners | With their help, artists sharpen pencils, preparing them for work. |
| Brushes | Professional artists prefer to use brushes made of kolinsky, sable, squirrel. Sometimes – synthetic. Brushes of different hardness allow applying paints of different consistencies. A palette knife is used when working with thick paints and allows creating relief strokes. |
| Gouache | A paint with a dense covering layer that is resistant to water. Due to its consistency, gouache is suitable for drawings with an abundance of small details. To make the colors lighter, the paint can be diluted with water. |
| Watercolor | A material that does not require additives to start working with it. Thanks to its transparency, watercolor paints allow you to mix colors, which helps to create unusual shades. For drawing, it is recommended to use paper with a certain roughness so that the paint does not spread or soak in. |
| Acrylic | It is characterized by high density and durability. Bright colors also allow you to create rich drawings. To prevent acrylic from drying out during work, it is recommended to store it in a tightly closed container. |
Master classes
A tank can be depicted by first studying its shape, basic elements and proportions:
- The vehicle has a rectangular basic shape. Military vehicles usually have sharp corners, so you don't want to make the lines too smooth.
- The shape of the turret is usually more complex than that of the hull.
- Some tank models have tracks with additional wheels located on the sides. They help the vehicle move over rough terrain.
- It is necessary to pay attention to details, such as the gun barrel, hatches and other elements. An abundance of picturesque details will help to avoid the resemblance of the drawn tank to a shapeless spot.
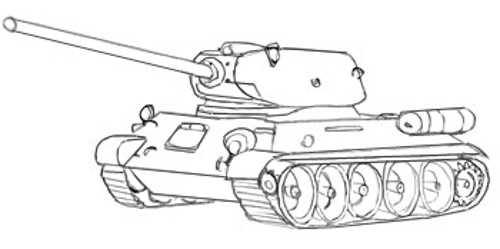
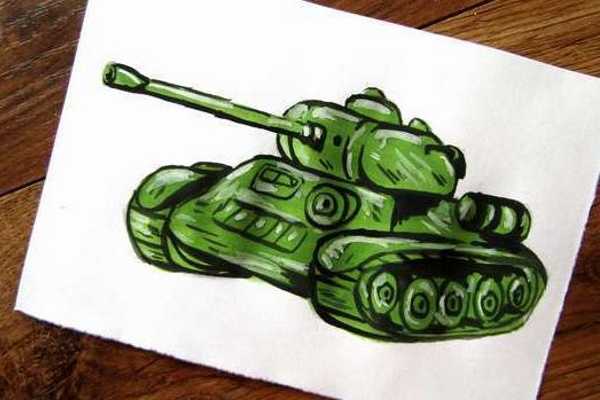
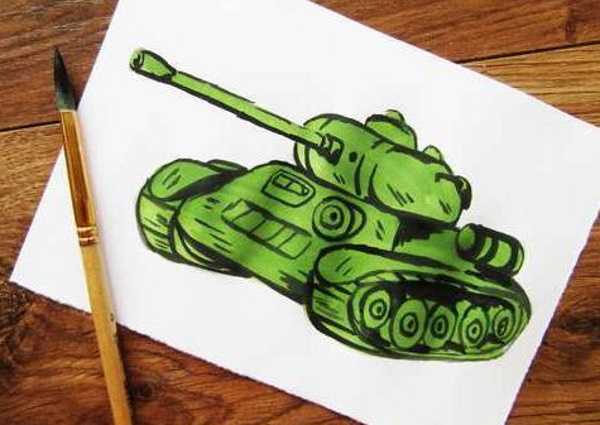
Tank T-34 in pencils
The tank in the child's drawing could be represented by the legendary Soviet T-34.

Using this example, you can master the basic technical techniques of pencil drawing and get a broad idea of how a pencil drawing is created:
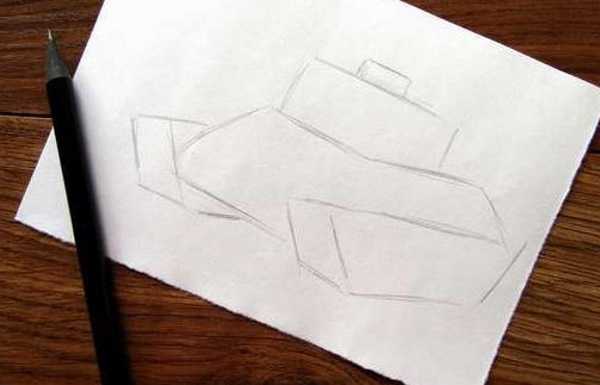
- Prepare the paper. Take an A3 sheet and divide it into 8 squares with soft lines. This will make it easier to organize the image and help create a harmonious and balanced image of the tank.
- Start with a schematic drawing, using straight lines for the base of the tank. Mark the perimeter of the turret, draw lines for the wheels and for the longitudinal hull. The T-34 tank is characterized by wide tracks.
To draw them, draw a wide outline with several supporting rollers. Next to the tracks, draw the tank hull, which is a rectangular shape with a convex front plate.
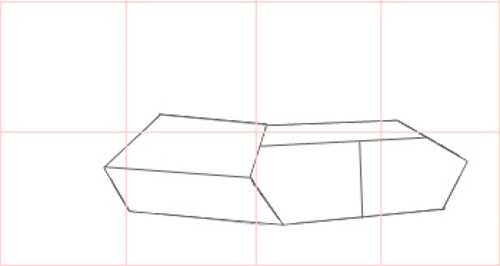
The hull should look longer and narrower than the turret. Leave some space on the edges for the rear and front wheels. These elements will be the basis for the further drawing.
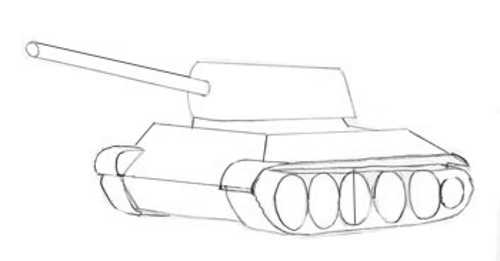
- The tank's turret is shaped like a cone with a cut-off nose. Draw a rectangle with a beveled back and round off the front of the turret.
Connect the hull to the turret and draw the gun. Work with soft lines to create the shape and add details such as bevels, holes and a hatch.
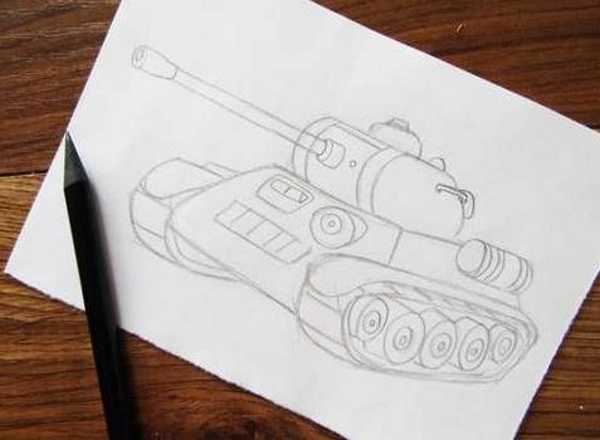
- Place a central wheel and 4 identical wheels of smaller diameter on the sides of the tank tracks. The size of each should be approximately the same. Add a 6th wheel of even smaller diameter, located at the rear of the tracks.
Round off the edges of the tracks where they connect to the wheels and add mudguards above them. Draw the wheels with a clear inner outline.
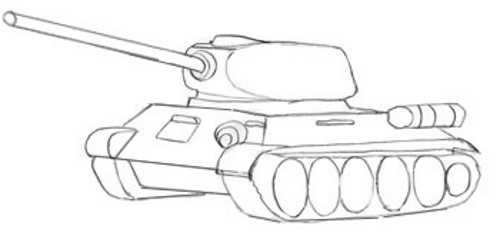
- Draw a gas tank on the side of the tank and mark the hatch area on the turret. Add steps for the commander to climb up in front of the hatch onto the tank. The gas tank can be shown schematically, depicting a rectangular shape.
Draw the hatch and steps in detail to show their structure. Draw the gas tank and the step leading to it under the bottom of the hull. The gas tank can be given the shape of an incomplete ellipse with a narrowing closer to the tank hull.
The hatch should be round in shape and protrude slightly from the plane of the cover on which it is made.
- Add details to the turret: it should have a clear shape and detail elements. The front part of the tank is slightly inclined. Make the gun barrel thinner. Draw a hatch cover on the top of the turret. Make the hatch cover convex.
Fill its inner edges with lines to emphasize their depth. Use soft lines to create shape.
- Add shadows with a soft pencil. Start with the wheels, move to the sides and back of the tank. This will make the tank visually rise above the sheet.
- Draw a large 5-pointed star on the forehead of the tower.
Simple, without working out the details with pencils and paints
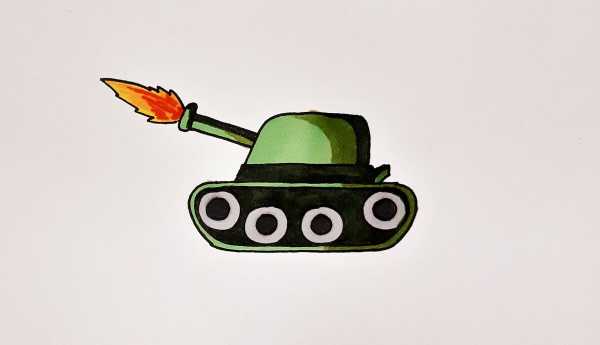
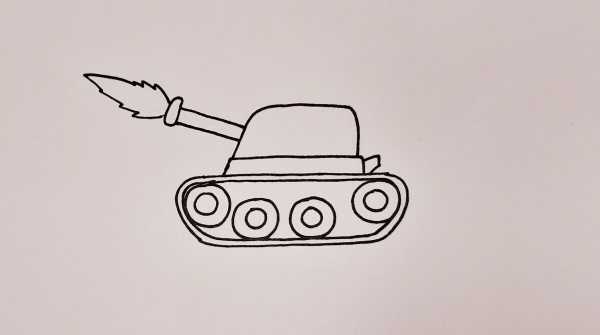
The tank in the children's drawing can be accessible to the youngest artists:
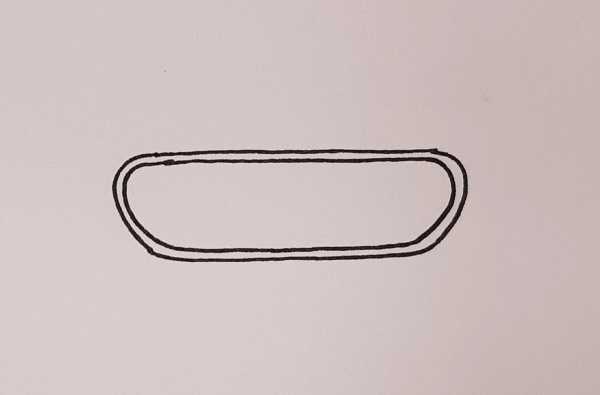
- Draw a trapezoid that will serve as the base of the entire structure.
- Inside the base, add a similar trapezoid of a smaller size. This will be the tank's body. Do not overlap the already drawn lines to outline the future location of the wheels.
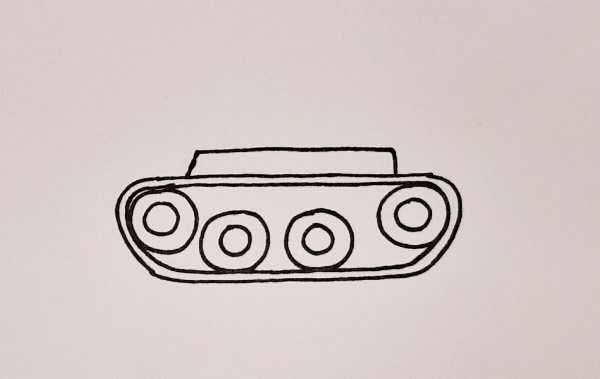
- Place the chassis elements in pairs at the bottom of the hull. The 4 wheels can be round. They must be large enough relative to the tank hull. They must not be placed too close to the trapezoid boundaries.
- Add a small platform between the hull and the turret. This is a rectangular element. It will simultaneously perform a noise-insulating and protective function for the fuel tank located at the rear of the vehicle.
- Add exterior details to the tank, such as an exhaust pipe on the rear platform and a turret on the hull. The exhaust pipe is usually triangular in shape with a beveled bottom edge and a hole located on the side.
- The tank's muzzle allows you to create a complete appearance of the entire vehicle. It is an elongated rectangle on the side of the turret, should be located strictly in the center. At the end of the rectangle, draw an oval. You can draw fire bursting out of the muzzle.
- The upper part of the tank is painted in dark tones, and the lower part in light tones. This gives the image volume. Paint the wheels and parts, the outer part of the hull in dark green or gray, the internal components in a steel shade.
The platform and turret can be given a dark brown color. The tank's barrel stands out in dark gray or black.
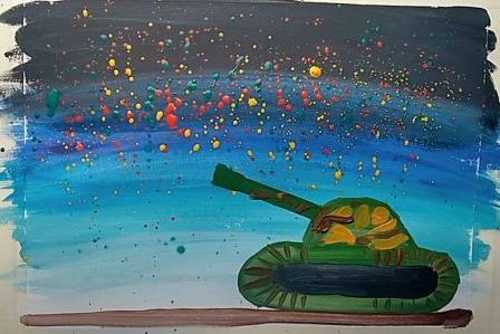
Simple gouache with fireworks
A tank in a child's drawing can be depicted on a sheet of paper using a set of gouache paints and drawing tools: brushes of different sizes, a container for water and a palette.
Step by step:
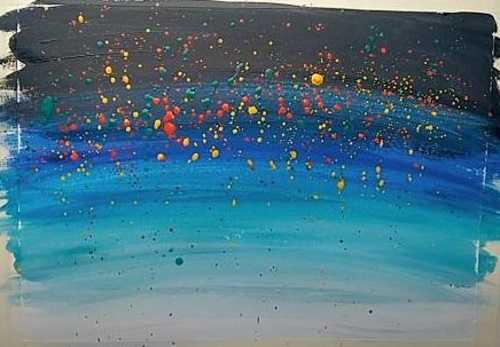
- Start at the bottom edge and use a large brush to create wide stripes of white, turquoise, blue and black. Smooth transitions between these colors will help create the base for the drawing.
- Using the spatter method, add yellow, red and green drops to the top half of the leaf.
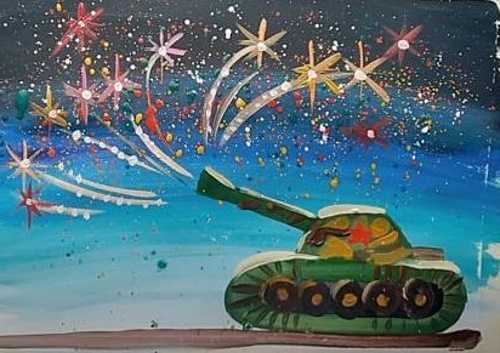
- At the bottom, draw a green oval, which will serve as the tank's tracks.
- Create a green tank turret. It should be massive.
- Draw a wide green line that will act as a cannon. Finish the cannon with a trapezoid element.
- Paint the oval of the caterpillar track black. This will help highlight the tank tracks and give them volume. To create movement, move from dark to lighter areas gradually and smoothly.
- Add a brown stripe at the very bottom of the sheet to represent the ground.
- Use brown strokes to create the impression of moving caterpillars. Place brown strokes on the tower. They should be as dynamic as possible, but directed away from the part of the object they were applied to.
You can improve the visibility of volume by using shadows and changing the intensity of shading. Apply layers of paint one on top of another, highlighting highlights and shadows. Maintain the ratio of light, medium and dark shades of color in different parts of the drawing.
The colors closer to the viewer should be saturated, and in the background they should be duller and more muted.
- Apply brown and yellow strokes across the surface of the tower to add texture and detail.
- Using a thin brush, draw white lines from the barrel of the gun, and at the end of each, draw stars - pink, yellow and red. You can use different techniques for applying paint, for example, in the form of dots or short strokes.
Add light dots to each line - they will symbolize fireworks.
- Add light highlights to the top of the tower and its base to emphasize the light and volume of the details.
- Draw a red star in the center of the top of the tower.
- At the bottom of the tank, draw 5 round wheels in brown. Inside each, add a small dark yellow circle to symbolize rubber tires. Add dark yellow stripes to the wheels to indicate the tire tread pattern.
With pencil and gouache
The tank in the child's drawing can be schematic. The paper for this drawing should be thick. Gouache of the following colors is needed: black, green and white. Soft pencils, HB, B and 2B, as well as an eraser will be required.
Step by step:
- Mark the approximate dimensions of the tank using reference points and contours. Mark the location of the tank's tracks and its main body. Place them symmetrically under the main body of the tank.
Place geometric shapes so that they create a general idea of the tank design.
Use medium-weight lines to create the outline and basic details. You can first make a drawing on a small piece of paper to determine the dimensions and location of the main parts of the tank.
- Draw the lower contour with smooth and graceful lines, observing the proportions. Pay special attention to the caterpillar part - add details such as the surface of the tracks and mechanisms.
Do not overload the drawing with unnecessary details, as this may complicate further drawing. Mark the connecting parts, wheel treads and track segments. Simplify the complex curves of the tracks using a series of straight lines connected by arcs.
- Create a track mechanism with all the details. Give it volume and a finished look. Add connecting elements, track segment surfaces and individual parts of the mechanism.
Adjust the width and depth of the prints to create the impression of movement and power of the machine. The tracks can be detailed or simplified, as in the picture above.
- Correct the general outline of the tank, specifying the radius of the track turning and the position of the main body. Specify in detail the lines of the main parts of the tank: hatches, turrets.
- The gun is one of the main parts of the tank, so it should be drawn with special attention. Requirements: correct proportions, smooth curves and transitions from part to part.
The muzzle is directed downwards from the main line of movement of the tank. It looks like either a cone with the base at the bottom or a cylinder with a thickening at the end.
- Paint the entire tank with green gouache. Since this is the first layer, you can apply the paint in a thicker layer. Mix several shades of green to make the tank's color rich. Let the paint dry. It is important to apply an even layer, avoiding greasy strokes and drips.

- Work the outline in more detail. Use a graphite pencil or black gouache.
- To give the tank volume and depth, use different shades of green to create shadows and gradients. Use a smaller brush to work on the light and dark areas on the tank's surfaces to create the effect of falling light.
You can add a little brown to enhance the shadows on sharp corners and edges of details.
- When the paint dries, apply white highlights to the tank. Use a thin brush for this and apply strokes along the shadow lines - this way the highlights will look natural.
By cells in a notebook with colored pencils
The tank can be depicted using simple steps that will allow the child to create a drawing, for which it is better to use squared paper:
- Draw the barrel of the tank. It should be 7 cells long, and its edge should be rounded.
- To create a tank turret, draw a semicircle. Draw a line down from the turret that will occupy 9 cells, and up - 4 cells.
- Draw the tank platform. It will be 11 squares wide and 1 square high. This will provide the tank with a solid base.
- Draw a caterpillar. It is oval in shape and consists of 17 cells in length and 3 cells in width.
- Inside each track there are 5 identically sized wheels. They provide maneuverability of the tank.
- Draw a large five-pointed star in the center of the tower. This will symbolize the power and grandeur of the tank.
- Paint the caterpillar wheels black to contrast with the main color.
- Draw a flag above the tower that will flutter in the wind. It should take up 7 cells along the tower and 3 cells across.
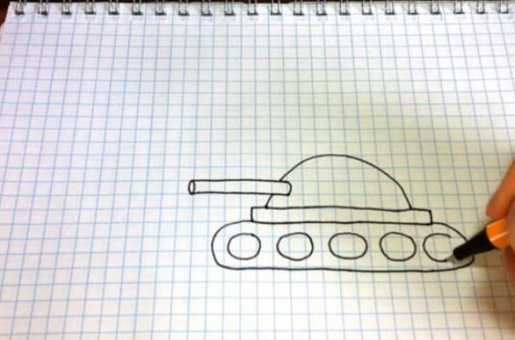
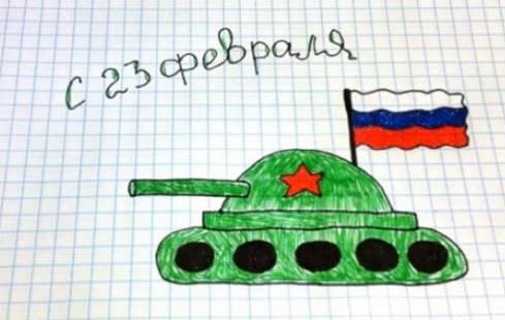
- Paint the stripes of the flag in 3 colors: white, blue and red.
- Tint the tank green. This is a traditional color for military equipment, it will give the combat vehicle a realistic look.
Tips for Beginners
To get the drawing, you need to:
- Create a general pencil sketch that conveys the basic proportions and shapes of the tank.
- Use a ruler, triangle or special auxiliary tools for geometric measurements.
- At the detailing stage, refine the outlines of the tank's hull and turret, adding the necessary structural elements and technical details. Use a soft pencil to create transitions between volumes and a harder one to make the lines clearer.
Details can be added gradually, starting with large ones and gradually moving to small ones.
- Draw the texture of the tank surface, taking into account the standards, as well as the individual features of the model. This will add realism and recognition to the work.
- Use different methods of creating shadows depending on the effects. For example, you can use a gradient transition from light to dark tone. Or create sharp contrasts between light and shadow to emphasize the shape of the tank and its details.
You can make pencil strokes either vertically or horizontally, depending on the artistic task at hand.
- When working on shadows, keep in mind that light and shadow are not only a means of creating volume, but also an important artistic technique that can highlight the features of a model, its technical characteristics and context of use.

- The darkest areas of shadows are placed in the foreground. As objects move away from the observer, the shadows become lighter. That is, shadows can be used to create a sense of distance.
- Make sure that the drawing is not overloaded and black. Use the shading technique to soften the shadows.
The image of tanks will help develop skills and imagination. This combat vehicle has complex geometry, and the drawing will consist of many volumetric forms. However, the child can create a simplified schematic version.
Video about drawing
Tank - children's drawing: