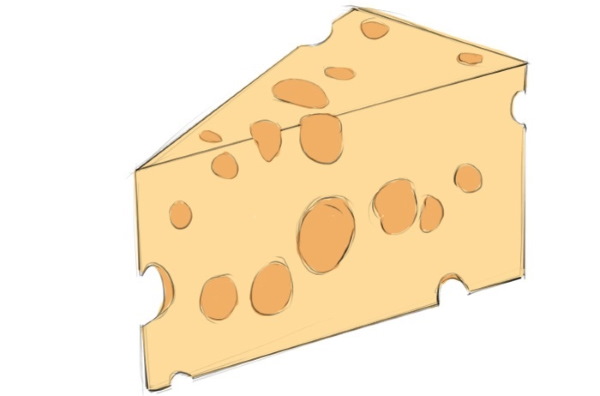
Drawing develops fine motor skills, imagination, helps children learn about the world around them and cope with stress more easily. Drawings for children should gradually become more complex, so the child will not lose enthusiasm and will be able to hone their drawing skills. You can start with a picture of cheese.
What you need to draw cheese
Cheese is a drawing for children that is difficult to draw if it has many small details. It is depicted either as a circle or as a triangular piece. Thanks to the fact that the child learns to draw cheese, he will learn what volume is, and also learn 2 figures: a triangle and a circle.
To draw a beautiful piece of cheese, children will need the following drawing supplies:
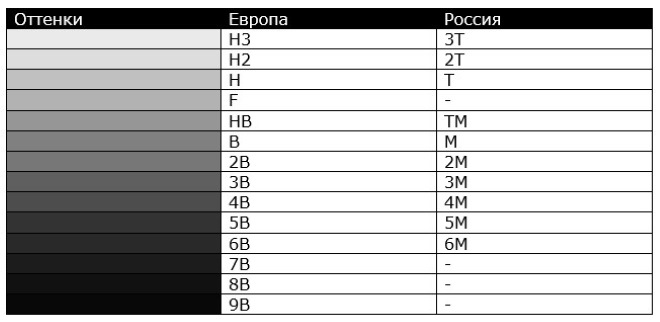
- 1 lead pencil with medium hardness from 2H (2T) to 2B (2M).
- Ruler up to 20 cm.
- Eraser.
- A4 paper or a squared notebook sheet.
- Colored pencils, crayons, markers or paints.
- Tassels.
Pencils
If the pencil is marked 2H, it was made in Europe; if 2T, it was made in Russia.
To select a pencil of the required hardness or softness, it is worth checking the table:
For a child aged 2 to 4, 3- and 6-sided pencils are a good choice. They will teach him how to hold writing instruments correctly and will not fall on the floor while drawing. The diameter of the pencil should be at least 1 cm, otherwise the child risks breaking the lead by pressing on it a little harder.
When buying pencils, you should pay attention to the manufacturer. Buying the cheapest stationery can cause allergic reactions or skin diseases in a child. Pencils in sets of 6-12 pieces, which cost less than 50 rubles, are pale, tear and scratch paper, and can easily break in half if a child accidentally drops them.
The following brands are in demand on the market:
- Derwent. This is a British company that creates pencils for both professionals and beginners. The price of slate, charcoal and colored pencils varies from 150 to 200 rubles per piece.
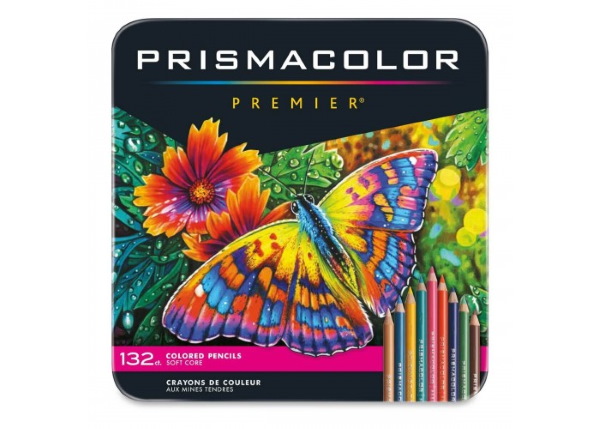
- Prismacolor Premier. This is an English company specializing in the production of tools for artists. In Russian stores, such as "Prismastore", pencils are sold individually at a fixed price - 165 rubles per piece.
- Lyra. These are German pencils with an affordable price for the consumer. A set of 6-colored Lira Ferby colored pencils can be purchased for 450-600 rubles. Individually, colored and regular pencils can cost from 140 to 80 rubles.
Paints
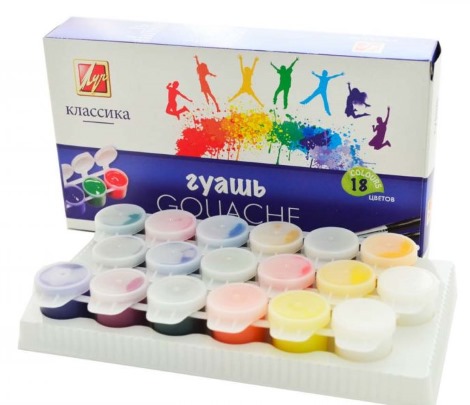
When choosing gouache for a child, you should avoid boxes labeled “artistic” and “silver”. Also, don't look at packages without special markings. Artist's gouache will be expensive, and its consistency is not suitable for painting Cheese on an A4 sheet. This is paint for professional artists.
Gouache with silver, gold or mother-of-pearl effects contains chemical elements that can cause allergic, skin and other diseases in a child. Gouache for beginners without special markings also belongs to the group of unsafe dyes.
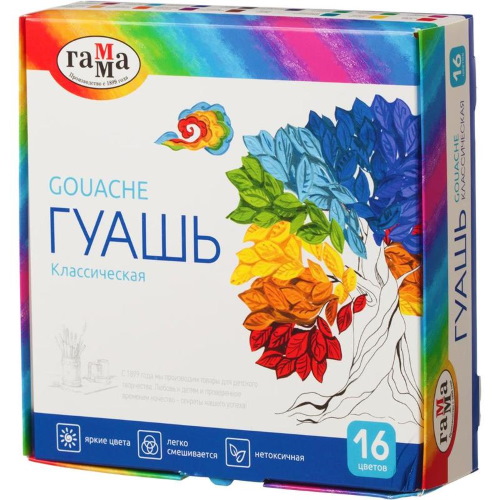
To choose gouache for children, just look at the packaging. There will be cartoon characters depicted there. For example, you can buy gouache in a set of 12 colors from the Gamma company for 280-300 rubles. This brand has a large assortment of art supplies for children. The priority when choosing watercolors falls on safety for the child.
The paint consists of:
- Water.
- Mineral pigments.
- Gum arabic or dextrin are natural-based adhesives.
- Glycerin.
- Sahara.
Low-quality paints may contain synthetic elements. For children aged 2-6, "school" or "honey" watercolors are perfect. They contain basic colors that will help master the drawing technique.
The following brands are considered high-quality and inexpensive in Russia:
- Jovi. A Spanish company that has a line of art supplies and toys with more than 1000 items. Watercolors can be purchased in the price range of 300-1000 rubles.
- Beam. This is a Russian brand with one of the most affordable lines of watercolor paints. The price for 6 colors starts at 40 rubles. You can buy paints at any office supply store or Rospechat kiosks.
The price is low due to the use of food preservatives in the paint. Therefore, if the child is allergic, it is better to refuse to buy this brand. The main complaint about the manufacturer is the lack of composition on the packaging.
- Brauberg. This is a German company that has been producing office supplies in Russia for over 15 years. Watercolor paints for children have a price range from 60 to 500 rubles. It is better to order paint on the official website Brauberg-com.
Tassels
There are few requirements for brushes for children aged 2 to 6 years. When purchasing, you need to check how the hair is secured in the metal base. To do this, it is enough to tug the bristles several times. If even one has come off, the brush is poorly assembled.
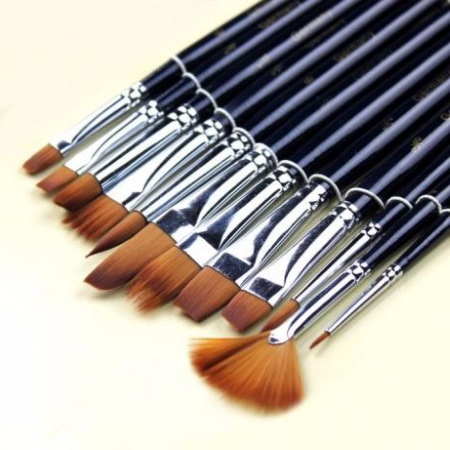
Another way to check is to ask for a glass of water in the store and check the quality of the contact of the bristles with water. If the coloring part does not lie hair to hair, it is better not to take such a brush. The hair part of quality brushes is made of squirrel, kolinsky and horse wool. The shaft is made of alder, oak, willow, birch. The metal base should be aluminum.
Felt-tip pens
Children love to draw not only on paper. To easily remove stains from wallpaper, kitchen furniture and the hands of young artists in the future, it is worth buying water-based felt-tip pens and markers.
If the child has not closed the felt-tip pens with caps, it is enough to put them in water so that they write again. Water-based markers are non-toxic and do not have an unpleasant odor like alcohol-based markers.
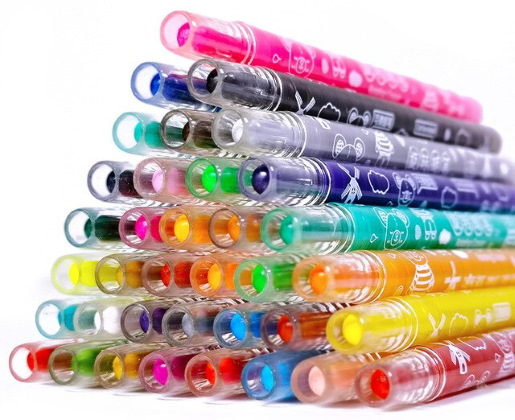
When choosing felt-tip pens, you can use the companies already mentioned in the article. You can also try sets of felt-tip pens from the Czech company Crayola and the French Maped. A set of such accessories does not cost more than 450 rubles. You can order them on the Ozon and Wildberries websites.
Paper
You shouldn't take a plain white sheet if you decide to start the drawing with a sketch. It's better to take a sheet in a cage, since by working on it, the child will quickly learn to draw geometric figures, draw straight lines with a ruler, and later - by hand.
You shouldn't buy the cheapest notebook in a box, priced from 2 to 6 rubles. They use poor quality paper that can easily tear if you press hard while drawing. It is also difficult to guide a pencil on it.
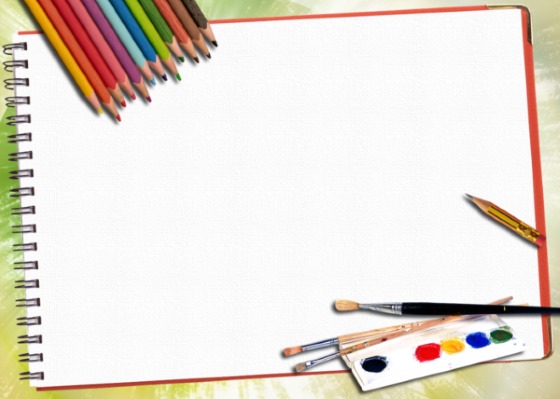
When buying a notebook, it is worth stopping at such companies as ErichKrause and Brauberg. A notebook with 12 sheets in a cage can be bought for 14-20 rubles from both companies.
Step by step instructions on how to draw a piece of cheese with kids using a pencil
Cheese - a drawing for children that can be easily drawn in just 3 steps:
- Drawing a volumetric triangle. The front and top sides are even, the back part is rounded. On the left edge, you need to make a depression, as in the picture.
- The next step is to decorate the cheese with holes. To give it volume, you should outline them.
- Now it remains to outline the contours with a black pen and color the cheese, or leave the drawing black and white. If there is not enough volume, you should do hatching in the holes and the lower part of the drawing, creating a shadow.
Variations of the pattern with instructions for execution
Cheese is a drawing for children that they can color with anything: paints, markers, or crayons. They can replace the holes in the cheese with stars or squares. You can start with paints or markers, without making a sketch if the child no longer needs one.
To try yourself in different drawing techniques and constantly progress in depicting surrounding objects, the article provides step-by-step instructions for beginners.
Painting with paints
To draw you need to prepare:
- A glass of water.
- Brushes of different thicknesses: from 000 to 3. Thick ones will save time and prevent paint from layering, while thin ones will allow you to work on small details.
- Sheet A4. In this case, the cell can be neglected.
- Watercolor or gouache. For watercolor, it is worth taking thicker paper.

Step-by-step execution of the drawing:
- First lines. You should take yellow or black color and draw a three-dimensional triangle without painting the inner space. It is better to do this with the thinnest brush (000). The sheet should be placed horizontally, because the drawing will be larger than when drawing with a pencil.
- Holes. Take black color and 2 brushes of sizes 000 and 00. Using the second brush, draw circles, which are carefully outlined with the first brush. It is also used to paint over the resulting crescents - the smallest internal parts of the holes in the cheese, which give the image volume.
- Painting. Here you can use brushes of all sizes (from 000 to 3), observing only one rule: the closer the yellow color is to the holes in the cheese, the smaller the brush size should be taken.
Drawing and coloring cheese with colored pencils
Cheese is a drawing for children, in which it is not always easy to depict volume.
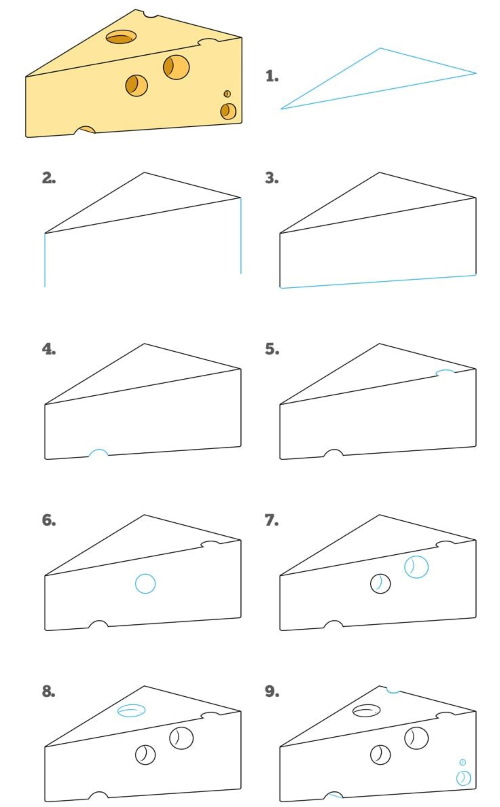
Therefore, there is an option to draw a flat, but no less beautiful cheese.
- A line is drawn in the center of the page.
- Below there is a second line at an angle of 35-45°.
- At the top, an arched line is drawn connecting the two previous lines.
- Circles are drawn inside the resulting triangle.
- The contours are outlined with a black pen.
- The drawing is being colored.
A voluminous piece of cheese
If the task is to teach a child to draw three-dimensional figures, it is worth using other drawing techniques.
Option 1
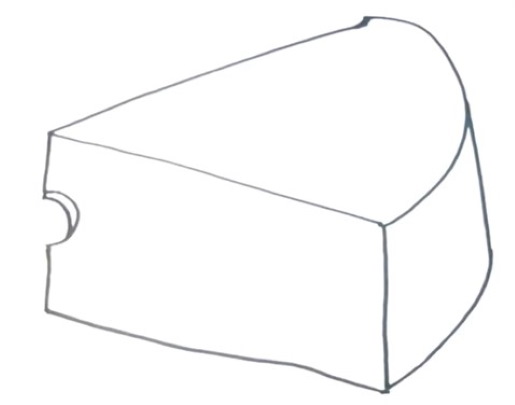
A volumetric triangle is drawn in 2 stages:
- A triangle is drawn at the top of the sheet.
- There are 2 lines going down from the triangle.
The line from the tip of the triangle will always be slightly longer than the line from its back. In this version of the drawing, you can not outline the holes of the cheese, but simply paint them. The depressions on the sides of the cheese should be added, in this technique they improve the drawing.
The circles themselves are drawn depending on the direction of the tip of the volumetric triangle. If it is turned to the left, then it is easier to draw the circles from left to right, if to the right, then from right to left. Next, outline the contours of the image with a black pen. Then paint it in any color at the discretion of the author. Here, as in the case of paint, you should be more careful at the junction of the elements.
Option 2
Another version of "Double-Sided Cheese" repeats the previous technique. The difference is that the drawing begins with drawing a rectangle. It is worth marking the depressions on it in advance.
After the rectangle is drawn, you need to select a point above it. There, 2 lines coming from the upper corners will meet. The left line should be larger than the right one. Then, the same steps as in the first option are repeated.
Option 3
It all starts with the image of a convex rectangle. The upper line is drawn as an arc down half a cell. Then the lower line is drawn, which is a cell or half a cell smaller than the upper one. Then the side lines are drawn. They are drawn from the upper line to the lower one, making a slope within one cell.
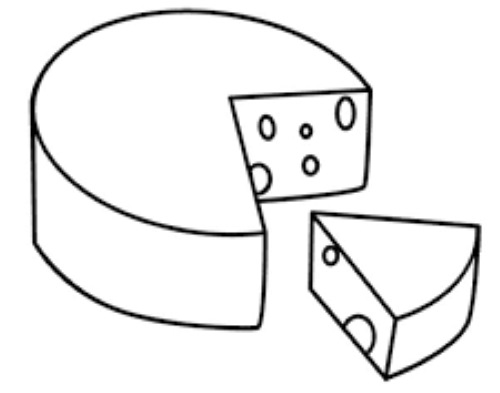
Drawing a Round Cheese Head
Round cheese can be drawn in two versions: flat and three-dimensional.
To draw a flat round cheese, you only need to follow 5 steps:
- Draw a circle. The figure will be even if you use a jar, a glass, a lid from a spill-proof paint jar or a pickle jar.
- Make another circle inside, stepping back 2-3 mm from the first edge of the large one.
- Draw cheese holes and outline them to create small "half moons".
- Trace the outline (optional).
- Colour the drawing. Here the child has the opportunity to use the first shadows. The distance from the first to the second circle and the "half-moons" can be painted dark yellow. Colour the rest with bright yellow paint.
The method of drawing volumetric cheese is extremely difficult for children and beginners to master. It is best to draw it using video tutorials.
Mouse with cheese
Step by step instructions:
- First, a volumetric triangle is drawn.
- Holes are drawn in the cheese.
- On any side, draw a semicircle – the head of the mouse.
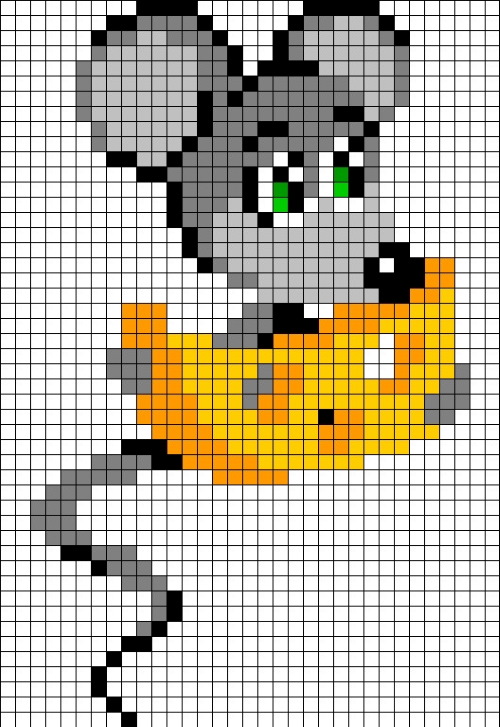
- On top of the head, draw 2 more circles or semicircles - the mouse's ears. Inside, you can draw 2 more circles to make the animal look more realistic.
- Eyes and a mouth of any shape the child wants are drawn on the head.
- The contours are outlined.
- The resulting picture is colored.
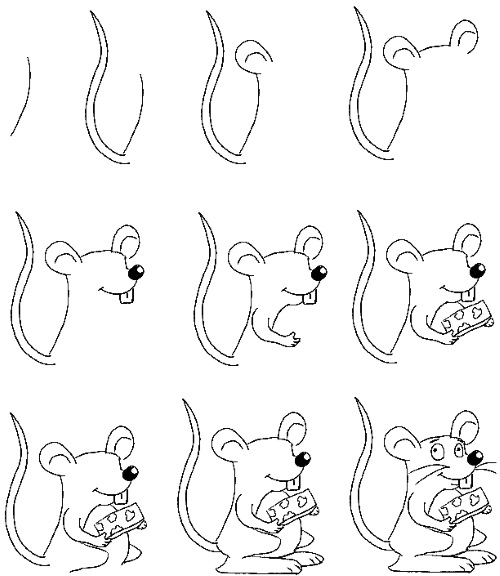
Option 2:
- Creating the head. The mouse head looks like a mark on a map that has been turned to the left. At the end is a black dot - the nose. Next to the nose are 6 lines - the whiskers.
- At the top, closer to the back of the future mouse’s head, draw 2 semicircles – ears.
- Two circles are drawn above the nose, and two more are inside them – these are the eyes.
- A line is drawn under the eyes to replace the mouth.
- An oval is drawn from the eye line, which is the body of the mouse.
- Just below the head at the beginning of the body, draw 2 lines that bend to the left side closer to the middle of the mouse's body - this is the arm. The second arm can be drawn on the left.
- A tilted semicircle is added and cheese holes are drawn on it.
- The hind legs are depicted as curved lines coming out from the bottom of the body. 4-5 stripes are added - claws.
- The tail is drawn with 2 lines, curved towards the nose and ending in a sharp end.
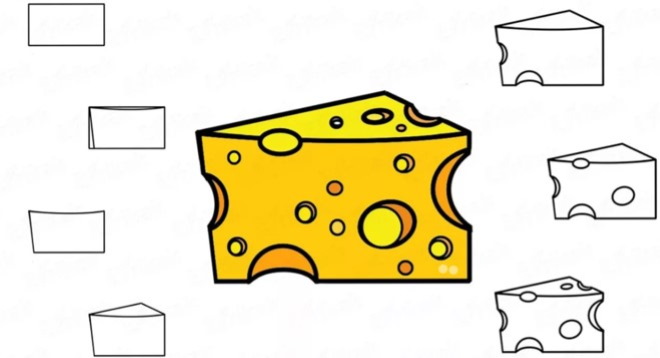
Cheese drawing by cells
This style of drawing is called "Pixel art". There are several ways to draw cheese.
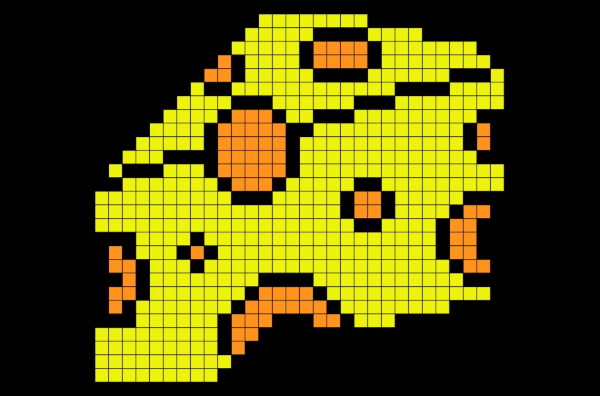
They are arranged in order of difficulty from easiest to hardest and longest:
- Buy a specialized book where the child will first trace the cells along the outline and then color them.
- Find pictures on the Internet and explain to your child the principle of working with images.
- Teach your child this style so that he can draw the picture he needs without a drawing.
Examples of pictures of cheese that a child can easily transfer to a piece of notebook paper are above.
Advice for the youngest children and their parents
Recommendations:
- Before you sit down to draw, it’s worth checking whether the pencil is sharpened.
- Until the child gains experience, you need to make a sketch of the drawing, and not immediately paint it with paints or felt-tip pens.
- Don't press hard on the pencil. If it writes faintly, you need to choose a softer pencil.
- Each drawing of a piece of cheese should begin by creating a triangle, and only then draw circles in this piece.
- The closer the elements of the drawing are to each other, the thinner the writing instrument rod will need.
You should start with the simplest flat drawing for children. Later you can try to draw cheese in 3 steps, and then other variations of the drawing, different types of shading.
Author: Bauman Alexander
Video about drawing
Cheese drawing for kids: