Sling beads are very easy to make, the main materials are beads, threads, and a hook. A detailed description of the process and a diagram for creating such an accessory will help even a novice craftswoman make it.
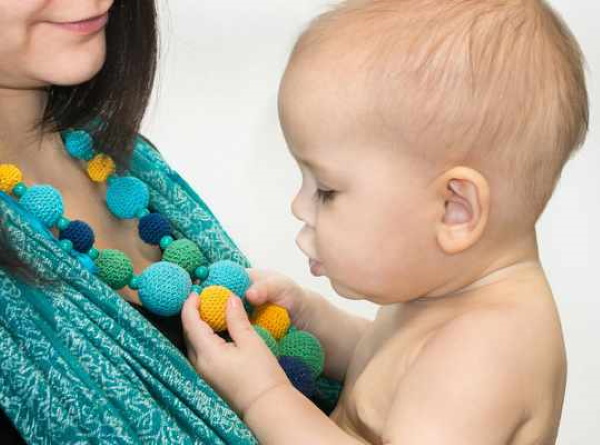
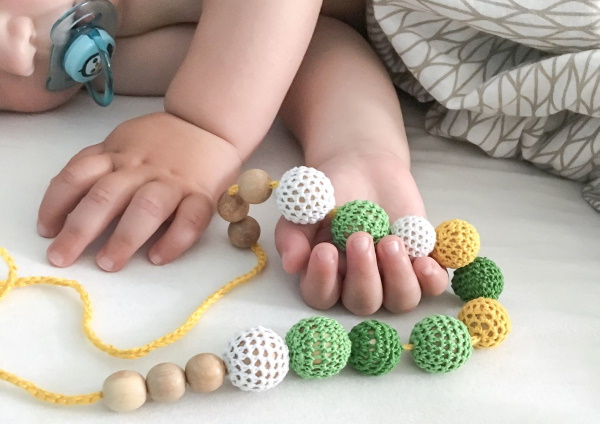
A bright decoration made of natural materials performs several functions at once, helping both the child and the mother, and even the father when carrying the baby in a sling or in his arms. And if such decoration is made with your own hands, it can become a kind of talisman for the baby, and will remain for many years as a memory.
What are sling beads for babies used for?
Sling beads, as you can understand from the name, are hung mainly on children's slings - devices for carrying babies. They perform not only a decorative function, but also help to cope with the child during walks or trips.
Main functions of sling bus:
- distracting the baby's attention from the mother during walks, feeding, and household chores;
- preventing the child from pinching, biting and pulling the mother's hair;
- development of fine motor skills, spatial thinking.
Instead of grabbing mom by the hair or scratching her, demanding attention during a walk or an important lesson, the baby is distracted by bright beads of different sizes. This accessory is often worn by dads, who fully appreciate its usefulness.
Since sling beads are made only from natural materials, biting and tugging at such beads will not cause harm. They can be used separately from the sling, hung on a stroller, or placed in the baby's crib. Some beads may have a rattling or rustling filler, and then the accessory also becomes a soothing rattle.
Preparation of materials
Sling beads crochet (diagrams and description of which are presented below) are made of simple, but necessarily safe for the child materials. And safety lies not only in non-toxicity, but also in durability. Do not use - glass, ceramics, metal fittings, beads or very small beads, polymer clay, felt.
What you will need to make sling beads:
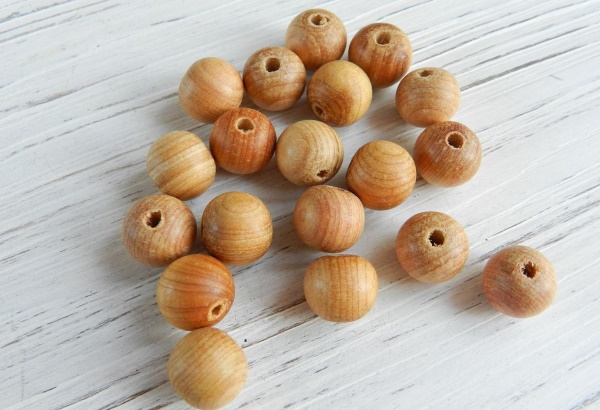
- wooden beads of different sizes;
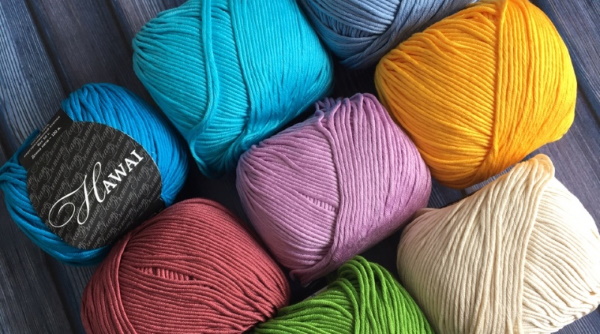
- cotton threads for knitting;
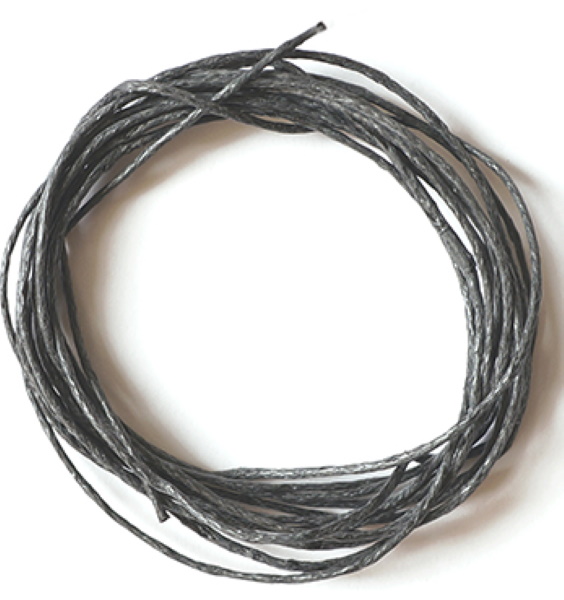
- ribbon or waxed cord as a base;
- various decorative elements – wooden beads in the form of animal figures, buttons, shells, knitted bags with various fillings.
It is important to use wooden elements in sling beads - the material is safe for the child, if it gets into the mouth, it will not cause allergies. Of course, the use of varnish or paint on the surface of the beads is excluded. The elements themselves must be large enough so that the child does not accidentally swallow them.
If shells are used in beads, for example, they need to be boiled and disinfected several times. It is also better to use buttons made of natural materials. It is also worth remembering that the beads will have to be washed often - the threads must be high-quality, 100% cotton, and not fade when wet. Elements and fillers that can swell or dissolve in water cannot be used.
| What yarn is suitable for sling beads | |
| Yarn "Chamomile" | S. M. Kirov Spinning and Thread Plant, manufactured in St. Petersburg. The price for a skein starts from 500 rubles in specialized stores. An excellent option in terms of price and quality. |
| Yarn "Pekhorka Successful" | The Pekhorskaya factory is located in the Moscow region. The threads are distinguished by their color fastness and ease of use. The price is from 1,000 rubles per skein at partner stores. |
| Yarn "Lily" | Made in China. Convenient for working with complex patterns. You can order it at any handicraft store. Price: from 1,500 rubles. |
The best option is to use mercerized cotton thread for knitting sling beads. Tightly twisted, high-quality dyed threads will be easy to work with and will not lose their appearance with frequent washing and baby's games. You should not use "Iris" threads or ordinary floss for knitting. This is due to the low wear resistance of the material and the inconvenience of work - the threads are too thin, often twist, inexpensive material can fade.
Necessary tools
Sling beads are most often crocheted. The work is easy, fast, and convenient patterns and descriptions of the knitting process can be quickly found in master classes from experienced craftswomen. To choose a crochet hook, you need to pay attention to the density of the yarn. For example, with a density of 200 m / 50 g or 300 m / 70 g, a hook with a diameter of 1.5 mm is suitable. For thinner threads, such as "Iris", you can take a tool with a diameter of 1.25 mm.

Bead tying will be more accurate if you use several hooks of different sizes in your work. When starting to knit, use the hook that fits the yarn, and when tying narrow parts and decreasing loops - a hook of a smaller diameter. For example, if the main rows are cast on with a 1.5 mm hook, then when decreasing loops it is better to take a tool with a diameter of 1.25 mm.
It is also important to look at the length of the tool, whether it has a plastic or rubberized handle, whether the hook itself is sharp or smooth. Here, each craftswoman chooses the most convenient option for work.
Product options
Crochet sling beads (diagrams and descriptions may offer a basic version of the product) can be transformed to suit your own style or needs.
What kind of sling beads can you make with your own hands:
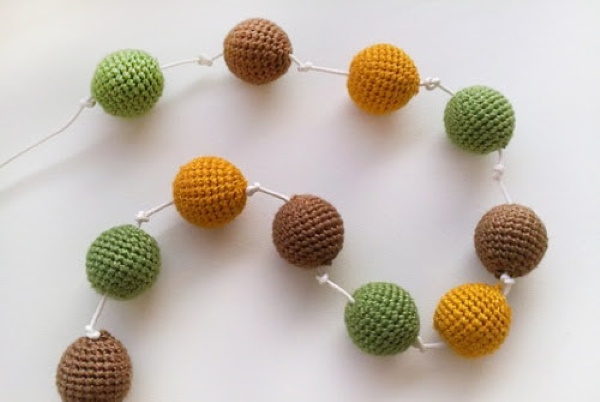
- Classic version - with wooden beads tied with cotton thread. Tied and wooden beads can be alternated. The beads can be tightly strung on a cord or located at a distance from each other and held with knots.
Sling beads crochet. Diagrams and description further in the article. - Sling beads with a rattle – elements with rattling filler inside are strung between classic beads.
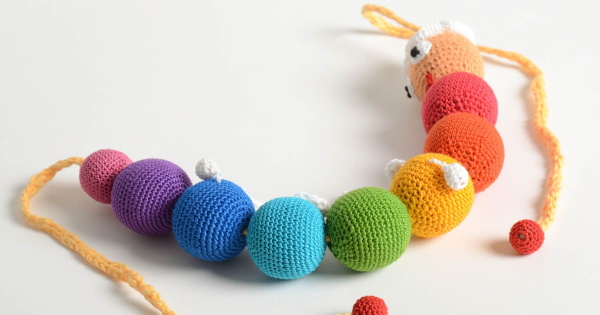
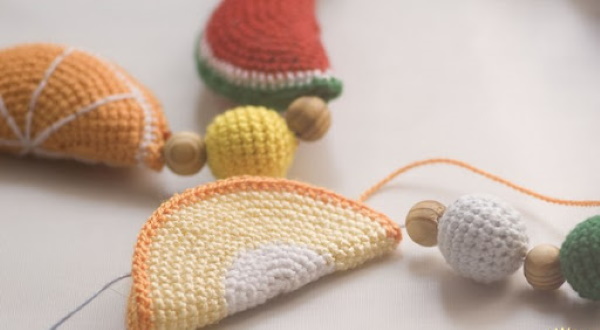
- Beads with various decorative elements - knitted fruits and vegetables, cute wooden animals, shells, buttons. Such decor will help the baby to broaden his horizons.
- A nipple strung on a cord between beads – another great option to calm a child on a long journey or while the mother is working. In this version of the product, it is important to constantly monitor the cleanliness of the nipple.
- Sling beads with soft knitted beads, which can be kneaded by hand. Such elements develop fine motor skills of hands well, but are suitable for older children who have already learned not to put inedible objects in their mouths.
Any additional elements can be combined with each other. For example, using a small plastic carabiner, you can attach a pacifier to the product, and alternate rattle beads with soft elements.
Filling options for sling beads:
- rice, buckwheat or other rustling grains;
- small stones;
- candy wrappers;
- small bells;
- wooden rings or other pendants;
- squeaky keychains;
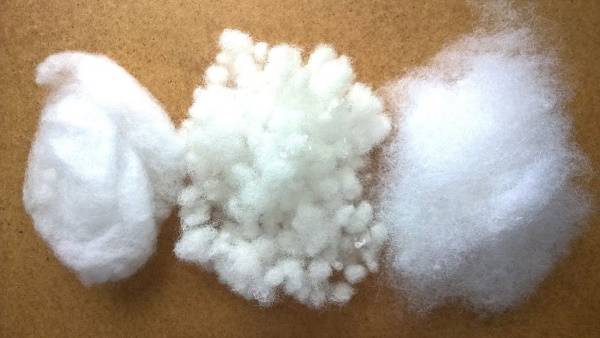
- soft filling for toys;
- music button from an old toy.
Bulk elements are good for sewing into canvas bags as soft, wrinkled beads. This also includes beads with soft filling for toys and various dense but rustling wrappers. To make a rattle, the rattling elements can be placed in a Kinder Surprise container. The plastic used in these containers is food grade, it is completely safe. Moreover, it will be difficult for a baby to open such a container to get the contents.
A bell or a music button can be sewn into a bead with soft filler. The main thing is that the knitting on such beads is tight enough, and the filler does not come out after washing. Sling beads with elements such as cereals, music buttons, paper fillers cannot be washed. They can be used to decorate a baby stroller or playpen so that the product does not get dirty so quickly, or for older children.
How to tie a bead for a sling bead
Sling beads crochet (diagrams and descriptions are presented in more detail below) are assembled in stages. The most labor-intensive process is tying the beads and choosing the filling for the rattle beads, as well as various soft elements.
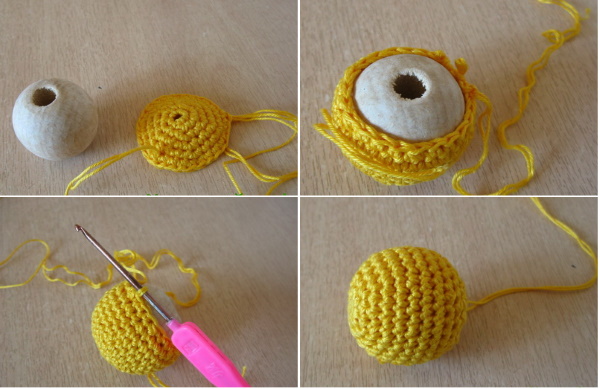
How to tie a wooden bead:
- The first row is made up of 5-6 air loops, closed into a ring;
- The second row is knitted like this: single crochets, two loops are knitted into each air loop;
- At the first stages, the knitted element is applied to the bead, and the sizes are checked;
- The next few rows are knitted according to the same principle, but 1-2 more loops are added in accordance with the increase in the diameter of the bead;
- There is no need to add loops closer to the widest part of the bead;
- After the equator of the bead, the loops, on the contrary, are reduced - this way to the end. When reducing loops, they should not be skipped, but knitted through two loops at once, so the product will be more neat, and the knitting more dense.
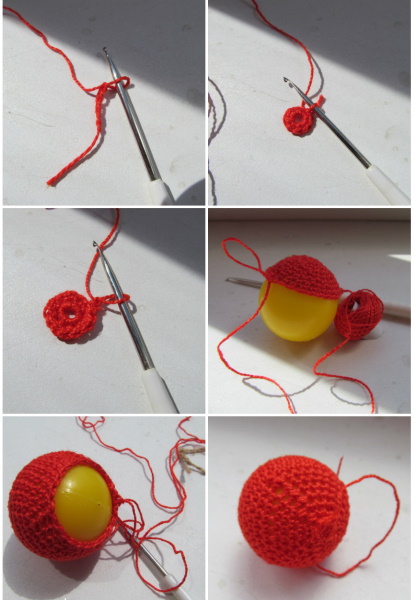
The initial and final threads need to be hidden. This can be done with a needle and thread that matches the color of the yarn. If the bead should be soft, then up to the middle of knitting you can take the same wooden bead as a base, and after the equator start filling the knitted element with padding polyester or other filler.
Option for openwork bead edging:
- The thread is wrapped twice around the index finger and pulled up over the winding.
- The hook is threaded into the resulting ring, capturing three layers of thread, the working thread is picked up with the barb once more, and the first knot is tied with its help.
- 8 single crochets are knitted into the resulting ring. This is done like this: the hook is inserted under the ring, the barb catches the working thread and brings it out from below, the thread is caught again and pulled through two loops at once.
- Knitting this row is done on the index finger - this is convenient, since the thread is held and does not interfere with the process, the last loop can be easily pulled up so that the knitting does not unravel.
- When 8 loops are ready, the resulting ring is removed from the finger, held tightly, and the short tail is brought forward.
- Now tighten the first knitted ring - you need to carefully pull the short tail, holding the knitting until both ends are connected. There is no need to cut off the tail.
- Now the hook is inserted into the last loop of the previous row again. The next single crochet is knitted into the first loop of the resulting ring. The ring is thus tightened to the end.
- On the basis of each loop of the ring, you need to knit air chains. There should be 3 loops in the chain. The thread with the chain is knitted into each next loop of the first ring using a single crochet. In total, there should be 8 "petals" around the "core".
- In the following rows, the "petals" are knitted in exactly the same way, but the entire "petal" of the lower row is used as the basis for the loop, and not its individual loops. You need to "dive" the hook away from you.
- Knitting according to this principle continues until the binding becomes slightly higher than the equator of the bead.
- Next, the knitted element is turned inside out, a bead is inserted into it, and knitting continues along it.
- To reduce the diameter of the row, you need to reduce the number of air loops in the “petals” - instead of three loops, two are knitted.
- Knitting continues almost to the top of the bead. Closer to the end, the size of the "petal" should be reduced to one air loop, and "dive" not under the neighboring "petal", but through one.
- In this way, you need to get to the point where the bead is completely tied, and a very small hole remains at its top. It is important that the bead itself is positioned with holes for the thread exactly at the beginning of knitting and at the end.
- One of the remaining tails should be passed through the entire weave to the other, then both tails should be hidden inside the hole of the bead. When threading a bead onto a string of beads, it is important to remember the direction of the ends of the weave so that they do not come out of the hole again.
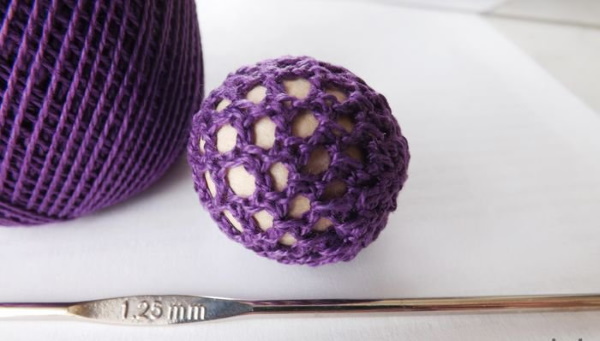
This binding is suitable for thin yarn - just right if the craftswoman decided to use any floss or "Iris". In this case, it is better to take a smaller hook size, for example, 1-1.25 mm in diameter.
For a 20 mm bead, the first row consists of exactly 8 single crochet stitches. To tie beads of other sizes, the number of stitches must be decreased or increased. This is an important point, since a regular single-color tie is adjusted on a bead by decreasing and increasing stitches, but here you need to “adjust” the size right away.
Algorithm for making crochet sling beads
Sling beads crochet (it is recommended to study the diagrams and description before starting work) need not just to be crocheted. It is important to understand the algorithm for their creation in order to avoid mistakes at any stage.
Sling beads are made in the following order:
- Choosing a sling bead design – using examples from the Internet and your imagination.
- Selection of a harmonious color scheme for the product.
- Search and study of the piping diagram.
- A selection of various functional and decorative beads.
- Purchase of necessary materials and tools – cord for beads, yarn for tying, bead base, decorative elements and fillers, needles, threads, scissors, crochet hooks.
- Making beads, rattles, soft elements.
- Assembling a sling bead from ready-made parts.
It is important to approach even the choice of design and color scheme of sling beads responsibly. This useful accessory should be liked not only by the child, but also by the mother, if she is going to wear beads on her neck during walks. Sling beads can be made in a certain theme (marine motifs, floral, abstract), made in one color or several bright shades, match the mother's clothes or the design of the sling, stroller.
Assembling the product
The last stage in the production of sling beads is the assembly of the product. It is better to think through this stage in advance, so as not to encounter a shortage of materials or unpleasant flaws.
You need to assemble the sling beads in the following order:
- Beads and additional elements are laid out on the table in the order they should be according to the design of the accessory.
- Take a pre-prepared cord and cut it to the required length with some extra.
- The cord is threaded through the holes of the beads using a hook (if the binding threads were hidden in the holes, the cord must be threaded in the direction of these threads).
- If necessary, you can tie knots on both sides of the bead, or you can string the elements in a row.
- If the product has a central element, it is better to start with it, stringing the remaining “parts” on both sides of it.
- The largest elements are best placed as pendants; beads look best from large to small in the direction from the center to the edges of the cord.
- It is better to place a small bead at the ends of the lace - this will simplify the task of untying the ends of the decoration if necessary.
It is important that the finished sling beads are liked by the design of the parents who will wear them on their neck or in their hands. Crocheted from high-quality yarn, they can become a real designer decoration, the purpose of which ignorant people will not even guess. The main thing is to use clear patterns and detailed descriptions of the process of making beads so that the accessory turns out neat and stylish.
Video about crocheting sling beads. Schemes and description
How to make sling beads from scratch: