A lunar rover is a vehicle designed to move on the surface of the Moon. Thanks to spacecraft, there is a unique opportunity to learn more about the Earth's natural satellite, and in particular about its surface.
The device has a unique design and external characteristics, which makes it an interesting object for drawing.
Necessary materials and tools
A basic set of materials and tools, the choice of which depends on the artist's style of work. The creative process requires flexibility in the choice of tools to achieve the desired result.
| Tools and materials | Brief description |
| Paper | Differs in density, thickness, surface texture and other characteristics. Drawing on thick paper gives expressive lines, but requires more pressure, while using thin paper may require attention to detail and more careful handling. |
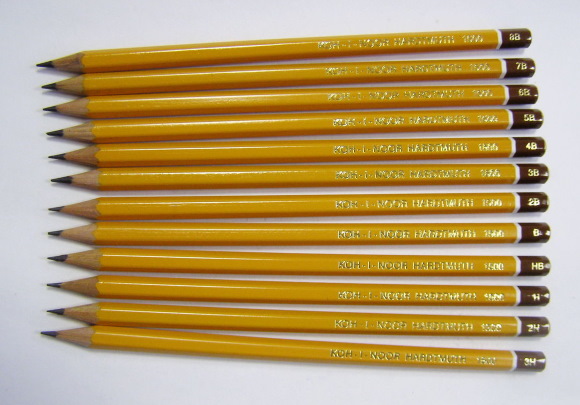
| Graphite pencils | They consist of graphite, pressed in a certain way and placed in a wooden shell. Pencils differ in hardness. Manufacturing companies may use their own marking system, although, as a rule, it corresponds to a scale from 9H (the highest hardness) to 9B (the softest pencil). |
| Colored pencils | They are used for creating drawings and sketches, as well as for coloring and toning. · Classic – these are regular colored pencils that have a standard wooden body and graphite lead. They come in a variety of colors and have medium hardness. · Simple ones have a softer core, which allows you to create smooth transitions and blurred contours. They are often used for shading and hatching. · Watercolor pencils have a thin rod that can be used both for drawing contours and for washing and creating a watercolor technique. The graphite rod of these pencils can be washed with water or special solvents. · Mosaic ones allow you to get an unusual mosaic effect. They have several rods of different colors, which are combined into one tool. With the help of pencils, the colors are evenly mixed. |
| Erasers | To remove unsuccessful areas of the drawing, erasers are used. They vary in softness and size. An eraser can be made of natural or synthetic rubber or vinyl. |
| Stencils | They are a tool for quickly creating repeating design elements, such as ornaments. Stencils can be made from a variety of materials, such as cardboard, plastic or metal, and have holes or slits through which the artist can apply paint to the paper. |
| Rulers, compasses | A ruler is a simple tool for measuring and comparing distances. A compass is a tool for drawing circles and other geometric figures, consisting of two legs with needles at the end. |
| Sharpeners | They are used to sharpen pencils. This tool helps to make the tip of the pencil sharp. There are different types of sharpeners - manual, guillotine, mechanical and electric |
| Brushes | Natural brushes are made from squirrel, pony or goat hair. Synthetic brushes are made from nylon or synthetics and have the ability to hold a large amount of paint. Round brushes are used to fill large areas of the drawing, and flat brushes are used to paint small details. |
| Gouache | This is a thick, opaque material based on pigments and glue that is easily diluted with water and is suitable for mixing colors. Gouache is used to apply dense brushstrokes that can fill large areas of canvas or paper. If you need to create translucent or blurry effects, gouache can be diluted with water, and if you need sharp or contrasting transitions, add a little glue to it. |
| Watercolor | Watercolor is characterized by transparency and brightness, which, when used correctly, can create beautiful chiaroscuro. It is a pigment based on plant glues, which is diluted with water. Watercolor drawings are easily corrected due to their transparency. |
| Acrylic | They have the following qualities: they dry quickly, give a bright, saturated color and create a durable film after drying. With the help of acrylic, you can create a variety of effects: from smooth and shiny surfaces to textured and relief ones. |
You may need a palette for mixing colors to work. It is needed to obtain new shades.
Master classes
The lunar rover is powered by solar panels that receive energy from the Sun. The first such device was created in the USSR more than 50 years ago. With the help of the lunar rover, it is possible to measure the temperature of the Moon's surface, its composition, see what the surface of the Earth's satellite looks like, and much more.
Following simple recommendations, you can create an original and detailed drawing. It is worth remembering that different drawing techniques can differ significantly from each other, so each creator has the right to choose the methods that suit him best.
Lunokhod-1
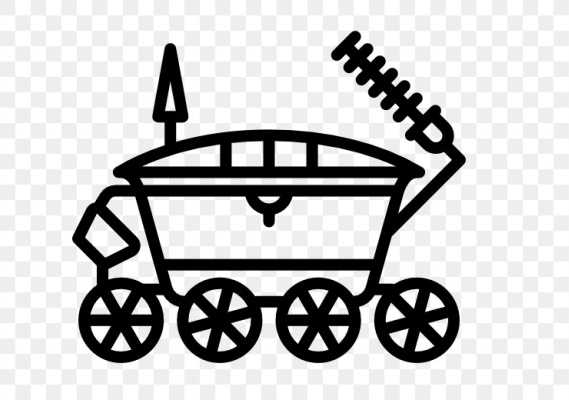
Lunokhod-1 is the world's first planetary rover sent from Earth to the surface of another celestial body - the Moon. It was an 8-wheeled vehicle powered by electric motors.
It was equipped with scientific instruments such as television cameras, an X-ray fluorescence spectrometer, a laser reflector for measuring the distance to the Moon. Lunokhod-1 also had a radio communication system that allowed it to transmit data on scientific research to Earth.
The lunar rover in the picture can be made realistic, for this you need to take into account all the details that are visible in the photographs, such as the shape of the body, wheels, antennas and other elements:
- Create a sketch. This will help you plan the placement of parts and understand how the drawing will look.
- Draw the body, wheels and antennas, paying attention to the proportions and placement of parts. Add solar panels, scientific instruments and other important elements.
- Draw details such as the relief of the Moon's surface and shadows from the Lunokhod body.
- The device was on the Moon, which means that the drawing should show traces of its movement on the surface. Draw them.
- Color the drawing according to the chosen style and color. Consider shadows, light and highlights to give the drawing volume and realism. The moon usually has a gray or light brown shade.
- To create volume, you can use gradations of light and shadow. Gradual changes in tone intensity from dark to light allow you to visually determine the distance and shape of objects in the drawing.
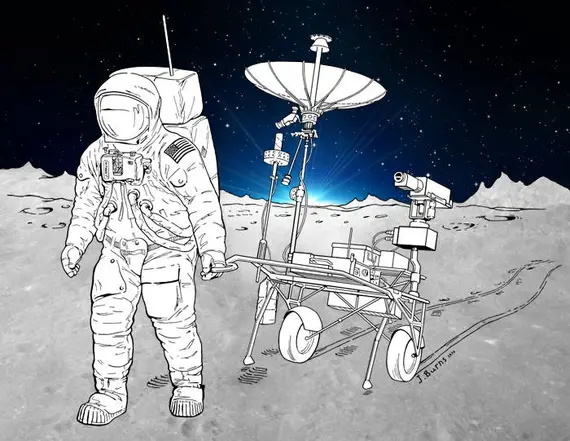
Model of Lunokhod-2
Lunokhod 2 is a self-propelled vehicle developed in the Soviet Union for the purpose of exploring the surface of the Moon. Lunokhod 2 was launched from Earth in January 1973. This vehicle was a large wheeled platform equipped with scientific equipment and a control system.
It was equipped with television cameras, an X-ray fluorescence spectrometer, and other instruments. Lunokhod 2 had 8 wheels, each of which could turn independently of the others, which allowed it to overcome various obstacles on the lunar surface.
The lunar rover in the picture can be depicted using a step-by-step plan:
- Create a base. To do this, draw a vertical line that will mark the front of the lunar rover. Mark the main dimensions of the lunar rover.
- Start drawing the body of the lunar rover from its front part. Use rectangular shapes to create the base of the body.
- Add wheels to the body of the lunar rover: 4 main ones. Give them a characteristic look: they should be round and have an inner rim. Draw the axles of the wheels and small protrusions on the top of the wheels to give realism.
- Draw a tower with an antenna on the top of the lunar rover. The tower should be slightly tilted forward. Give the tower the shape of a rectangular parallelepiped. At the top of the tower, draw an antenna in the shape of a rectangle with rounded edges.
- Lunokhod 2 had several solar panels on its body. They helped it charge its batteries from sunlight. Depict the solar panels as thin rectangular panels on the back of the lunar rover.
- Draw additional details such as steps, hatches and handrails.
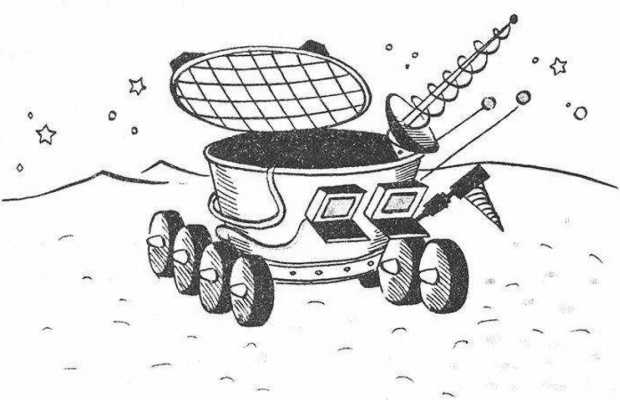
Model (was not implemented)
Step-by-step master class:
- Draw the basic shape of the lunar rover without going into details.
- Start drawing the wheels. Draw 6 wheels at the bottom of the lunar rover model. They should be located at the same distance from each other.
- Add a periscope. This can be depicted as a thin rectangular tube with a lens at the end. Place it on top of the rover so that it points forward.
- A manipulator can be added to the side of the lunar rover - a kind of hand that can be used to grab and move objects. Depict it as a long, curved metal structure with several movable joints.

- To give volume to the model of the lunar rover, use shadows and lines. Add lines to create the effect of depth and volume, as well as shadows to emphasize the contours of the lunar rover and its parts.
Moonwalker with a lunatic in cartoon style
A lunar rover in a cartoon style drawing can be depicted using creativity and imagination:
- Start by drawing the base of the rover, which is a rectangular platform with wheels. Use a simple pencil to create the outline. Pay attention to details, such as the lines connecting the wheels to the platform.
- Add the lunar rover itself to the platform. Draw the body with shapes and details, such as the hatch and supports. Draw antennas, instruments on the body or headlights. To create an emphasis on details, use different line thicknesses when drawing them.
- Give the lunar rover a cartoonish look using various techniques. You can draw round wheels or make the body more elongated and oval. Or add round eyes, big ears or a nose.
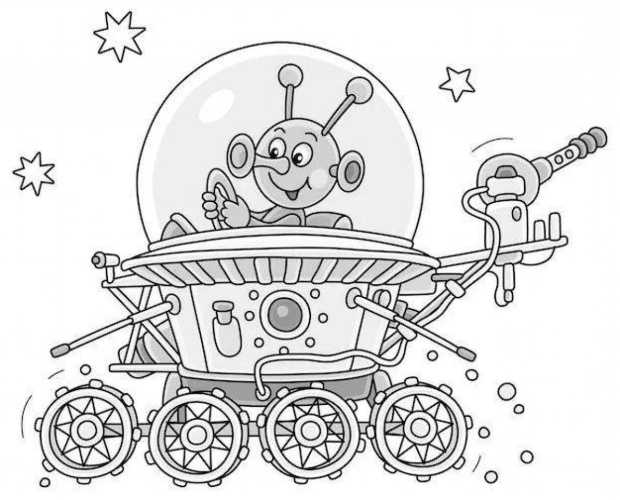
- Draw a round window through which you can see the Sleepwalker inside the device.
- Draw a lunatic astronaut in a lunar rover. This is a funny character with expressive facial features. Give him a unique look using an unusual nose and tube-shaped ears.
- Adding extra details such as shadows, gradients and textures to give the drawing volume and realism.
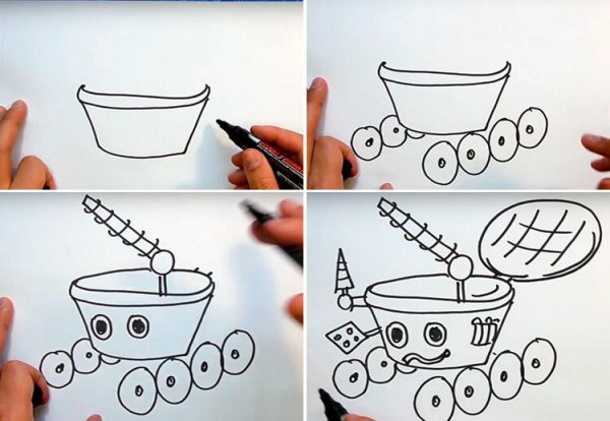
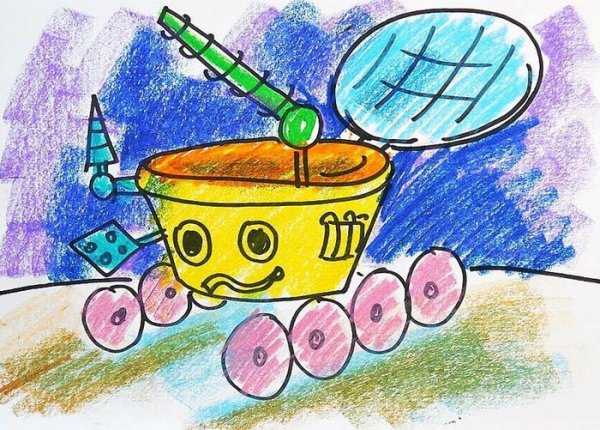
Cartoon with eyes in colored pencils
The lunar rover is depicted in a cartoon style, starting with simple forms and gradually moving to more complex details:
- Create a sketch of the lunar rover. Use light lines to outline the contours of the vehicle, its wheels and parts. Determine where the eyes, mouth and other details will be located.
- Start with the main lines of the Lunokhod body. Draw the body in the form of a parallelepiped.
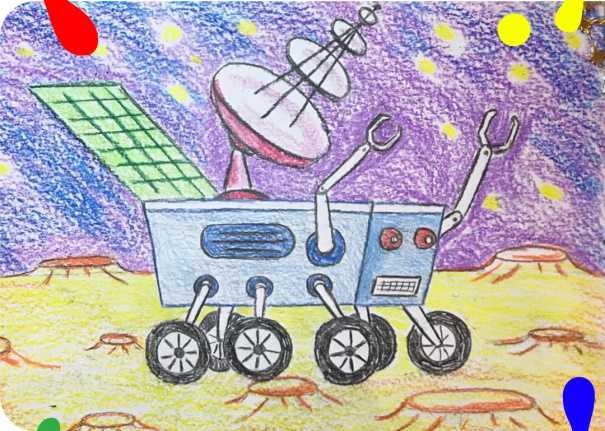
- Draw 6 wheels, manipulators, a solar battery and a radar.
- Add eyes. They can be oval or round to give the drawing a cartoonish style.
- Draw the surface of the Moon with craters.
- Color the lunar rover with the selected color. Create transitions between colors to add volume to the drawing.
- Color the sky with blue and purple pencils, and the stars with yellow.
- Add shadows and highlights to add realism. You can also make the shadows lighter or darker depending on the angle of the light.
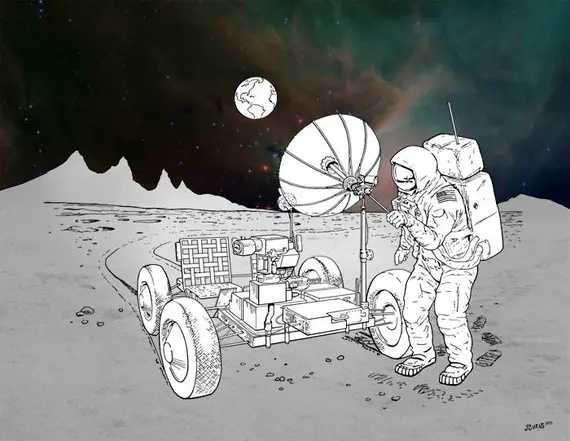
Apollo 15 Lunar Rover
As part of the Apollo program to explore the moon, the Apollo 15 spacecraft was launched in 1971. The Lunar Roving Vehicle was designed to improve the mobility of astronauts on the moon.
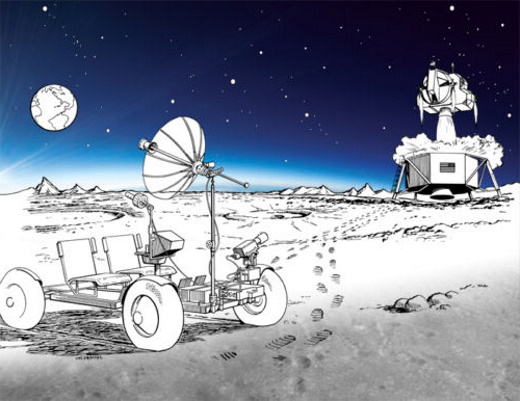
It was a 4-wheel vehicle designed specifically for low gravity conditions, with steering, brakes, and suspension that allowed astronauts to move comfortably across the lunar surface.
Step-by-step instructions to help you create a unique image:
- Start by creating a general sketch of the lunar rover. Draw the base of the car, its body and wheels. Do not go into details at this stage. Mark where the perspective will be - this will help create the effect of depth.
- Draw the chassis (wheels). Draw the details: rim, spokes and tires. Each wheel was equipped with its own electric motor, which provided the car with excellent maneuverability and cross-country ability on the uneven lunar surface.
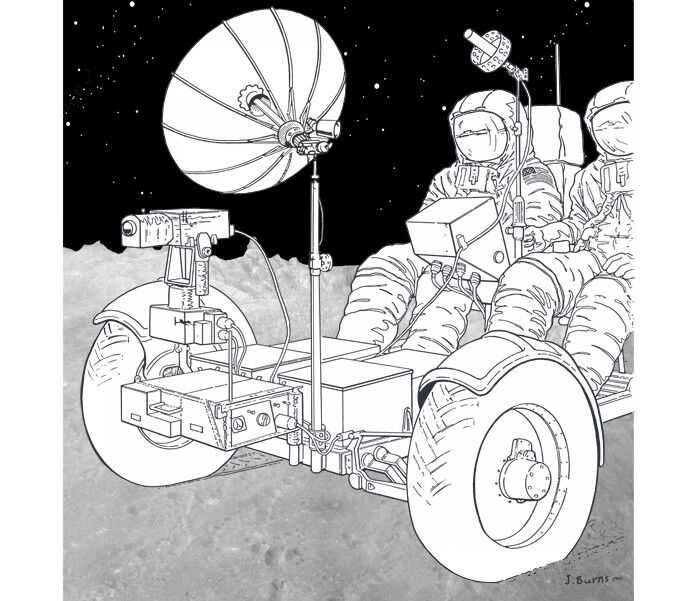
- The car cabin was equipped with 2 seats for the driver and passenger, as well as control and navigation equipment. Draw it.
- Draw a power plant that was a solar battery that converted sunlight into electrical energy. The control system was based on an onboard computer that automatically regulated the speed and direction of the machine.
- Draw the instruments on board, which included cameras, radiation and temperature sensors, an altielectrograph, and a magnetometer.
- Depict the surface of the Moon, which has a gray tint. Depending on the lighting, the rocks may appear brown, bluish, or have a lighter or darker tone.
To create the moonlight effect, you can use the dirty blending technique, which will create light, barely noticeable shadows. The color of the "moon dust" can vary from light gray to dark brown.
- Add a human footprint to the lunar surface. Start with a simple sketch to determine the location and shape. The lunar surface is covered with regolith, a layer of loose soil made up of dust, small stones, and rock fragments.
A person walking on the surface of the Moon leaves a chain of footprints and small depressions. You can draw large, clearly visible ones. Although in reality these chains would be barely noticeable - due to the low gravity.
To add volume to a print, use shadows and highlights. Shadows will help emphasize depth and volume, and highlights will add light and brightness.
- Add shadows from craters or mountain ranges. This will help create a sense of depth and space.
- The sky can be colored with watercolor pencils, using black on the surface of the moon and moving on to lighter shades of blue.
- Leave small white dots in the sky – stars.
- Finish drawing a small sphere – the Earth. To make it recognizable, depict the outlines of the continents.
- To give the drawing volume and depth, add shadows and light. Use different shades of gray to create a shadow effect. Light can be added with a white pencil or pen.
Tips for Beginners
Drawing a lunar rover is possible taking into account general recommendations that are useful not only for beginning artists seeking to master a new direction, but also for more experienced ones wishing to improve their skills:
| Basic principles | Brief description |
| Studying the prototype | Before starting work on the drawing, it is necessary to study information about the prototype of the lunar rover, familiarize yourself with its technical characteristics, appearance. This will help to create a realistic drawing. |
| Composition | It is important to correctly position the lunar rover on the sheet of paper. Its placement in the drawing space should be thought out in order to create a dynamic and captivating image. |
| Sketch | Before you start drawing, you need to create a sketch. You can use pencils for this. The sketch should give a general idea of the shape of the lunar rover, its proportions and detailing. |
| Basic forms | You can create the basic shapes of the lunar rover using geometric shapes such as rectangles, cylinders, and cones. This will help define the structural features of the vehicle. |
| Detailing | After creating the outline, you can begin drawing the wheels, hatches, antennas and other elements of the lunar rover. It is important to pay attention to the proportions and location of the parts. If the lunar rover has a porthole, it is worth adding an image of an astronaut in a spacesuit there. |
| Shadows and Lighting | They will help create volume and depth of the image. The shadows on the lunar rover will be directed from the body and parts, and the light source will be located slightly above. |
| Coloring | The color of the lunar rover is usually associated with the material it is made of, but other options can be used. Harmony is important: you should consider the color combinations between the different surfaces of the lunar rover and the overall palette of the design. For example, the main color can be combined with the shades of the celestial body on which the lunar rover is located. You can use the entire range from terracotta shades to deep marengo. |
Following the recommendations, you can include a new direction in your creative style - drawing a lunar rover. The created image will not only reveal the beauty of space, but will also interest you with its scientific component.
Drawing lunar rovers is a creative activity that requires not only strict adherence to proportions and color schemes, but also imagination.
Video about drawing
Lunokhod - drawing: