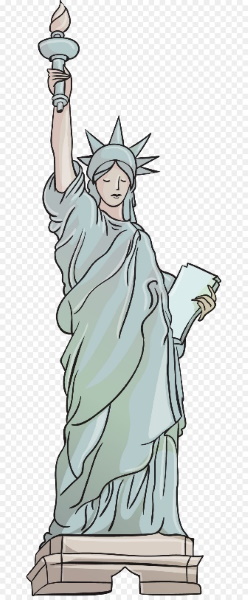
Located in New York, USA, the Statue of Liberty will be more interesting to draw for children who already understand what it is and know the history of the American architectural structure. Such drawings can be created in realism, as well as in other techniques, for example, cartoon or watercolor.
How to Draw the Statue of Liberty
According to the recommendations of experienced artists, children should create a drawing of the Statue of Liberty in accordance with the simplest algorithm:
- First, you need to define the horizon line. In the vast majority of cases, this line should be located 3-5 cm above the middle of the working plane. If you shift the horizon down, it will be difficult to depict a full-length statue, and if up, it will be necessary to fill the space at the bottom of the sheet of paper with secondary objects.
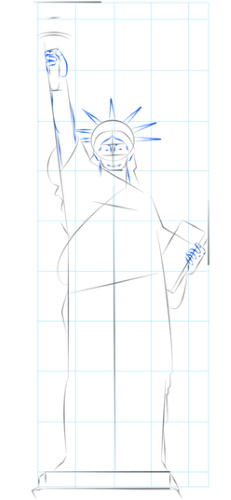
- Draw the base of the architectural structure. It is located at the lower boundary of the working plane and has a rectangular shape. The base should consist of several geometric figures (usually 4 or 5) with different characteristics (height, width, length). The upper component of the base should be drawn the most compact in its dimensions.
- From the upper component of the base, you need to draw the main part of the statue (the body). The easiest way to draw this section is as a rectangle. If the image is created in cartoon or other techniques, the body of the statue can be depicted using less clear geometric shapes (for example, an oval with blurred boundaries).
- A schematic drawing of the head and limbs of the statue. With the help of sketches, the young artist will be able to select the optimal sizes of these parts of the image, as well as determine their specific shape.
- Drawing the features of the Statue of Liberty. To make the drawing look realistic, it is necessary to depict the eyes, nose, and mouth on the face of the statue, while observing the angle from which the object is being drawn. The hands of the architectural structure also need to be outlined more carefully.
- Depicting the details of the main object of the drawing. At this stage of the work process, it is necessary to depict the crown on the head of the statue, as well as the tablet (a board with text written on its surface) and a brush on the right, and a torch on the left.
- Drawing the folds on the Statue of Liberty's clothing. The older the child, the more detailed he should be when copying the image. If an artist aged 7-8 is working on such a drawing, it is not necessary for him to detail the appearance of the clothing.
- Applying shadows, half-shadows and hatching. This way you can indicate the angle of light falling on the statue, visually place accents, and also give the drawing realism.
- Detailing the base of the Statue of Liberty. The base of the architectural structure should also be shaded and shadowed. If desired, the young artist can be encouraged to use his imagination and artificially age the statue, for example, by depicting chips on its base.
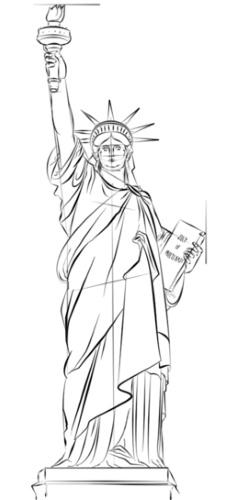
Statue of Liberty drawing - full drawing detail. - Drawing the background. At the final stage of the work process, it is important to give the child freedom of action. Let the young artist draw airplanes circling around the statue or tourists photographing an American architectural structure, and so on. If you strictly control the entire process of creating a picture, you can provoke negative emotions in the child, which will deprive him of motivation not only for fine art, but also for other activities aimed at revealing creative potential.
- Coloring the image.
With a pencil
It is recommended to learn how to draw the Statue of Liberty using a simple pencil.
The main advantages of using such a tool are:
- Ease of useThere is no need to press hard on the pencil or hold it in any special way.
- Possibility to correct mistakenly drawn lines with the eraser. It is important that the eraser used by the young artist is of high quality. Otherwise, erasing lines can lead not only to the pencil being smeared across the work surface, but also to the appearance of scuffs and holes on the sheet of paper used.
To create an image of the Statue of Liberty using a simple pencil, a child will need:
- Several sheets of paper. In case it becomes necessary to redo the work due to the impossibility of correcting it.
- A set of pencils. The set should contain pencils of different hardness. This is necessary for more comfortable drawing of individual details of the image, as well as correct application of shadows, half-shadows and hatching.
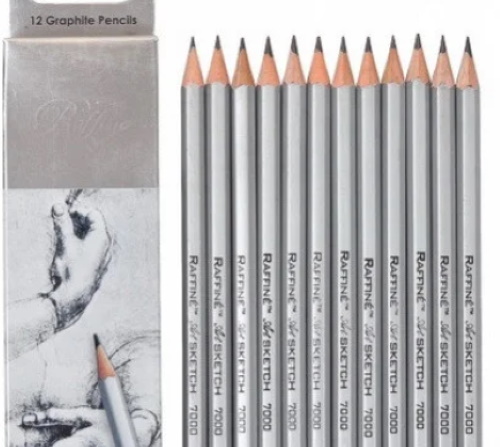
- Eraser.
- Stencils. This is relevant if a young child is working on creating a drawing of the Statue of Liberty and is not yet physically capable of correctly drawing the main lines of the object.
It is recommended to draw the Statue of Liberty in strict accordance with the algorithm chosen by the artist.
For example:
| Image variant | Workflow Algorithm |
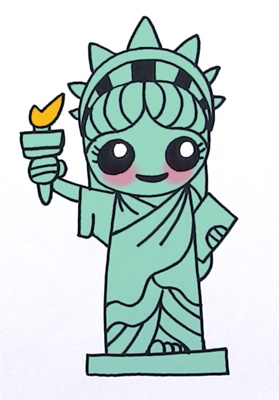 | 1. In the lower part of the working plane, draw a rectangle, the distance between the upper and lower edges of which should be no more than 4-5 cm (the base of the statue). 2. Step back 4 cm on the right and left, and draw up 2 parallel lines, the length of which should be at least 10 cm. 3. On the outside of the right vertical, draw a semicircle, inside which draw a rectangle located slightly diagonally (a board held in the hand). 4. Draw a rectangle on the outside of the left vertical. 5. From the rectangle, draw 2 short parallels to the left, at the extreme points of which draw a small circle (hand). 6. Draw a triangle under the circle, and a rectangle with a schematic fire on top (torch) above the circle. 7. From the extreme points of the main verticals draw a large circle (head). 8. Draw 2 small circles inside the head, placing them at the same distance (eyes). Draw small circles (pupils) inside the eye contour, then color the space around them. Draw 3 short straight lines (eyelashes) on the outer sides of the eyes. 9. Draw smoothly curved lines above the eyes (the outline of the bangs), then draw 2 semicircles above the border of the head, repeating the curve of the main border. 10. Draw 7 small triangles on the outside of the upper semicircle, placing them in descending order from the center to the edges. 11. Fill the spaces between the semicircles with randomly curved lines. 12. Color the drawing and, if desired, add objects located in the background. Since the drawing is made in a cartoon technique, it is permissible to use several colors for coloring, including bright ones. |
What colors to paint
The Statue of Liberty drawing can be colored or left in its original black and white color. It is recommended to select shades to fill the space inside the outline taking into account the style in which the image was created.
For example:
- if the drawing is created using a realistic technique, it is recommended to paint it in light blue, locally applying shadows, half-shadows and shading;
- If the drawing is created using cartoon or other techniques, you can use blue, green, pink, purple, yellow and any other bright color to color it.
Draw a torch
In the detailed drawing of the main image, special attention must be paid to creating the outline of the torch, located on the left side, if the Statue of Liberty is drawn full face.
There are several ways to draw a torch:
| Image variant | Method of creating a drawing |
 | 1. Determine the boundaries (square) of a small area of the working plane in which you plan to draw the torch. 2. Mark the horizon line. 3. In the lower part of the limited area, draw 2 parallel vertical lines, the extreme points of which must be connected by semicircles. 4. Above the semicircle located at the top, draw a few more smoothly curved lines, slightly different from each other in length. The extreme points of the lines should also be connected with semicircles. 5. From the top line, draw a deformed semicircle, the larger part of which should be located in the area of the upper right corner of the limited plane. 6. Adjust the outline of the semicircle, making it angular, like a flame. 7. Draw the flames using pointed and smoothly curved lines inside the main outline. 8. Paint the torch, choosing colors based on the technique used to create the images. |
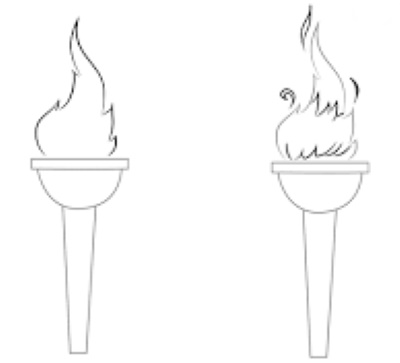 | 1. Determine the boundaries (square) of a small area of the working plane in which you plan to draw the torch.
2. Mark the horizon line. 3. Draw 2 vertical lines under the horizon line, located at a distance of 2-3 cm from each other. The lines should be positioned so that the space between them narrows towards the lower boundary of the limited plane. 4. The lower extreme points of the verticals must be connected by a horizontal line. 5. The upper extreme points of the verticals must be connected with a semicircle curved downwards. 6. The extreme points of the semicircle must be connected by a horizontal line. 7. Stepping back 1 cm from the connecting horizontal line, draw another line parallel to the original one. 8. The extreme points of the parallels should be connected by vertical lines. 9. From the upper straight line, draw an upward elongated semicircle, the outline of which should be slightly pointed. 10. Add detail to the image by drawing the flames inside the main outline of the object. |
 | 1. Determine the boundaries (square) of a small area of the working plane in which you plan to draw the torch.
2. Mark the horizon line. 3. Draw 2 vertical lines under the horizon line, placing them at a distance of 2-3 cm from each other. 4. The lower points of the verticals should be connected with semicircles curved downwards. 5. The top points of the semicircle curved downwards must be connected with a straight line. 6. From the middle of the connecting horizontal line, draw a semicircle extended upwards. 7. Adjust the outline of the semicircle, making it more angular, like a flame. 8. Add detail to the image by drawing a drop inside the flame outline (a schematic representation of flame tongues). 9. Color the drawn detail, choosing a shade in accordance with the technique used by the young artist. |
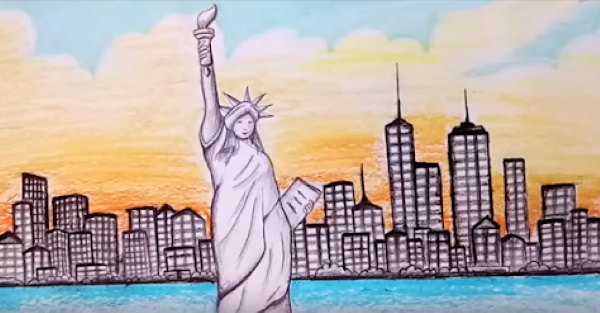
Full length
It will be easier for a child to create a full-length drawing of the Statue of Liberty using cartoon techniques. To make the task more difficult, you can ask the young artist to think through the background and draw the statue taking into account secondary objects.
This approach will train the child’s ability to correctly determine the location of details in space, as well as correctly prioritize the construction of a composition.
You can draw the Statue of Liberty:
- With colored pencils. Before coloring the drawing, it is recommended to outline the outline with a simple pencil. The expediency of this recommendation is that it is easier to correct a line drawn with a simple pencil than one drawn with colored pencils.
- With paintsIf a child aged 10-12 is working on creating an image, it is acceptable to draw the statue without first outlining the outline of the key object.
- With felt-tip pens (It is best to use felt-tip pens only for drawing the outline of the main object by experienced artists. Colored pencils or paints are more suitable for coloring. They will fill the space inside the outline more evenly, which will have a positive effect on the overall appearance of the final image).
One of the easiest ways to draw the Statue of Liberty in full size is:
| Image variant | Workflow Algorithm |
 | 1. Mark the horizon line. 2. From the lower boundary of the working plane, draw 2 vertical lines so that the distance between them narrows as they approach the previously determined horizon line. 3. Draw 2 parallels outside the right vertical, directing them diagonally to the upper right corner (hand). Draw a small oval (hand) at the extreme points of the parallels. 4. In the drawn brush of the statue’s raised hand, depict a lit torch in any way convenient for the child. 5. Draw a triangle (a board pressed against the body) on the outside of the left vertical. 6. From the corner of the triangle, draw 2 smoothly curved lines, placing their extreme points inside the geometric figure (the hand holding the board). 7. Draw a circle (head) at the extreme points of the verticals that form the body. 8. Inside the circle, draw the outline of the hair, placing smoothly curved lines on the right and left along the outline of the head. 9. Draw 2 rounded ovals, placing them on the same level. 10. Draw small circles (pupils) inside the ovals, coloring them black. 11. Draw 2 more semicircles (crown) above the outline of the head. 12. From the upper semicircle, draw 7 pointed semicircles located at the same distance from each other. 13. Color the resulting image, having first (optionally) drawn in the secondary objects of the composition. |
Complex option
The Statue of Liberty can be offered to a child of any age to draw. While the drawings of very young artists will be more schematic, older children will be able to create a detailed image, made in a realistic technique.
To do this, the creator is recommended to use the algorithm below:
| Image variant | Workflow Algorithm |
 | 1. Determine the horizon line. 2. From the lower border of the working plane, draw 2 rectangles, placing them at a distance of 5-7 cm from each other. 3. Connect the upper edges of the geometric figures with a straight line, which should become the base for the next rectangle located above. The second rectangle should be low (the distance between the generating lines is no more than 2 cm). 4. Finish drawing the third rectangle, making it the tallest of all those created earlier. 5. From the upper border of the third rectangle, draw vertical lines, placing them at a distance of 5-6 cm from each other. The lines should be drawn smoothly curved (imitating waves on clothing). 6. In the area of the previously defined horizon line, on the outside of the right vertical, draw a rectangle, the upper edge of which should be directed towards the upper right corner (board with inscriptions). 7. On one of the generating edges of the rectangle, draw several straight lines, the extreme points of which should be located inside the geometric figure and be connected to each other by semicircles (fingers of the hand holding the board). 8. Extend the left main vertical after the horizon line upwards by drawing another parallel at a distance of 3-4 cm from the forming key line (raised hand). 9. Finish drawing the torch in your hand using any method convenient for the artist. 10. At the level of the place where the beginning of the line with which the raised arm was drawn is located, draw an oval (head). 11. Above the oval, stepping back 2-4 cm, draw a semicircle, placing its start and end points on the main geometric figure. 12. From the semicircle, draw 7 triangles, placing them at the same distance from each other (crown). 13. Add detail to the image by drawing the eyes, mouth and nose of the statue inside the head. 14. If desired, color the drawing and refine the background. |
You can learn to draw the famous Statue of Liberty both at the initial stage of learning the basics of fine art, and in the case when a child or adult already has a number of special skills (for example, studying at an art school).
Drawings of American architectural structures require precision, an understanding of the features of drawing objects based on their distance from the viewer, and the ability to copy simple lines and geometric shapes.
Statue of Liberty Drawing Video
How to draw the statue of liberty: