Pattern and description of knitting a hooded hat knitting needles can be found in various thematic publications devoted to needlework. The model, which combines both a scarf and a hat, has been popular for many years, as it allows you to look fashionable and feel comfortable even in the cold season. Hooded hats were previously worn by fishermen and wealthy nobles. In the 19th century, for example, knitted hoods were called "Bashlyk", and they were worn over the main headdresses in cold or damp weather.
Fashionable models of women's and children's knitted bonnets
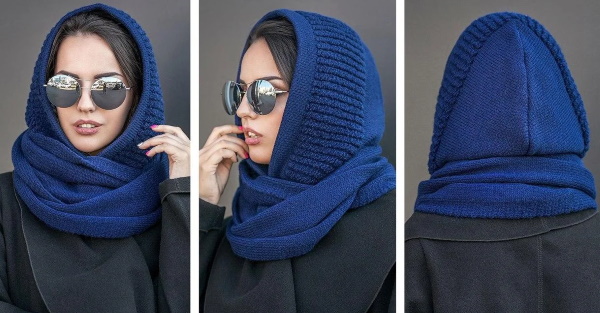
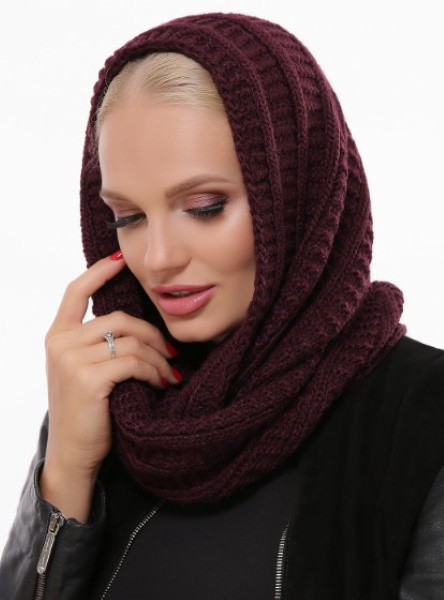
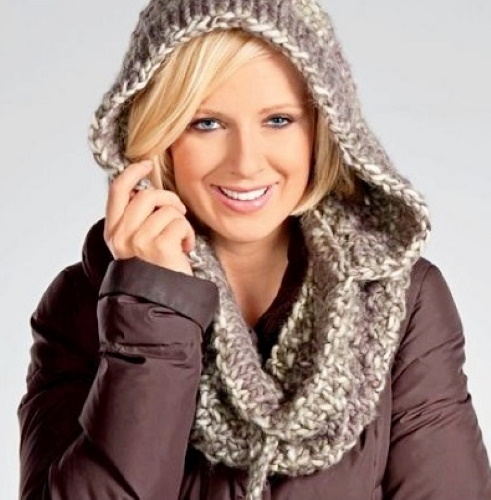
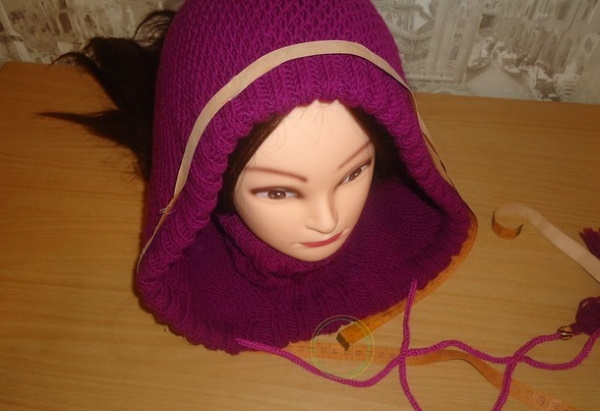
A knitted hooded hat, the pattern and description of which can be found both in old knitting magazines and in modern glossy magazines, is one of the favorite headwear among women of all ages. The advantage of such a wardrobe item is that it combines several things necessary for the cold season: a hood and a scarf.
Models for girls can be both classic, made with garter stitch, and decorated with braids, pimples, cones or leaves. In addition, models with ears are also popular with children. Adult women also do not deny themselves the pleasure of wearing a warm and comfortable headdress in the cold season.
The advantage of a hooded hat is that it:
- easy to remove;
- maintains hairstyle;
- does not require an additional storage bag;
- ideally suits any face shape;
- individual accessory.
The hooded hat is called differently, and it depends on the method of its knitting. For example, a snood is not only a wide scarf knitted in a circle, but also a headdress that will protect you from the cold wind in any weather. Recently, a snood with a drawstring has become especially popular, which allows you to adjust the diameter of the opening for the face.
A bonnet is also a type of hooded hat. It differs from a snood in that this product has ties on the neck or a small warm stand-up collar.
At the end of 2019, knitted balaclava hats appeared, which can also be classified as a variety of models. Such a headdress covers not only the neck, back of the head, head and forehead from the frost, but also part of the face from the chin to the nose.
Tools and materials for knitting
A knitted hooded hat, the diagram and description of which will help even a novice needlewoman to create a unique headdress, requires careful selection of materials for its creation.
Before you start knitting, experts recommend deciding on:
- style;
- material;
- headset.
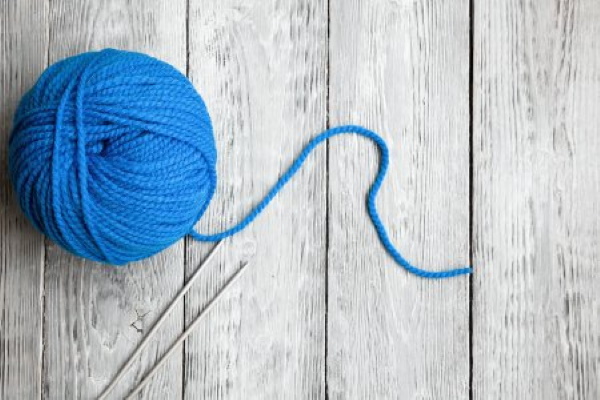
A quality product will only be obtained with the correct selection of all the listed components. For a knitted hood for the fall-spring season, you can take thin non-wool threads. Such a product will be light, and its knitting will be small. To create a winter snood or hood, it is recommended to use a woolen thread with the addition of acrylic. The headdress will be dense and warm, and the loops will be larger than in the previous version.
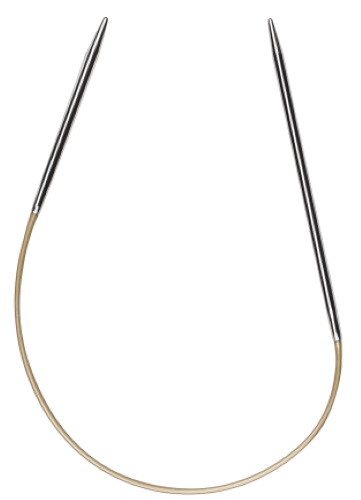
To create a hood-hat you need:
- knitting needles;

- large pin;
- thread holder;
- hook;
- yarn.
If desired, you can decorate the product with the selected fittings.
Types of yarn used for different seasons of the year:
| Winter | Spring |
| Alpaca | Acrylic |
| Angora | Viscose |
| Merino | Polyamide |
| Mohair | Cotton |
| Fleece | |
| Cotton |
Manufacturers often mix natural thread with artificial yarn to give it universal qualities. For example, to ensure that the material does not fade for a long time, acrylic is added to the yarn, and to make the thread stretch and not break, polyamide is added.
Patterns and description of knitting a women's hood hat with knitting needles
At first glance, knitting a hood-hat with your own hands is difficult, but it is not. Even a beginner needlewoman can handle such a product. All knitting patterns consist of front and back loops. In addition, you need to master the rules of yarn overs and tilting loops to the left and right.
Bonnet with drawstring
A knitted hooded hat, the diagram and description of which will help you knit a warm headdress for the winter, can be made with a drawstring for tightening. One of the models of such a wardrobe item is called Hyacinth.
To make it you need:
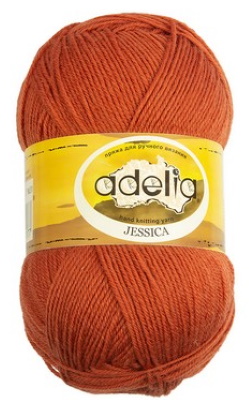
- yarn "Adeline Jessica";
- mohair “Nako Monair Delicate”;
- knitting needles 3.75 mm;
- knitting needles 2.75 mm;
- hook 3 mm.
The product is knitted in 1 thread.
To connect the hood with the drawstring, you need:
- Cast on 4 stitches on the needles.
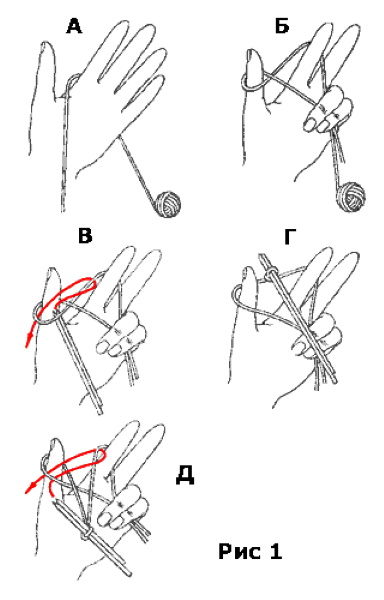
- Row 1 consists of face loops. The edge loop is not knitted, and the last one is made purl.
- Row 2 and subsequent even rows consist of purl and 2 increases at the beginning and end. This is done until there are 40 loops on the needles. After that, they are added to 106 pieces.
- Next, the hood is knitted in a circle to the required height.
- At the back of the product, you need to remove several loops and make a sprout (5 shortened rows on each side) so that the headdress holds its shape and does not stretch.
- The front of the product is knitted up to the chin, after which several loops are removed onto an additional knitting needle and knitting begins in turning rows.
- To round out the product, place a marker several rows before the end of knitting. 1 loop before and 1 loop after, knit 2 loops together several times in each even row.
- The remaining loops are sewn together by folding them in half.
The weight of the finished product is 0.26 kg.
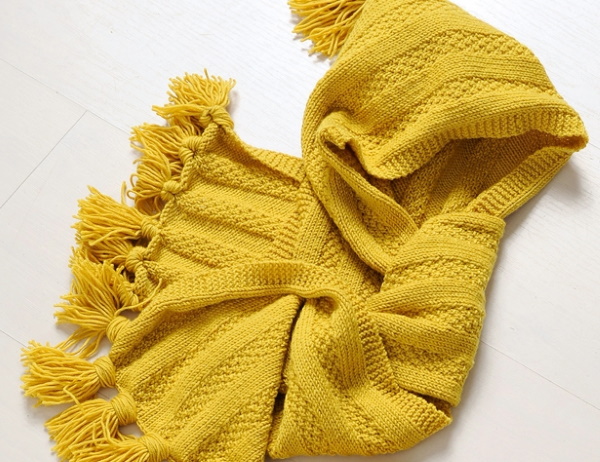
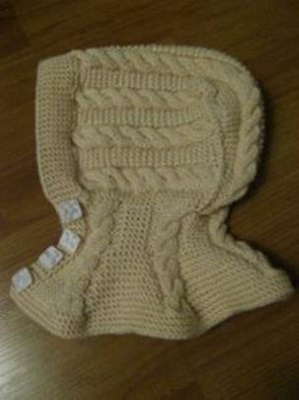
Model with tassels on buttons
The secret to making a hooded hat is that it is knitted like a rectangular piece of fabric. To give the headdress a pointed shape at the back, it is sewn exactly in the middle.
For a product with tassels you will need:
- yarn;
- knitting needles No. 4;
- hook No. 3;
- buttons 2 pcs.
The model with tassels is suitable for both an adult girl and a little girl.
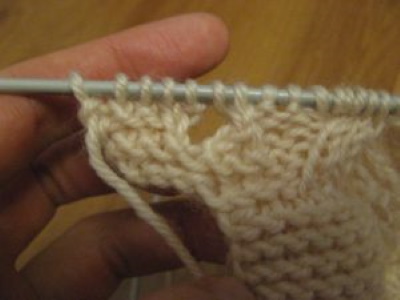
To knit a fashionable hat for a girl, you need:
- Cast on 55 stitches (including edge stitches) on knitting needles.
- Next, the rows are knitted, repeating the pattern, where 5 loops of garter stitch, 5 - front surface and 5 - double pearl stitch alternate. The element with 5 front surface and 5 double pearl stitch is repeated 3 times. After this, 5 front surface and 5 garter stitch are knitted again.
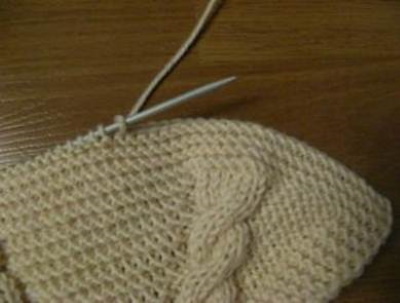
- The loops are closed after knitting 160 cm from the 1st row.
- After this, the scarf is folded and the model is sewn with a flat seam.
- A tassel made in advance is sewn on top of the seam. The length of the tassel should not exceed 7 cm.
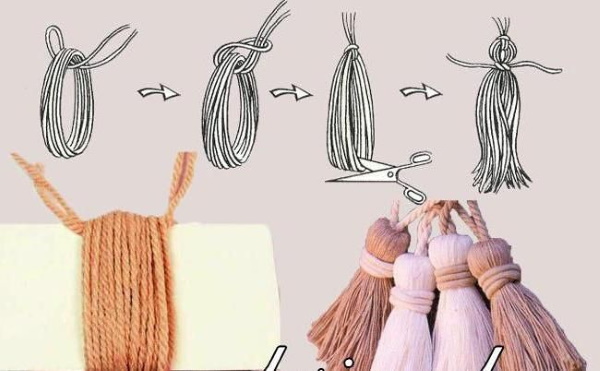
- Additionally, you can decorate the product with fringe by cutting off sections of thread 9-10 cm long.
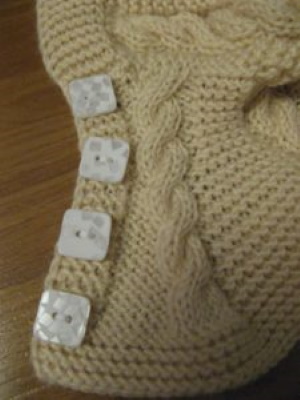
Once the headdress is completely ready, buttons are sewn onto it so that it does not slip while being worn.
With a dickey
A knitted hooded hat, the pattern and description of which are familiar to many needlewomen, is sometimes supplemented with a bib to warm the chest in addition to the head and neck. The bib can be made either in wedges or round, depending on the knitter's wishes.
For a winter product you will need:
- yarn (2 skeins);
- knitting needles No. 5.
The size of the product is 53 cm, and the height of the hood is 33 cm. When knitting, use the front surface and 2 by 2 elastic. The hood and collar are knitted separately.
To create a winter headdress with a bib, you need:
- Cast on 108 stitches for the hood (including edge stitches).
- 3 cm are knitted with a 2 by 2 elastic band, and even rows begin, after removing the edge, with 2 purl loops.
- Next, 22.5 cm are knitted with the front surface. In this case, after knitting 54 loops, turn back. The remaining loops remain outside the work. This is done until the end of the row.
- After this, from each purl row, the loops are closed according to the pattern: 1 loop 4 times, 2-3 times, 3-2 times, then 4-1 time. The total number of closed loops will be 34.
- All loops are closed after 30 cm from the beginning of knitting. The second part of the headdress is knitted in the same way as the first, only loops are closed in even rows.
- For the collar, cast on 96 stitches and knit a 20 cm piece with a 2x2 elastic band. After this, the stitches are closed and the edges of the collar are sewn together.
To finish the product, the hood is sewn along one edge and the upper part of the collar is sewn to its lower edge.
Bashlyk with plaits and a pompom
To ensure comfort in the winter cold, you can knit a bashlyk with plaits and a tassel.
To create the product you will need:
- yarn 0.5 kg;
- knitting needles;
- ruler;
- scissors.
For a winter product, the thread should be made of acrylic and wool.
To knit a bashlyk, you need:
- Cast on 46 stitches.
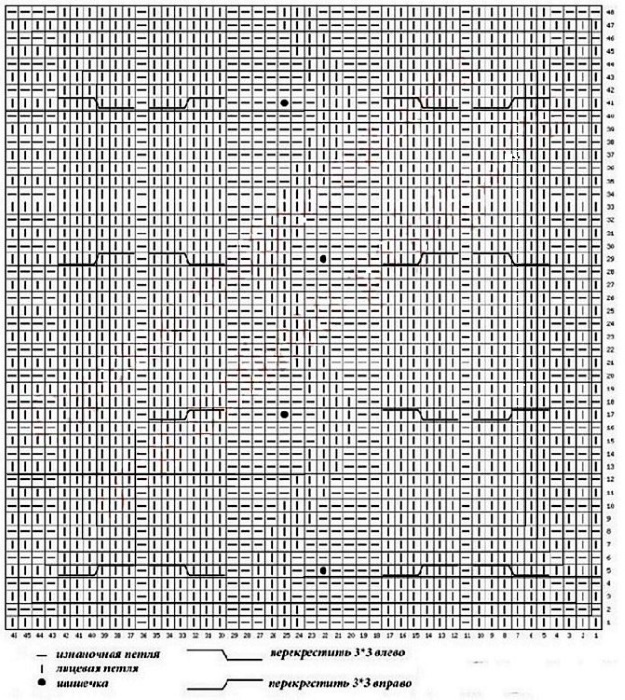
- Row No. 1 is knitted, and then follow the pattern.
- After the length of the fabric is 95 cm, on the right, after the garter stitch, they begin to add loops for the hood, adhering to the rule that in every 2nd row 1 loop should be added and so on 12 times. To make the loops look original, they are knitted using the "Bump" pattern.
- Thus, 30 cm of the product is knitted, after which loops are reduced according to the same principle.
- As soon as the decrease of loops is finished, start knitting the second part of the product.
To make the headdress ready, the hood is sewn along the edge of the increase and a tassel is attached to its sharp part. Both edges of the scarf can be decorated with fringe or small tassels.
Hood with combined pattern
A knitted hooded hat, the diagram and description of which are understandable even to novice craftswomen, is a universal headdress that can be made with any pattern you like.
To create the product you will need:
- yarn;
- knitting needles;
- scissors.
For a product measuring 38 x 94 cm you will need:
- Cast on 152 stitches (including edge stitches) on knitting needles.
- Next, knit 6 rows in garter stitch.
- After this, rows 7 and 8 are knitted with stocking stitch, adding 30 loops in row 7. The first increase is after the 3rd loop from the gap between the loops, the second and subsequent ones - after 5 loops.
- Next, the model is knitted according to the pattern, repeating the pattern over a distance of 33 cm.
- After the pattern, begin decreasing the loops, working according to the same pattern as in the increase.
- At the last stage, knit 6 rows with garter stitch and close the loops.
Cones and leaves are used as patterns. Before washing, the hood is sewn along the seam.
Scarf and hood - one piece
To get a scarf and a hood in one product, you can simply choose the pattern you like and knit the product. The resulting fabric can be sewn to make something like a hood or left as a scarf and thrown over your head if necessary.
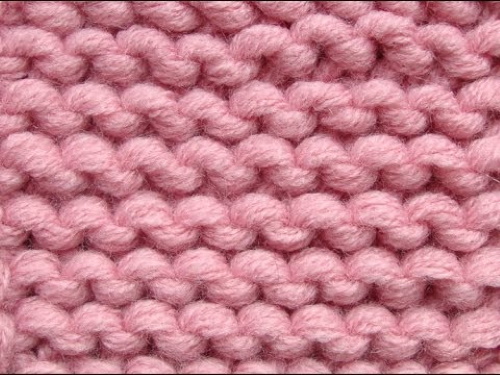
Beginner needlewomen can knit themselves such a headdress and scarf using the stocking stitch or stocking stitch. Some create a scarf with pockets at the end to not only keep the head and neck warm, but also to warm the hands.
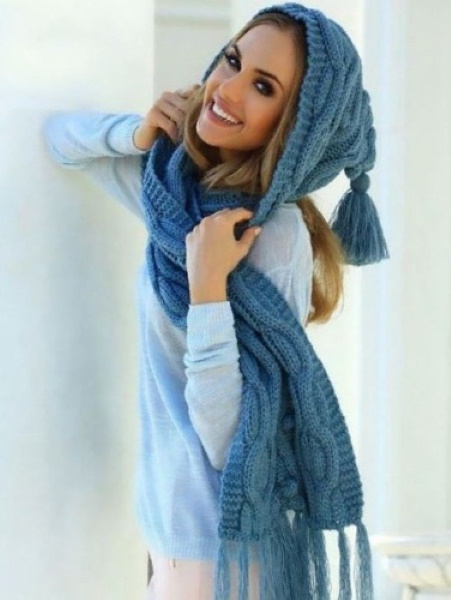
Hood with long scarf in wide braid style
A long scarf that smoothly turns into a hood can be styled with a wide braid.
To create the product you will need:
- yarn (4 skeins);
- knitting needles No. 25;
- auxiliary spoke.
The scarf is knitted with double thread.
To knit a scarf-hood, you need:
- Cast on 14 stitches.
- Rows 1 and 2 are knitted with garter stitch, after which they begin to create the braid.
- For a large braid, you need to knit the 1st row by alternating 2 front and 2 back stitches, cross 1 loop to the right over 2 front stitches, and cross 1 loop to the left over 2 front stitches. Finish the row with 2 back stitches and 2 front stitches.
- Row No. 2: knit all loops according to the pattern.
- Row #3: 2 knit, 2 purl, 6 knit, 2 purl, 2 knit.
- Row No. 4 is similar to No. 2, where all loops are knitted according to the pattern.
- The pattern is repeated from rows 1 to 4.
The loops are closed on row 84.
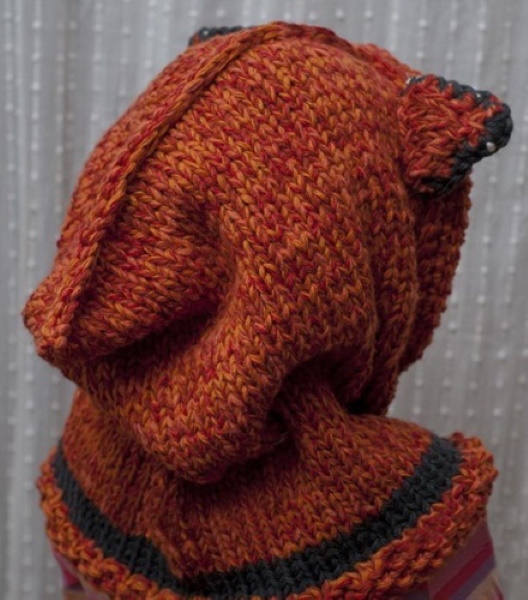
Model for girls "Red fox"
The diagram and description of knitting a hooded hat with knitting needles will tell you in detail how to make a beautiful accessory called "Red Fox". For the headdress, it is recommended to choose a light, warm orange thread. The hat is a single-piece knitted fabric, and the ears are knitted separately.

For the hat you will need:
- orange and contrasting yarn;
- knitting needles (preferably circular);
- hook;
- centimeter;
- scissors.
To knit a bright headdress for a girl, you need:
- Cast on 70 stitches.
- After this, rows 1 through 4 are knitted in a circle with the front surface without a connecting seam.
- Next, rows 5 through 8 are knitted with the front surface, using a contrasting thread.
- At the next stage, rows 9 through 20 are knitted with orange thread without changing the pattern.
- In row #21, the first 35 loops are knitted according to the pattern, after which the work is turned over and the product is knitted in turning rows for another 39 rows.
- At the next stage, the hood is sewn along the sharp edge.
- Next, the front part is crocheted,
- After this, knit 4 more rows without a yarn over and, turning the edging strip over, fix the ears.
- The ears are knitted with the front surface, casting on 10 loops on the needles. In each row, close 2 loops into one at the end of the row. The ears consist of 4 parts, which are then sewn into two.
To ensure that the headdress fits well on the child, you can pull a woolen cord through the loops of the hood.
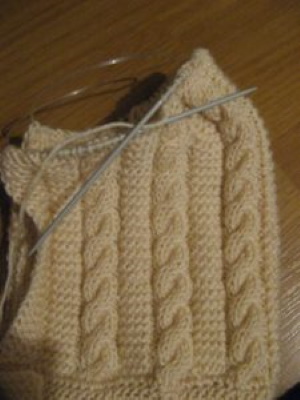
Children's hat with cords
When knitting a hat for a baby, you need to choose soft, non-prickly yarn.
For knitting, in addition to yarn, you will need:
- knitting needles;
- hook;
- centimeter;
- scissors.
The product can be in either light or dark tones.
To knit a hat, you need:
- Cast on 7 stitches and knit 125 rows in garter stitch.
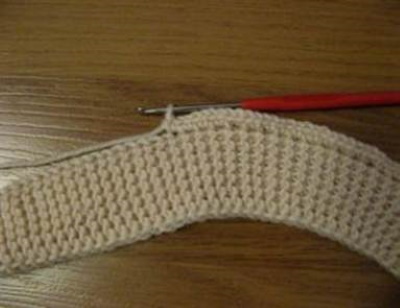
- This will create an elastic band that will fit snugly against the baby's face.
- Next, using a crochet hook, knit 1 row from the edge braid without a yarn over, from which 106 loops are cast on to the knitting needles.
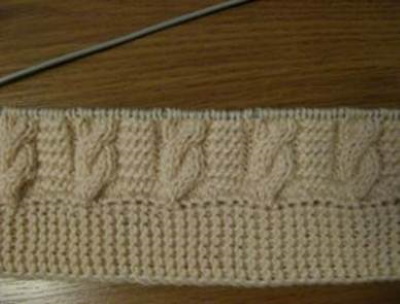
- Continue knitting according to the following pattern: edge stitch, cable stitch (2 purl, 6 knit stitches), garter stitch (2 purl, 4 knit stitches), cable stitch again and garter stitch (so on until the end of the row), then garter stitch (2 knit stitches, 2 purl stitches) and edge stitch. The pattern is repeated for 43 rows.
- Row 44 is conditionally divided into 3 parts so that the middle one consists of 36 loops, from which the crown is knitted, adhering to the pattern described above, while the tourniquet is made not from 6 loops, but from 4.
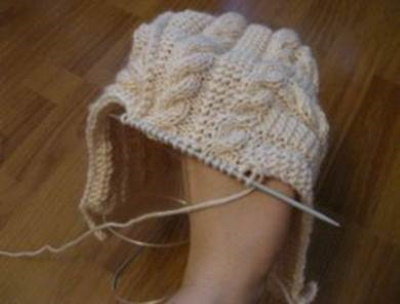
- Row 45 is knitted according to the main pattern, while loop No. 36 is connected to the loop following it.
- After this, the work is turned over, and row 46 begins with removing the 1st loop. Then the loops are knitted similarly to the previous row and the work is turned over again.
- Mirror knitting continues until row 51, after which in this and the next row, decrease in the central part. After this, continue decreasing loops on both sides until there are 16 loops left on the needle.
- Then knit with decreases until all the loops on the sides are finished. The work is closed and the working thread is cut.
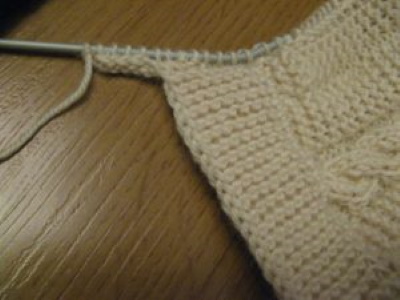
- Now form the neck by casting on 5 chain stitches from the bottom edge of the hood, 74 stitches from the edge of the garment and another 5 chain stitches.
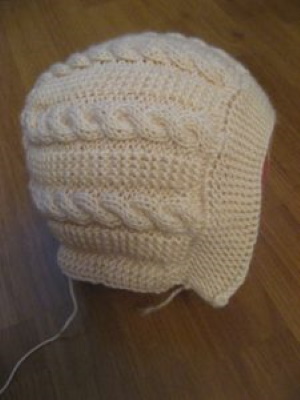
- Continue knitting according to the pattern after removing the edge stitch: garter stitch (6 knit stitches), cable stitch (2 knit stitches, 6 knit stitches), garter stitch (2 knit stitches, 5 knit stitches). The garter stitch pattern alternates with cable stitch until the end of knitting.
In the next row, add 2 knit stitches and repeat the pattern rapport.
- Next, knit 16 rows without increases, following the pattern.
- At the next stage, loops are added again, creating 2 of them in front of the edge in each row.
- After this, the work is turned over and the remaining 10 rows are knitted with front loops.
At the final stage, buttons are sewn onto the product.
Beanie hat with elastic brim
To ensure that the hooded hat has an elastic edge that fits close to the wearer's face, experts recommend knitting it with a loose elastic band.
To create a 58 x 70 cm product you will need:
- smooth yarn (6 skeins);
- knitting needles of the required diameter;
- scissors.
The majority of the headdress is made of knot pattern. The bottom edge and the edging around the face are made of elastic.
To knit a hooded hat, you need:
- Cast on 90 stitches to create the top of the headdress.
- Next in row No. 1, alternate 1 front with 1 back.
- After this, rows #2 and #3 are knitted in the same way as row #1 and 2 loops before the end, the loops are wrapped and turned around.
- Rows 4 and 5 are created similarly to row #3, but for 2 loops before the last one, wrap the loop, make 1 front loop and wrap the loop again and turn around.
- The main part is knitted with knots, creating them by knitting 2 sts together purlwise, then leaving the loops on the left knitting needle, throwing the thread behind the work, 2 loops together knitwise through the same loops, removing the loops from the left knitting needle.
- To create a collar, add 14 more loops to the main loops at the end of row No. 1, which is knitted as front loops.
- In row No. 2, knit 1 front stitch and continue to create knots until the last 15 loops, which are knitted alternating front and back stitches.
- Row No. 3 is knitted with front loops up to the last 14 loops, which are knitted alternating front and back loops.
- In row #4, make knots up to the last 12 loops. The remaining loops are knitted alternating front and back.
- Next, the fabric is knitted according to the pattern. The product is closed when it reaches a height of 20.5 cm.
Knitting this product is based on the same principles as most hooded hats. The pattern and description of knitting a hooded hat with knitting needles can be selected individually. All models of fashionable headwear have a similar creation process. To get a truly original thing, you can use additional decorations such as rhinestones, beads or embroidery.
Video about knitting a hooded hat with knitting needles
How to knit a hooded hat with knitting needles: