Easy drawings intended for children to copy should consist of simple geometric shapes and a small number of details. A good example in this regard is the image of the planet Earth.
By working on creating such pictures, the child will see his own progress, which will strengthen his motivation to practice fine art skills, and also help him believe in his own abilities.
How to draw planet earth
Drawing "Earth" for children is not only a chance to try yourself as an artist, but also an opportunity to learn about the structure of the world as a whole.
During the creation of the image, as well as during its subsequent coloring, parents or teachers (depending on who is the direct participant in the creative process) should tell the growing person about celestial bodies, space, planets, the Galaxy, stimulating his desire to understand the world around him.
The drawing of the Earth, enthusiastically drawn by children, stimulates them to learn about the outside world
The classic algorithm for creating a drawing of the planet Earth comes down to several key stages:
Find the horizon line on the sheet of paper you are using. This horizontal line can be located either in the center of the working plane or a few centimeters above or below it. The specific location for the initial line should be chosen taking into account the overall composition, the number of details in the image, and the angle of the key object.
Draw the outline of the main object – planet Earth. Depending on the selected working tool, as well as the child’s skills, the outline can be created with either a regular pencil or colored stationery – markers, colored pencils or paints.
Complete the drawing of the main object's details located inside the outline (for example, schematically depicted rivers, continents, oceans and seas). Depending on the artist's age, he can be asked, for example, to copy the outline of the continents from a globe or maps. Thus, by complicating the task, the teacher will not only strengthen the child's interest in his work, but also stimulate the development of attentiveness, accuracy and perseverance in the young artist.
Draw the details of the image located outside the outline of the main object (for example, other planets, if the Earth is drawn within the Galaxy). It is recommended to decide on the presence of secondary images before starting work. This is one of the determining factors when placing the horizon line.
Color the drawing with paints, colored pencils or felt-tip pens, if the original idea of the image requires it. You can diversify this stage by using non-standard methods of applying pigments. For example, you can color the background like this: make a few strokes with a colored pencil, pressing hard on the tool used, then rub the pencil with a small piece of paper, thus coloring the necessary area of the working surface.
With a pencil
Drawing "Earth" for children will be easier to create with a simple pencil. This working tool will allow not only to outline the main lines before their final drawing, but also to easily correct erroneously drawn lines.
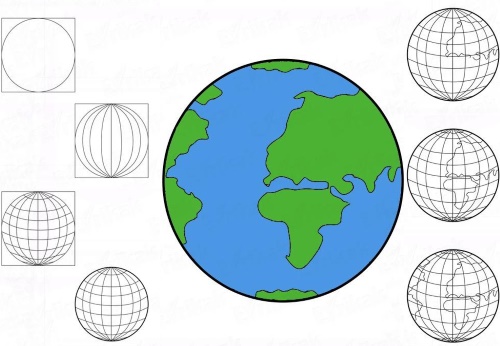
Variant of drawing of planet Earth
Workflow Algorithm
Choose a square sheet of paper as a working plane. If the sheet is rectangular, the square's boundaries can be drawn with a pencil or a new geometric figure can be cut out from the original.
Draw an even circle inside the square, filling most of the free space on the sheet of paper with it.
At the top and bottom of the circle, mark one elongated semicircle of small size (poles).
From the left border of the circle to the right, draw a slightly curved downward line (meridian).
Stepping back from the upper meridian by 1-3 mm (depending on the scale of the image), draw several more lines that exactly repeat the bend and direction of each other.
From the upper pole to the lower pole, draw several slightly curved lines, placing them at a distance of 1-2 mm from each other (meridians).
Using the depicted meridians as a guide, refine the drawing by drawing the boundaries of continents and bodies of water within the outline.
Colour the drawing, choosing green for the mainland and blue or light blue for the water.
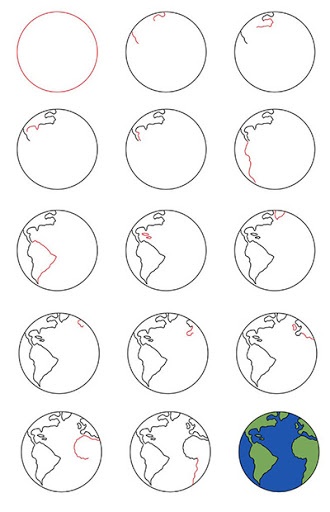
Choose a square sheet of paper as a working plane. If the sheet is rectangular, the square's boundaries can be drawn with a pencil or a new geometric figure can be cut out from the original.
Draw an even circle inside the square, filling most of the free space on the sheet of paper with it.
From the left border of the circle, draw a curved line to the center. The extreme point of the line should be located approximately in the middle of the circle.
From the same point on the left edge, draw another curve, placing it horizontally.
Connect the curves with a zigzag line.
From the resulting figure, draw a vertical line downwards inside the drawn circle, making it zigzag.
From the same point, draw another line, directing it to the right edge.
Connect the curves using a line located 2-3 mm closer to the center from the right edge.
Add detail to the image and, if necessary, color it with colored pencils.
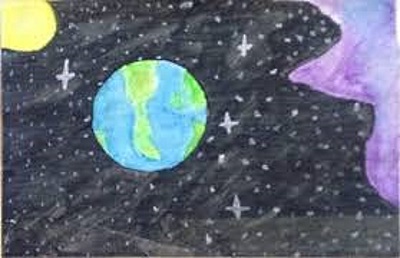
With paints
Drawing "Earth" for children, painted with paints, is not only an opportunity to learn how to work on creating images in a realistic style.
According to research by child psychologists, painting helps young artists cope with stress and relieve nervous system strain, which is necessary in preventing the development of neuroses.
Variant of drawing of planet Earth
Workflow Algorithm
Paint the entire surface of the sheet of paper you are using with black or dark blue paint.
When the background paint is dry, draw an even circle in the center of the working surface so that it fills the maximum amount of the sheet surface.
Paint the inner surface of the circle evenly with light blue paint so that the outline of the geometric figure has a more saturated shade and the inside is less dense.
Without letting the blue paint dry, use white paint to create asymmetrical streaks inside the main geometric figure (imitating the outline of continents and bodies of water).
In the central part of the circle, use green paint to depict chaotic streaks, mixing white with pigments of other shades.
Let the paint dry, then, if necessary, adjust the design by adding local saturation.
Around the main object, lightly touch the brush with a lot of white dots, placing them randomly (stars).
Paint the entire surface of the sheet of paper you are using with black or dark blue paint.
When the background paint dries, stepping back 3-5 cm from the right border of the working plane, it is necessary to draw a vertical line, making it a curve with smooth transitions.
Paint the distance from this line to the right border with light purple paint.
In the middle of the dark part of the sheet of paper used, draw an even circle.
Paint the inside of the circle blue, then wait until the paint is completely dry.
Using green paint, draw several green spots on a blue background, placing them randomly (continents).
In the upper left corner, draw a semicircle, then paint the space inside the outline of the figure yellow (the sun).
Around the main objects of the image, randomly place a lot of dots with white paint (stars). 5-7 of them should be drawn in detail (depict the pointed ends of the celestial bodies, and also paint them with a denser pigment).
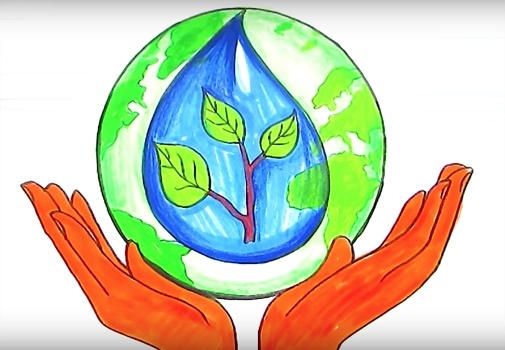
Postcard options
The drawing "Earth" for children can be not only the result of ordinary creative work in free time, but also be used as a greeting card. For example, a drawn planet held by human hands can be placed on the front side of a card given to close relatives in honor of Victory Day.
Variant of drawing of planet Earth
Workflow Algorithm
Determine the center of the work plane.
From the bottom border, draw slightly curved lines directed towards the right and left edges of the sheet of paper used.
At a distance of 2-3 cm from the main lines, draw 4 more curves on each side so that the resulting figures look like human palms spread out in opposite directions.
Draw an even circle between your palms (planet Earth).
Using green paints or pencils, draw green spots on the right and left edges of the geometric figure inside, placing them randomly along the entire length of the outline.
Inside the circle, using smoothly curved lines, depict a drop so that it fills most of the internal space of the main geometric figure.
The area inside the drop should be painted blue.
Inside the drop, draw 2 vertical lines, placing them at a distance of 3-4 mm from each other (branch).
From the right and left borders of the branch, draw a few more short straight lines, at the ends of which you need to draw green leaves.
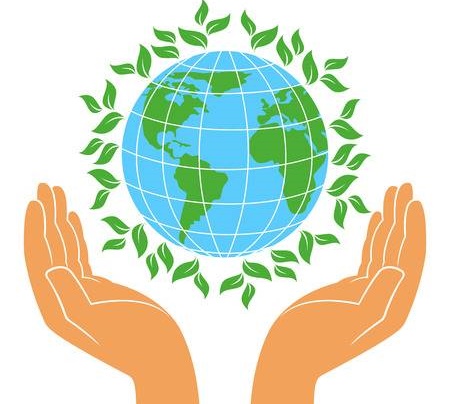
Determine the center of the work plane.
From the bottom border, draw slightly curved lines directed towards the right and left edges of the sheet of paper used.
At a distance of 2-3 cm from the main lines, draw 4 more curves on each side so that the resulting figures look like human palms spread out in opposite directions.
Draw an even circle between your palms (planet Earth).
The area inside the circle is drawn with slightly curved vertical and horizontal lines, placing them at a distance of 1-2 cm from each other (meridians).
The areas between the points of intersection of the meridians are painted light blue.
Draw green spots throughout the interior of the drawn planet, placing them randomly.
Step back from the Earth's contour 3-4 cm, depict small leaves (2 lines slightly curved in opposite directions, the intersection points of which should form an angle), placing them at the same distance from each other. Leaves should be painted green.
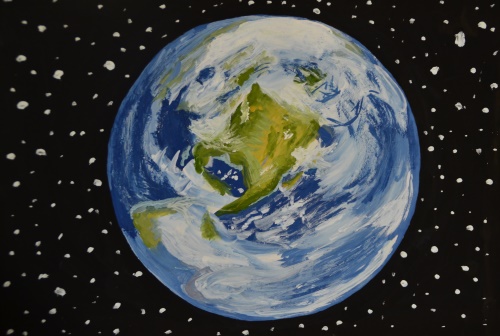
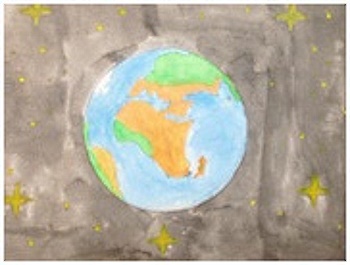
View from space
The Earth as seen from space can be drawn with both colored pencils and paints. It is not recommended to use markers or felt-tip pens in this case, since when filling the inner part of the main figure, the smoothness of the line transition will be important, which is impossible to achieve with felt-tip pens.
Variant of drawing of planet Earth
Workflow Algorithm
The sheet of paper on which you plan to draw the planet must be painted dark blue, gray or black, evenly distributing the pigment over the working surface.
Find the center of the sheet of paper you are using.
In the center, draw an even circle, the size of which should be large enough to fill most of the working surface.
The area inside the Earth's outline should be painted blue, and then, after waiting for the paint to dry (if used), the continental parts of the land should be marked with brown and green.
Draw 5 large stars around the outline of the drawn Earth, drawing them in yellow.
Using light brush strokes, paint small dots (stars in the distance) around the main object of the image.
Visually divide the working plane into 3 parts using verticals (no need to draw vertical lines). The part of the plane located at the right edge of the sheet of paper should be divided into 2 halves by a horizontal line.
Paint the left part of the working plane blue, the part next to it purple, and the part located at the right edge of the sheet of paper being used light blue (top) and yellow (bottom).
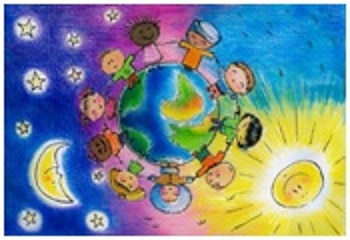
Draw a circle in the center of the sheet (planet Earth), fill the inside with green and yellow spots, located randomly (continents). Color the area outside the continents blue (water).
Draw schematically people along the outer contour of the drawn planet (if the child working on such a drawing is not yet 9-10 years old, it is recommended to exclude drawing people). The people depicted should have different skin colors and clothing styles, but at the same time hold hands, as if symbolizing the need for all inhabitants of the planet to treat each other with respect.
On the left side of the work plane, draw stars and a month, then paint them yellow.
On the right side of the working plane, draw silhouettes of birds (top) and the sun with human facial features and rays (bottom).
Flat
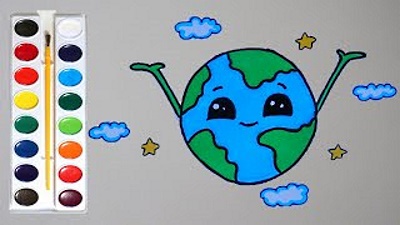
For children, the easiest way to draw the Earth is in cross-section. Such flat drawings can be decorated by asking the young artist to “bring to life” the planet, giving it human features:
Variant of drawing of planet Earth
Workflow Algorithm
Determine the center of the working plane, then create the background by painting the sheet of paper you are using light blue or gray.
Draw an even circle in the center of the page.
From the right and left borders of the main object, draw 2 diagonal lines, directing them to the upper right and upper left corner of the working plane, respectively (the planet's arms). The distance between the lines should be no more than 1 cm.
The top points of the lines must be connected, thus drawing an oval (brush).
Draw 4 semicircles inside the circle, placing them randomly opposite each other. The borders of the semicircles must be transformed into wavy lines, after which the inner part of each of the newly formed figures must be painted green.
The space between the green parts needs to be painted blue, after which draw the eyes in the middle of the circle (2 semicircles with a straight line at the base), eyebrows (slightly curved short lines above the eyes) and the mouth (a downward curved line located between the previously drawn eyes).
On the outside, stepping back 3-7 cm from the outline of the main figure of the image, draw clouds and stars, placing them randomly.
To add variety to the task, you can ask the young artist to independently draw other planets near the Earth. Also, an additional task can be to detail the image (for example, legs are drawn on the planet or a hairstyle is created, etc.).
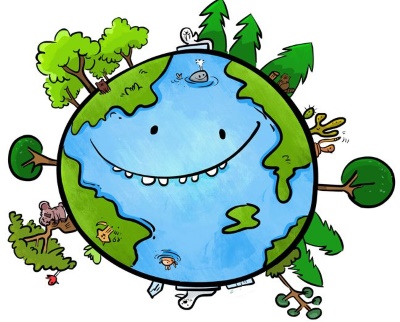
In the middle of the working plane, draw an even circle so that it fills most of the surface of the sheet of paper used.
Inside the geometric figure, using wavy lines whose start and end points lie on the contour, depict 4 semicircles. The inner area of the resulting figures should be painted green (continental parts).
In the center of the depicted Earth, place 2 dots (eyes), and under them depict a mouth (a downward curved line).
From the mouth line, it is necessary to draw several small semicircles (teeth).
From the outside, draw straight and curved lines from the outline, with which to depict trees, bushes, and firs. Plants also need to be painted in the appropriate colors (trunk brown, crown green).
Fictional
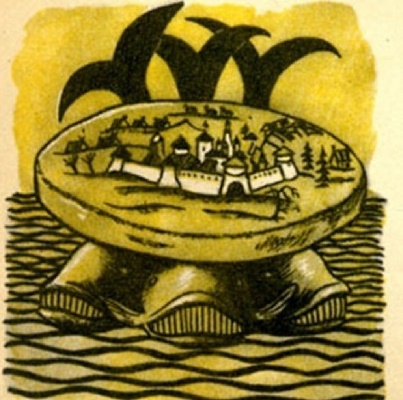
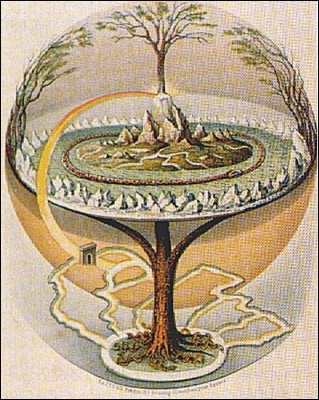
In ancient times, people believed that the Earth was located on three whales or represented a kind of crown of the Tree of Life. Based on such ideas of the inhabitants of the planet of that time, we can assume that they drew the Earth like this:
Variant of drawing of planet Earth
Workflow Algorithm
Determine the horizon line.
Fill the lower part of the working plane with wavy lines (waves), and paint the upper part in one tone.
Draw 3 elongated ovals at the bottom. The space between their edges should be filled with vertical lines located at a distance of 1 cm from each other (whale mouths).
Schematically depict part of the whale's body.
Draw a rounded oval in the middle of the working plane. Stepping back 3-4 cm from the lower border of the geometric figure, draw another slightly curved line, exactly repeating the main contour.
From the upper border of the oval, draw curved lines, connecting them together, thus drawing the whales' tails.
Inside the oval, schematically depict houses with trees, symbolizing the presence of inhabitants on planet Earth.
From the lower border of the working plane, draw 2 vertical lines, placing them at a distance of 3-4 cm from each other (trunk).
Add one more branch to the trunk on each side.
Between the branches, draw an oval, inside which schematically draw houses, mountains, people (at the young artist’s choice), symbolizing the presence of inhabitants on planet Earth.
Taking the oval by the middle, draw an even circle so that the original figure is inside the circle.
Working on creating a drawing of the Earth, accompanied by adult comments about the structure of space and celestial bodies, can be a fascinating activity for children.
When choosing a task for a young artist, it is necessary to take into account his age, as well as the availability of relevant skills. If a lesson in fine arts is not organized correctly, a child may receive a negative experience that will deprive him of any motivation to further reveal his creative potential.
Video on how to make a drawing of the planet Earth