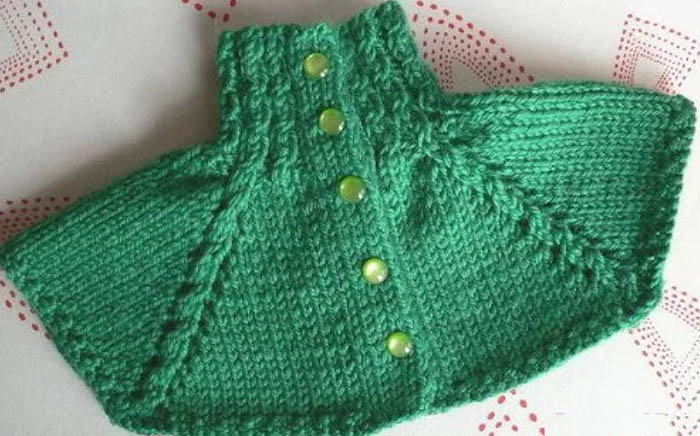
A bib is a chest insert that is visible in the neckline of clothing worn on top. It is worn by children to protect their necks from the wind instead of a scarf. A bib is a universal wardrobe item, so it can be either male or female.
You can knit it with knitting needles using patterns for turtlenecks and jumpers, since the principle of their creation is similar. For convenience Children's bibs are made with buttonsso that the child can put on and take off the bib independently.
Tips for Beginners
The bib with buttons is knitted with knitting needles (the children's model differs from the adult bib only in size and design) and is knitted quickly.
An inexperienced craftsman will need about 2 days to complete the work, while a person with experience in knitting will need 3-5 hours.
Features to consider before knitting
To work on the bib, you need to take into account several nuances:
| Threads | The yarn for knitting the collar should be soft, there should be no lint on the threads. Prickly material can irritate the skin, and protruding lint will get into the eyes and mouth of the child. It is advisable to give preference to natural threads: cotton or bamboo, angora or merino wool. |
| Spokes | You can choose the number of knitting needles by trial and error, but beginners should focus on the diameter of the threads. Yarn manufacturers make a note on the packaging of which number of knitting needles is suitable for working with the material. It is better to buy circular knitting needles rather than straight ones (shuttle): they are more convenient for knitting. |
| Sample | Every master knows how important it is to knit a sample with the threads, knitting needles and pattern chosen for the work before starting work. Even if you follow the step-by-step instructions, having the same threads and tools as in the master classes, you can knit a product of a different size. This happens because of the different knitting density: some people prefer to tighten the loops tightly, while others knit loosely with a thread without tension. Because of this, you may need to re-tie the collar from the beginning. The sample is needed to calculate the number of loops when knitting. According to conventional canons, it is necessary to dial 20 P and knit with the main pattern 10 cm in height. The sample must be washed and ironed, then only measure and make calculations. |
| Taking measurements and calculations | To make the bib easy to put on and at the same time fit tightly around the neck, you need to take measurements: head circumference and chest circumference of the child. To find out the exact number of loops, you need to multiply the head circumference (in cm) by the number of loops in 1 cm of the sample. To understand how many rows are needed, you need to multiply the estimated length by the sum of the rows in 1 cm of the sample. |
| Additional tools | Auxiliary tools make working on the bib easier. A sewing tape is needed for taking measurements. In order not to get confused in the rows, to make marks on the fabric for ease of work, knitting markers are needed. They are usually used to mark the beginning or end of a row, raglan lines on the bib. |
Selection of threads and knitting needles
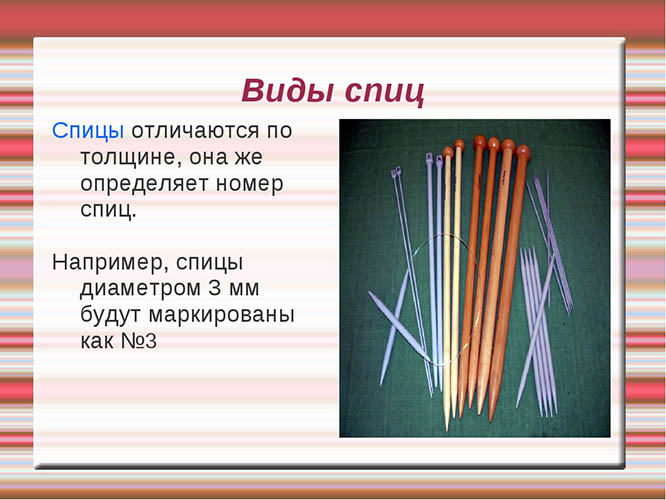
Knitting needles are classified by numbers that correspond to their diameter. The tool is selected according to the thickness of the threads. The density of knitting is regulated by the knitting needles: the thicker they are in relation to the yarn, the looser the fabric will be, and vice versa, if the knitting needles are thinner than the threads, the knitting will be tight.
Tools #1, 2 and 3 are used to knit openwork patterns from thin threads. Needles #3, 4 and 5 require thicker yarn. Thread manufacturers indicate on the skein labels which diameter of the tool is suitable for working with the material.
If there is no marking on the spokes, their diameter is determined using a sheet of paper. A hole is made in it with a tool, the width is measured with a ruler. The value (mm) will coincide with the spoke number.
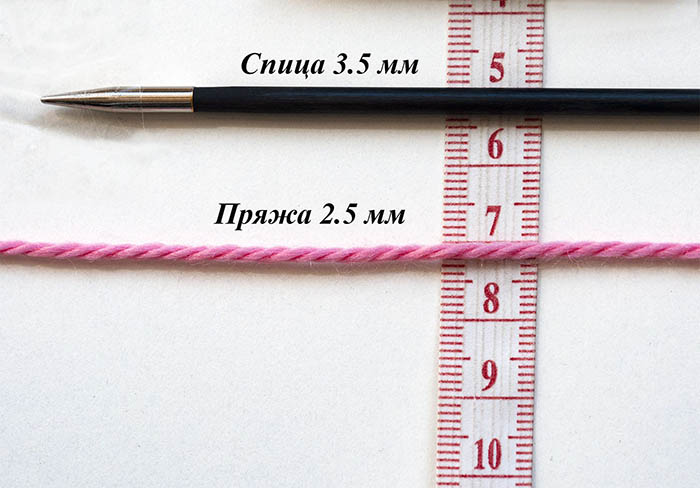
In the opposite situation, when the thickness of the threads is unknown, it is difficult to select tools for work, the diameter of the yarn is measured. In knitting, there is a rule that is followed in this case: the thickness of the knitting needles should be 2 times greater than the diameter of the yarn. It is necessary to fold the thread in 2 layers and measure its thickness. The resulting value will correspond to the appropriate number of knitting needles.
By type, instruments are divided into:
- circular (suitable for working with items that are knitted in a circle or when the fabric is too wide for regular knitting needles);
- Straight (stocking) needles are divided into short and long (the former are needed to create socks, scarves and other narrow items, and the long ones are for medium-sized items).
Both types of knitting needles are useful for knitting a baby collar.
The spokes are made from the following materials:
- trees;
- plastics;
- aluminum;
- metal (suitable for beginners, as loops slide easily on them and they are universal, suitable for any yarn).
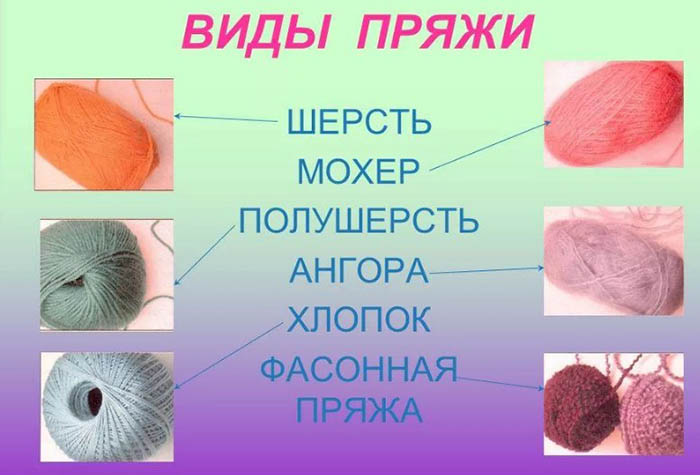
The yarn for knitting a baby bib should be soft, not prickly and warm. Wool yarn is considered universal, but it can cause allergies. Synthetic (in its pure form, it is more suitable for decorative items than for warm things) and natural threads are also used.
A bib with buttons knitted with knitting needles (a children's model should be warm) is often made from a mixture of synthetic and natural threads. The first type stabilizes the density, strength and appearance of the product. Natural yarn gives the bib the necessary properties.
For children's clothes, soft, warm, light woolen yarn is used:
- merino;
- alpaca;
- angora;
- mohair.
With frequent use of a woolen bib, the product may become felted, the fluff may roll up, and the appearance may deteriorate. To avoid this, manufacturers add synthetic or cotton (knitted) yarn to the wool thread. This also affects the price of the materials: the higher the percentage of synthetics in the composition, the cheaper the threads.
Conventional symbols in master classes
The instructions use conventional designations for the names of loops that are used when knitting a collar with knitting needles:
- P – loop;
- R – row;
- LP – front loop;
- IP – purl loop;
- KrP – edge loop (the first loop in a row is removed without knitting, the last one is performed as an IP).
Additional types of loops are described in master classes.
Neck dimensions
The length of the bib is determined by the neck circumference. If possible, it is measured with a tape measure.
If the collar is knitted as a gift and there is no way to take measurements, you can use the standard neck circumference values for children:
| 3 months | 6 months | 9 months | 1 year | 1.5 years | 2 years | 3 years | 4 years |
| 22 cm | 22.5 cm | 23.5 cm | 24-24.5 cm | 25 cm | 26 cm | 26.5 cm | 27.5-28 cm |
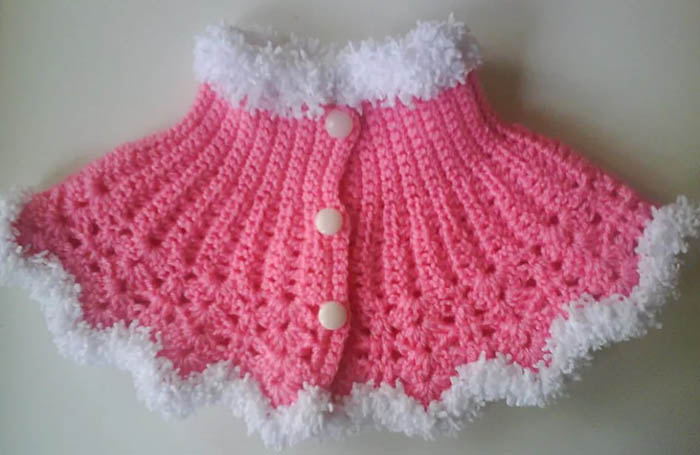
Bib for a girl (1 year)
To knit a bib you will need:
- single-color threads (composition: 65% acrylic, 35% merino, the length of the thread in a skein is 150 m);
- circular knitting needles on a #2.5 cord;
- 3 buttons.
Before knitting, you need to calculate the number of loops. The master class provides instructions for 88 P. But the number of loops to be cast on can be changed by adjusting the bib knitting algorithm to the desired number of loops.
Instructions for knitting a collar:
- Cast on 88 sts.
- The first 9 cm are made with a simple 1x1 elastic band. The collar height is made with a margin for the lapel.
- The next row after the elastic: from each front loop of the elastic, make 2 LP. As a result, the row will look like a 2x1 elastic.
- Continue knitting with a 2x1 elastic band until this part reaches a height of 6 cm.
- In the next row, you need to make an increase again to get a 2x2 elastic band. From the wrong side, 2 LP are made from each LP.
- It is necessary to continue knitting the 2x2 elastic band for another 15 cm in length.
Once the desired height is reached, all loops must be closed, the thread secured and hidden inside the knitting. Since the bib must be buttoned, it is necessary to knit 2 side strips. One of them must have loops for threading buttons.
Instructions for knitting a button placket:
- From each edge loop on the side of the collar, 34 or 36 sts are cast on to the knitting needles.
- Knit 1x1 elastic in height 6 rows.
- Close all loops.
Plank with holes:
- Similarly, dial 34 or 36 P.
- Knit 2-3 cm of 1x1 elastic.
- Place markers in the places where the holes should be located. The distances between the holes should be the same. Usually, a hole is made that corresponds to the diameter of the button, and 1 cm is added to it. The resulting value will be equal to the distance between the holes.
- The loops are made using a yarn over. At the location of the hole, 1 ND is made, the next 2 P are made as LP.
- From the wrong side, knit the strip according to the pattern. The yarn over is done as LP.
- Having knitted 6-7 rows, the loops are closed and the thread is hidden.
At the end, buttons are sewn on.
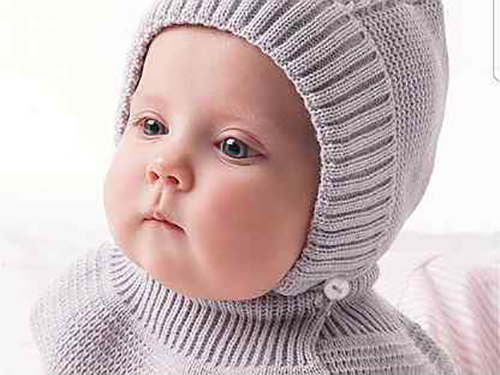
Simple baby bib
A buttoned bib for infants is knitted with knitting needles without a high neck, since the child's neck is not yet sufficiently elongated, the chin often touches the chest. A high neck of the bib will interfere, rub the child's sensitive skin.
To work you will need:
- 100% sheep wool yarn – 50 g;
- knitting needles No. 4;
- 2-3 buttons;
- knitting markers.
The main pattern of the bib is garter stitch, when all the loops are knitted both on the front part of the work and on the back. The border and openwork pattern are made separately.
Instructions for knitting the border:
- 1-2 R: all loops are knitted as LP.
- 3 R: 2 P together as LP, 1 ND, from the next 2 P you need to do 2 LP from each.
- 4 R: 1 P slip, 1 LP, pull the slipped loop through it, 1 LP, pull the first loop through the second, 1 LP.
- 5-8 R: repeat the first 4 rows.
Scheme for making an openwork pattern:
- 1 R: perform the rapport to the end of the row *2 P together as LP, 1 ND*, 1 LP.
- 2 R: knit all loops as if to LP.
The knitting density in garter stitch is 21 sts x 42 rows, which is equal to a sample measuring 10 x 10 cm.
A bib with buttons (a children's bib model can be knitted with knitting needles in 2-3 hours) in this version is made for a 3-month-old baby:
- Cast on 16 sts.
- In the first row, knit the first 4 loops according to the border pattern, place a marker, 11 LP, 1 KRP. Having completed 2 cm between the KRP and the marker, knit 2 rows with an openwork pattern.
- Then continue knitting with garter stitch in shortened rows: 6 LP (knit after the installed marker, turn the product over, knit the stitches as LP and turn again. You need to knit 2 rows like this.
- After the marker, knit 10 stitches, turn the work and knit the remaining stitches to the end of the row.
- Turn the piece again. 2 Rows knit all stitches as LP.
- Knit the next 10 rows, making an openwork pattern at the end every 5 cm.
- In the next row, having completed the first 17 sts, after the openwork, knit 2 cm LP without shortened rows.
- After 2 more rows, form 2 holes for buttons. To do this, you need to do 2 P together as LP, then 1 ND.
Changes in work depending on the age of the baby:
| For a six-month-old child | For a baby aged 8 months |
| 1. Cast on 22 sts. 2. Repeat 1 R, but instead of 11 P, do 17 LP. 3. Continue working the garter stitch with shortened rows: 10 LP after the marker, turn the fabric, knit to the end of the LP and turn the work again. Repeat 2 rows in this manner. 4. After placing the marker, knit 14 sts, turn the work and knit the front loops to the end. 5. Turn the work again. Knit all the loops of row 2. 6. Work 10 rows, repeating the openwork pattern at the end every 5 cm. 7. In the next row after the first 22 sts, having knitted an openwork pattern, perform another 2 cm as LP without shortened rows. 8. In the next row, you need to form 2-3 holes for buttons (in place of each, you need to make 2 P together as LP, then 1 ND). | 1. Cast on 30 sts.
2. Repeat 1 R, but instead of 11 P, do 25 LP. 3. Then knit with shortened rows: 16 LP after marker, turn the work over, knit stitches as LP, turn the work. Repeat 2 rows in total. 4. From the marker, knit 20 LP, turn the work, knit all loops in the opposite direction as LP to the end. 5. Turn the knitting again. Complete 2 rows completely. 6. Work 10 rows, working an openwork pattern every 5 cm. After completing the first 22 sts of the next row, knit an openwork pattern, and then knit 2 cm high as LP without shortened rows. 7. In the last row, form 3 holes for buttons. To make a hole, you need to do 2 P together as LP, and then 1 ND. |
At the end, all the loops are closed, the thread is fixed and hidden inside the knitting. At the last stage, the buttons are sewn on.
Before putting the bib on your child, it should be washed in cold water and left to dry on a horizontal surface so that the bib does not stretch and lose its shape.
To knit a baby bib, you need to have a minimum of knitting skills. Bib models with buttons resemble scarves and are rarely decorated with complex elements. The main thing is to sew the buttons firmly so that the child does not accidentally tear off or swallow one of them.
Video about knitting a collar
Master class on knitting a buttoned bib: