Viruses are a hot topic in recent years, which is reflected not only in news programs, but also in children's cartoons. Scientific animations allow you to explain to your child the importance of a global pandemic, why it is necessary to maintain hand and body hygiene. You can draw a virus with either a pencil or paints.
Cartoon virus
Viruses are unique organisms in their structure. Plant bacteria are, in most cases, safe for animals. Viruses that affect animals are safe for humans.

How to draw a Virus with a pencil:
- Prepare a clean sheet of paper and a compass. Put a dot with a pencil in the place where you want to draw the virus.
- Place the sharp edge of the compass on the slate point. Use the device to draw a small circle that forms the "face" of the virus.
- Using convolutions of different sizes and diameters, make a frame around the resulting circle - as shown in the picture. In this way, you can create the characteristic shape of the virus.
- Using a simple soft pencil, make the previously drawn circle slightly irregular. The shape should have small bulges, the lines can be of different thickness.
- Remove excess lines using an eraser or a kneaded pencil.
- Visually divide the "face" of the virus into 3 parts. Using a ruler, draw 2 lines at an angle in the upper third of the face.
- Draw short vertical segments between them. This way you can create an evil look.
- Draw semicircular eyes under the eyebrows, similar to citrus slices. The eyes can be different in size - depending on the tilt of the character.
- Draw thin, oval black pupils from the upper border of the eyes.
- The lower half of the "face" is occupied by the virus's evil grin. It resembles a large slice of orange.
- Draw sharp teeth using zigzag lines.
The resulting image can be shaded or colored.
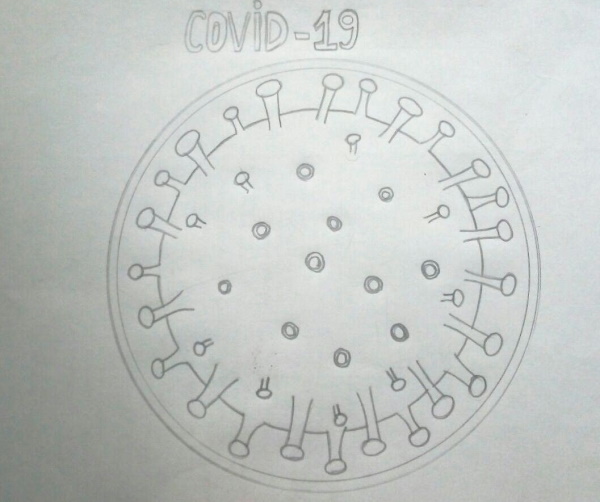
Coronavirus
Coronaviruses are a family of viruses that includes about 45 representatives (as of 2020). The unusual structure, reminiscent of the solar corona, determines the name.
How to draw coronavirus with a simple pencil:
- Prepare materials. To create the drawing you will need thick paper - a standard album sheet or Whatman paper.
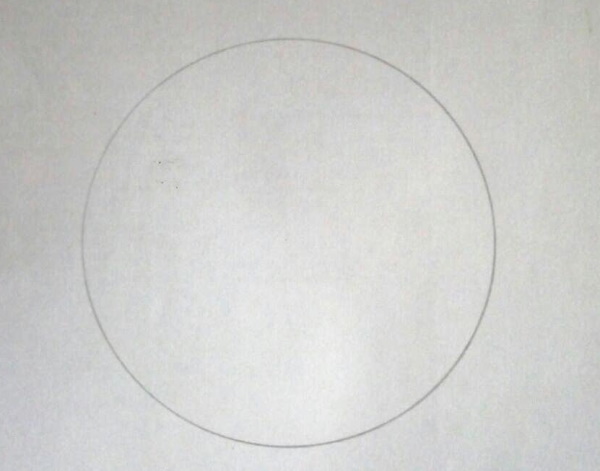
- Using a ruler (or visually), measure the middle of the sheet. Put a small dot with a sharp soft pencil.
- Use a compass (or other available tools) to draw a circle. The diameter of the figure should be approximately 10-11 cm. It is more convenient to use a compass, since the circle will be located exactly in the middle of the sheet, without deviations.
- After drawing the circle, the point can be erased.
- Suction cups are a way for several viruses to connect. They completely cover the surface of the coronavirus shell.
- Draw small, slightly curved lines around the entire perimeter of the circle, as shown in the picture. Connect the segments with ovals of a small diameter.
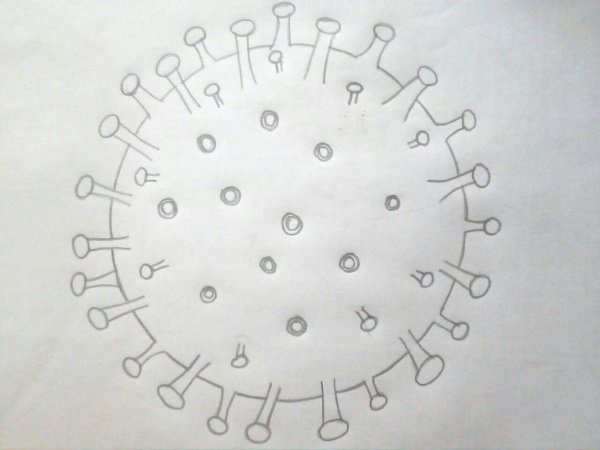
- The suction cups should be of different sizes.
- Inside the circle, also depict small “donuts” in a chaotic order.
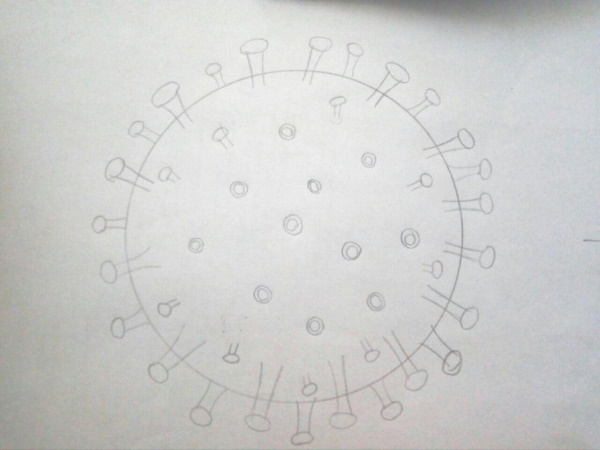
- Duplicate all the lines with a hard pencil. This will make the drawing clearer and brighter.
- Excess details can be removed with a kneaded eraser or eraser.
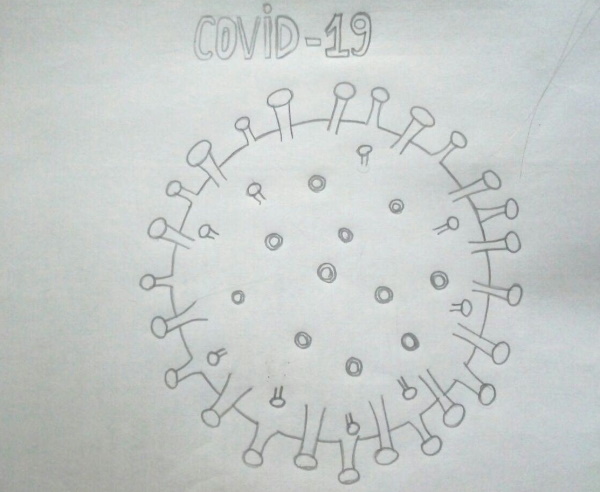
- If desired, you can add the inscription "COVID-19".
- Using a ruler, draw 2 straight vertical lines above the main drawing.
- Write the inscription in the resulting line. Duplicate the lines twice and connect them with small segments. The letters will be three-dimensional.
- The lines that form the stitch can be erased or left.
- Using a compass or improvised materials, draw 2 circles (approximately the same diameter). The figures will form the shell of the virus.
The resulting image can be colored or shaded as desired.
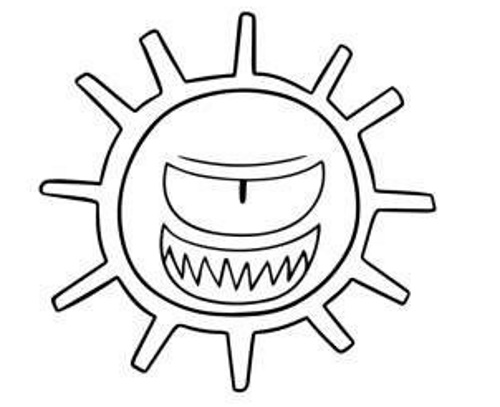
Drawing for children
Another option for drawing a virus with a pencil for children is a one-eyed character. You can draw the image using a ruler and a compass. You will also need a clean sheet of paper, pencils with different softness leads, and an eraser.
Step by step process:
- On a clean sheet of paper, put a small dot with a soft pencil. Place the point of the compass on the dot.
- Draw a medium-sized circle. Move the compass lead slightly and add an additional circle of a larger diameter.
- Draw small rectangles on the border of the outer circle. Their number, size and thickness can vary.
- The process of detailing the base of the image requires creating more fuzzy, uneven contours. It is also necessary to connect the rectangles with the border of the outer circle - as shown in the picture. The corners can be slightly smoothed.
- Visually divide the area of the inner circle into 3 parts.
- The upper part is occupied by the character's eyebrow. It is necessary to draw a long, thin, slightly curved line.
- Just below the previously drawn segment, draw a figure resembling an inverted partial moon, as shown in the picture.
- At the upper border of the eye, visually measuring the middle, draw a thin oval - the pupil.
- The lower part of the inner circle is occupied by the character's grin. The evil smile also resembles an inverted partial moon, duplicating the previously drawn figure.
- The grin must be divided by zigzag lines.
- Use an eraser to remove all unnecessary elements of the drawing. Use a pencil with a hard lead to draw the base and small details of the image.
The resulting image can be colored or left unchanged.
Also, to draw and create a complete plot, you can combine several types of different viruses in one drawing.
Influenza virus
Flu is an acute respiratory infection that is transmitted by airborne droplets. The disease is spread by certain viruses. People of different ages and animals are susceptible to the disease. Flu viruses can be different, depending on the type. To draw a simpler "model", you will need: a compass, a ruler, pencils of different hardness and white paper.
How to draw a Virus with a pencil:
- On a clean sheet of paper, put a dot with a soft pencil.
- Place the tip of the compass on the resulting mark and determine the desired diameter of the circle - the figure is the basis for further drawing of the image.
- Draw a neat, even circle of the desired diameter. Use an eraser or kneaded paper to remove the unnecessary point.
- Using a ruler, draw many straight short segments of different lengths – as shown in the figure.
- On each previously drawn line, "plant" a small circle. For drawing, you can use a compass or use a small diameter handy object.
- Also add some circles inside the main large shape.
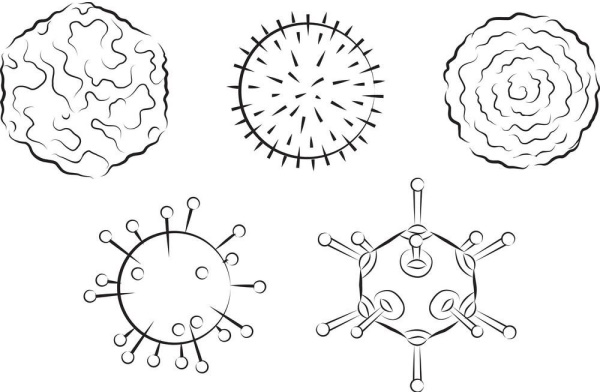
In this way, you can get the flu virus. You can paint the image in different shades: green, orange, blue. Most often, flu is associated with a greenish, green-brown color. Viruses, despite their danger, can be useful to humans. Some agents enter the fight against harmful bacteria in the body.
How to draw a virus easily
Virus images can be different: more or less detailed. To draw an infectious agent, you will need several pencils, a clean sheet of paper and additional tools.
Algorithm:
- On a clean sheet of paper, put a point with a soft pencil. Place the point of the compass on the mark.
- Draw a circle of small diameter. You can duplicate the lines with a hard pencil. If desired, add some bends and convolutions to make the base more natural.
- Along the entire perimeter of the previously drawn circle, place small notches - marks for drawing the elongated protein threads. The distance between adjacent marks should be approximately the same.
- Draw protein threads - as shown in the picture. It is important to alternate sizes: visually divide the base into 2 halves, each of which should begin and end with a large protein thread.
- The top of each protein strand is formed by small ovals. They can be of any diameter and size, depending on the location of the virus.
- Draw small oval and round shapes between some protein strands. Also add several elements all over the surface of the virus.
- Use oval and round shapes to mark the areas of glare. Also draw the light zone using an inverted partial moon.
- The resulting image should be “cleaned” of unnecessary elements, and all main lines should be highlighted with a hard pencil.

The finished drawing can be colored. Different colors and shade mixtures are used to depict viruses.
Stylized virus
Viruses are infectious agents and pose a danger to human and animal health. In order to convey to a child the need for hygiene and personal protection for educational purposes, the image of viruses can be slightly exaggerated.
How to draw a Virus with a pencil:
- Draw a round shape on a sheet of paper manually or with the help of additional devices. For this you will need a pencil with a soft lead.
- To give the figure a more untidy shape, add waviness and texture, also using a pencil with a soft lead.
- Remove excess lines with a kneaded eraser. Connect the remaining elements together and draw with a pencil with a thick lead.
- Add teardrop shapes to form protein strands. The elements have different directions and different shapes.
- To begin with, you can depict approximately identical drops, and then detail them by adding irregularities.
- Connect the resulting elements with the main figure, remove the remains of the pencil and draw additional elements with a hard pencil.
- Draw several rounded elements around the formed base – as shown in the picture. They have different diameters and shapes.
- Also add some oval and round shapes inside the circle and some protein strands.
- The resulting virus is detailed by adding an “evil look and a smile.”
- Draw curved brow ridges that resemble the horns of a bull.
- Connect the resulting curves to the semicircles - the character's large eyes, and add a few wrinkles using curved arched lines.
- Between the eyes, as shown in the picture, draw the nose. It resembles a small rectangle with smoothed corners, inside which there are 2 round dots - the nostrils.
- The smile is located in the lower third of the drawing and resembles a slice of orange or lemon.
- Duplicate the lower border of the smile twice, and also add curved sections – wrinkles.
- Inside the mouth, draw zigzag lines connecting the upper and lower borders.
- The evil grin and sharp teeth give the character an ominous look.

The resulting drawing can be colored or left as is. To create a clearer image, you can duplicate all the details with a black marker or gel pen.
Bacteriophage
Bacteriophages are viral agents that attack bacterial cells. Their help and presence are necessary for the human body. Due to their ability to destroy bacterial cells, bacteriophages are actively used in medicine and pharmacy.
How to draw a Virus with a pencil:
| Stage | Description of the stage | Image |
| 1 | On a clean, pre-prepared sheet of paper, measure out the required size for the future bacteriophage. Divide the measured part with a visual horizontal line – approximately in half. The upper part will be occupied by the head of the bacteriophage. | 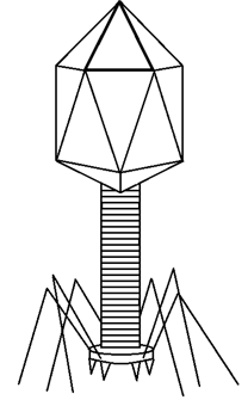 |
| 2 | To draw the head of a bacteriophage, you will need to draw several triangles using a ruler or improvised tools. | |
| 3 | Draw a neat equilateral triangle of small size. Visually draw a horizontal line located slightly above the lower border of the triangle and put 2 small dots at equal distances. | 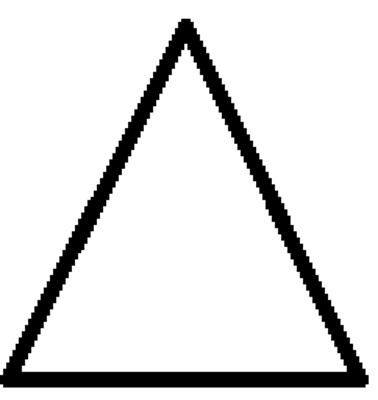 |
| 4 | Connect the resulting points with the upper corner of the triangle and its lower border. In this way, you can get a figure resembling a dome. | 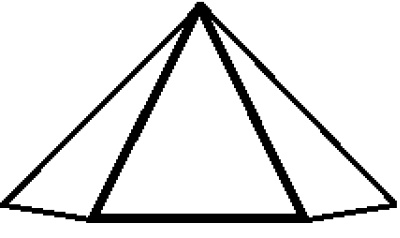 |
| 5 | Draw 2 vertical lines down, slightly short of the previously outlined visual line. Connect the lower part of the segment with the side edge of the equilateral triangle. Repeat the action with both sides. |  |
| 6 | Connect the sides of the head together at an obtuse angle. Connect the resulting notch with the corners of the "main" triangle. | 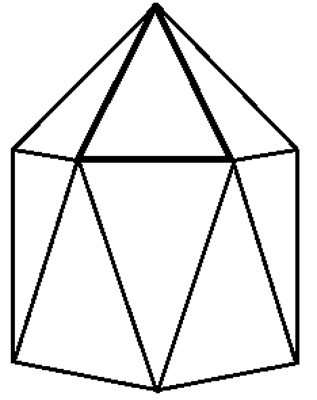 |
| 7 | From the resulting acute angle, draw a small segment downwards. Connect its lower point with the side edges of the resulting figure. | 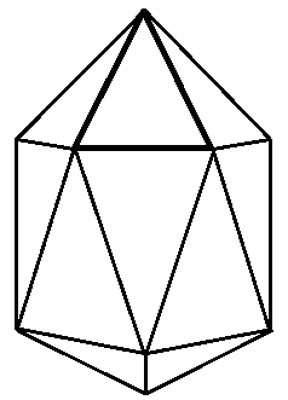 |
| 8 | Using a ruler or any handy tool with a smooth and straight border, draw an elongated rectangle. Divide the area inside the figure into equal parts with vertical lines. If desired, you can "round off" the corners. | 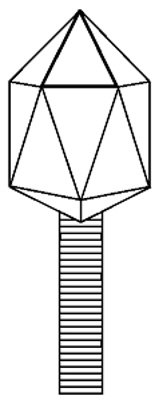 |
| 9 | Attach the basal plate to the bottom of the bacteriophage rod. It consists of a small oval and an arcuate line. | 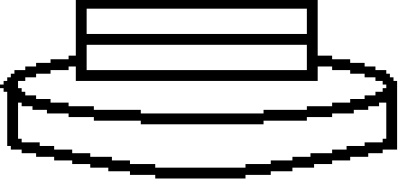 |
| 10 | Attach sharp teeth – small inverted triangles – to the lower border of the basal plate. |  |
| 11 | Form the capsid threads with zigzag lines. They are associated with the legs of the virus. | 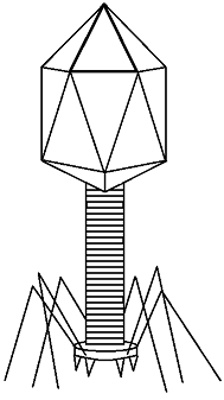 |
The resulting image can be detailed or colored to taste.
Adenovirus
Adenoviruses are a group of infectious agents that cause irritation of the mucous membranes. The disease affects both adults and children.
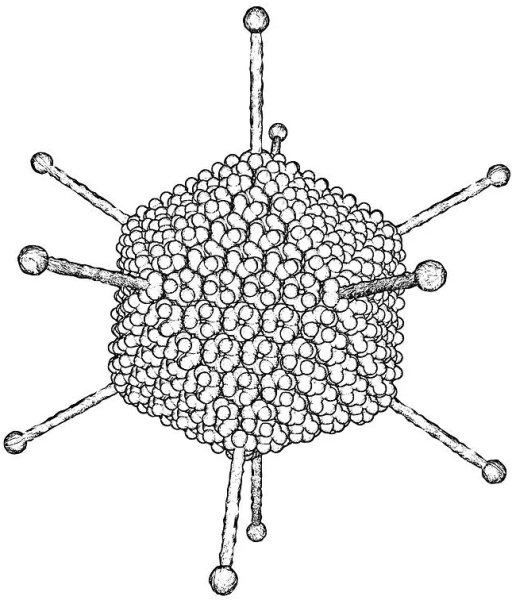
How to draw adenovirus with a pencil:
- Visually measure the middle on a white sheet of paper.
- Using a ruler, draw a small square with a soft-tip pencil.
- Draw low rectangles to the top and bottom borders of the square.
- Remove the reference lines with an eraser or a rubber. This way you can get a neat hexagon.
- Add elongated rectangles to each corner of the figure to form protein threads.
- At the ends of the protein strands are small ovals or circles.
- Fill the inside of the virus with small circles. For convenience, you can use a black marker with a thick tip. The figures should completely fill the adenovirus capsid.
- Use an eraser to remove unnecessary lines. Use a pencil with a hard lead to draw the remaining details.
The resulting image can be colored or left unchanged.
Drawing viruses is quite simple - there are many varieties of infectious agents. Images can be used as a basis for drawing posters, or as educational lessons for children. Drawing viruses with a pencil is quite simple - you will need a sheet of white paper, pencils and following the algorithms.
Video on how to draw a virus
How to draw different viruses: