Sewing items from fabric or leather scraps is a fairly ancient occupation. The Tokyo Museum has preserved an outfit decorated with a patchwork pattern that is about 3 thousand years old. In Rus', sewing together the remains of homespun fabric had a practical nature, and only at the beginning of the 20th century did do-it-yourself patchwork become a form of creativity accessible to both beginners and gurus.
Types of patchwork
The English word "patchwork" literally translates as a product made from scraps.
Techniques for sewing from pieces of fabric can be conditionally divided into:
- Classic version, or English patchwork. Before sewing, the scraps are given the same correct shape, for example, a square. Preference is given to fabrics of calm shades of cotton, a maximum of 2 colors. The technique is easy for beginners to master.
- "Crazy" or crazy patchwork It is composed mainly of complex abstract shapes, the fabrics can be of different colors and textures. The sewn canvases can be decorated with lace, ribbons and embroidery.
- Oriental patchwork It is based on the classic version, the fabrics are selected in contrasting colors, the products are embroidered with sequins, beads and stones, and fringe can be inserted between the patches.
- Japanese patchwork is a subtype of oriental sewing, characterized by the use of bright silk fabrics, on which beautiful appliques in the form of flowers and plant ornaments are sewn. The patches are joined together by hand. The highlight of the technique is the use of the sashiko stitch (forward needle) with a contrasting thread, which is performed with perfectly even stitches.
Japanese patchwork style is one of the most difficult for beginners. It is difficult to make it yourself - Knitted patchwork. The fabric is made up of knitted or crocheted motifs, for the production of which you can use leftover threads.
DIY patchwork for beginners, as a type of handicraft, opens the door to imagination. It would be advisable for beginners to first master its classic version, and then move on to more complex forms.
Choice of fabric
The easiest way to cut and sew cotton patches is due to the straight weave of the threads.. Pieces of cotton fabric do not crumble or stretch in different directions, so they are easy to connect together evenly. Cotton is a wear-resistant material. Chintz is denser than calico, so the products will be of higher quality; denim can be an alternative.
Elegant and luxurious products are made from silk. This fabric is used mainly for sewing clothing parts, as the material is fragile and expensive. Pieces of silk can be used to create a unique wall panel.
Linen fabrics are characterized by strength and durability, they let air through, the natural material feels slightly cool to the touch. Linen scraps can be used to make summer clothes that are pleasant to wear, breathable window curtains and wear-resistant tablecloths.
Linen is a hypoallergenic material with antibacterial properties; fungi, bacteria, and other microorganisms unfriendly to humans are afraid of it.
From woolen pieces you can make a warm blanket, potholders or original outerwear. Such products are well draped and do not wrinkle. The material is fire-resistant and very durable. Drape has similar properties.
Fantasy items are obtained by combining different types of fabrics, there are no special rules here. Quite successful things are obtained by sewing together corduroy and denim scraps, the luxury of silk is emphasized by pieces of velvet.
DIY patchwork for beginners is easiest to master on cotton fabrics, then the handicraft will bring pleasure, and the high-quality result will become an incentive for new work.
Why do you need patterns in patchwork?
When creating a canvas from scraps of different shapes, pre-prepared templates made of cardboard or plastic will help. Their use will allow you to quickly cut out parts of the required shape and size and economically cut out the fabric. The templates are thin frames with a width equal to the seam allowance, the inner contour of which runs along the junction of the parts, and the outer contour along the cutting line.
Tools for work.
- Sharp steel scissors, blade length from 18 to 25 cm.
- A roller knife that allows you to cut out patchwork pieces along a ruler from several layers of material at once. It comes with a replaceable blade, the optimal diameter is 45 mm.
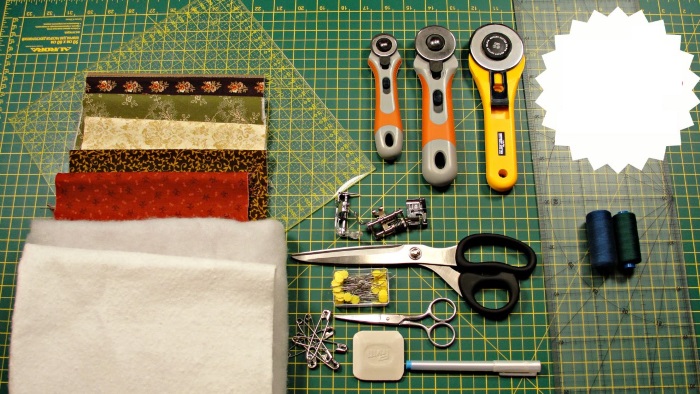
- Thick mat for roller cutter, convenient size 50 × 60 cm.
- Rulers for patchwork.
- Chalk, hard soap or special pens with washable paste for applying markings.
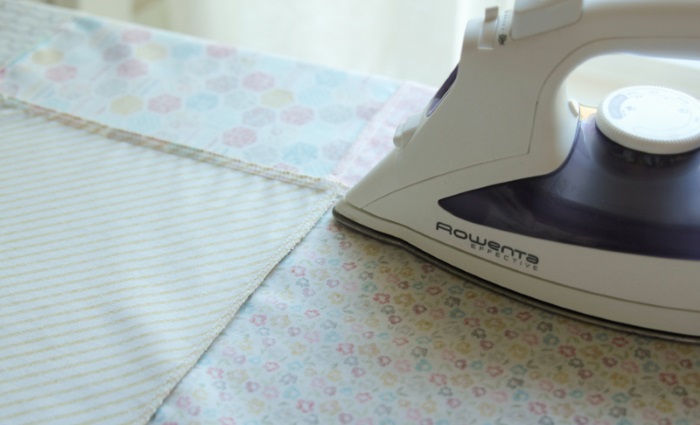
- Everything for ironing.
- Purchased or homemade templates.
- Adhesive or non-adhesive fillers (gaskets).
- Everything for sewing.
Patchwork is an activity for the patient; learning how to make unique items with your own hands will require time and perseverance. For beginners, it is enough to have scissors, an iron, chalk and homemade templates in your arsenal.
Rules for cutting and joining parts
- To avoid shrinkage of the finished product, the fabric is pre-washed and ironed.
- Pieces of fabric with a straight weave should be cut along the grain threads. They are located parallel to the edge of the wefts - perpendicular to it. If there is no edge, then you need to stretch the fabric, it will stretch better along the weft.
- When sewing with a machine, it is advisable to leave seam allowances of 7.5 mm – this is the distance between the needle and the edge of the machine foot.
- For fraying material, it is better to increase the allowance to 1 cm.
- When working by hand, the patches are sewn together with a forward stitch.
- When using a sewing machine, the parts are sewn together one after another, then the threads between them are cut; this technique is not used when working with triple joints or more.
- First, small parts are connected into small blocks, and then the finished blocks are sewn together.
Patchwork techniques and patterns
Sewing patches only in the style of crazy patchwork has no rules and no specific patterns.
However, in the process of spreading this type of handicraft among beginners, the basic techniques of sewing from fabric scraps have become popular. Each technique has a certain sequence and pattern of placing fabric pieces on the canvas, following which you can get a guaranteed result.
Patchwork quick squares
To sew the product, you will need 4 types of fabric with different patterns, it is better to use cotton: 2 pieces of one color, for example, beige, and 2 pieces of another shade, for example, blue.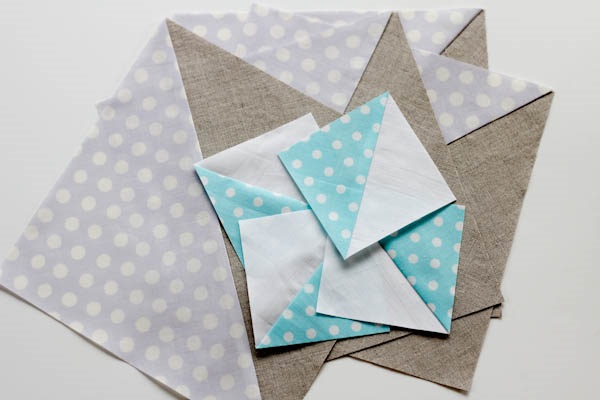
Each fabric is cut into strips of equal width, which are sewn together along the long side: first, the beige patches are joined, then the blue ones. The resulting pieces are laid face to face (the seams should be on the outside) and sewn together from both edges to form a sleeve.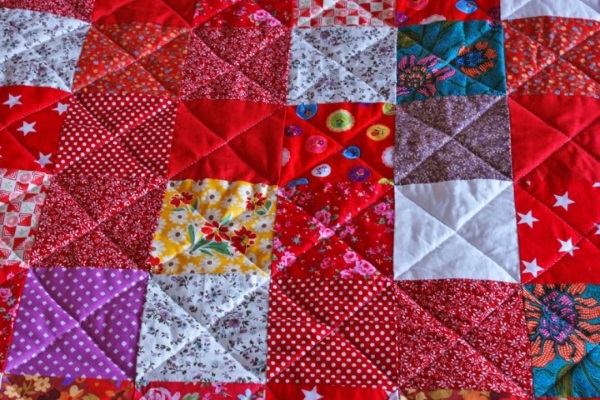
The prepared canvas is marked with oblique lines at 450 now in one direction, now in the other, along the entire length. Squares are cut out according to the markings. Then, in any order, the squares are sewn together into a single product.
Patchwork watercolor
The basis of this technique is classic patchwork, the products are sewn from squares. The technique was named watercolor by the principle of selecting fabric shades. To make a beautiful canvas, you will need at least 7 or 8 pieces, for example, 4 pieces will be from a color line from light blue to blue, the remaining 3 - from light pink to burgundy.
The basis of the canvas can be plain fabrics or similar to them, and the pattern can be laid out from scraps with a floral pattern.
The effect of watercolor is best seen when assembling the product from small motifs. In this case, it is necessary to observe a smooth transition from one shade to another.
In our example, the edges of the canvas can be laid out with blue and dark blue motifs with a floral print, the transition to the center can be made through light blue and soft pink shades without a pattern, and in the center, a bright floral composition of red and burgundy patches can be placed.
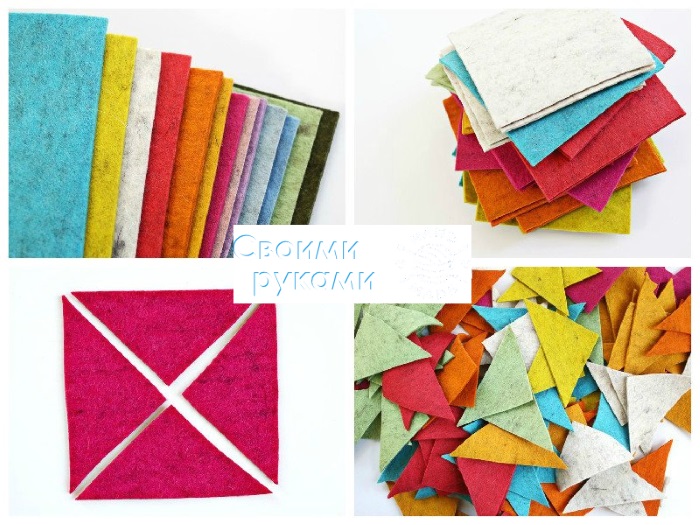
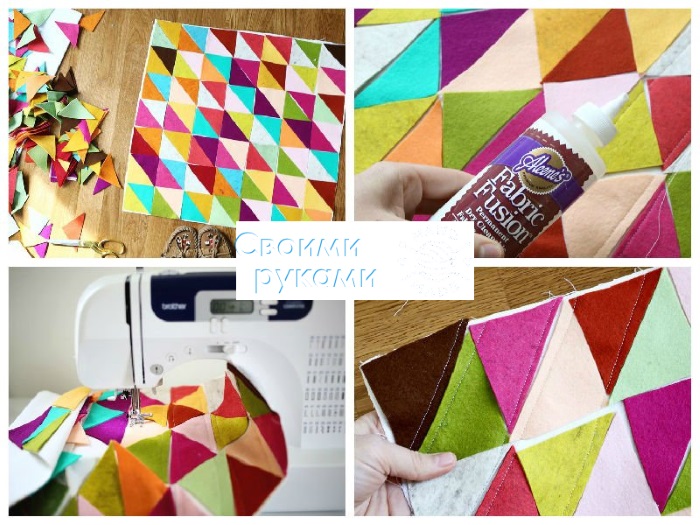
Triangle technique
First, you need to cut isosceles triangles from different colored pieces of fabric. The easiest way to do this is using a template, leaving allowances for the seams. Then the motifs are sewn together with the side edges into long strips, the bases of the triangles form the edges of the strips.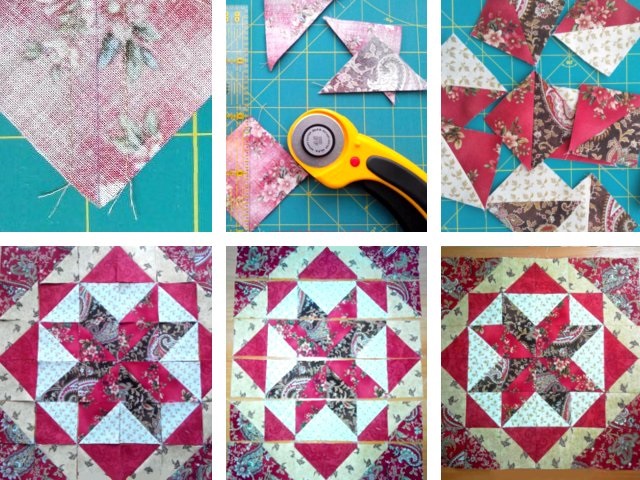
After assembling the blocks, the back side, where the seams are, should be ironed. The resulting long blanks are stitched together into one piece. If the colors of the triangles match when joining the strips, then squares or diamonds will appear on the piece, depending on the shape of the triangular patches.
Honeycomb technique
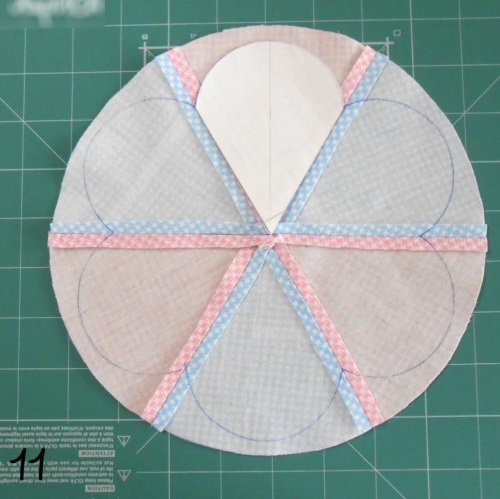
The canvas is assembled from hexagonal equilateral motifs cut out according to a template. For the template, you need to draw a circle of a certain radius on a sheet of cardboard using a compass. On the circumference, put aside 6 segments of the same length as the radius. You will get a regular hexagon.
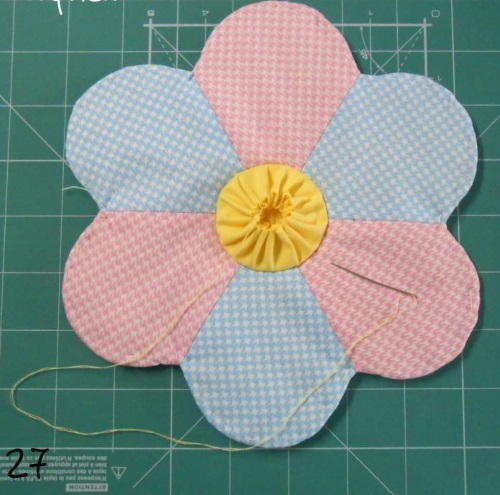
Often, when working in this technique, 6 flower leaves are formed in a circle from one color, and the central motif is cut out of a contrasting color. The main background of the product is assembled from a single-color fabric or material with a barely noticeable pattern. The "honeycombs" are sewn together first on one side only, to obtain rows. Then the rows are connected to each other. It is more convenient to sew the motifs by hand.
Chess technique
This is another classic patchwork option. The squares are cut out of 2 fabrics of contrasting colors, the number of patches of both shades is the same. You can simplify the procedure of joining the motifs by first sewing the patches into rows, and then stitching the rows together. Each new row must start with a square of a different color.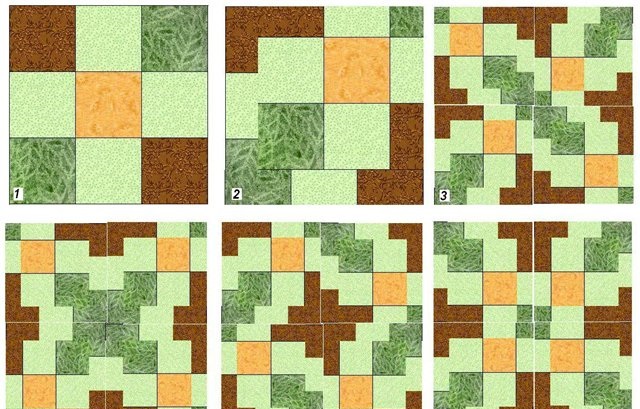
If you stitch 4 or 9 small motifs together in a checkerboard pattern to form a square block, then by connecting such blocks with plain patches you can get a complex colored pattern.
Patchwork patterns
Depending on the shape of the motif, you can create a huge number of patterns. Thus, square patches can be made in one piece or a square block can be assembled from small squares, stripes or triangles. They can also be arranged in the form of diamonds. Triangles give no less scope for imagination. A relatively simple pattern of triangles is the square block "Mill".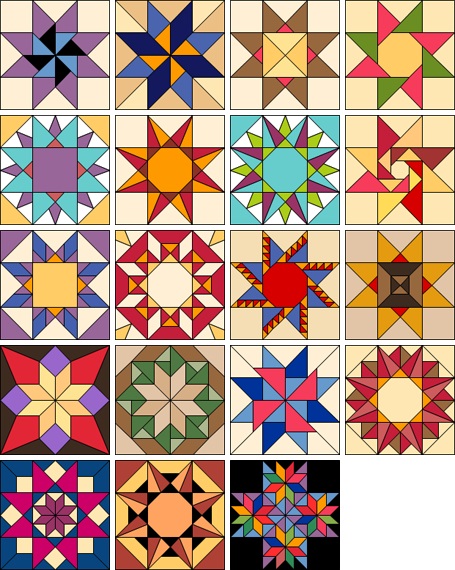
It is formed from 4 large identical squares. Half of such a square is a solid triangle, the second half is assembled from 2 small triangles. The resulting blocks are placed with the acute angles of the triangles to the center so that each motif is rotated 900.
The strips can be folded into a square with a "Log Cabin" pattern. The strips of fabric are laid out in a spiral around the central square, forming an ornament reminiscent of logs in a log house. If you place the central flap in the corner, the strips will only need to be sewn on 2 sides of the square.
Colored stripes can also be arranged in a parquet or ladder pattern, formed into zigzags, and stitched together to form diamonds and square blocks.
How to assemble a block from squares
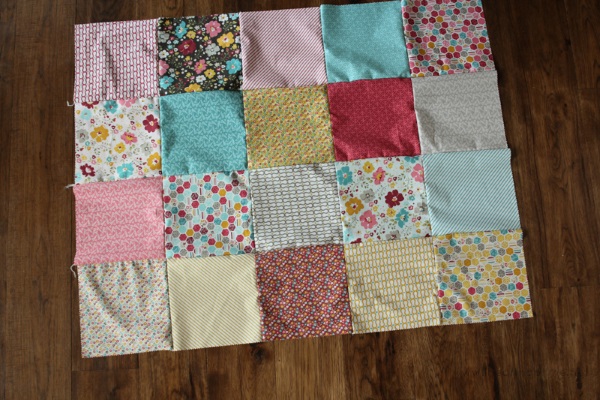
DIY patchwork for beginners requires spatial imagination and a careful sequence of actions. Below is an algorithm for assembling a 4x4 block of 16 square motifs.
- First, all cut and ironed pieces need to be laid out on a flat surface in the order in which they will be sewn together.
- Next, the second piece of fabric is placed face down on the first piece of fabric of the first row, the motifs are sewn together on a machine, and the thread is not cut.
- The second piece of the second row is placed on the first piece of the second row, and the motifs are stitched after the first batch.
- The first and second squares of rows 3 and 4 are sewn in the same way. 2 vertical rows are collected, the thread can be broken.
- Squares from the 3rd column are sequentially sewn to the second column of the resulting workpiece, also starting from the 1st row and ending with the 4th. The squares for stitching from the 3rd column are placed face down on the corresponding square from the 2nd column, already sewn to the 1st.
- The 4th column of motifs is attached in a similar manner.
- The large workpiece is carefully rotated 900to stitch the rows together.
- The far right row is placed face down on the 2nd row to the left of it, the seam is stitched.
- All remaining rows are sewn in the same way.
DIY Patchwork Quilt for Beginners
You can sew a smart blanket top using any of the above patterns. The colors of the patches depend on the interior and taste of the future owner of the product. The blanket is formed from three layers: patchwork top, filler and lining. You can use synthetic padding as a filler, cotton unquilted batting or wool are suitable for a baby blanket. The lining can be cut from satin or flannel.
- Both the insulation and the lining are cut with side allowances for seams.
- The top layer and insulation are laid on a flat surface and secured with pins or large stitches in some places.
- Then you should quilt 2 layers of the future product in the direction from the center to the edges, this will prevent the appearance of gathers.
- After stitching, the edges of all 3 layers are stitched together, then piping is sewn onto the edges.
Baby blanket in patchwork technique
Bedspreads for children's beds with small motifs in delicate or cheerful colours look great.
The order of actions for creating a product:
- Determine the required size of the bedspread and cut out the whole back side with some extra space.
- Make the front side of the product using any of the techniques described above; for beginners, it is better to stick to the classic patchwork.
- Lay the backing fabric face down on a flat surface, then place the patchwork piece on top, face up.
- Quilt both fabrics by hand along the seams between the blocks, or stitch them using a machine.
- Sew the edging first on the front side of the product, then fold it to the back side and stitch it as well.
Patchwork blanket
DIY patchwork for beginners can be mastered by making a children's knitted blanket from squares. To knit the motifs you will need knitting needles and yarn of the appropriate numbers.
- Cast on 31 stitches onto knitting needles.
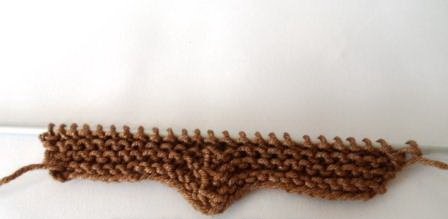
- Mark the middle loop with colored thread.
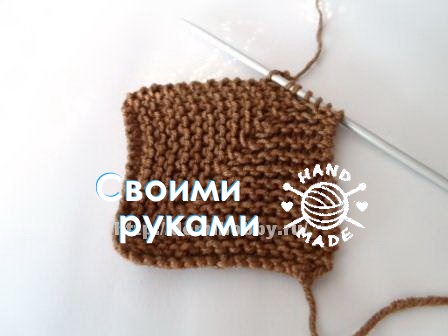
- Knit all stitches as front loops, in every second row knit the 3 central stitches together as front loops.
- When all the loops have been decreased, pull the thread through the last 3 loops on the needles and fasten it.
- Knit the required number of motifs and sew them together; you can use a contrasting thread and a goat stitch for this.
Pillows
Decorative patchwork pillows can be single-sided or the patchwork fabric can decorate both sides of the pillow.
- Sew the front side of the pillow from scraps according to the chosen pattern.
- Prepare fabric for the back of the pillow, or make another piece from scraps.
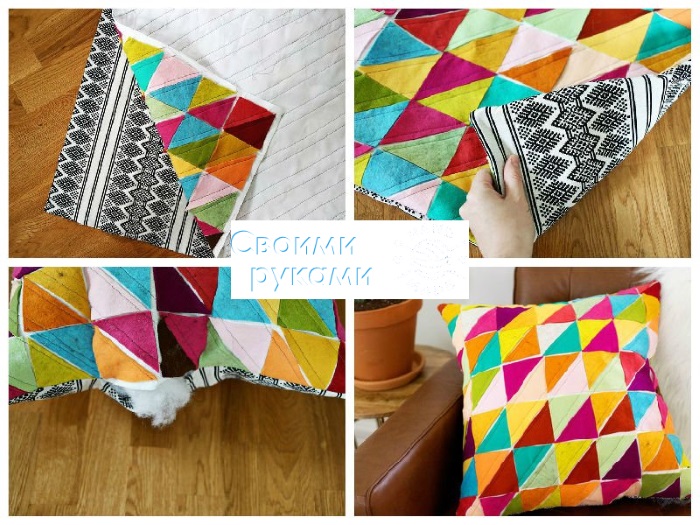
- Place the pieces of fabric right sides together and stitch on three sides, then turn the piece inside out.
- Sew in a concealed zipper on the fourth side.
- Stuff the pillow with filling.
Potholders
DIY patchwork may seem like a difficult task, especially for beginners, but you can master this technique by making small items, such as potholders.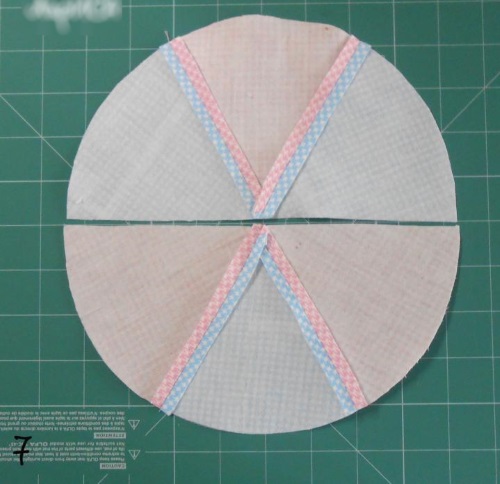
- The scraps for the front side of the product are sewn onto two layers at once: batting and a cotton or linen base, which will become the back side of the potholder.
- Sew a long ribbon of a contrasting color along the edge of the potholder, face down – this will be the edging.
- After folding the piping to the back side, the piece is sewn on.
- If the edging tape allows, then you can make a small loop out of it on the last corner of the potholder.
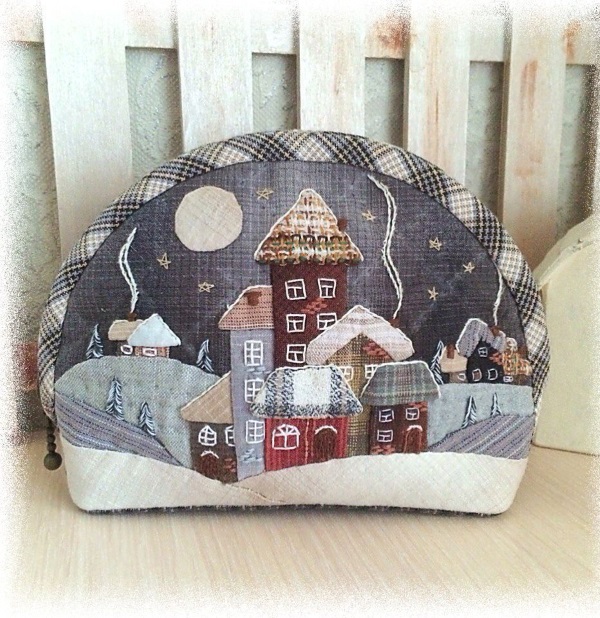
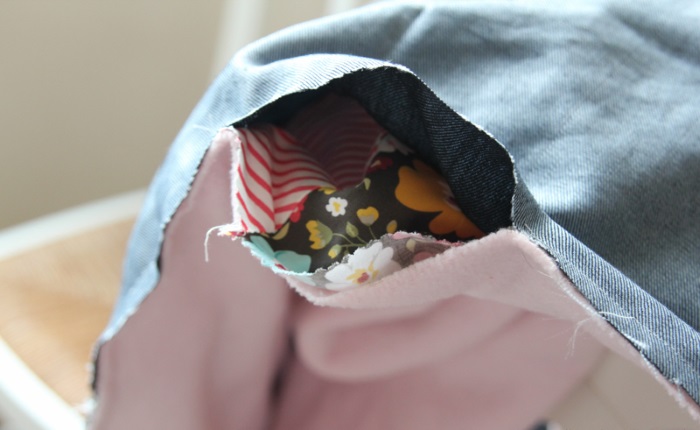
Bags
- For a simple evening bag, you need to make a rectangle from the scraps, approximately 38 cm x 30 cm in size.
- The patchwork fabric is sewn onto a rigid interlining.
- A zipper is sewn to one of the narrow sides of the rectangle, then the fabric is folded inside out, and the zipper is sewn to the second edge.
- Next, without turning the product inside out, sew the side edges of the bag.
- The corners adjacent to the future bottom of the bag are turned and stitched under
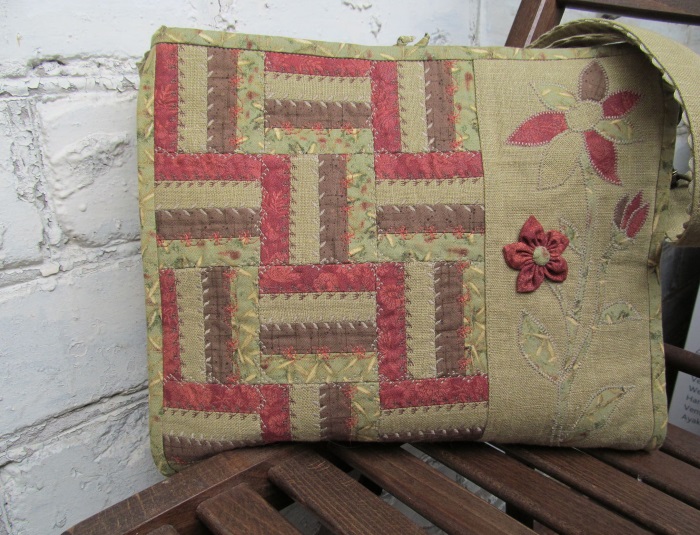 45 angle0 at a distance of 2 cm from the sharp end.
 - The product is turned inside out.
- Loops of strong cord are sewn into the upper corners, to which a strap or chain is attached.
- A similar piece is formed from the lining fabric, which is inserted inside the bag and sewn on with a blind stitch.
Patchwork knitting
By knitting woolen motifs of different shapes on knitting needles, you can make a warm product that fits into the interior of the room. Individual parts can be sewn to each other with threads or crocheted with a contrasting thread.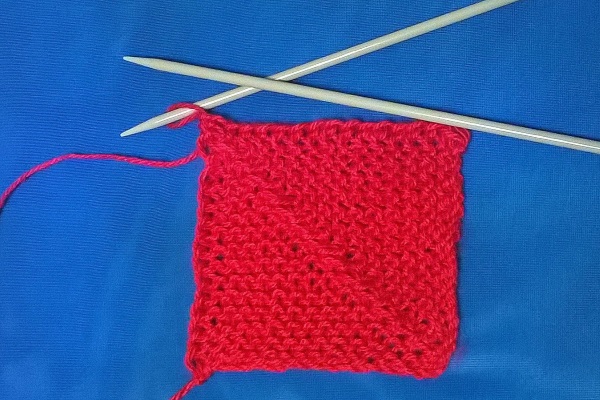
Also, subsequent motifs can be knitted from existing ones, picking up loops directly from the edge loops of the finished piece. Original products are obtained from sectional yarn.
Patchwork crochet
The various crocheted motifs can be solid or openwork, single-color or multi-color, square, hexagonal or triangular.
Finished products can be decorated with crocheted flowers or woolen thread embroidery.
By knitting patches from each other, you can create complex abstract shapes in the style of crazy patchwork. For warm products, you can use the technique of knitting with a long hook.
The versatility of patchwork opens up wide opportunities for those who like to create items with their own hands. The result of the work will always be an exclusive item, even if it is made according to simple patterns for beginners.
Article formatting: Vladimir the Great
Video about patchwork
Patchwork for beginners:
Crazy style patchwork:
I have accumulated so many scraps over the years of sewing and it is a shame to throw them away and I have nowhere to put them, so I found a use for them. Thanks for the ideas!