The hat is a popular piece of clothing that is often drawn both separately and when depicting people or cartoon characters. Drawing this headdress is not as difficult as it seems at first glance.
Pencils, paper and supplies
You can draw a hat with regular colored pencils, paints or felt-tip pens. You can draw on regular A4 paper, but it is advisable to use high-density paper, which will protect your child's artwork from accidental bending or damage.
When choosing pencils, you should take into account that there are different types of pencils according to their degree of hardness:
- hard (H);
- hard-soft (HB);
- soft (B).
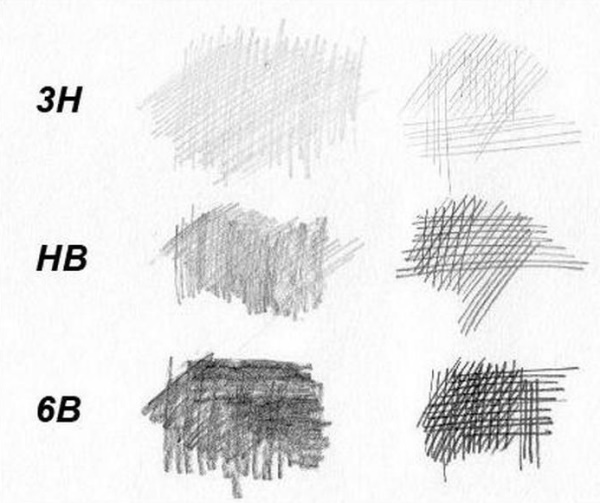
For drawing, it is recommended to use pencils of medium hardness. When buying colored pencils, you should pay attention to the saturation of their color, as well as the quality of the lead, which should be strong enough (the thickness of the lead should be 3-4 mm).
The different types of pencil lead, which differ in the type of material from which it is made, are listed in the following table:
| Type | Composition and properties | Purpose |
| Watercolor | It is made from chemical emulsions and has the characteristic features of watercolor paints. | Drawing colorful pictures (landscapes or still lifes), as well as coloring any drawings and background applications. |
| Classical | Made from colored pigments and white clay, the lines have clear boundaries and do not smear across the surface of the sheet. | Drawing pictures with clear outlines, as well as drawing contours and sketches of pictures. |
| Pastel | Made from linseed oil, the drawings created with pencils of this type have a special softness of image. | Colouring individual outlines of the drawing, as well as drawing colourful pictures and creating background decorations. |
| Wax | Made of wax and does not require constant sharpening. During drawing, it glides smoothly across the paper. | Drawing landscapes and background applications. |
For drawing simple pictures it is recommended to use classic or watercolour pencils. For children of school and preschool age it is enough to buy a set of pencils consisting of 10 different colours.
For ease of drawing, it is recommended to choose pencils with a faceted shell.
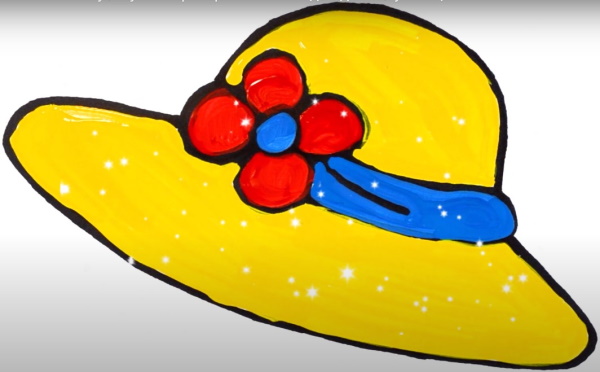
Women's hat
How to draw a hat can be found in classic drawing books. A woman's hat looks very colorful and fashionable. You can draw such a hat with regular colored pencils, but you can also use felt-tip pens.
The process of drawing it consists of the following steps:
- Draw an elongated oval (20 cm wide and 4 cm high) in the center of the sheet, located at an angle of 45° to the vertical of the drawing. Then erase the upper middle area of the outline with an eraser. The result will be the base of the hat.
- In the upper left area of the outline, draw a small ring with a diameter of 0.5 cm, and around the ring, draw 4 large half rings with a diameter of 2 cm. The result will be a flower.
- Fix the pencil in the right area of the contour of the lowest petal of the flower, and then draw a line until it touches the right upper area of the contour of the base of the hat. After that, round the line upward and continue to draw the pencil towards the flower until the line touches the right area of the contour of the right petal of the flower. The result will be the rim of the hat.
- Place the pencil between the bottom and right petals of the flower, then draw a 3 cm long line to the right, parallel to the outline of the hat.
- Place the pencil in the upper right area of the hat rim outline and draw a large semicircle that should end on the left side of the hat outline. This will result in the upper area of the hat.
- Use a black pencil to outline all the lines of the hat.
- Fill the flower petals with red color.
- Fill the center of the flower and the rim of the hat with blue.
- Fill the top and base of the hat with yellow.
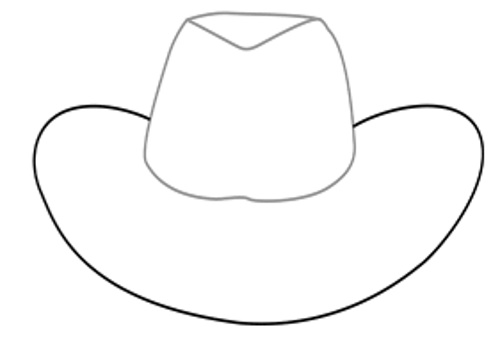
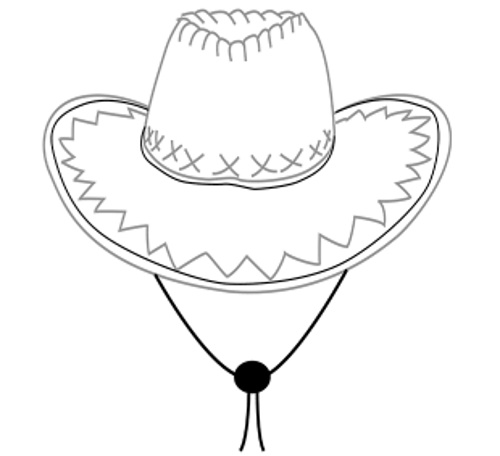
Cowboy hat
To draw you will need a regular pencil, an eraser and regular paper.
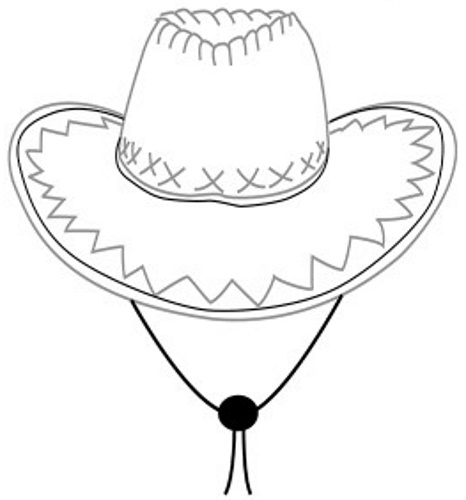
The process of drawing it consists of the following steps:
- Draw a trapezoid, the lower base of which should be equal to 5 cm, and the upper one - 3 cm. Then you need to erase the corners of the trapezoid with an eraser and round them off.
- Fix the pencil just above the lower left area of the trapezoid outline, and then draw a curved oval pointing downwards, the right area of which should end at the lower right area of the trapezoid outline. The result will be the visor of the hat.
- Inside the top area of the hat, along the bottom area of its outline, depict a seam in the form of a number of successively depicted letters x.
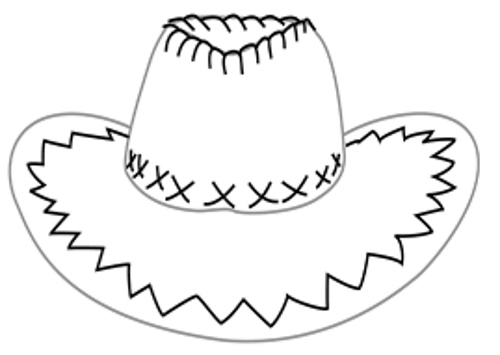
- Draw a triangle under the top line of the trapezoid contour, and then draw vertical segments along the contour of this triangle, the distance between which should be 0.5 cm.
- Inside the visor, along its contour, draw a sawtooth line.
- Under the visor, depict a rope in the form of a curved semi-oval, in the lower area of which depict a thick dot imitating a knot, and under it depict 2 vertical stripes.
Top hat
Every child who is into magic should know how to draw a top hat, because such a hat is an essential attribute of any magician.
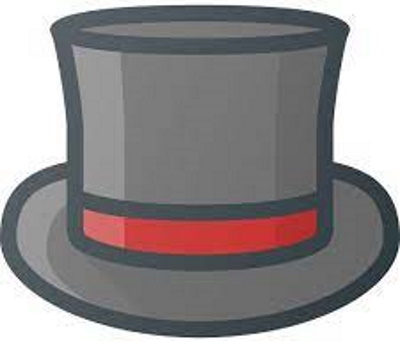
To draw this hat you need to follow these steps:
- Draw a horizontally elongated oval 5 cm wide.
- From the left and right edges of the oval, draw vertical lines directed downwards (the height of the lines should be equal to 7 cm).
- Connect the vertical lines with a downward curved arc (this will create the hat's cylinder), and then draw a parallel line a little higher than it (this will create the hat's rim).
- Place the pencil just above the lower left area of the hat outline and draw the visor as a large semi-oval, the outline of which should end in the right area of the hat outline.
- Fill the top area of the hat with light gray and the bottom area with dark gray.
- Color the rim of the hat red.
Witch hat
Girls who like cartoons about witches and sorceresses will really like this drawing.
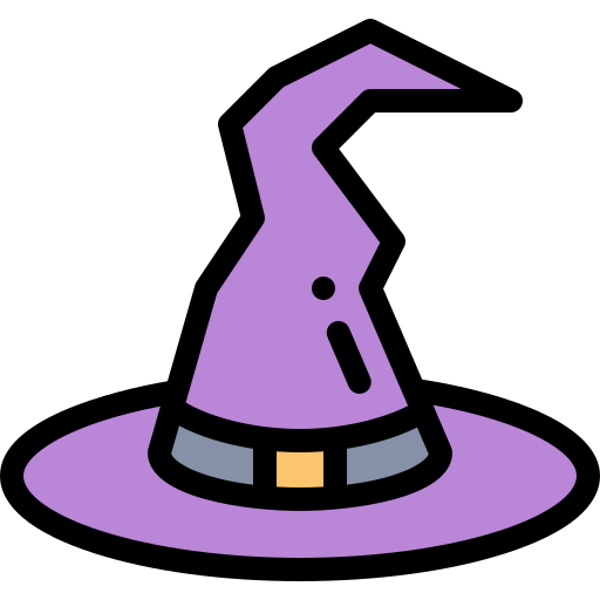
To draw this hat you need to follow these steps:
- Draw an isosceles triangle with a height of 10 cm and a base of 3 cm.
- Erase the top half of the triangle with an eraser, and then from the top area of its outline draw curved zigzag lines directed to the right. Then draw 2 connecting lines that will form the tip of the hat.
- Draw an arc under the base of the triangle, convex downwards, and then erase the base of the triangle with an eraser.
- At a distance of 0.5 cm above the lower area of the hat outline, draw a line parallel to it. The result will be the hat rim.
- Draw a square inside the hat rim, in its center.
- Fix the pencil just above the lower left area of the hat outline and draw a semi-oval that should connect with the right area of the hat outline. The result will be the visor of the hat.
- Outline all the lines of the hat with a black pencil.
- Color the hat purple.
- Color the rim of the hat gray and its center yellow.
Graduation hat
Every excellent student should know how to draw a graduation hat. This hat serves as a symbol of graduation from school or university. The tradition of wearing a special uniform together with this headdress exists in almost all foreign and European countries. It will not be difficult to depict such a hat.

To draw it, you need to do the following steps:
- Draw a rhombus stretched horizontally (the top of the hat).
- Draw parallel lines under the two lower sides of the rhombus, at a distance of 0.3 cm from them, to give volume to the rhombus.
- Fix the pencil in the middle of the left lower side of the rhombus, and then draw a small line down, and the direction of the line should be slightly shifted to the left. The length of the line should be 2 times less than the length of the side of the rhombus.
- Fix the pencil in the middle of the right lower side of the rhombus, and then draw a small line down, and the direction of the line should be slightly shifted to the right. The length of the line should be 2 times less than the length of the side of the rhombus.
- Connect the lower ends of the drawn lines with a horizontal arc, convex downwards.
- Draw a small ring in the center of the top area of the headdress.
- Fix the pencil in the right area of this ring and draw a curved line to the right to the edge of the rhombus, then continue drawing this line down to the middle of the lower area of the hat. Then you need to draw a second similar line, parallel to the previous one. As a result, you will get the main area of the tassel.
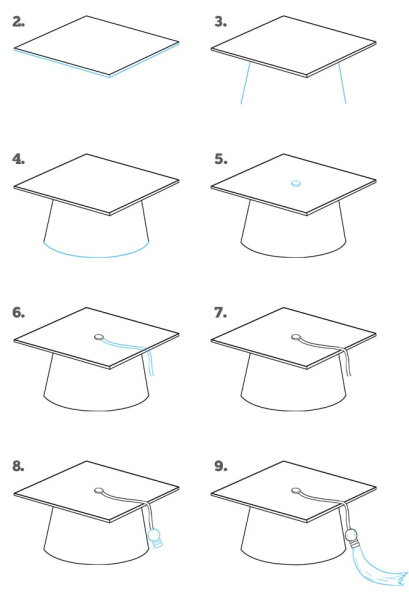
- At the bottom of the main area of the brush, draw a small ring, and under it, 3 flattened ovals. Then under the ovals, draw the brush itself.
- Fill the hat with black.
- Fill the main area of the brush with gray and the brush itself with yellow.
Men's hat
You can draw a classic men's hat using a regular pencil.
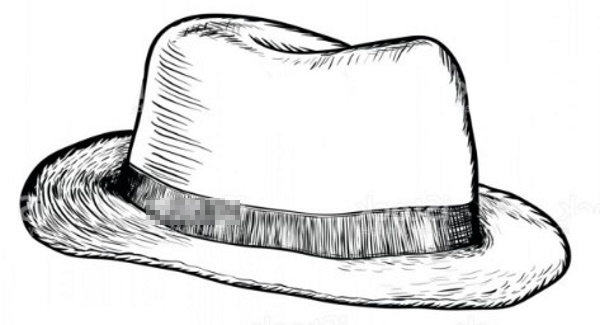
The drawing process consists of the following stages:
- Draw an auxiliary trapezoid, the lower base of which should be equal to 5 cm, and the upper base - 4 cm.
- Erase the top area of the trapezoid along with its top corners with an eraser.
- Place the pencil in the upper left area of the trapezoid contour and draw a curved horizontal line directed to the right. It is necessary to finish drawing it as soon as the pencil reaches the middle of the upper area of the trapezoid.
- Place the pencil in the upper right area of the trapezoid contour and draw a curved horizontal line directed to the right. The line should pass through the right end of the previous line. It is necessary to finish drawing it as soon as the pencil reaches the upper left area of the trapezoid.
- Draw a downward curved arc under the lower base of the trapezoid. Then erase the base of the trapezoid with an eraser. The result will be the upper area of the hat.
- Above the bottom line of the hat outline, draw a line parallel to it. The result will be the hat rim.
- Place the pencil just above the left area of the hat outline and draw the visor of the hat as a horizontal semi-oval, the right area of which should connect with the right area of the hat.
- Fill in the visor of the hat with a pencil.
- In the left area of the hat, depict shading in the form of small horizontal segments located along the vertical of the drawing.
- Shade the top area of the hat.
- Along the visor of the hat, apply shading with long lines that should be parallel to the outline of the visor.
Women's Beach Hat
To draw a beach hat you will need brown and black pencils.
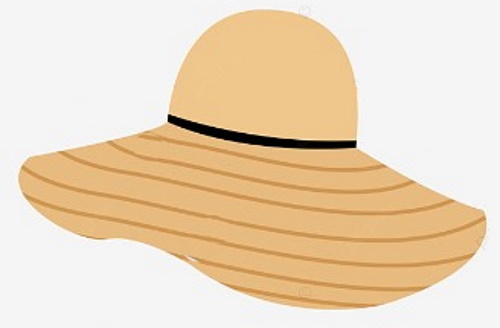
To depict it, you need to complete the following steps:
- Using a brown pencil, draw a half ring with a diameter of 5 cm.
- In the lower area of the semicircle, use a black pencil to draw a thick arc convex downwards.
- Fix the pencil in the lower left area of the arc and draw a straight line (5 cm long) directed to the left at an angle of 45° relative to the vertical of the drawing.
- Fix the pencil in the lower right area of the arc and draw a straight line (5 cm long) directed to the right at an angle of 45° in relation to the vertical of the drawing.
- Fix the pencil at the end point of the left line and draw a wavy arc until it connects to the right end point of the right line. The result will be the peak of the hat.
- Inside the visor of the hat, draw horizontal parallel lines with a dark brown pencil.
- Fill the top area of the hat with light brown and the visor with regular brown.
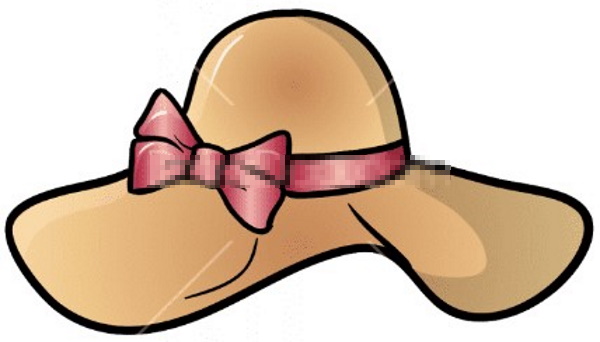
Hat with a bow
To draw this hat you will need colored pencils or markers.
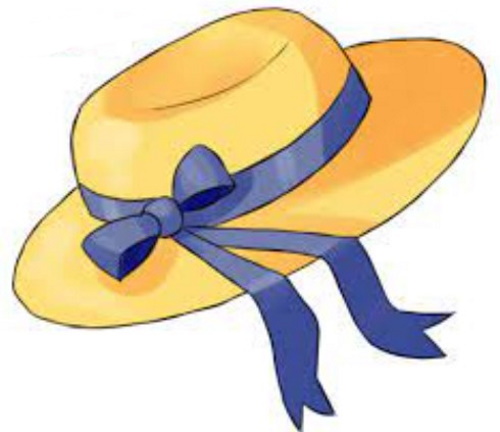
The sequence of actions for drawing it is as follows:
- Draw a trapezoid at an angle of 45° to the vertical of the drawing. The dimensions of the trapezoid should be as follows: the length of the lower base is 5 cm, the length of the upper base is 4 cm, the height is 2 cm.
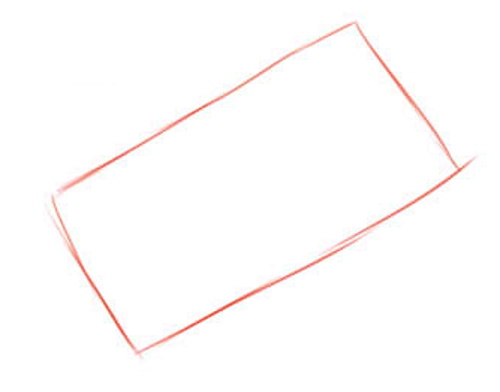
- Erase the top corners of the trapezoid and round them off.
- Fix the pencil in the lower left corner of the trapezoid and draw a convex arc downwards, which should connect with the lower right corner of the trapezoid. Then erase the lower base of the trapezoid with an eraser.
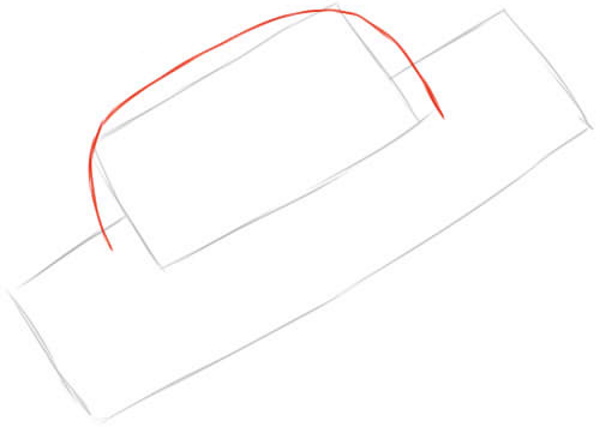
- Draw a small arc, convex downwards, under the top line of the hat outline.
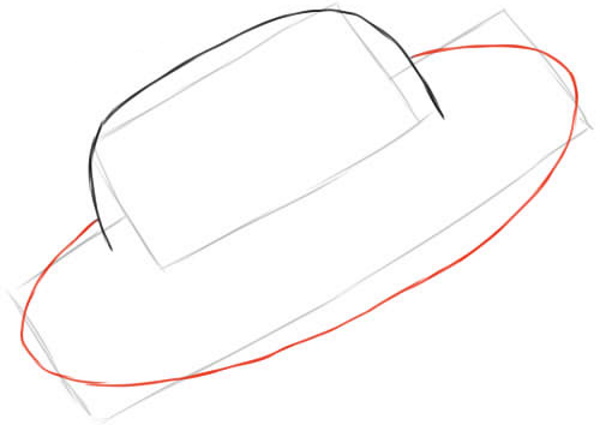
- At a distance of 0.5 cm above the lower area of the hat, draw a line parallel to it. The result will be the rim of the hat.
- In the left area of the rim, draw a knot in the form of a curved ring.
- To the left of the knot, draw a trapezoid stretched to the left, located at an angle of 45° to the vertical of the drawing. The left area of the trapezoid should be wider than its right area. In the lower area of this trapezoid, draw a narrow oval and fill it with black.
- To the right of the knot, draw a trapezoid stretched to the right, positioned at an angle of 45° to the vertical of the drawing. The right area of the trapezoid should be wider than its left area. In the lower area of this trapezoid, draw a narrow oval and fill it with black. The result will be a bow.
- Place the pencil just below the middle of the left area of the hat and draw the visor of the hat in the form of an elongated oval, the outline of which should connect with the right area of the hat.
- Place the pencil in the lower area of the bow knot and draw a line perpendicular to the outline of the visor. After this line reaches the outline of the visor, it is necessary to continue drawing it down a few centimeters. Then it is necessary to draw exactly the same parallel line at a distance of 0.3 cm from the previous line. Then it is necessary to connect these two lines at the bottom with a corner concave inward. As a result, the first hat band will be obtained.
- Draw a similar second hat band next to the first one.
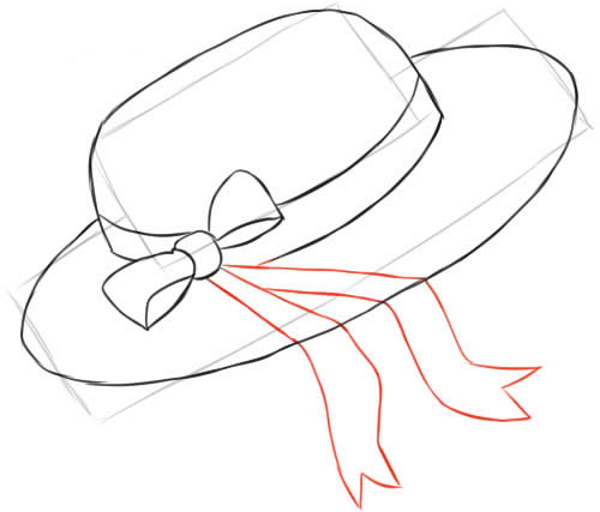
- Fill the hat with yellow. The top and right areas of the hat should be filled with a more saturated color.
- Fill the headband, bow and two ribbons with blue.
Creative hat
Every fashionista should know how to draw a hat in a creative style.
To draw it, you need to do the following steps:
- Draw a half ring (the top part of the hat) with a diameter of 3 cm.
- Fix the pencil at the left lower point of the outline and draw a convex arc downwards, which should connect with the right lower area of the hat outline. Then erase the lower line of the semicircle.
- Above the lower arc, draw an arc parallel to it at a distance of 0.5 cm from it. The result will be the rim of the hat.
- In the left area of the rim, draw a small rectangle (the bow knot), located at an angle of 45° relative to the vertical of the drawing.
- To the left of the knot, draw 2 trapezoids, with their large bases pointing to the left and located close to each other.
- To the right of the knot, draw 2 trapezoids, with their larger bases pointing to the right and located close to each other. The result will be a bow.
- Fix the pencil in the lower left area of the arc and draw a straight line (3 cm long) directed to the left at an angle of 45° relative to the vertical of the drawing.
- Fix the pencil in the lower right area of the arc and draw a straight line (3 cm long) directed to the right at an angle of 45° relative to the vertical of the drawing.
- Fix the pencil at the end point of the left line and draw a wavy arc until it connects to the end point of the right line. The result will be the peak of the hat.
- Outline the outline and all the inner lines of the hat in black.
- Fill the hat with brown.
- Fill the hat's rim and bow with purple.
Following the above instructions, any parent can explain to their child how to draw a hat. You can draw this headdress in a matter of minutes and even a preschool child can handle it.
Video on how to draw a hat
Video on how to draw a hat: