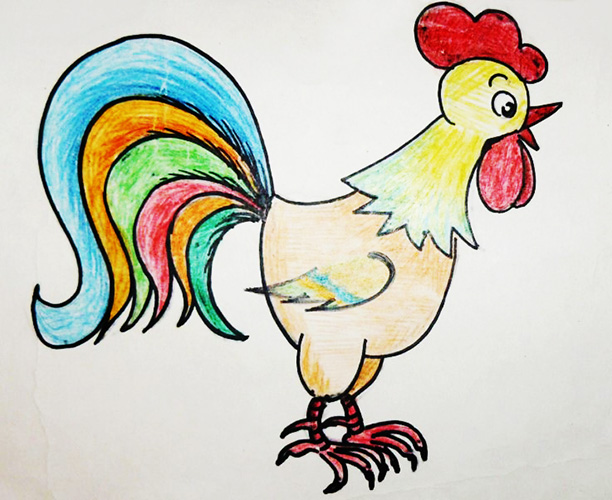
Every 12th year, according to the eastern calendar, passes under the sign of the rooster. This proud bird, endowed by nature with a beautiful multi-colored tail, is the personification of activity, energy and sociability. If it is not possible to have a live rooster at home, you can draw with a pencilBoth adults and children can cope with this task.
Drawing tools
The main tools and materials for drawing a rooster will be:
- sheet of paper;
- simple pencil;
- eraser;
- several colored pencils.
The more colors you use, the more colorful the rooster's pride - his tail - will be.
Paper
For drawing, you can use album pages or A4 sheets. It is important to choose a material that will match the tools used.
When choosing paper, you need to pay attention to its 4 main characteristics:
| Characteristic | Description |
| Sheet size | The main thing here is that the drawing can easily fit on the paper. |
| Paper density | It is important not to confuse the density of sheets with their thickness: these are different characteristics. The unit of measurement of paper density is g/m2. The higher the density, the more expensive the material. But for drawing with pencils it is not necessary to use the thickest paper. 100-200 g/m2 will be enough. |
| Paper texture | The drawing material can be smooth or rough. Generally, smooth paper is more suitable for pencils. |
| Acidity | The material must be acid-free so that the design remains on it as long as possible. Before buying, you must make sure that the packaging has a corresponding mark. |
Simple pencil
When choosing a pencil, you need to pay attention to the hardness of its lead. It is usually designated by the letters "H" and "B", as well as numbers. The letter "H" indicates the hardness of the pencil. The larger the number next to this letter, the harder the lead.
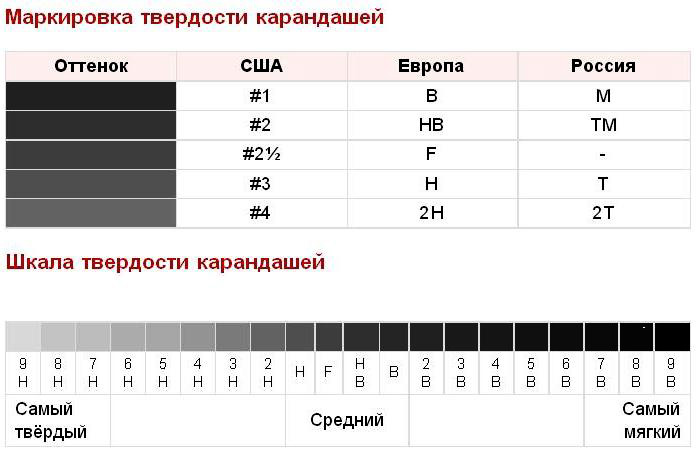
The letter "B", on the contrary, speaks of softness. As the number next to it increases, so does the softness of the lead.
Eraser
An eraser is used in drawing work to remove unnecessary lines drawn with a simple pencil. Usually these are auxiliary lines that should be removed at a certain stage of the work. You can use any eraser. The main thing is that it performs its main function well: removes the trace of the lead of a simple pencil.
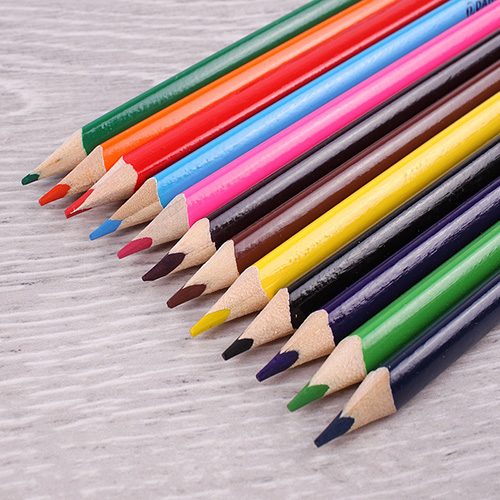
Colored pencils
Drawing a rooster begins with creating a sketch with a simple pencil. Colored pencils are used at the final stages of creating the image. This process is especially interesting for children, because they can give the drawing any color. The choice is limited by their imagination and the number of different colored pencils in the set.
To get real pleasure from drawing with colored pencils, you need to pay attention to their characteristics when choosing.
Tool case
The most common cross-section options are:
- hexagon;
- triangle;
- circle.
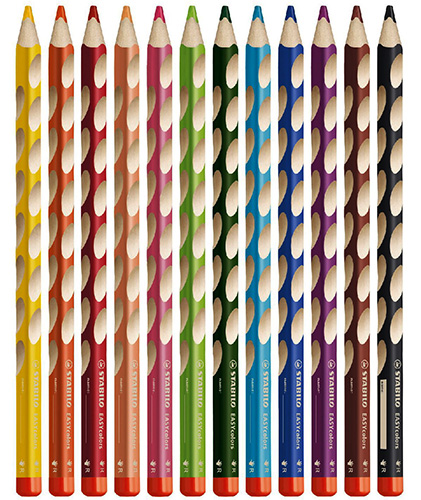
A triangular body is recommended for children. You can buy Marco pencils from the GripRate series. Jumbo series colored pencils are perfect for young artists. They have a thicker body and lead. With their help, the child will quickly learn how to correctly position his fingers when drawing.
An important advantage of colored pencils with a triangular cross-section is that, unlike round ones, they do not roll off a horizontal surface. This means that the young artist will not have to pick up a pencil that has rolled off the floor while working.
Lead diameter
They can have different diameters. The standard thickness should be considered from 0.25 cm to 0.5 cm. Both thick and thin products have advantages and disadvantages.
For example, a thick lead:
- harder to break;
- allows you to paint over a larger area of a sheet of paper faster;
- in a pencil it quickly becomes dull and requires constant sharpening.
With thin lead, it's the other way around. Their main advantage is that you'll rarely need to sharpen them. However, you'll have to spend more time coloring large areas of paper. It's easier to break a thin lead than a thick one.
The best option would be to purchase professional colored pencils from the ColorCore series, the lead diameter of which is 0.4 cm. The manufacturers have made sure that they do not roll onto the floor.
Physical properties of the lead
They depend on the material used to make the pencils.
There are 4 main types of pencil leads:
- classic;
- watercolor;
- wax;
- pastel.
The main component of the lead of classic pencils is usually white clay. Its color depends on the added coloring pigment. In good pencils, these pigments are of natural origin. They are not exposed to the negative effects of sunlight and are gently applied to the canvas.
Some colored pencil leads are made with special emulsions that can interact with water. They can be used to create a watercolor effect on paper.
Wax crayons are quite popular with young artists and their parents. They differ from regular crayons in that they glide smoothly over paper and do not require sharpening. Wax is used instead of white clay. The role of the wooden body is often played by ordinary paper wrapping.
The lead of pastel colored pencils differs from the other varieties listed above by the presence of linseed oil in its composition.
This makes the material soft. Like wax crayons, pastels do not need sharpening. Their only serious drawback is that they are difficult to draw straight lines and sharp strokes.
Hardness and softness
Like regular pencils, colored pencils can be soft or hard. This affects the nature of the work with them, as well as the quality of the finished drawing. However, unlike regular pencils, colored pencils are not marked by the level of softness. The artist has to check them himself.
Some stores allow you to test any pencils on paper sheets for free before purchasing, which makes choosing much easier.
Good colored pencils should be about as soft as a regular pencil marked HB, simply called hard-soft.
It is also recommended to check how well the pencil sharpens. During this process, the lead should not crumble or break. In this case, only high-quality sharpeners should be used for testing. An example of such is TM Kum.
Number of different colors in the set
The smallest sets that you can find in the store consist of 6 pencils, but more often you can find a set of 12. This amount may be enough to implement the main creative idea.
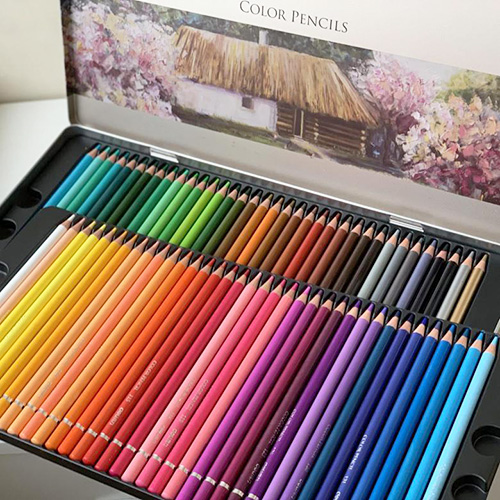
There will also be no problems finding a place to store such a set, which cannot be said about such packages, which contain, for example, 72 pencils.
Pencil brand
There are many companies involved in the production of these drawing tools.
The most popular are:
- Marco;
- Faber Castell;
- Koch-i-noor;
- September 1.
Master classes
Having prepared the necessary materials and tools for work, you can proceed to drawing. Below are several master classes.
First, simple methods of drawing a rooster are given, which are suitable for beginners, including children who have never held pencils in their hands before. There are also examples of work for more experienced artists.
How to draw a rooster for a child
A rooster (a drawing for children in pencil will be distinguished by the simplicity of the image) on a sheet of paper will be made if you adhere to the following scheme:
- Draw a circle that will act as the head.
- In the upper left part of the circle, draw a small circle that will become the eye.
- Draw several arced lines above the head. This will be the comb.
- On the left, draw a beak, represented by triangles, and directly below it, an arced line, indicating the earring.
- Draw a pair of lines coming from the head to represent the neck. These lines should be connected by a wavy line that will separate the color of this area of the plumage.
- Draw the body of the rooster and its fluffy tail, represented by many feathers.
- Add a wing in the form of an arched line and a pair of legs located under the body. Don't forget to draw the toes at the ends of each leg.
- Decorate the wing with several small arced lines.
- Start coloring the drawing using colored pencils.
Simple drawing
A simple version of a rooster image can be done in the following steps:
- Use a simple pencil to draw the base of the rooster's body. This will be a figure consisting of two ovals connected to each other. One of the ovals - the larger one - is located in the center of the sheet. This will be the bird's body. The other oval is located slightly higher. It is smaller in size. This will be the head.
- Connect both ovals with 2 wavy lines.
- Draw the main details of the head. This will be the beak, represented by a pair of small triangles, as well as a round eye and a 3-tooth comb.
- Add earrings and draw zigzag lines that will separate the neck plumage from the main one.
- Draw a wing. In this case, the rooster is shown in the drawing so that only its right wing is visible, while the left one is hidden behind the body.
- Imagine the wing as an oval. It is important not to forget to divide it into feathers.
- Draw a characteristic luxurious tail. To do this, it is enough to draw several arcs in the back of the body.
- Add a couple of legs and then use the eraser to remove any unnecessary lines.
- Color the rooster with colored pencils. The rooster's feathers can be of different colors. The more different shades are used, the more beautiful the drawing will be. In this case, the comb should be colored red, and the beak and legs - yellow.
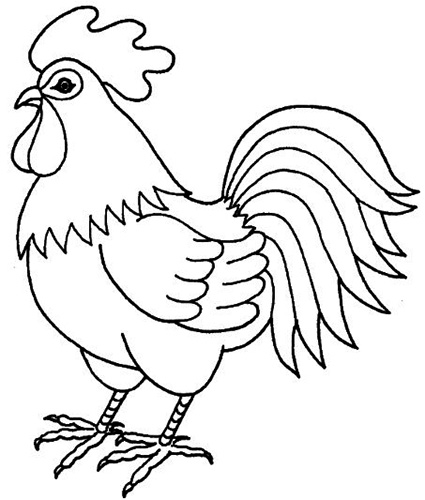
Simple contours
A rooster (a drawing for children with a pencil can be based on simple outlines) on a sheet of paper can be created if you adhere to the following steps:
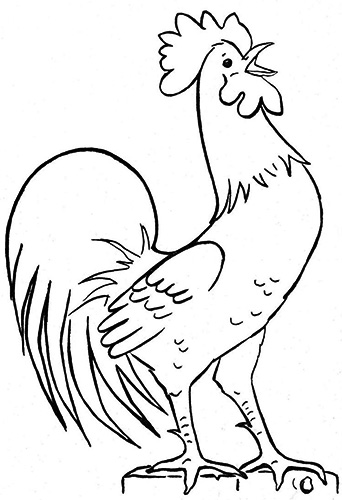
- Select 3 areas. The contour lines can be of any shape. However, it is important to ensure that they fit together well in size.
- Draw a circle in the middle of the sheet. This will be the rooster's body.
- A little to the right and higher, draw an oval, which will become the rooster’s tail.
- On the other side of the body, slightly to the left and above it, draw a triangle. The head will be located here.
- Add a few small figures. There will be 4 of them in total, and they can all be ovals. 2 small ovals should be located under the body. These will be the paws. The other 2 ovals are on the head. The lower one will become earrings.
- Draw the general outline of the rooster, outlining all previously drawn elements with a single line.
- Remove all unnecessary lines.
- Draw 2 parallel lines down each of the 2 ovals. This will be a pair of rooster legs.
- Detail the drawing. This stage is not difficult in itself, but it is the longest. It is advisable to start with the detail that seems easiest to draw. This could be, for example, the paws. The main part of them was drawn in the previous stage. Now it remains to add a few fingers, each of which can be represented by a triangle.
- After the paws, move on to the tail, or more precisely, to drawing a zigzag line that will separate the body from the tail.
- Draw the outline of the longest and outermost feather.
- Draw a wing that is located in the middle of the body. You can draw it any way you like.
- Detail the head. There should be a small beak, represented by a triangle. Place the earrings under it, slightly correct their outline.
- Mark the area for the eyes.
- Make the initial outline of the comb on the head.
- Draw the feathers. To do this, highlight the tail feathers by drawing several curved lines.
- Add 1 more zigzag line on the neck.
- Select several feathers located near the wing.
- Finish drawing the eye and spurs on the legs.
- To make it easier to color the drawing with pencils, make barely noticeable outlines for different colors.
- Turn a black and white drawing into color. Rooster feathers can have different colors: from white and black to bright red and orange. When making the drawing colorful, you can also add a simple landscape in the background. For example, a rooster will look good on green grass. You can also add a rustic wooden fence.
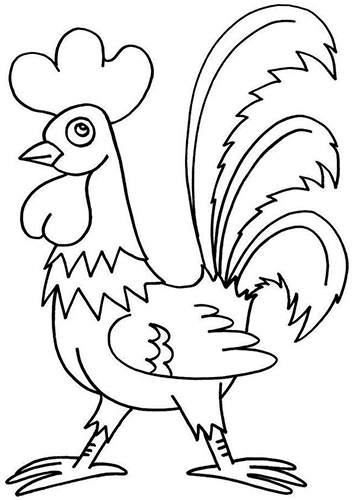
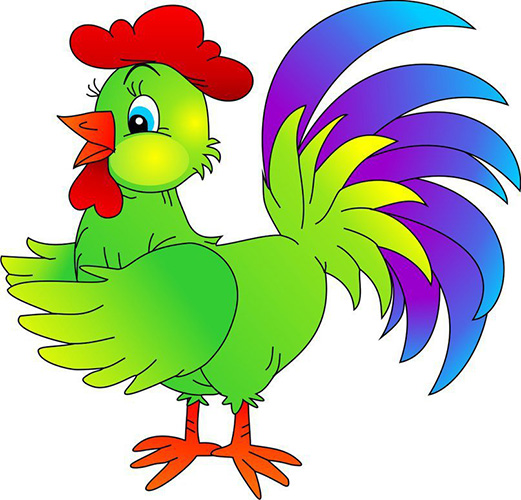
Cartoon Rooster
Rooster (a drawing for children in pencil can be presented in the form of a cartoon character) cartoon character will be a good alternative to watching cartoons.
The stages of the image are as follows:
- On a sheet of paper, draw 2 ovals of different sizes. One of them is in the center of the sheet, this will be the body. The other oval is located slightly higher and to the left. It is smaller in size. This will be the head.
- Connect the ovals with a wavy line. To the right of the large oval, there should also be another wavy line, which will be the basis of the tail. Below this same oval, place a straight line - the prototype of the lower limbs.
- Once the basics of the cartoon rooster drawing are in place, begin adding the details of the head. There are a pair of large eyes, a small beak, and a long comb that reaches all the way to the neck. The eyes should be represented by circles, the beak by a triangle, and the comb by a series of arced lines following each other.
- Add feathers on the neck and earrings under the beak.
- Draw the body in detail. You need to depict the left wing and the upper tail feather.
- Draw feathers all over the bird's body. They can be represented by many small strokes.
- Refine the image of the paws.
- Finish drawing the tail feathers, remembering that this is the real pride of the rooster, and its main distinguishing features should be splendor and beauty.
- Remove all unnecessary lines with an eraser.
- Color the bird. Since this rooster is cartoonish, you can use more bright colors. The plumage can be multi-colored, the beak and legs - yellow or orange, the comb and the wattles under the beak - red.
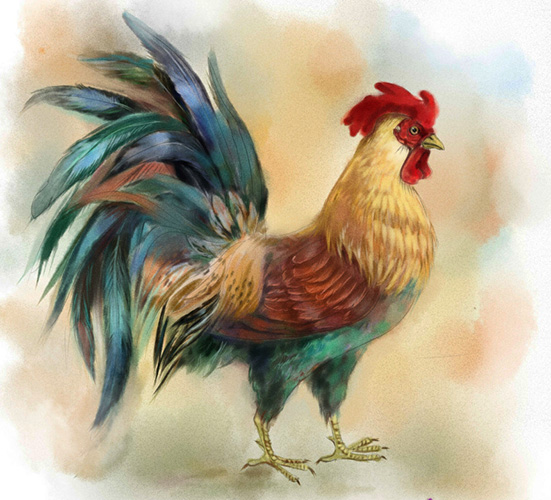
Realistic rooster
A rooster (a pencil drawing for children from an adult will be a good gift) in the form of a realistic image will be difficult for a novice artist to create. Such work requires a lot of patience. However, the result will be a magnificent picture, distinguished by high realism.
In addition to pencils, which are recommended to be used more, you will need a kneaded eraser. It takes about 10 hours to complete the drawing.
The main stages of its creation are as follows:
- Draw a sketch of a rooster using a hard-soft HB pencil.
- After lightening all the lines with a kneaded eraser, proceed directly to coloring the drawing using colored pencils.
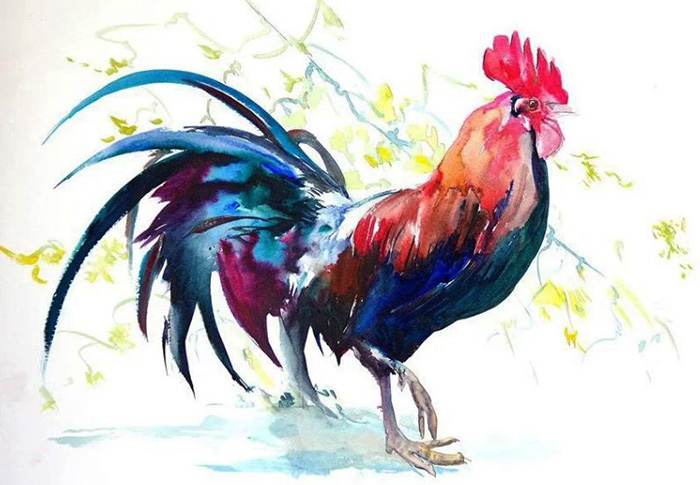
- To convey the shine of the feathers, apply shades of green and blue. The general approach to creating feathers is to first depict the most shaded areas, and then you can bring out a specific color. The final step is polishing.
A similar approach can be used to create yellow plumage. - To draw the comb, use several shades of red, and fill the dark areas with cold purple colors. Additionally, use a white gel pen to imitate the pimples on the surface of the comb.
- Add a shadow under the rooster's legs so it doesn't look like he's hanging in the air.
The rooster is a very beautiful bird, which with its multi-colored long tail is in no way inferior to the peacock. And the same proud look that the rooster has, no other animal has.
If you have a sheet of paper and colored pencils, you can draw a rooster. Even a beginner will get a beautiful drawing, and as you improve your skills, each next bird drawn will become more beautiful.
Video about drawing a rooster for kids
Master class on drawing a rooster from a Russian fairy tale: