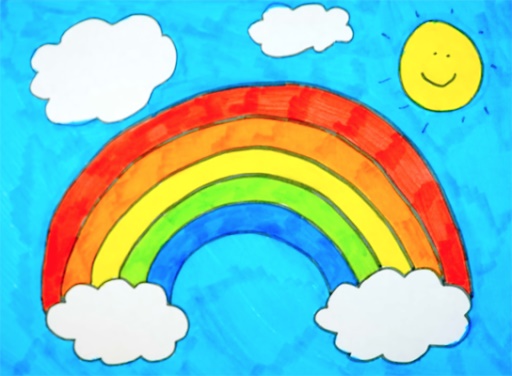
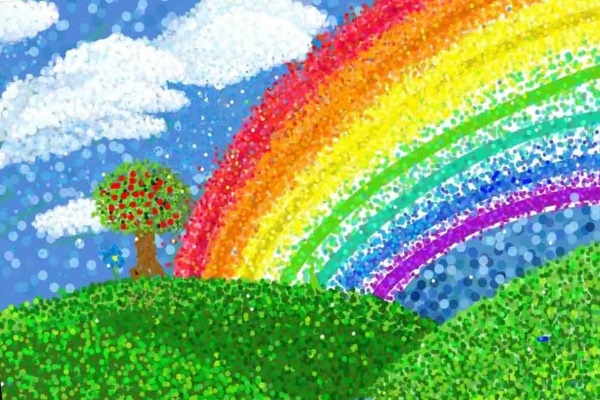
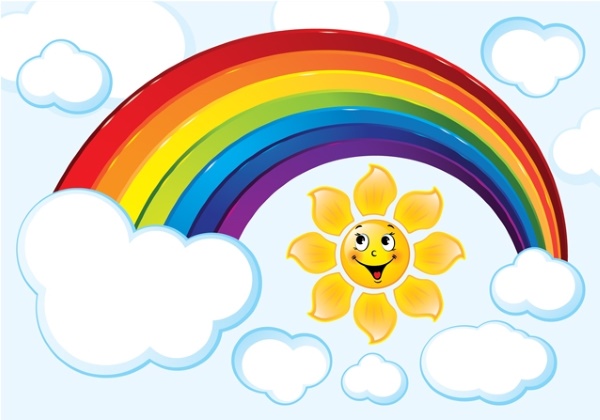
Rainbow is one of the bright objects in the blue sky that pleases both children and adults. It is a beautiful phenomenon with many different colors that smoothly flow into each other, creating an incredible picture.
Once you have learned how to draw a multi-colored arc, you can transform any drawing.
Drawing tools
It is customary to distinguish 7 colors in a rainbow. However, in reality there are more, because the transitions are smooth. A painted rainbow can look like a real one, even if the artist uses 5 shades.
For this you can use the following colors:
- red;
- orange;
- yellow;
- green;
- blue.
If there are more pencils in the set, it is better to use them all. In this case, you will get a more saturated multi-colored arc.
In addition to colored pencils, you can use markers and paints.
You should also prepare:
| Tool | Description |
| Simple pencil | It will be especially useful if you need to add a few more elements to the rainbow, for example, clouds or the sun peeking out from behind gloomy clouds right after the rain. This tool will help create the contours of objects |
| Canvas | Most often, it is a sheet of paper. |
| Eraser | With its help you can quickly remove unnecessary lines, for example, those that were used as auxiliary lines or those that were drawn accidentally. |
Simple pencil
When choosing a simple pencil for drawing, you should pay attention to the hardness of these tools. It is designated by numbers and letters on the body of the pencils. The Latin letter "B" denotes softness, and "H" denotes hardness.
In addition to letters, numbers are used for designation. As they increase, the specified characteristic increases. For example, a 3B pencil is softer than a 2B pencil, and a 5H pencil is harder than a 4H pencil.
As the pencil becomes softer, the tone becomes more intense.
Eraser
When using a simple pencil, an artist will definitely need an eraser, regardless of his skill level and experience. In any case, it will be necessary to delete lines that are used at a certain stage of work as auxiliary ones.
For these purposes, you can use a regular eraser, which schoolchildren use in class. However, It is better to buy special erasers called kneaded erasers.
They are designed for drawing and are softer than regular erasers. They are great for sketching and fine detailing.
To protect the nags from drying out, they must be stored in a box. For more delicate, fine work, you can cut the eraser in half diagonally. In this case, it will be possible to use its sharp corners.
Paper
Everyone who likes to draw has a special album, on the pages of which various drawings and sketches are made using a simple pencil.
When choosing paper, as well as pencils, you need to take into account your goals, for example:
- For drawing with lines and strokes, thick paper is best;
- the grainy version is more suitable for tonal-pictorial drawing;
- Low quality, loose paper is not suitable for long-term drawings.
Tools and materials for painting with watercolors
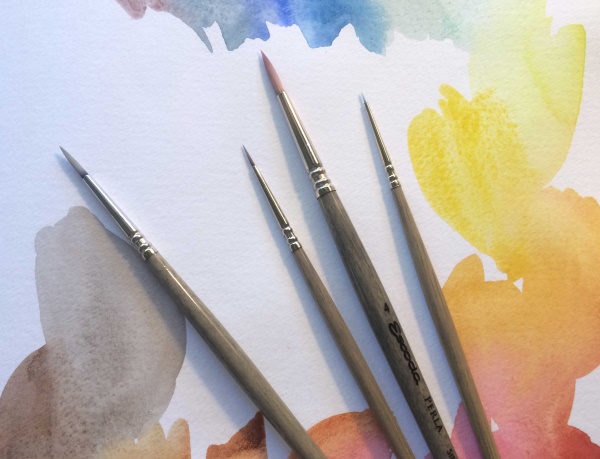
A squirrel brush is best for painting rainbows for kids with watercolors. When buying, pay attention to the elasticity of its pile. You can check this by running your finger along it. If the pile is elastic enough, it will instantly regain its shape.
The squirrel brush should become drop-shaped when exposed to water. You can check this in the store by asking the seller to bring a container of water.
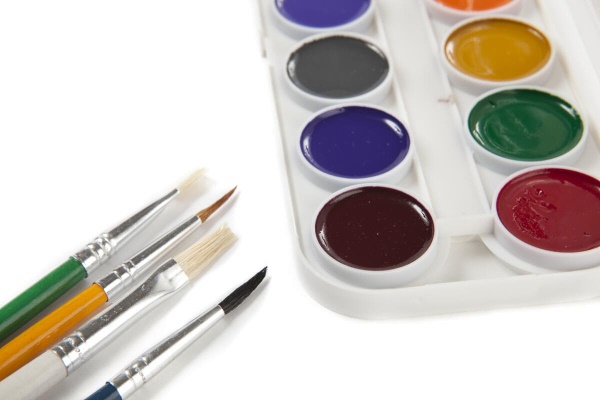
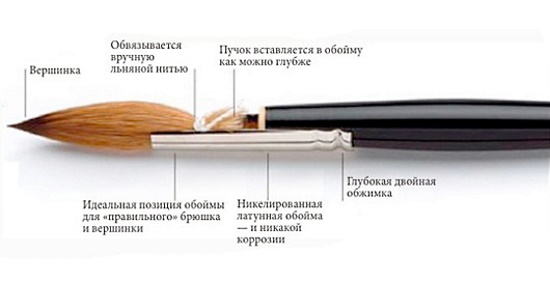
During the drawing process, each artist will be able to decide for themselves which brush suits them best – decide on the size and shape. Perhaps someone will prefer a synthetic brush.
As for manufacturers, knowledgeable artists usually prefer products made in Europe. Domestic brushes are also very popular: both natural and synthetic.
Tools and materials for gouache painting
For gouache, you can choose the cheapest brushes – synthetic ones. In this case, it is necessary to pay attention to the elasticity of their pile. The shape of the hair depends on the size of the objects you plan to draw.
For large drawings, flat brushes are better suited. For drawing small details, it is advisable to use canonical brushes.
Master classes
Having prepared the necessary tools and materials, you can move on to the image of the rainbow. The drawing of this object can have varying degrees of complexity.

There are options that require nothing more than a few pencils and a sheet of paper. A child can easily do such drawings. However, the youngest children will need help from their parents or other adults.
If you follow the instructions, you can create an excellent painting that will delight you with its bright colors and realism.
Simple Rainbow Drawing with Colored Pencils
Rainbow (it is best to start drawing for children with simple options) in a simple version can be done using several colored pencils.
It can be 5 colors: the last 2 colors - blue and purple - are excluded from the main 7. However, it is better to use all colors: in this case, the drawing will be more saturated and beautiful.
To work you will need colored pencils and a sheet of paper.
The stages of drawing are as follows:
- Start drawing the rainbow from its top stripe, which is always red. To do this, you will need to draw a large arc using a red pencil. The red stripe should run along the top of the drawing, starting in the lower left corner and ending in the lower right corner. Here, you should especially try to make sure that the arc does not have any curvatures, because you will need to use it as a guide when drawing the other colors.
- Place the orange stripe under the red arc. If the red stripe is drawn correctly, there should be no problems with drawing the orange one. It goes right under the red one and follows all its curves. This stripe will be slightly shorter.
- Draw a shorter yellow arc under the orange arc.
- Draw a green arc under the yellow one.
- Draw a blue arc under the green one.
- If desired, draw a blue arc under the blue one first, and then a purple one.
Rainbow with simple and colored pencils
Rainbow (it is recommended to start drawing for children with pencils) will be easy to do with pencils. In this example, the matter is complicated only by the fact that, in addition to colored pencils, you will have to use a simple pencil and a black marker.
However, the number of colors, as in the example above, can be equal to 5. It is enough to use red, orange, yellow, green and blue pencils.
If there are more colors, do not neglect to use them. In this case, the drawing will be brighter and more like a real rainbow., and not on the painted colored striped arc.
In addition to the rainbow, small clouds will be drawn. To draw them, you will need a simple pencil and an eraser, so that you can delete a line that was mistakenly drawn in the wrong place or correct the drawing at any time.
The process of drawing a rainbow goes through the following stages:
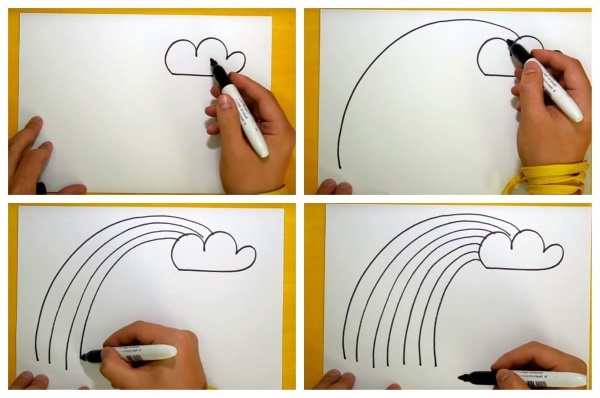
- Draw 2 ovals: 1 should be at the top left, and 1st - at the bottom right. These will be the clouds from which the rainbow should emerge. It is not necessary to try to draw lines here. For now, this is a sketch that can be done with quick movements.
- Turn 2 ovals into fluffy clouds. All you need to do is add wavy lines of different sizes. They can and should extend beyond the ovals.
- When you get 2 fluffy clouds, connect them with arc lines. If you plan to use only 5 colors, you will need to draw 6 arc lines from the 1st cloud to the 2nd. If you have more colored pencils, the number of arc lines also increases. The rule here is simple: there should be 1 more arc line than the number of colored pencils. For example, if you plan to draw a full rainbow with 7 different colors, there should be 8 lines.
- Take a black marker and make the contours more distinct with it. At the same time, the lines of the ovals that were depicted in the 1st stage should be deleted. Only wavy lines will become the borders of the clouds.
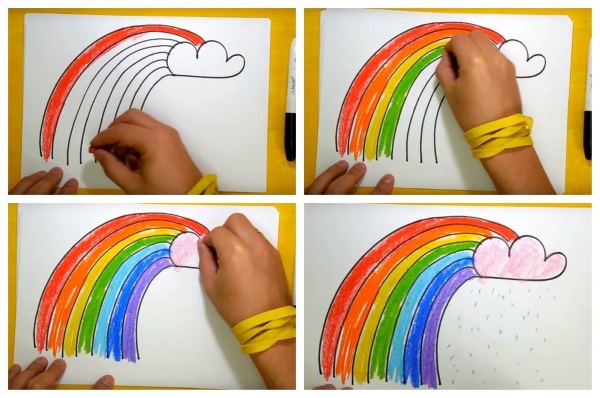
- Color the picture. Use a blue pencil to do this. Use it to color the clouds. Apply the color so that there are white gaps. This will make the clouds look lighter and airier, and therefore more realistic.
- Proceed to coloring the rainbow itself. No gaps should be left here.
- Since the top stripe of the rainbow is always red, start with that color.
- Draw the next stripe as orange, followed by yellow, green and blue.
If more colors are used, it is important not to mix up their placement. The well-known mnemonic rule about the hunter and the pheasant will help here. The two main remaining colors - blue and purple are at the very bottom - under the blue.
If light yellow or dark green is used, they should be arranged so that there is a smooth transition from yellow to green. The same applies to other adjacent colors: red with orange, green with blue.
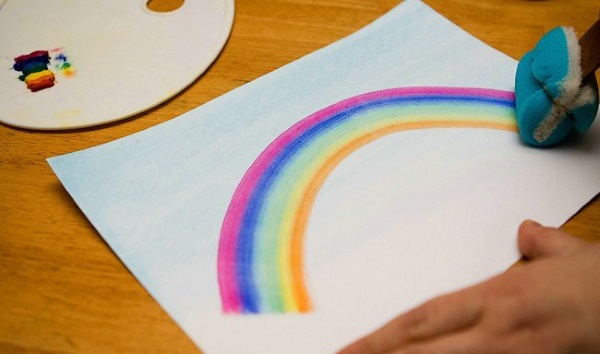
Simple Watercolor Rainbow Drawing
A rainbow (a drawing for children can be done with either pencils or paints) is a little more difficult to depict with watercolors than with pencils.
The difficulty is that in this case you need to select a brush of the right size and dip it in a container with water, and then wait for the picture to dry. In general, the work is not difficult: a child can cope with the task, especially if adults help him.
To work you need to prepare:
- watercolor paints;
- sheet of paper;
- brush;
- a container with water, which can be a small glass.
The process of drawing a rainbow can be conveniently divided into 7 stages, at each of which you need to draw 1 arc:
- Start with the top arc, which is always red.
- After washing the brush, take the orange color and draw another arc under the red one.
- Draw a yellow arc.
- Draw a green arc.
- Draw a blue arc under the green one.
- Draw a blue arc under the blue one.
- Finish the rainbow with a purple stripe at the very bottom.
The lower the arc is, the shorter it is: the red arc should be the longest, because it is higher than the others, and the purple one should be the shortest: it is assigned a place at the bottom.
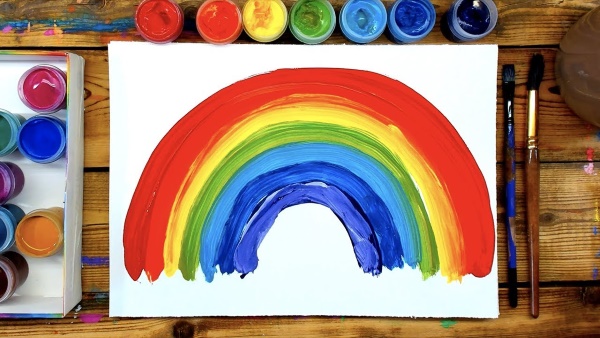
Rainbow in gouache
The master class on drawing a rainbow with gouache is designed for children who are 6 years old. The difficulty is that the drawing is done using the stroke technique.
For work you will need the following materials and tools:
- white paper (A4 size paper is best);
- gouache;
- brush No. 1;
- container with water;
- simple pencil;
- palette for mixing paints.
The stages of drawing are as follows:
- To add tenderness to 4 colors: red, orange, blue, violet. To do this, each of them is mixed with white.
- When the paints are prepared, move on to drawing the arc lines. They should be located at the bottom of the paper sheet. A simple pencil is used to draw them. There should be 8 lines, despite the fact that the total number of colors in the rainbow is 7.
- After completing the rainbow sketch, move on to creating the outline of the next object that will be present in the picture. We are talking about the sun: it is located at the top left. In this version, the sun should be represented not just as a circle, but as a spiral. It will be a circle, but it should be a long line twisted into a spiral.
- Similar to the sun, draw a cloud that is located on the upper right. There should also be a spiral here, only the lines should be wavy. The cloud should be about the same size as the sun.
- Proceed to coloring the main object of the painting - the rainbow. The first color used should be red. But this should not be a solid coloring, but the application of short strokes.
- Similarly, fill the 2nd strip of the rainbow, which is located under the red one. Orange paint is used for this.
- Draw a yellow stripe.
- Apply green strokes. This will be the center of the rainbow.
- Draw a blue arc under the green one.
- Finish drawing the blue and purple stripes of the rainbow.
- Use blue gouache to give the appropriate color to the spiral cloud located at the top right. The paint should also be applied in strokes. In this case, it is not the cloud itself that should be painted, but the spiral line made with a simple pencil. It is most convenient to start from the center of the spiral.
- Continue coloring the cloud. Now apply light blue instead of blue. Step back a little from the blue strokes and apply light blue strokes.
- Add purple, light purple and pink strokes to the cloud.
- Fill the remaining space in the cloud with blue strokes.
- When the cloud is ready, move on to coloring the 3rd object - the sun, which is drawn with a pencil in the upper left part of the paper sheet. Like all other objects, it is colored in a spiral with short strokes. First, red gouache is used, then yellow paint is applied to apply the next strip of strokes.
- Add orange touches to the sun.
- Draw a strip of yellow strokes again.
- Add pink strokes to the object.
- Fill the remaining space in the spiral sun with yellow strokes.
The drawing is almost ready. It remains to add a few more objects to give it life:
- Small raindrops fall from the cloud onto the rainbow. They should be depicted with slanted blue strokes;
- Bright rays emanate from the sun in different directions. They should be represented by a multitude of yellow strokes, arranged in several lines.
An unconventional way to paint with a sponge
Rainbow (a drawing for children with paints can be done in various techniques), depicted with paints pleases its creators. In this case, they can feel like real artists.
However, the problem is that they don't always succeed, especially if they haven't done this kind of creativity before. It will be easier for children if they don't have to dip the brush in water every time.
The method of drawing a rainbow, which will be described below, differs from traditional methods in that the work will be done "dry", without using water and brushes. However, it is important to ensure that the paint is not dry, otherwise the drawing will not work.
For work you will need the following tools and materials:
- gouache 7 basic rainbow colors;
- A4 sheet of paper;
- sponge;
- cotton swabs.
The last 2 materials will be used instead of the usual brushes.
The stages of drawing are as follows:
- Insert 1 cotton swab into each of the 7 jars of gouache.
- Apply 7 colors to the sponge using each stick one by one.
- Turn the sponge over and draw it across the paper in an arc-shaped motion.
Also, if the child is still too young, you can suggest that he draw a rainbow with finger paints.
Arcs can be depicted:
- by applying fingerprints;
- applying painted palms. Then it is better to use Whatman paper;
- using a plastic fork or spoon.
This is where the drawing ends. So with one simple movement the child should get a great rainbow. The picture can be supplemented with other objects, which depends on the artist's imagination.
It is not often that you can see a rainbow in the sky. To do this, you need to wait until the rain passes and then the sun comes out.
If you want to look at a rainbow in hot weather or during a harsh winter, you can draw it on a sheet of paper using 5 or more colors. Such a picture will help brighten up gray everyday life, and children will be happy with such a bright picture, especially if they create it themselves.
Video on the topic: how to draw a rainbow
How to paint a rainbow with paints: