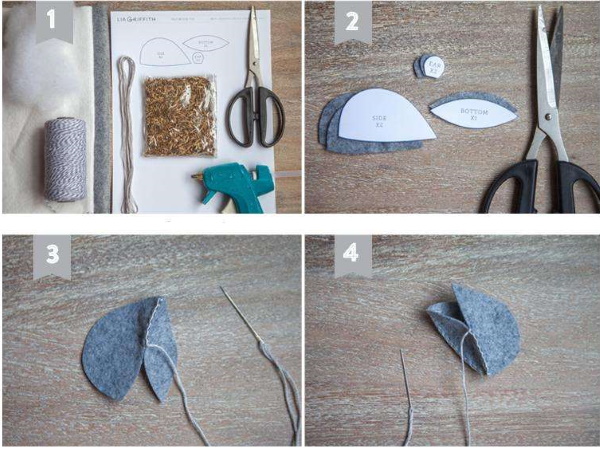
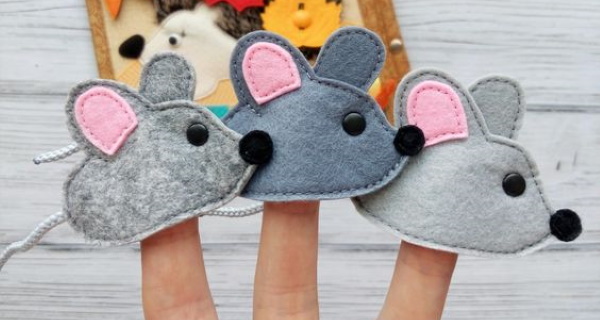
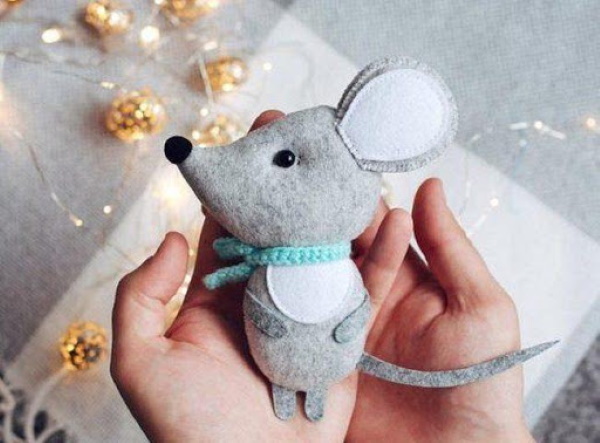
Felt mouse is a very nice and stylish toy, which can be so different depending on the idea and pattern. It can be an interior decoration, a Christmas tree pendant, a keychain, a souvenir or a children's toy.
Materials and tools for working on the craft
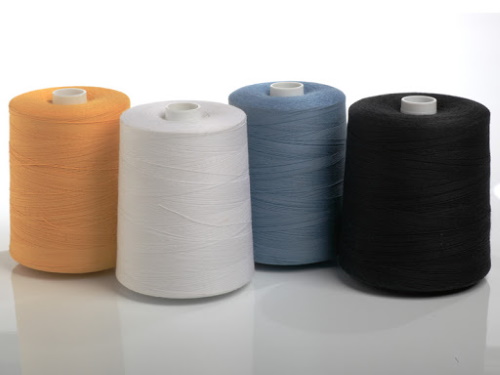
To create a felt mouse, soft felt of medium thickness is usually used. This material is quite flexible, it is easy to sew, you can not process the edges. If desired, if the parts are small or the idea requires it, you can use glue to connect the elements. In addition to the main material from which the toy is cut and sewn, filler is also used for volumetric mice.
Below in the table are the characteristics of felt and filler, and tips for use:
| Felt | Filler | |
| Varieties, composition | According to its composition, it can be natural, synthetic or mixed:
It differs in the thickness and rigidity of the sheet. The thickest and rigid sheets are not used for toys. For voluminous and large toys with many parts, fleece is sometimes used. | Only synthetic fillers are used for toys:
|
| Peculiarities | For flat and small toys, you can choose hard and fairly thick felt. Large toys are best made from soft felt of medium thickness or fleece. Natural felt is more expensive and is not always needed, as it can cause allergies. | Holofiber or synthetic padding in pieces gives the toy more volume. Synthetic padding in a sheet or cloth is easier to push into the parts. |
| Tips for use | For children's toys, it is better to choose synthetic felt. It is easier to work with and does not cause allergies. | It is better to stuff toys with a stick. For thin parts, a pen rod will do, push the stuffing with its back side. |
When creating some toys, reinforcement is sometimes required to create the toy's frame. You can use copper or aluminum wire. Florist's wire is suitable for thin parts and small mice. Mouline threads are good for joining parts, especially if the seam is laid on the outside and serves a decorative function. Regular reinforced threads are also suitable.
There are special sticks for stuffing the parts with filler, but you can also use what you usually have at hand. For example, sushi sticks, pencils or pen rods.
You can transfer the pattern to felt with a piece of soap or a pen (from the back side of the piece). The eyes and nose for the mice can be cut out of the same material or special blanks or beads can be sewn or glued on.
The felt mouse, the patterns for which are presented further in the article, can be with or without clothes. It is important to choose felt and other fabric of such shades for the mouse itself and its clothes so that they harmoniously combine with each other.
For a mouse in pastel shades, clothes should be made in the same range. It is advisable not to combine more than 3 main colors in 1 toy. You can use lace or braid of a suitable texture and color.
How to make a mouse pattern?
You can draw a pattern for any toy yourself or take a ready-made template. First, it is important to think about what the toy will be like, whether it will be one-piece or will it have independent paws, a head, ears. It is better to first draw the general appearance of the toy, then think through each detail separately.
You need to draw a pattern separately for all the overhead parts:
- peephole;
- cheeks;
- hairstyles.

The easiest way to cut out toys is to sew them in one piece. To do this, draw 1 pattern. If you use a ready-made template, you need to transfer it to paper or print it in real size. For multiple use of a pattern or template, it is better to draw it on thick paper or cardboard.
How to use the template?
The pattern is transferred to felt folded in 2 layers if you need to sew a simple mouse from one piece. You can draw an outline of the template on 1 sheet of felt with chalk or a piece of soap, then apply the drawn side to the second sheet and tap it a little.
This will transfer the drawing to the second sheet. Then you can cut along the outline. If you need to sew the parts over the edge from the outside, you don't need to add any space for the seam. If the mouse is sewn from the inside out and then turned inside out, you need to add 0.5 cm for the seam along the entire perimeter of the part.
All the details are cut separately on felt of the chosen shade. You can outline the details of the pattern with a pen from the back side. If you are working on a volumetric mouse, then when transferring the pattern to felt, it is important to mark the places that should be left unsewn to fill the toy with filler. After completing the work, they are sewn up with a blind stitch.
Main seams
To make seams, when working on a felt toy, you can use a machine stitch or a regular hand sewing needle and some types of stitches. Any stitch or type of stitch that is used in sewing or embroidery can be used when making a textile toy.
Flat and simple felt mouse figures are usually sewn with external decorative stitches. You can choose threads in the same tone as the felt or contrasting ones to enhance the decorative effect.
Commonly used stitches:
- back with a needle - from the outside you can see even, straight stitches in a row, similar to a machine stitch;
- over the edge - a seam slightly diagonally across the edge of the fabric;
- overlock or buttonhole – a seam across the edge that covers the free edge of the product, very durable and aesthetically pleasing.
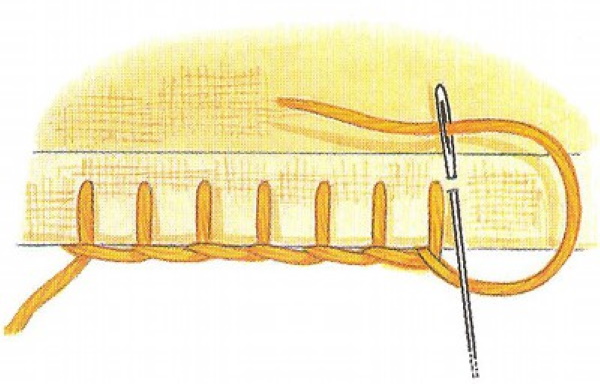
If the toy is voluminous and needs to be filled, then the holes for stuffing are sewn up with a blind stitch. If the toy parts need to be sewn from the inside out and turned out, then you can use a machine stitch. It is important that when working with felt, you do not need to process the edges with a zigzag.
Master class for beginners: how to sew a simple felt mouse The felt mouse, the patterns for which are presented further in the article, is very easy to make, but looks cute and stylish. This is largely due to the fact that it is sewn from felt. This is a material that helps to create things with a special charm.
To create this mouse, you need to transfer the pattern onto paper or draw your own blank of the required size. Here is a very simple template, the body with the head, ears and tail are cut out separately. If desired, you can separately cut out any decor for the mouse's body, for example, a heart or a star and details of the muzzle, for example, the nose.
It is important to cut out and trim all the pieces from the wind in the desired color before you begin sewing.
Body with head part
First, we work on the body and head parts. They are cut according to one template and resemble an oval, slightly widened at the bottom. You need to cut out 2 identical parts. After the work on all parts of the mouse is finished, the parts of the case will need to be sewn together and the toy will need to be filled with padding polyester.
Ears
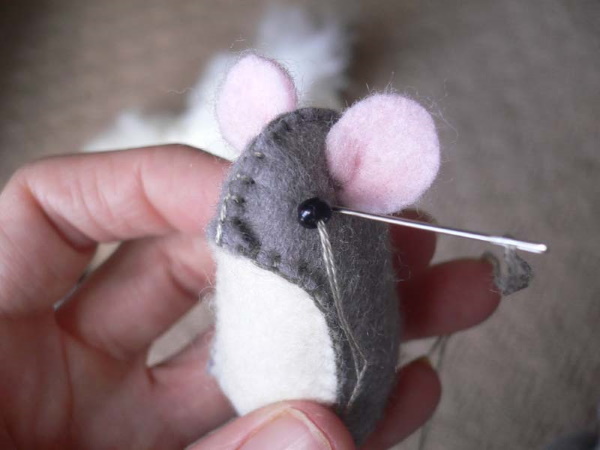
Each ear consists of 2 parts: the main part, in the same color as the mouse, and the middle part in pink. First, you need to apply and sew the middle part of the ears to the main part. Then you should sew the edge of the entire ear with a seam through the edge. When the ears are designed, you should attach them to the front part of the body in the right place and fix them with a needle or a basting stitch.
Tail
The tail can be cut out of felt of the same color as the whole mouse or you can make it contrasting, for example pink. For the tail, it is enough to cut out 1 piece. Then you need to attach the tail piece to its place on the front part of the body and fix it, like the ears.
This is necessary so that when sewing and filling the toy, each detail is in its place and does not shift.
Eyes and nose
The muzzle is designed before all the parts are connected. You can embroider eyes and whiskers with simple stitches, glue or sew on a nose cut out of black felt. If desired, the nose can be embroidered with black threads.
Another option for decorating the face could be the following:
- make eyes and nose from black beads;
- embroider the antennae with simple stitches or simply thread the threads and leave the free edges loose.
Then, when all the details of the mouse are designed, you need to sew 2 body parts along the edge with a seam through the edge. It is better to start the seam from the bottom and move up along the entire perimeter. When there is 2 cm of unsewn edge left, fill the toy with a little padding polyester or holofiber using a stick and finish the seam.
Ideas, patterns, schemes of cute felt mice. Flat and volumetric figures with your own hands
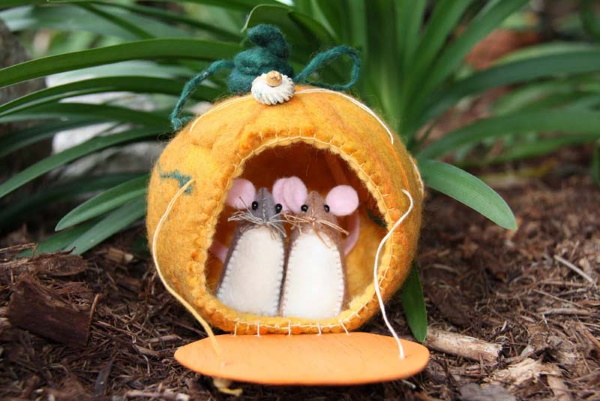
There are many ideas and models of felt mice. Each of them has its own features and techniques that will allow you to create toys more efficiently and accurately. Despite the fact that working with felt is very simple and comfortable, it is important to take these features into account so that the toy turns out stylish and high-quality. Felt mice can be used to decorate the house, use them as Christmas tree decorations or holiday decor, give them to children to play with, create mobiles for children's beds, pendants, keychains.
Flat mice in profile
A felt mouse, the patterns for which are easy to construct, can be flat and one-piece, turned in profile. Such toys are good for creating mobiles for children's beds or Christmas tree toys, any pendants. Such a mouse can be cut out in one piece or make ears, front paws and a tail separately. An interesting detail of the toy can be a piece of cheese in its paws.
Do it like this:
- Cut out the body and head pieces from grey felt.
- Cut out the paws from grey felt.
- Make 2 ear pieces in grey and 2 in pink.
- Cut out and trim the tail from pink felt.
- Cut out the cheese pieces from yellow felt, make holes with nail scissors or a hole punch. A hole punch can be used if the felt is thin and hard.
This mouse will need some tape to create a loop for hanging it. You will need to cut off 15-20 cm of tape in advance and leave it ready.
Once all the pieces have been cut out, you can begin processing and sewing:
- First, you need to embroider the muzzle. It can be made entirely from threads or you can add felt details, such as an oval nose and eyes.
- Then you need to sew together 2 ear pieces, placing the pink part on top of the grey one.
- Sew the paw pieces together, lightly padding them with synthetic padding.
- Sew the cheese pieces together.
- Now you need to attach the details of the ears, paws, tail and loop to their places on one side of the body and secure. Sew the body parts together, lay a thin layer of padding polyester.
- Use stitches to attach the cheese to the paws.
The mouse is ready. Here you can use your imagination and change the pattern, making pants or a dress for the mouse and cutting out additional details from colored felt.
Standing mink with white belly
To create a voluminous toy with a more complex cut, you will need a pattern of many parts and a little more time to work.
To sew a standing mouse with a white belly, you need to prepare:
- felt in grey, white, pink and yellow shades;
- 3 black beads;
- threads in the same color as the felt and black;
- filler;
- braid.
Do it like this:
- Cut out the mouse's body from 4 pieces. 2 halves of gray, a gray base and a white belly.
- Cut out the grey upper paws and pink palm details, pink lower paws.
- Cut out the ears from 2 pieces of pink and grey.
- First you need to sew all the small details: ears, upper and lower paws, cheese, using threads in the same color as the felt.
- Sew 2 grey pieces, if necessary, at this stage sew in a ribbon for hanging and a tail made of rope or ribbon. Sew in a white belly in the front, fill with padding polyester or holofiber, sew on the base. Use threads to match the felt and a seam through the edge.
- Sew on the ears, upper and lower paws.
- Embroider the muzzle details with threads, beads or sew on felt details, sew the whiskers with black thread, leave free ends of the threads.
- Sew a piece of cheese into the paws.
The mouse is ready. This toy can stand on a shelf by itself, if you sew in a ribbon, you can hang it.
Option with thin legs
Felt mice with thin paws look very unusual and stylish.
The toy itself can be sewn using any pattern you like, but the paws can be made from other materials:
- From thin wire. To do this, you need to cut a floral or thin copper wire to the chosen size, so that it is long enough for 2 paws. Thread it through the body of the finished toy. Wrap each paw with threads or thin rope, fixing the end at the base with glue. Fix the edge of the paws with glue and bend.
- Knitted from cotton threads. To do this, you need to crochet a chain of air loops. You can go through another row in the opposite direction with half-columns, fasten the thread to the mouse's body at the base of the paw.
- The simplest option is a ropeTo do this, you need to cut a rope long enough for 2 paws, thread it through the body at the base of the paws, and tie a knot at the end of each paw.
In these ways you can make only the upper legs or the lower ones too.
Mouse with big ears
Mice with big ears look funny and touching. They can be sewn using the simplest pattern, which consists of a head, body, paws and ears. Two parts are cut for each detail. The only special feature is that the ears are cut larger in size than the head and body.
Rodent glove puppet
To create a mouse-shaped glove doll, you need to use felt for the details and fleece for the base of the glove.
Do it like this:
- Cut out 2 glove pieces from fleece that resemble a mitten with 2 thumbs on the sides.
- Cut out small parts of the mouse: socks, eyes, ears, paws, tail and belly from felt.
- Sew the muzzle, belly and paws onto the front of the glove. You can use a machine stitch or hand stitch with a needle back or a seam through the edge.
- Sew the ears.
- Place the ears between the 2 glove pieces and stitch them together.
- Sew a tail on the back.
The mouse-shaped glove is ready. It can be made in any size for an adult or child's palm.
Sonya
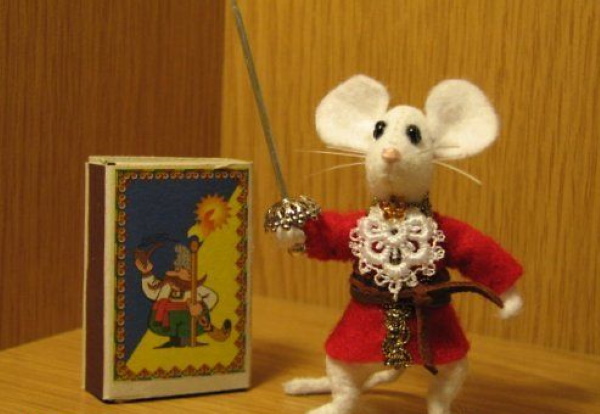
Felt can be used to sew any cartoon characters or fictional heroes. Sonya the Mouse can be dressed in a beautiful dress made of lace or cotton, which is sewn on top of the figurine. Large and voluminous toys can be sewn from fleece, which resembles felt in composition and quality, but is softer and more pliable.
To create such a toy you need:
- Cut out all the body and costume details.
- Sew the body parts. You can sew them on a machine, leaving space for stuffing the toy and then turn the parts inside out.
- When all the parts are sewn and filled, sew the clothes and attach them to the body.
- Afterwards you need to sew on the head and paws.
You can make any costume for the mouse. For clothing, you can use fleece, cotton, lace or other fabrics.
Mice for different holidays
Felt can be used to make themed toys for any holiday. For example, New Year's mice-pendants for the Christmas tree or mice in a sock for a gift. For this, you can choose any simple mouse pattern.
There is no need to complicate it with the number of details. It is important to use the appropriate colors of felt. For Halloween, you can sew a bat out of felt. For it, you need to use black or gray felt and cut the wings according to a special pattern. Do not forget to sew in the ribbon for hanging while sewing the body parts.
For the birth of the baby, you can decorate the bed with pendants with mice in pink or blue suits. Any mouse patterns given in the article can be used exactly as they are or modified to create unique designer toys from felt to your taste.
Video about making a mouse from felt
How to make a mouse from felt: