Simple crafts made from cotton swabs and discs are not only interesting entertainment for children, but also an effective and quick way to decorate a gift, make a toy for a baby or create an original postcard for any holiday.
Tools and improvised means
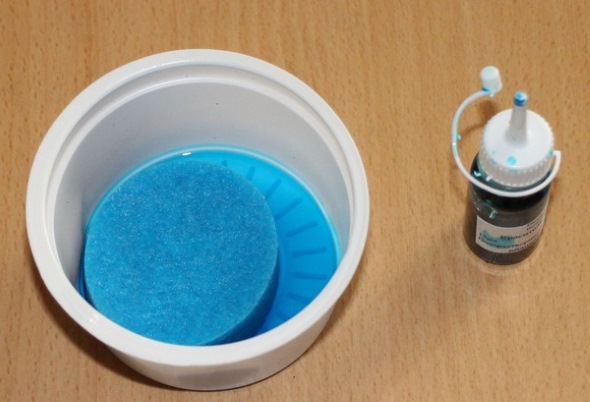
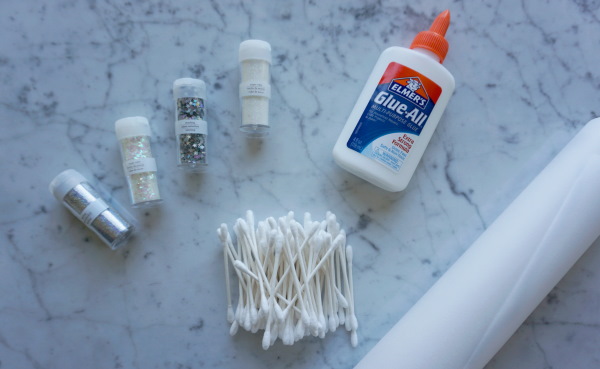
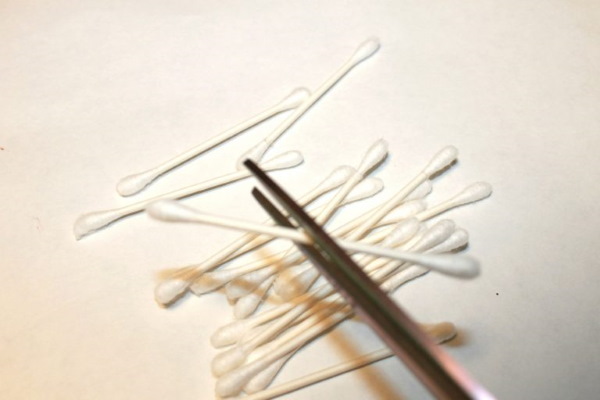
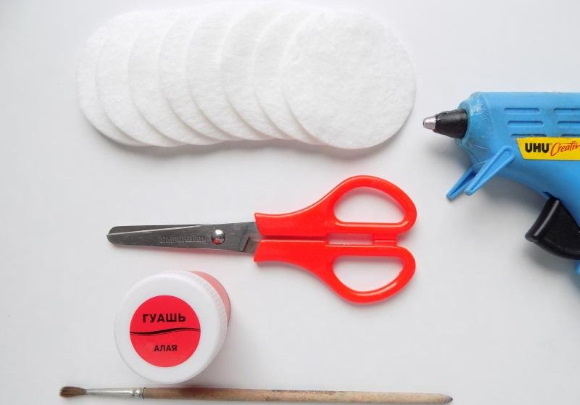
To start creating with cotton swabs and cotton pads, you need a minimal set of tools and materials. For crafts, it is better to choose inexpensive cotton swabs, since the plastic of such brands is thinner and easier to cut.
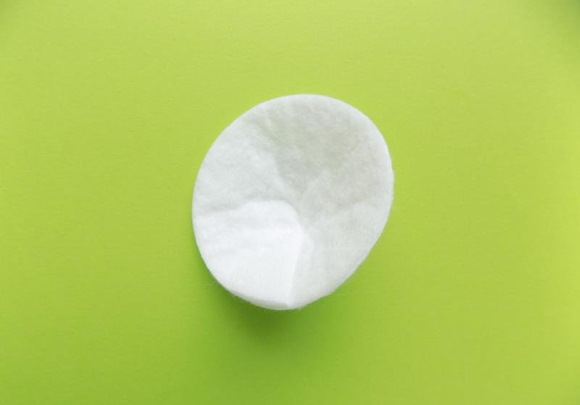
It is better to take cotton pads with a pattern (a print resembling stitching). Such disks are easier to cut, they delaminate less, they are easier to paint, and they hold their shape better. To work with sticks, you will also need a glue stick or thick PVA glue, and to work with cotton pads, you can also take a glue gun.
General recommendations for work
Crafts made from cotton swabs will bring pleasure if you know how to properly fix the swabs.
This process requires adherence to several rules:
- If you need to glue the sticks one by one, pointwise, you can spread the cotton side. In other cases, if you need to fix several sticks at once, it is more convenient to apply glue to the base, since it absorbs it less.
- Cotton swabs will not stick to the base immediately; they need to be pressed very well, held for 10-15 seconds, and then placed under the press.
- White glue stick, if you make a thick coating, glues cotton swabs to cardboard better than PVA. With PVA glue, the product has to be put under a press for a very long time or choose a very thick glue. For very young children, glue can be replaced with plasticine of the corresponding shade in any craft.
As for cotton pads, the technology of flowers and other crafts made from this material resembles similar works made from felt and fleece. However, there is a difference associated with the use of crafts. To make flowers from felt, only hot glue or threads are used, they are quite durable, so they are often used to decorate clothes and various accessories (bags, hairpins).
Flowers made from cotton pads are not as durable, and they can quickly become unusable if touched frequently. Plus, cotton flowers completely lose their shape when wet. They can also get dirty, since they have to be painted with gouache or watercolors.
Thus, spectacular flowers made of cotton pads and sticks can only be used to decorate and decorate a limited number of items, and their service life is short. With the help of such flowers, you can create a postcard, a picture, a greeting poster, decorate a gift or a masquerade costume with them. To fix the petals, use hot glue (not suitable for children) or very thick PVA.
There are two ways to dye cotton pads and sticks:
- Dip them in a solution with dissolved dye and squeeze them out carefully.
- Apply paint with a wide brush by dabbing, there should be enough water on the brush.
In both cases, you can use watercolors, gouache or food coloring.
Crafts from cotton swabs on a plane - 10 interesting ideas
Using cotton swabs for appliqués and crafts on a flat surface allows you to add volume and relief to the product - for example, to reproduce the texture of wool and snow.
The craft is done very quickly, and the result is very original. In this technique, you can make a picture for the wall, a toy for a puppet theater, a postcard.
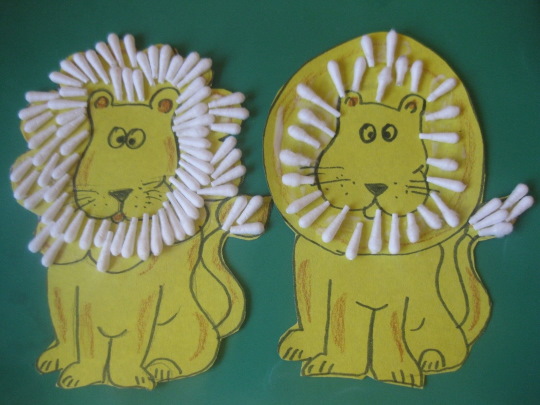
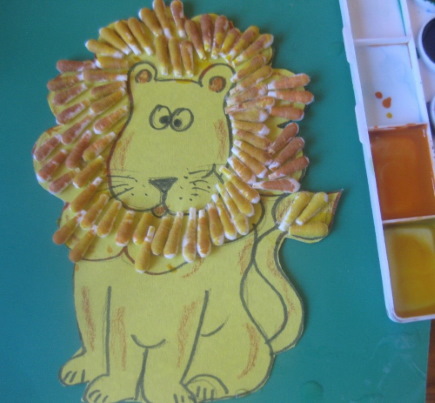
Master class - craft using cotton swabs "Lion"
The lesson can begin with an excerpt from S.Ya. Marshak’s poem “Lion Cubs”:
Don't you know dad?
A big, red lion?
He has heavy paws.
And a shaggy head.
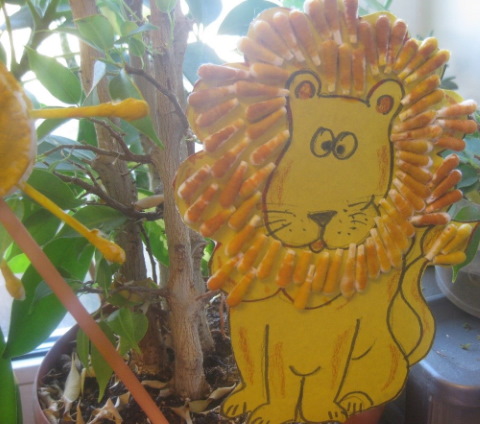
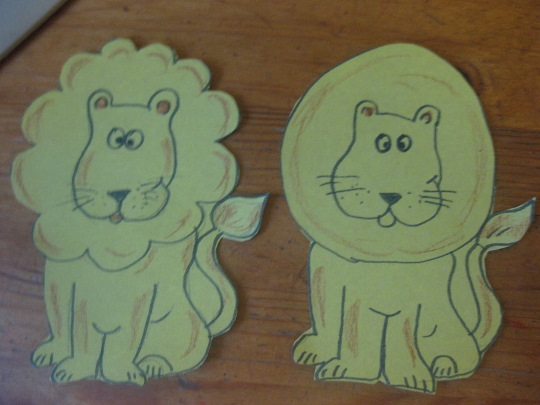
Next, you can show a lion cut out of cardboard. You should discuss with the children why it has a "shaggy head", what the lion has on its head (mane). Then you can think about what materials to use to make the mane "shaggy" - cotton wool, cotton swabs, cotton pads, threads, wool, paper.
Tools and materials:
- Cotton swabs – more than 15 pieces.
- Scissors.
- Glue stick, PVA glue or yellow plasticine.
- Paints (watercolors or gouache), brush.
- Scissors.
Execution process:
- First, you need to draw and cut out an image of a lion with a mane on yellow cardboard. Children aged 3–5 receive a ready-made picture.
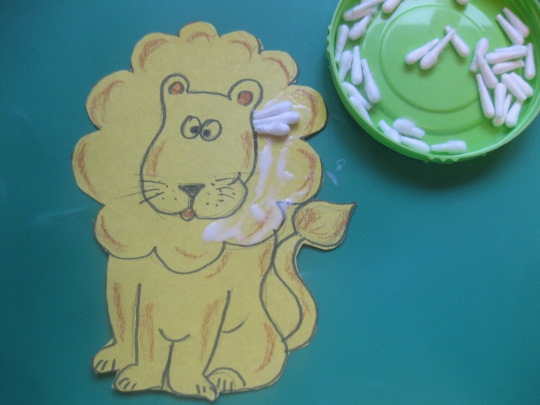
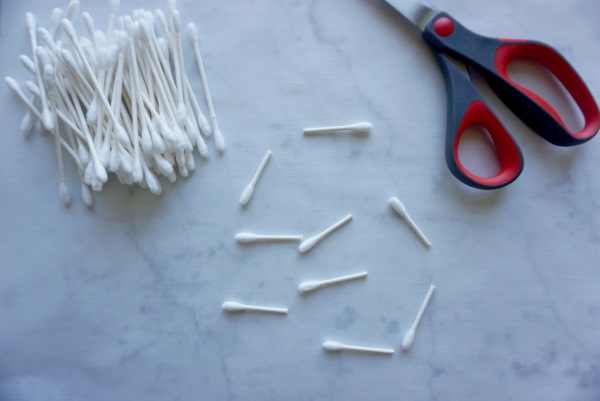
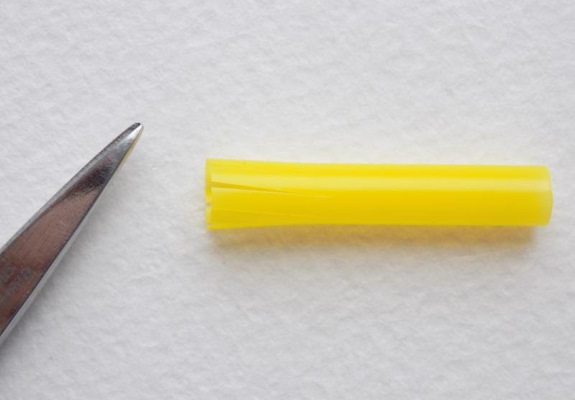
- Next, prepare the cotton swabs; for the craft you will need at least 30 cotton swabs. They need to be cut off.
- The next step is to spread the lion's mane in parts and glue the sticks in a circle. You don't need to spread it all at once, as the glue dries. Press each stick with your finger for 5 seconds. Children aged 3-5 can glue the cotton swabs at a distance so that the work is not too long and tiring. You can also attach cotton swabs to the tail tassel.
- When all areas are filled, the product must be placed under a press for 10-15 minutes.
- Next, the sticks are painted, alternating yellow, orange and brown colors. This creates a motley mane. It is necessary to repeat with the children that the brush should simply be pressed against the cotton swabs.
Very often this activity motivates to make a lion in other techniques, for example, with a mane made of cotton wool or cotton pads. Based on this master class, you can create other crafts (animals, plants).
Poodle
Work process:
- First, cut out an image of a large poodle.
- Cut off the cotton tips from 10-12 cotton swabs.
- They glue cotton tails to the crest and withers area, and make balls on the tail and legs.
- If the poodle is white, it is not painted; if it is black or apricot, the cotton swabs are tinted with the appropriate color.
Horse
Progress of work:
- They select an image of a horse and cut it out.
- Cut off the tops from 12-15 cotton swabs.
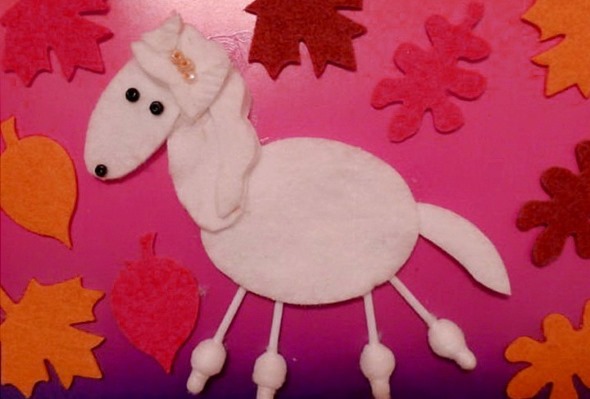
- Apply glue to the mane and tail, glue the sticks on and place the horse under the press.
- The sticks are tinted with gouache or watercolors.
Chick
Progress of work:
- At stage 1, cut out an oval template, and also prepare a red beak and white circles for the eyes.
- Next, cut the cotton wool from 10-20 cotton swabs, depending on the size of the chicken.
- Apply a thick layer of glue to the oval base and fix the sticks in a circle, pressing each for 5 seconds. Attach 3 sticks vertically on top for the crest, 3 sticks on each side for the wings, and 6 sticks for the paws below.
- At the next stage, it is necessary to place the craft under the press.
- After that, paint the sticks yellow and the paws red. You can glue a shell made of cotton pads nearby.
- At the final stage, glue the eyes and beak.
Panda bear
Progress of work:
- Cut out the bear's body from cardboard or draw it on a piece of paper with a pencil.

- Cut off the ends of 20-25 cotton swabs.
- Apply glue gradually to the base and cover the entire body of the bear or just the belly with cotton wool rollers.
- Cardboard or plastic eyes and a nose are glued on top.
- The paint is used to create characteristic black spots.
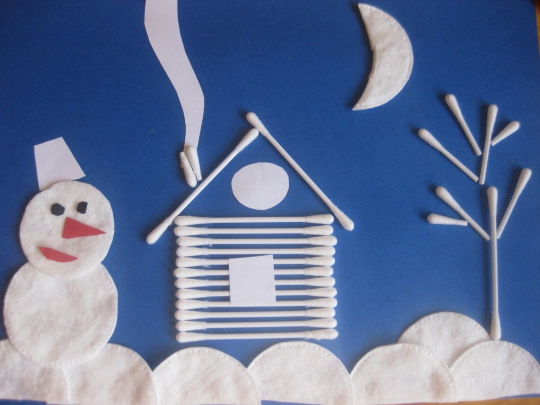
Master class - applique using cotton swabs "Winter landscape"
Crafts from cotton swabs and disks are an ideal option for creating an image of winter with children. At the beginning of the lesson, you can read a beautiful poem about winter. Then ask the child what looks like snow (expected answers are cotton wool, white paper, flour, sugar). The adult says that the goal of the lesson is to turn a sheet of cardboard into a winter picture.
Tools and materials:
- 10-12 cotton pads.
- 20-22 cotton swabs.
- Glue stick, PVA glue or white plasticine.
- White paper and pastel paper (blue, pink, beige).
- Light blue or blue cardboard.
- Small pieces of colored paper (black, red).
- Scissors.
- Simple pencil.
- Press weight.
The process of performing the work:
- First of all, on the base sheet you need to outline the composition with light strokes - where the houses will be located, how many of them there will be, what size they will be, where the snowman will be, where the trees will be.
- Next, you need to cut the cotton pads in half and lay out the snowdrifts on the sheet in a wave shape, then glue the snowdrifts and put the sheet under a press for 5 minutes.
- At this point, you should prepare the sticks for the object that will be in the middle, for example, a hut or houses. The hut can be laid out entirely from sticks in the form of a log cabin with a window made of white paper on top, or you can make a house out of colored paper, and make the roof with cotton swabs, as if there is snow on it.
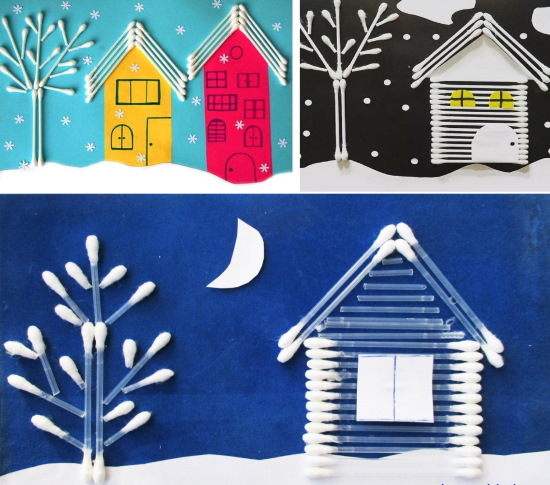
- Then you need to glue the sticks with thick PVA glue or glue stick. For kids, you can use white plasticine instead of glue.
- Next, the Snowman, trees, fence and other elements are laid out on the base one by one and glued using the same pattern.
- You can paint snow in the sky with white gouache, or glue tiny pieces of cotton wool in some places. You can also make clouds and a moon from cotton pads.
By analogy with this master class, using the same materials and techniques, you can create other interesting appliques:
- Application "Funny skeleton" or "Dinosaur skeletons". Cotton swabs are ideal for these crafts because they follow the shape of the bones.
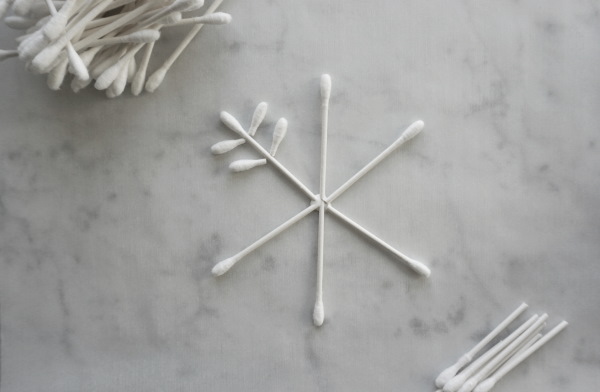
- Application "Snowflake". Cotton swabs allow you to create snowflakes of a wide variety of patterns and sizes on a sheet of paper.
Volumetric crafts from cotton swabs
Crafts made from cotton swabs can be not only flat, but also three-dimensional. Such products can be used as full-fledged toys or decorative interior details.
These will be either bas-reliefs on a flat base or completely three-dimensional crafts.
In the second case, cotton swabs are glued or stuck into various figures made from plasticine, foam, papier-mâché, plastic containers (for example, from Kinder eggs) and balls.
Master class - craft from cotton swabs and disks "Ladybug"
You can start the lesson with the poem "Ladybug, black head" and show how a multi-colored bug on a stick flies from place to place. Then you should ask if the children can guess what the ladybug is made of.
Tools and materials:
- 1 - 2 cotton pads.
- 6 cotton swabs.
- Paints (watercolors or gouache).
- 2 brushes (thick and thin).
- PVA glue or plasticine.
- Black cardboard.
- Scissors.
- Plastic eyes or white paper and a black marker.
- Cocktail straw.
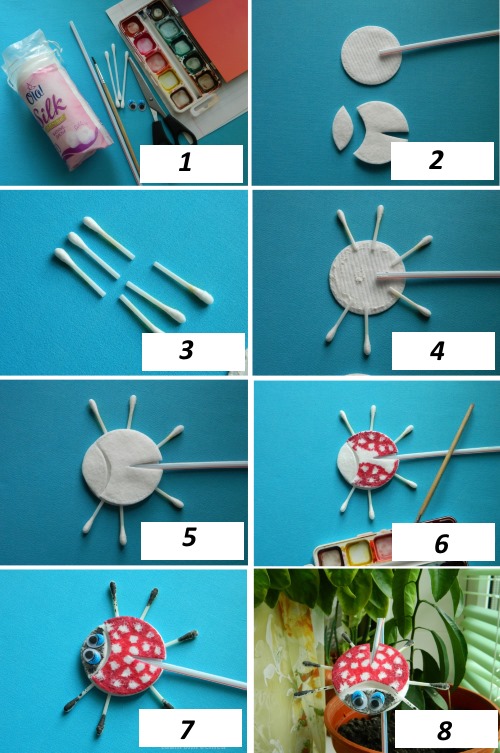
The process of performing the work:
- Children cut out a circle from black cardboard, having drawn it in advance using a template. This is the ladybug's abdomen. For children aged 2–3, an adult gives the finished parts.
- Next, you need to prepare the legs from cotton swabs - the swabs can be cut in half, then the legs will be short. Or cut off the cotton part from one side of each swab, and take the long segment for the paws.
- At the next stage, the body and head are prepared - a slit is cut for the wings and the head is cut out from the same disk.
- After this, spread glue quite thickly in the center of the cardboard part of the belly; for children, the glue can be replaced with a plasticine sausage; the craft in this version will be less durable, but children 2-3 years old will be able to handle this stage themselves.
- The paws are placed on cardboard or stuck into plasticine. You can also stick a cocktail straw into the plasticine so that you can travel with the ladybug or insert it into a flower pot.
- Press the paws from above with a cotton pad on which the wings are cut and add the head at a small distance. For some time the product is placed under the press.
- Next, the children paint the wings with red paint, and the cotton swabs of the paws and head with black paint. The adult separately discusses that the paint is not smeared with a brush, but rather dabbed on a cotton pad.
- After this, the craft needs to be allowed to dry a little, glue the plastic eyes with plasticine or hot glue (with the help of adults) and you can play with it.
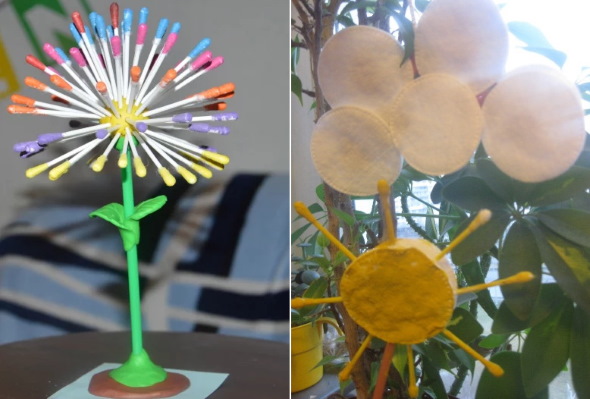
You can make other crafts using the same principle:
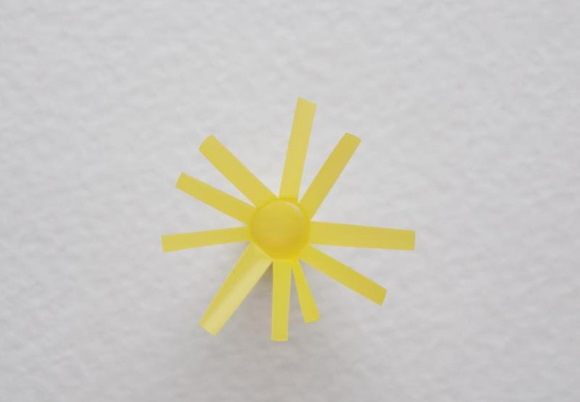
- “Seven-flowered flower” on a tube. You can paint the petal sticks in different colors using a brush or by dipping them in paint and drying them in advance.
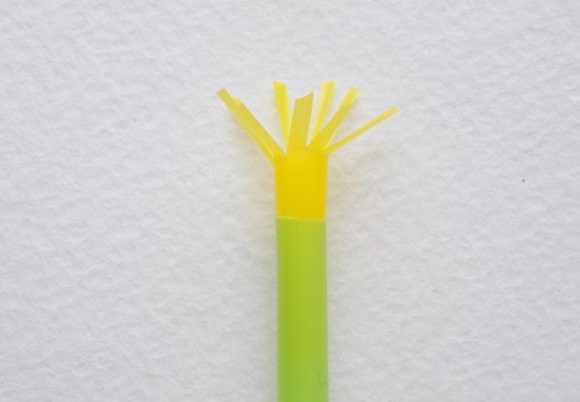
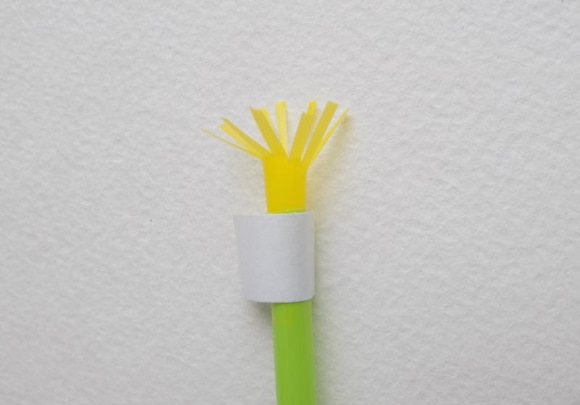
- "Sun" on a stick or string. This sun made from a cotton pad and cotton swabs can also be part of a more complex craft – the “Sun and Cloud” pendant.
The sun and a fluffy cloud made from cut cotton buds are suspended on a stick; threads are pulled from the cloud, to which pieces of cotton pads are tied. This is snow. You can also make a cloud to match the sun from 5-6 cotton pads, fastened with white glue.
Master class - craft from cotton swabs "Sheep"
The lesson can begin with the poem “Tell us, our little lamb, how much wool will you give us,” with a riddle about a sheep, or with the fairy tale “The Fox and the Sheep.”
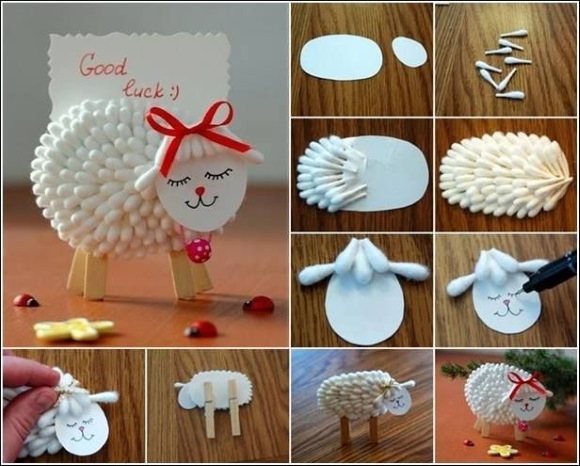
Materials and tools:
- Cotton swabs – quantity depends on size, but not less than 15 pieces.
- Glue stick, PVA glue or white plasticine.
- White cardboard.
- Ribbon.
- Black thin marker.
- 2 wooden or plastic decorative clothespins.
- Scissors.
Manufacturing process:
- First, a template of the lamb's body is cut out.
- Prepare cotton swabs by cutting off the tips.
- Draw the sheep's face with a marker.
- Glue cotton tips from sticks onto the body and crest in a circle or in a free order, the outermost row should extend beyond the edge of the product.
- You can also glue sticks to the back side, then the sheep will turn out to be quite voluminous.
- You can tie a ribbon around the sheep's neck - for example, in the shape of a heart - then the sheep can decorate a gift for a loved one.
- At the final stage, you need to attach clothespin legs at the bottom, then the sheep will stand. You can also attach a rope on top to use the sheep as a hanger for a mobile or a Christmas tree decoration.
A sheep made of cotton swabs can be made using a completely different principle, using a white plasticine ball or a Kinder container as a base. Then holes are made in the plastic body with a heated awl or needle, tinted white, and then cotton swabs are inserted.
By analogy with the “Sheep”, you can make other crafts – for example, a bunny, a kitten or a puppy.
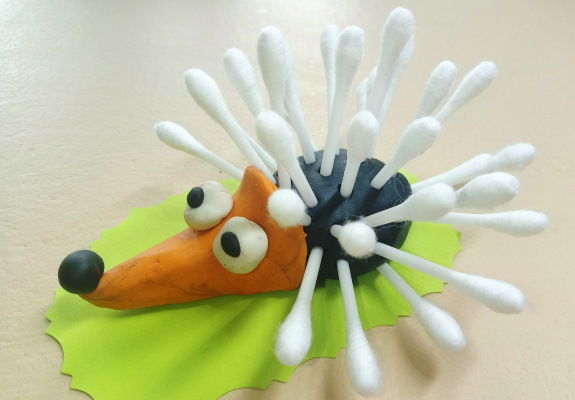
Master class - craft from cotton swabs for the little ones "Hedgehog"
Crafts from cotton swabs are available not only to older children and adults. This very simple product is suitable for children 1.5 - 2 years old. You can start the lesson with a riddle about a hedgehog or with looking at pictures and determining where the hedgehog's nose, paws, and needles are.
You can also tell a story about a hedgehog who didn’t like being prickly and grey, because he lived in a magical forest where everyone was friends and there was no one to protect himself from or hide from, and then he went to a sorceress who gave him soft needles and painted them in all the colours of the rainbow.
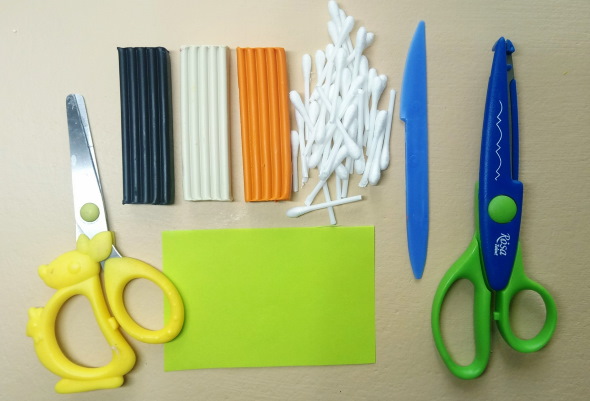
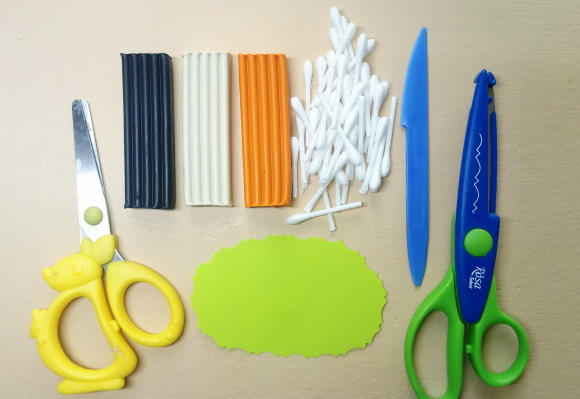

Tools and materials:
- Modeling dough or plasticine.
- Cotton swabs – 10-12 pieces.
- Paints (watercolors or gouache).
- Stand for modeling.
- Scissors.
Manufacturing process:
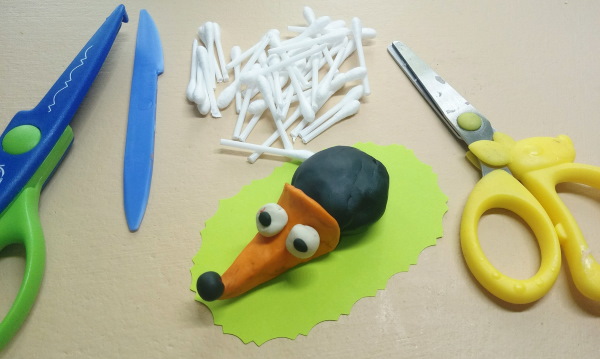
- First, children mold the body of the hedgehog - they pull the nose out of the ball.
- Then they stick in needles from cotton swabs in a free order. The sticks are prepared in advance by an adult, cutting off one end.
- The eyes and nose are also made from the tips of the sticks.
- The needles are painted brown or all the colors of the rainbow. The eyes and nose are black.
You can create other crafts using the same principle:
- "Volumetric snowflakes". You can take a white plasticine ball or cover it with foil. Stick snowflake rays into the ball. You can make joints with small plasticine balls.

- "Fantastic Flowers". Make holes in a thin plastic ball with a heated awl or needle, insert cotton pads into them and tint with paint. The stems can be made from wire and bent in a fancy way.
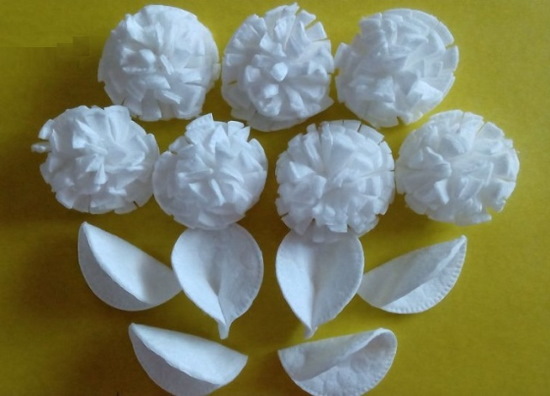
Flowers from cotton pads and sticks – 5 beautiful options
Crafts from cotton swabs are not the only original way to use household materials in creativity. With the help of flowers from cotton pads, you can quickly and originally decorate gift packaging, a postcard or a greeting poster.
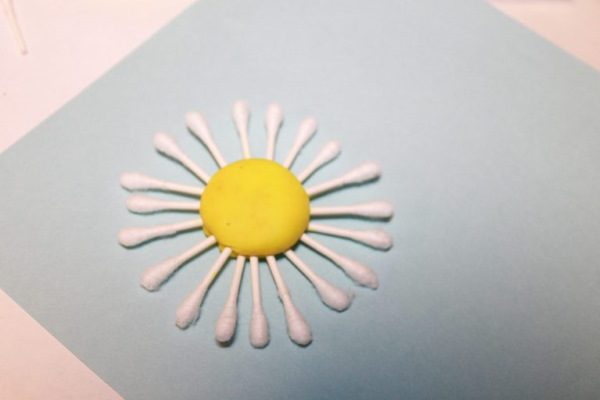
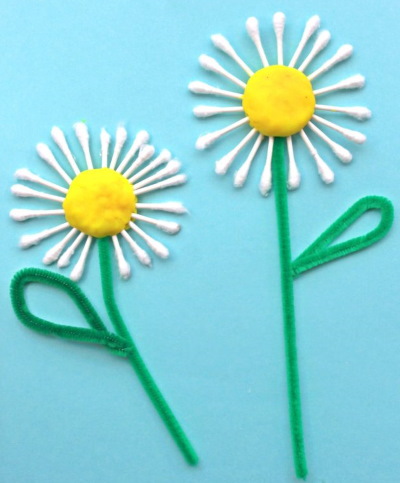
Master class – flower from cotton pad and sticks “Chamomile”
This applique is ideal for children aged 2-3. It takes a few minutes to complete and looks very impressive.
Materials and tools:
- Cotton pads – 1-2 pieces.
- Cotton swabs – 8-10 pieces.
- Glue stick or PVA.
- Scissors.
- Cardboard.
- Green paper.
- Paints.
Execution process:
- A cotton pad is glued in the middle.
- I make a glue ring around it and put in the cotton wool from the sticks.
- The disk is painted yellow.
- The stem is made from a ready-made blank or laid out from sticks and painted green.
Master class – flowers from cotton pads and sticks “Calla”
At the beginning of the lesson, you need to look at photos of live flowers and analyze the features of the inflorescence.
Tools and materials:
- Cotton pads – 3 pieces.
- Cotton swabs – 3 pieces.
- Paints (watercolor or gouache).
- Scissors.
- Colored paper of a green shade.
- Cardboard for the base (preferably double-sided).
- Ribbon in tone with cardboard.
- PVA glue or hot glue and a glue gun.
- Green cocktail straws - 3 pieces.
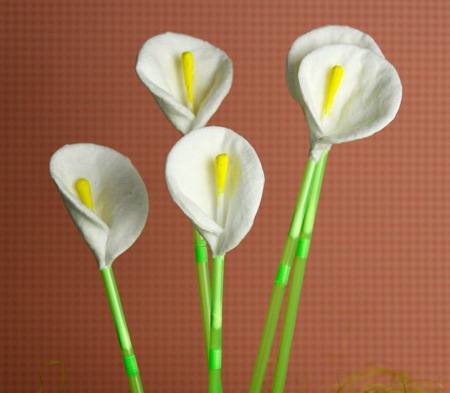

Manufacturing process:
- First, prepare the stamens for the flowers by painting cotton swabs yellow on one side.
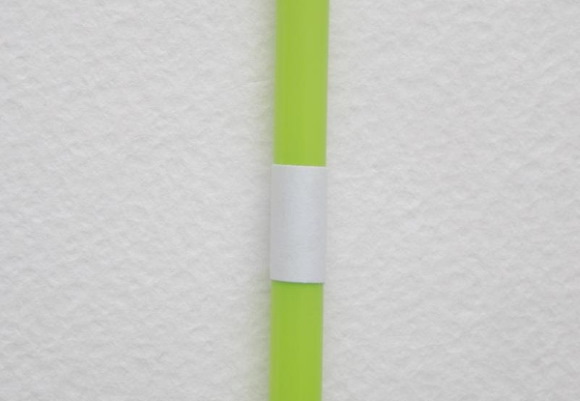
- Then let the paint dry, and at this point you can prepare the cardboard packaging for the bouquet. To do this, cut out a cardboard semicircle, make a wavy edge. Fold the semicircle into a trapezoid ("cup") and bend the corners to the sides. On the back side, you can attach ties from ribbons.
- After this, insert cotton swabs (stamens) into cocktail sticks (stems), they match perfectly, the cotton side serves as a seal.
- Cotton pads are wrapped around and secured with hot glue or PVA. The attachment point (receptacle) can be painted green.
- Leaves of paper or disks are glued to the tubes.
- A bouquet of 3 calla lilies is secured inside the envelope. On the back wall of the envelope, 2 slits are cut for each flower along the width of the stem. The tube is pressed a little and secured inside, the tails of the flowers can be cut off or left sticking out.
- The flower packaging can be used as a greeting card.
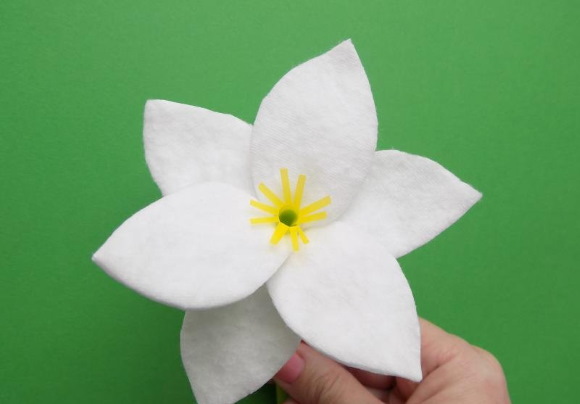
Master class – flower from cotton pads “Narcissus”
You can start the lesson with the ancient Greek myth about the young man Narcissus, after whom the flower is named. You can also look at a photo of a living flower, name all its parts, possible colors.
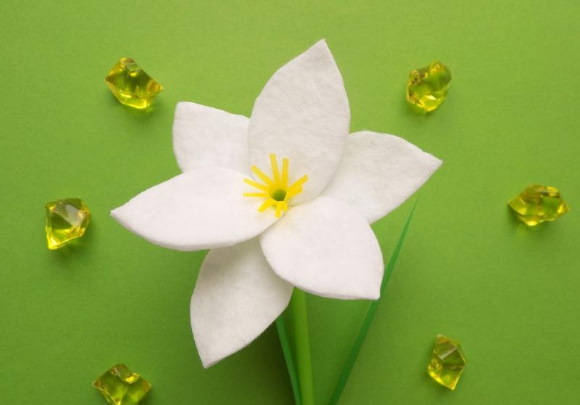
Tools and materials:
- Cotton pads – 8 pieces.
- Scissors.
- Thick PVA glue or hot glue and a glue gun.
- Yellow watercolor or gouache.
- Colored paper of a green shade.
- Cardboard of blue or light blue color.
Manufacturing process:
- A few hours before starting work, you need to prepare the material for the stamens. Take half a cotton pad, soak it in water with yellow gouache or watercolor mixed in, and squeeze it out well. Then carefully lay it out to dry.
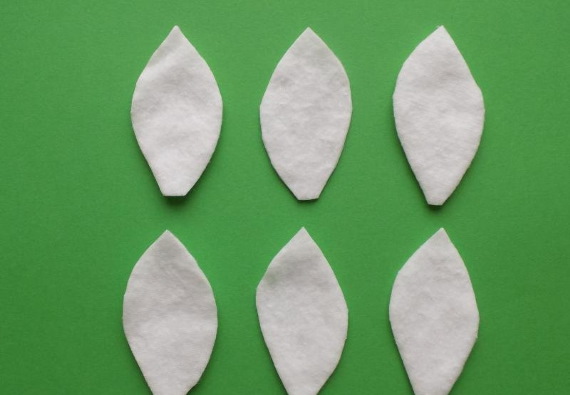
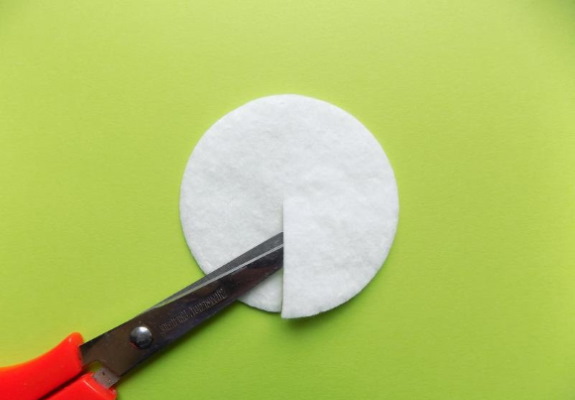
- From cotton pads, cut out 6 petals in the shape of a boat, with one edge slightly thickened, and also cut out a circle with a diameter of 4 cm.
- Next, you need to bend all the petals and iron the folds well.
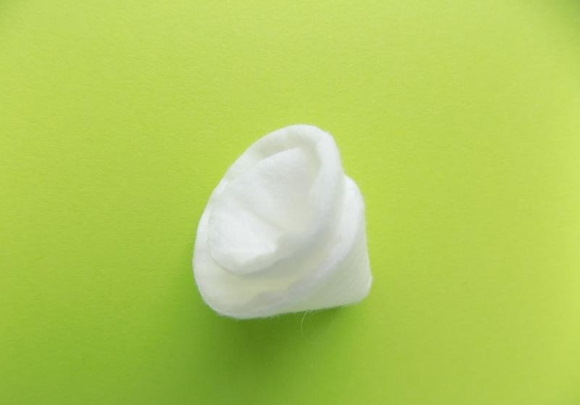
- The next step is to pinch the very edge of the petals and glue them together with a drop of hot glue or thick PVA to give them volume. You can skip this step with younger children.
- Then the flower is assembled on the cotton pad base. First, three petals must be glued. Each petal must be pressed well at the base and held for 5 seconds.

- If the work is carried out with hot glue, it is better to wet the finger or press the product with a special spatula or other device to avoid glue getting on the skin. It is safer to work with thick PVA with children, in this case it is better to assemble the product directly on cardboard.
- Next, take half of the disk, painted yellow, make 5-6 cuts for the stamens on the rounded side, roll it into a tube, glue it together. Attach the stamens to the middle of the inflorescence. Stamens can also be made from 3 cotton swab tips. If there is no time to paint the disk, the core can be made from yellow felt or a yellow household napkin.
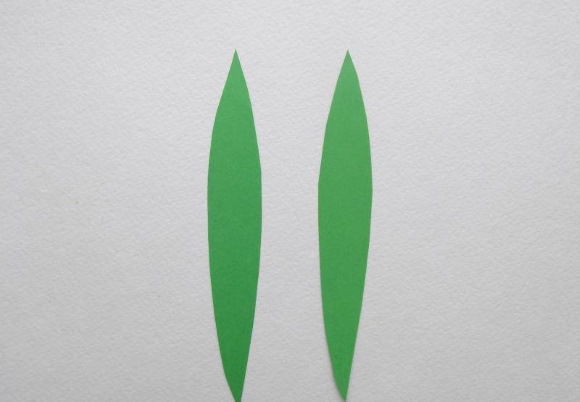
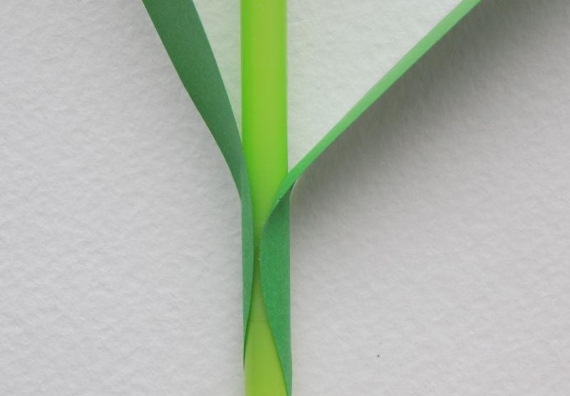
- At the final stage, cut out the stem and leaves from colored paper and glue them on. Leaves can also be made from colored cotton pads.
This daffodil can be placed on a card or made into a painting using a disposable plate as a base.
Master class – flower from cotton pads “Dahlia”
This is one of the most spectacular flowers that can be made from either felt or cotton pads.
Materials and tools:
- Cotton pads – from 20 pieces.
- Thick PVA glue or hot glue and a glue gun
- Paints.
- Scissors.
- Ruler.
Manufacturing process:
- If the dahlia should not be white, then the cotton pads should be dyed in advance by dipping them in water with diluted dye.
- Cut a circle from a cotton pad with a diameter of 4 cm; this is the base.
- Then cut out 9-10 petals of three sizes: 4.5 cm, 3.5 cm, 2.5 cm.
- The petals at the base are folded and glued on both sides to give volume.
- The assembly begins with the largest petals, attaching them in a circle to the base so that the tips stick out halfway.
- The next row is made up of overlapping smaller petals, then the smallest ones.
- You can glue stamens made from cotton pads into the core or sew on beads.
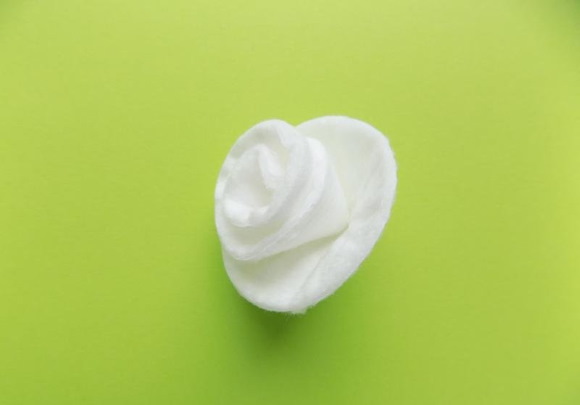
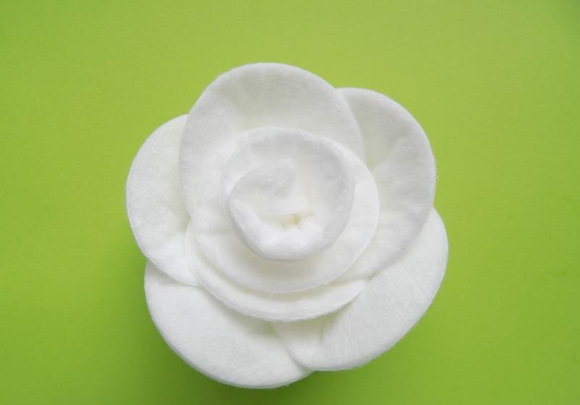
Master class – flower from cotton pads “Rose”
This delicate cotton pad flower, which can be rolled up in minutes, will complement any gift.
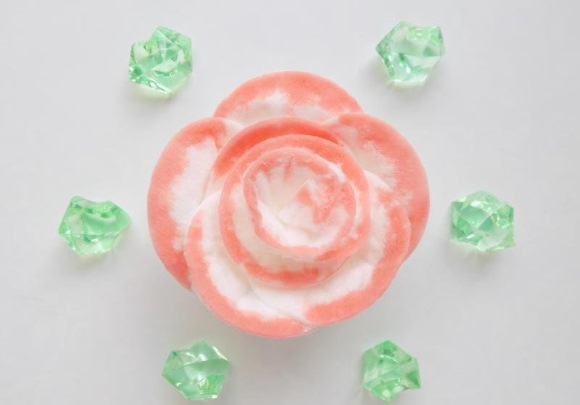
Materials and tools:
- Cotton pads – 6-7 pieces.
- Paints.
- Thick PVA glue or hot glue and a glue gun.
- Scissors.
Manufacturing process:
- You need to paint the cotton pads in advance.
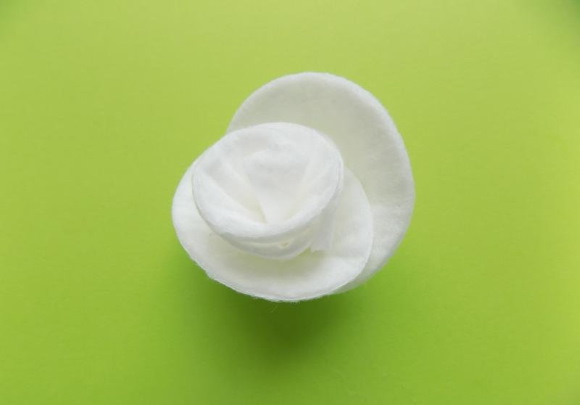
- Roll one of the painted disks into a tight tube and secure with glue.
- Gradually wrap the remaining disks around this tube, forming a bud. Attach the petals at the bottom with glue.
- At the end of the work, you can paint the edges of the petals.
- To complete the composition, you can tie a ribbon to the flower in the same color or glue sheets of cotton pads.
Making souvenirs from cotton swabs and discs is such a fascinating activity that, having tried it once, you will want to come up with more and more new crafts from these and other materials.
Author: Pichugina Stanislava
Video about crafts from cotton swabs
Crafts from cotton swabs: