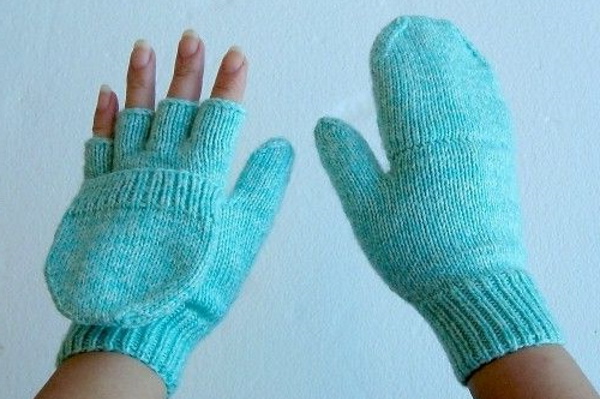
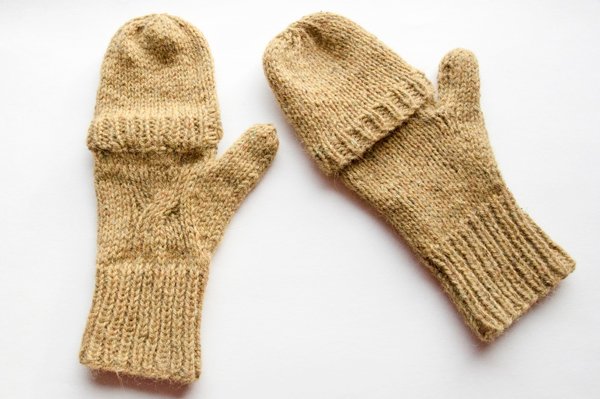
Mittens or mittens with a folding top have been popular at different times due to their convenience. The history of the appearance of this type of mittens is not reliably known, but according to one version, they were invented for sellers in markets. When it is inconvenient to work in mittens or gloves, and without them, hands freeze.
How to determine the size
Mittens can be knitted with a flap if you measure the size of your palm accurately. To do this, take measurements from it. In this process, it is not enough to transfer the outline of the palm to paper, although this is also necessary to clarify the pattern of the mitten.
It is recommended that beginning craftswomen pay special attention to measurements so that the size of the mittens fits exactly.
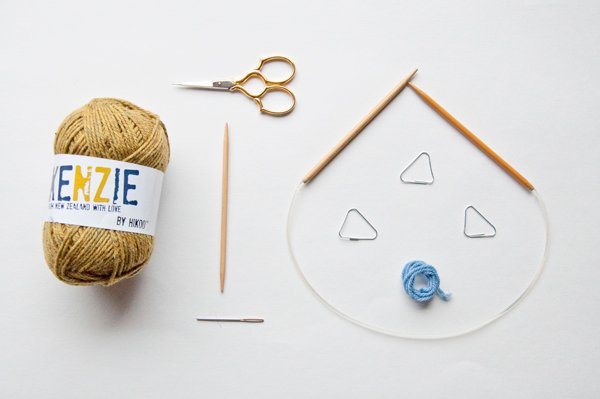
The following materials will be required for this work:
- Medium-thick yarn to make the top piece of the product from 2 threads. Choose thick and warm yarn for the cold season. It is recommended to use 100% acrylic threads or with the addition of wool. For a pair of mittens, you will need 1-2 skeins of 140 g.
- Double pointed needles (5 units), matching the thickness of the thread. The needles should match the thickness of the yarn: for thick thread, the needle size is 4-4.5 mm, for thin thread - 2.5 mm needles.
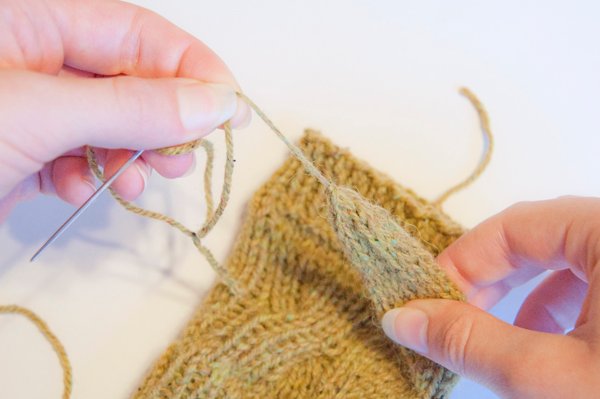
- A needle for gathering all the parts of the mittens together.
- Buttons or other decorative details at your discretion. The button is sewn on for the convenience of fixing the folding cap on the back of the mitten. A loop is sewn on the cap.
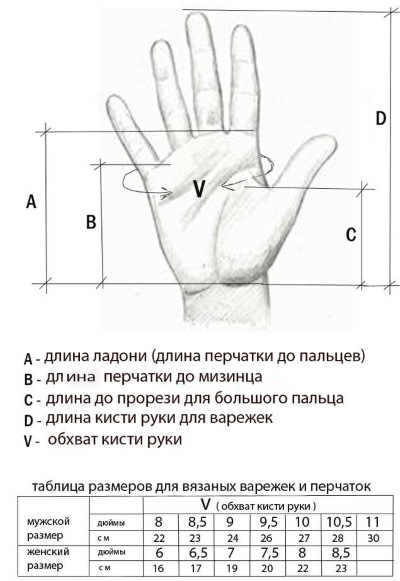
Before you start knitting mittens, take measurements from your palm and make a pattern. All measurements are taken on a relaxed hand. All data is recorded with an addition of 0.5 cm so that the resulting mittens are not too tight.
Step by step measurements:
- The palm is outlined with a pencil or pen on paper.
- Measure the circumference of the wrist.
- Measure the volume of the palm at its widest part (circumference).
- Measure the length from the wrist to the base of the thumb.
- Length from the beginning of the little finger to the wrist.
- Length from the beginning of the index finger to the wrist.
- The maximum height of the palm. To do this, measure the length from the beginning of the middle finger to the wrist.
- Additionally, the total length of the folding cap is measured.
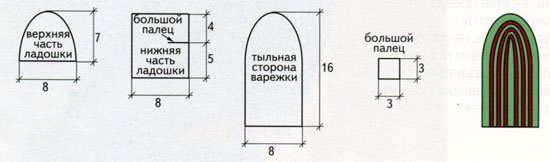
The obtained measurements are used to create a mitten pattern to make the knitting process easier and faster. All maximum values are marked on the diagram to correctly determine the size and know the exact number of loops and rows required. A trial sample of the mitten is created, where 2 loops equal 1 cm.
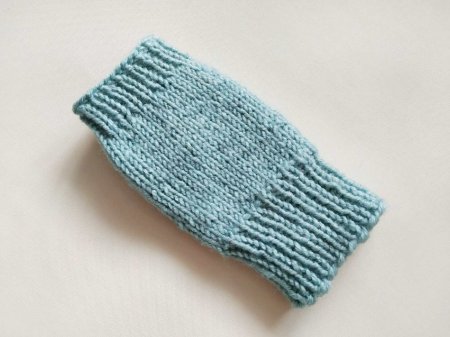
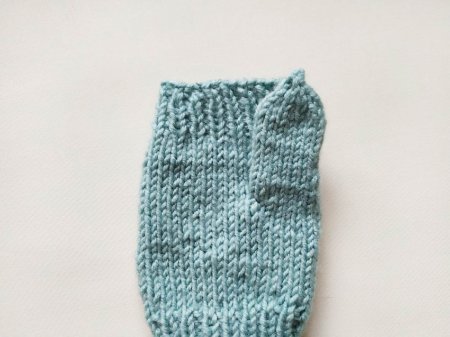
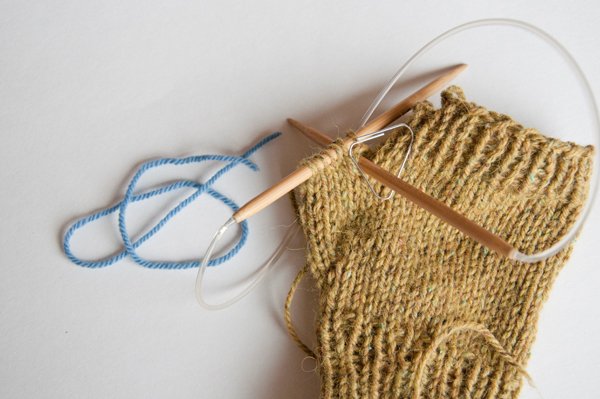
The gloves consist of three parts: the main part, the folding part and the fingers. They start by knitting the base, then form the tubes for the fingers, and finally make the flap. Then all the components are sewn together and fixing details or decoration are added.
When knitting, it is recommended to control the uniform density of the fabric so that all fragments of the product are symmetrical. Pay special attention to the part with the folding cap. This part should be the tightest, fit tightly to the fingers so that the product retains heat.
Those who do not have enough experience in knitting mittens are recommended to try to make mittens with light-colored knitting needles. If dark-colored yarn is used, the loops are difficult to distinguish, which is why craftswomen can get confused in the pattern.
Men's
Fold-over mittens are also called transformers. Many men find this model practical for work, winter hobbies or everyday life.
During the production of the product you will need:
- knitting needles (size 3);
- 50 g wool yarn.
They create a pattern on the product using threads of different colors or knit with single-color yarn. The elastic band is made in the process according to the 1*1 pattern.
 |  |
 |  |
 | |
The process of creating mittens includes the following steps:
| Stage | Description |
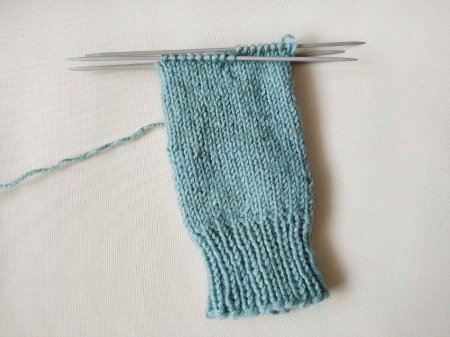
| Cuff |
|
| Main part |
|
| Fingers |
|
| Upper part |
|
Children's
Before you start knitting children's mittens, choose yarn, knitting needles for it and a suitable pattern. Carefully measure the parameters of the child's hand. It is also important to specify the knitting density, because each craftswoman knits in her own way.
To do this, dial 10 trial loops and knit 2-3 rows. Compare how many loops in the finished fabric fit into 1 cm. Children's knitted items require less yarn than adults, but also take into account the pattern.
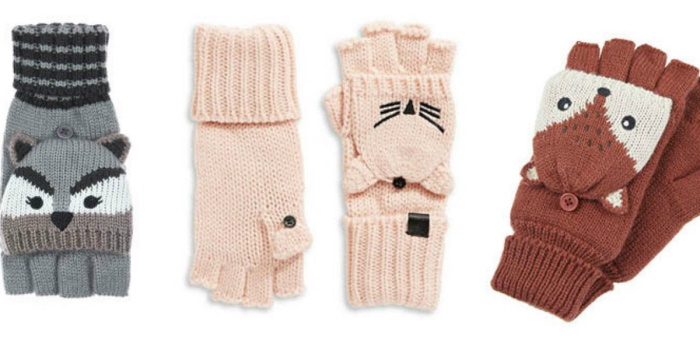
Mittens with a muzzle
Fold-over mittens for kids can be made with an animal face design on the outside of the mitten.
During the work you will need:
- yarn;
- nicknames for animal images;
- knitting needles that match the size of the yarn;
- buttons for fixing the upper part of the glove.
The formation of mittens includes the following steps:
| Stage | Description |
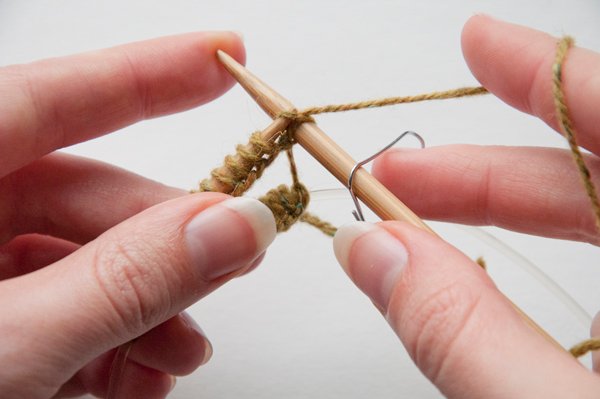
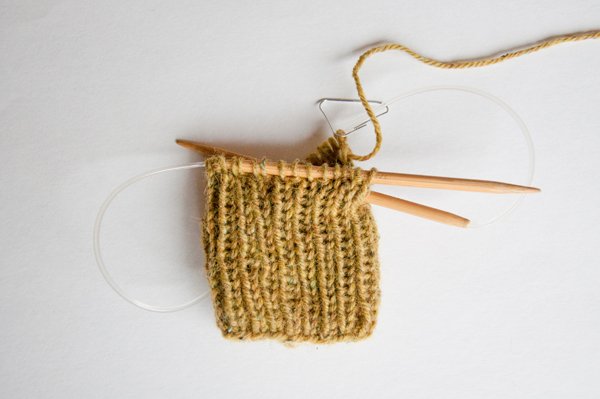
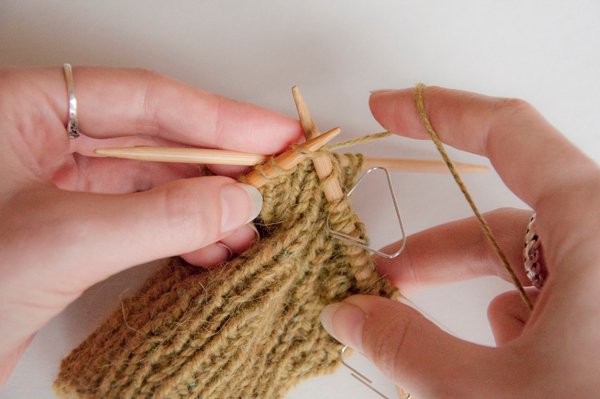
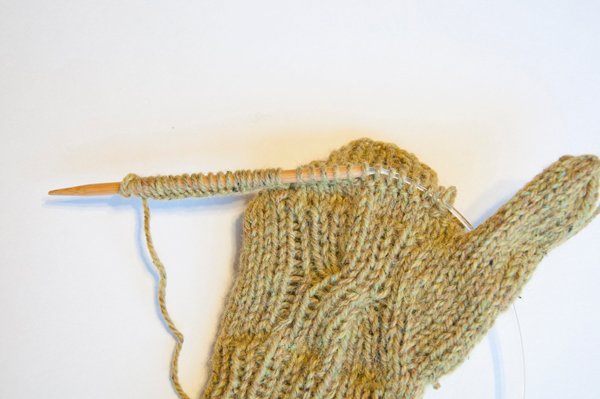
| Main fragment | 1. Make a knitting sample to determine the density. Knit loops in 5-10 rows. Then determine the size of the product. 2. Knit the elastic band according to the 1*1 pattern. Cast on the calculated number of loops and knit in a circular elastic band. When you reach the wrist line, knit another similar fragment for the fold. 3. Continue knitting in a circular pattern. The number of loops remains the same up to the base of the thumb. It is not knitted at this stage. For convenience, the place where it will be knitted is marked with a contrasting thread. 4. Continue knitting the pattern according to the previous algorithm to the base of the index finger. From this point, begin dividing into 4 tubes. All fingers are knitted separately, adding several loops in different places so that holes do not form in the pattern. The tubes for the fingers are not finished, the loops are closed. It is recommended to use an elastic method of closing loops in a row. |
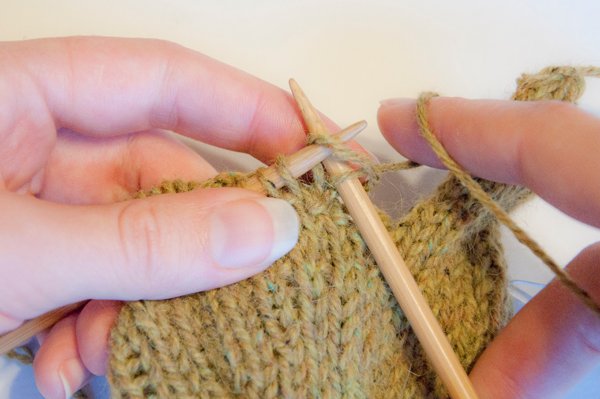
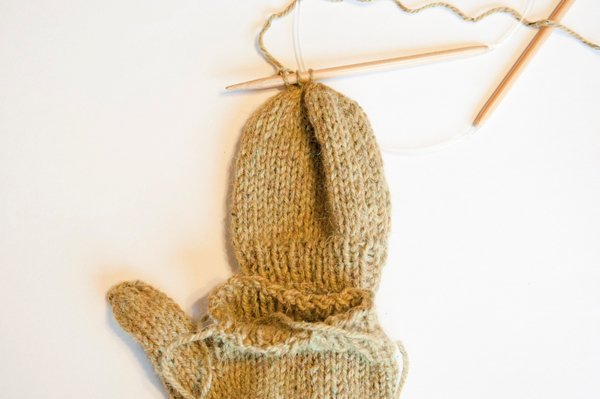
| Folding fragment | 1. Cast on stitches for the flap section – its length is equal to the volume of the palm. Without changing the number of stitches, knit this section with a double thread (for additional warmth) using a 1*1 elastic band. Continue like this for the entire length.
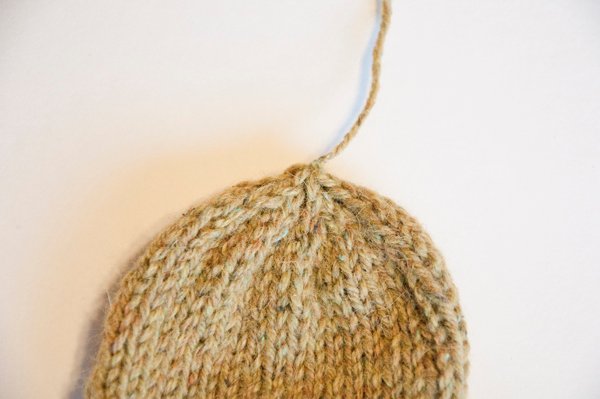
2. 2 cm before the end, start decreasing 5 loops in a row. Do this not on the sides, but selectively, to avoid a sharp narrowing. 3. In the last row, tighten all the loops into a knot and hide the remaining threads. |
| Ears on the flap | 1. Cast on as many stitches as you want (you determine the number yourself – it should be enough for a child’s finger).
2. Knit 2 ears 4 rows in a row. 3. Reduce the number of loops 3 rows in a row, tighten the remaining loops together. 4. Each fragment is sewn to the base of the folding cap. |
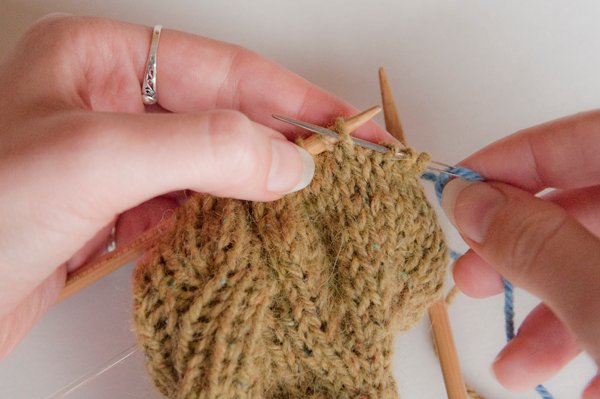
| Thumb | 1. Remove the contrasting thread from the main part of the mitten. This leaves a notch for the thumb.
2. Cast on stitches along the edge of the notch and knit the length in a circular pattern with the front surface. 3. Close the loops as you did in the main part of the mitten. |
| Decor | 1. To create an applique on the flap fragment, go over the loops on the upper fragment of the mitten with a black thread. This method prevents the formation of extra threads on the inside of the mitten. The thread depicts the nose and antennae.
2. A button is sewn onto the outer side of the main part of the mitten, and a loop is attached to the narrow part of the folding part. |
Classic model
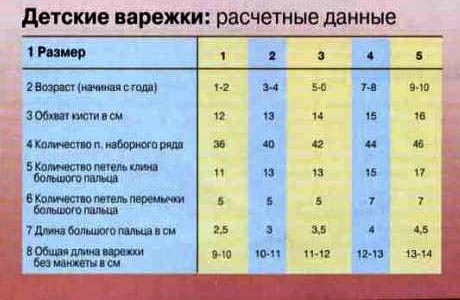
The standard version of children's mittens according to this pattern is designed for the hands of a child of 5-6 years. If you are making a knitting pattern for a child of a different age, then select the size yourself according to the pattern indicated above. The knitting step is 10 * 10 cm - 20 loops per 27 rows.
When knitting, use:
- acrylic threads of 2 colors – 290 m per 100 g;
- 5 knitting needles (size 2.5).
The knitting process includes the following steps:
- Using yarn of one color, make a set of 40 loops and divide into 4 parts.
- Knit the cuff with a 1*1 elastic pattern to a height of 6 cm.
- Create a pattern by knitting 26 rows of stocking stitch.
- After 3 cm, form a finger: make 2 loops on the main knitting needle, transfer 8 loops to the auxiliary one. In the next row, these 8 loops are added back.
- After 13 cm from the elastic, remove 20 loops onto a separate knitting needle. Pick up these loops over the remaining ones, connecting them into a pattern.
- After 3 cm, knit 2 loops at the end of all the needles. Continue to reduce to 4 loops on each needle. Tighten them, cut the thread.
- From the finger edge, cast on 12 stitches with yarn of a different color, knit them with the 8 stitches that were previously left on the auxiliary knitting needle.
- Narrow the finger where the nail is approximately located - decrease the loops as described in the main part of the mitten.
- On the outside of the mitten, at the cut, cast on 20 loops and knit an elastic band according to the 1*1 pattern, keeping a distance of approximately 1.5 cm.
- The second mitten is made in the same way.
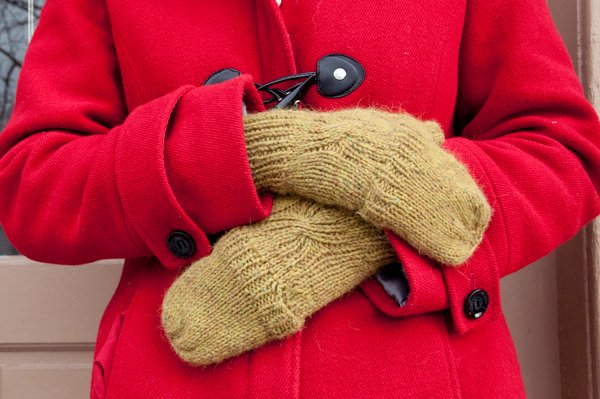
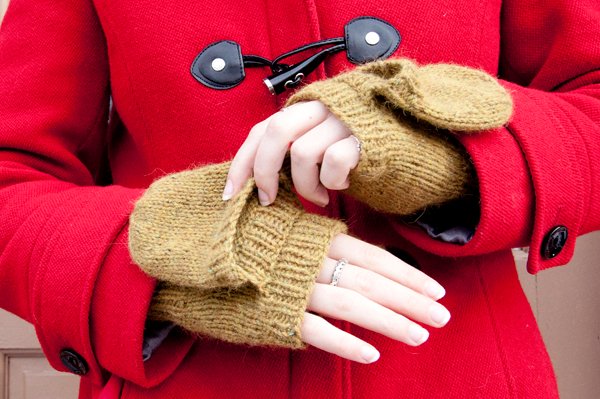
Women's
Gloves-mittens with a folding top and open fingers are made on 4 knitting needles.
If desired, yarn of different colors can be used to create a pattern on the product or to mark with lines the stages of transition to the level of the little finger, the thumb or the transition area to the flap. If using a single-color yarn, these sections can be marked with chalk or a pin.


The process of creating transforming gloves includes the following steps:
| Stage | Description |
| Main part | 1. Cast on 36 stitches in the classic way, distribute them onto 4 knitting needles, forming a circle. 2. Knit the elastic band according to the pattern 1*1. Knit the cuff with an elastic band for 5-7 cm. If you need a longer sleeve, extend the knitting. 3. Cast on a loop on each knitting needle and knit 3 rows in stockinette stitch. 4. Make a notch for the thumb. For the right mitten, place the loop at the beginning of the 1st knitting needle, for the left mitten – at the end of the 4th knitting needle. 5. Knit 3 rows with the front surface. 6. In another row add a loop, knit 3 loops, yarn over. 7. Repeat point 5. 8. In the next row, make a yarn over, knit 5 loops, yarn over. 9. Repeat point 5. 10. In the next row, make a yarn over, knit 7 loops and a yarn over. 11. Using the same algorithm, create a notch for the thumb to the end. 12. Transfer 11 loops to a separate knitting needle or pin and divide in half. 13. Reduce the stitches to the level of the little finger – knit together the outer stitches on the last and first knitting needles. |
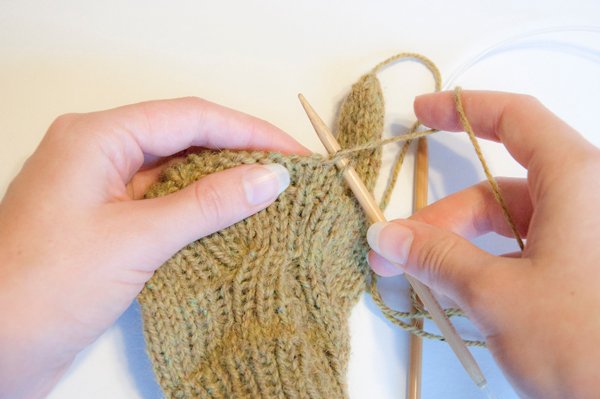
| Fingers | 1. Knit all the loops on the 1st needle, 6 on the 2nd. Transfer 4 loops from the 2nd needle to a separate needle, 6 loops from the 3rd needle. Make an air set of 3 loops (you get a little finger).
2. Knit 3 rows in a circle. 3. Remove 4, 11 and 6 loops onto separate needles, creating the remaining fingers. 4. Place the remaining 11 loops on 3 knitting needles and add 4 air loops. Knit the finger in a circle for 2-3 cm. Make the last row with an elastic band and close the row. 5. Add a thread from the inside. Remove the loops from a separate knitting needle and make 3 air loops. Place the loops on all the knitting needles and knit the finger in the same way as in step 4. Repeat the knitting pattern for the remaining fingers. |
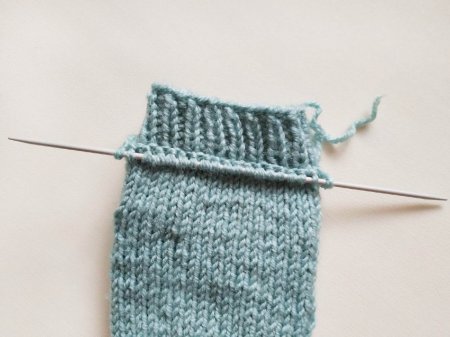
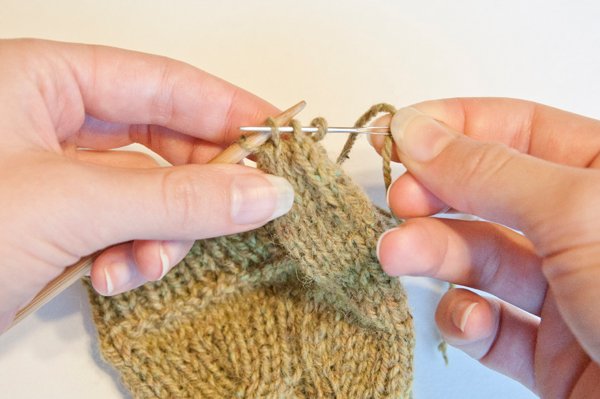
| Convertible top | 1. Turn the mitten over to the outside and cast on 25 stitches in the designated place.
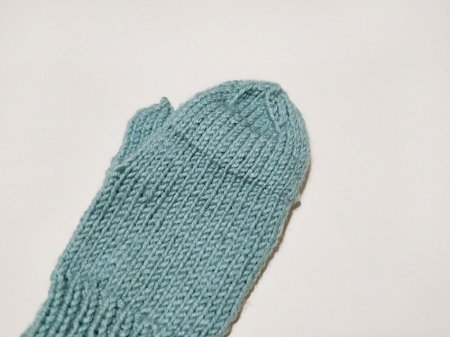
2. Make a side loop, turn the mitten from the bottom up and knit with purl rows. 3. Connect 2 knitting needles and cast on another 25 stitches (51 stitches in total) 4. The loops from the mitten are knitted with a stocking stitch, the steel ones - with a rib. All the loops in the 1st row of the rib are turned over before knitting so that the edge is even. 5. Knit 5 rows and reduce the number of loops by knitting 2 loops together in all subsequent rows. 6. Connect the fold-over parts of the mitten. |
| Thumb | 1. Tie the thread to the notch and cast on 6 loops.
2. Transfer the stitches from individual knitting needles to the main needles. 3. Knit rows of the desired length for the finger. 4. Reduce the loops evenly and tighten the edge. |
How to crochet
Fold-over mittens can be made not only with knitting needles - craftswomen can make this product with a crochet hook to give the mittens an openwork look. This method is suitable for beginners, provided that the pattern is followed.
The process will require:
- yarn 50 g and 30 g per 200 m (acrylic 100%);
- hook (size 3);
- buttons.
If you make mittens in one color, then use 80-100 g of yarn of one color.
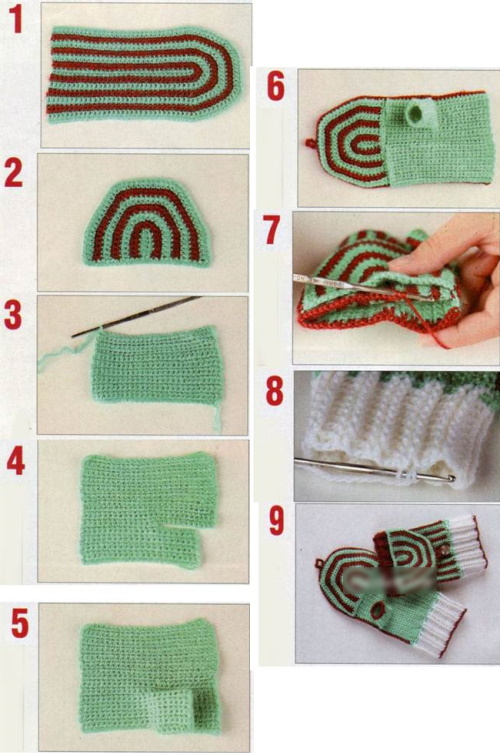
The process of creating transforming mittens includes the following stages:
| Stage | Description |
| Back side |
|
| The outer side |
|
| Fingers |
|
| Layout |
|
Knit mittens with a folding top using knitting needles or a crochet hook of different sizes and models. Before starting to work on creating a knitted product, take measurements to accurately determine the size.
In addition to the pattern, it is important to make a trial sample of the design to determine the knitting density. After that, they begin knitting the mittens, which can be with or without fingers, plain or in a colored version.
Video about knitting
Fold-over mittens: